Introduction
Proper maintenance of motorcycle fairings is vital for both aesthetics and longevity. Removing old paint can enhance a bike’s appearance, but it requires specific products and techniques to avoid damaging the delicate materials. In this article, we’ll delve into the best options for paint removal, starting with the highly regarded Chemical Guys Paint Remover designed for motorcycle fairings. Next, we will explore DIY solutions that may be suitable for lighter jobs. Understanding safety precautions is also essential, as improper handling of paint removers can lead to hazardous situations. Finally, we will walk through step-by-step instructions on using these products effectively. This comprehensive guide aims to equip business owners with the knowledge to maintain and rejuvenate motorcycle fairings safely and efficiently.
Tables of Contents
Chapter 1: Revitalizing Motorcycle Fairings: The Power of Chemical Guys Paint Remover
- Unpacking the Effectiveness of Chemical Guys Products for Motorcycle Fairings
- Effective Application Techniques for Chemical Guys Paint Remover
- Navigating Safety Protocols and Environmental Considerations with Chemical Guys Paint Remover
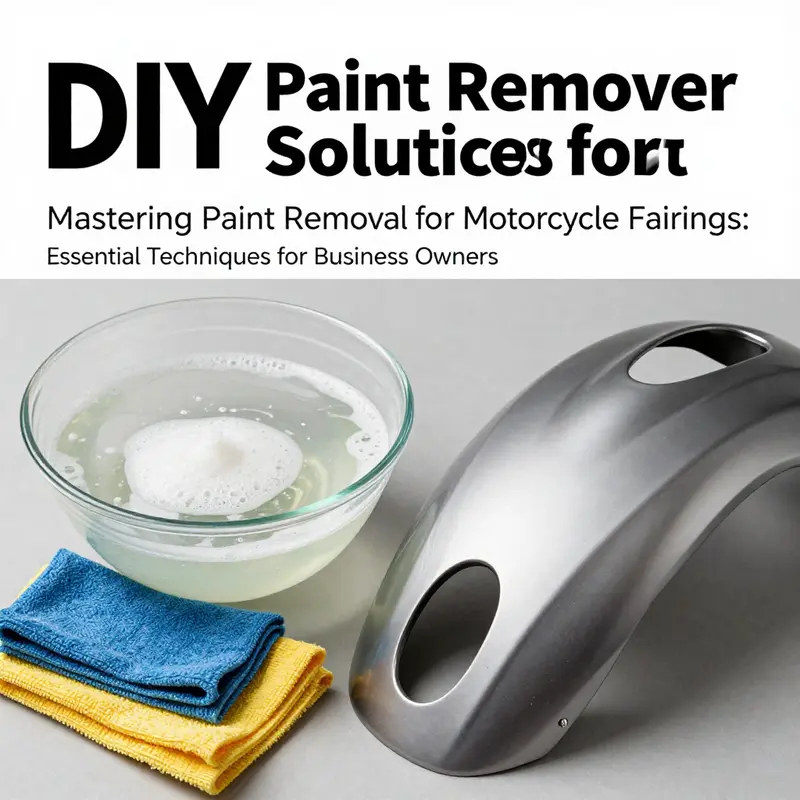
Chapter 2: Effective Paint Removal Techniques for Motorcycle Fairings
- The Myth of Baking Soda Paste: Why It Falls Short for Motorcycle Fairings
- The Myths of Vinegar as a DIY Paint Remover for Motorcycle Fairings
- Harnessing the Power of Rubbing Alcohol for Motorcycle Fairing Restoration
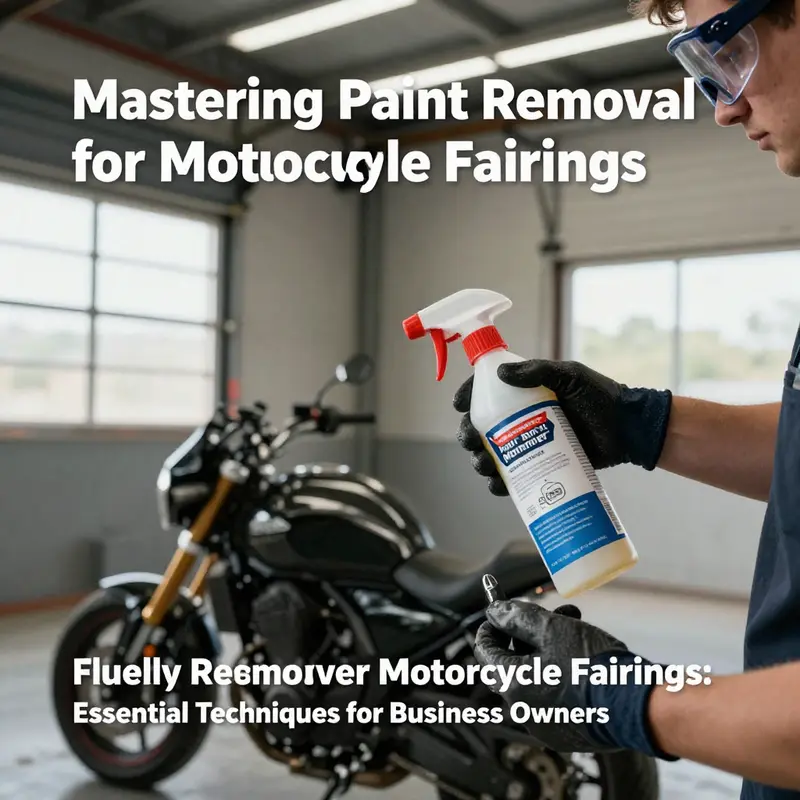
Chapter 3: Ensuring Safety While Stripping Paint from Motorcycle Fairings
- Essential Personal Protective Equipment for Safe Paint Removal on Motorcycle Fairings
- Creating a Safe Workspace: Ventilation and Environmental Precautions for Paint Removal
- Navigating Material Sensitivities and Safety Protocols in Paint Remover Use
Chapter 4: Safety First: Essential Precautions for Using Paint Remover on Motorcycle Fairings
- Navigating Safety: Protecting Yourself and Your Motorcycle Fairings During Paint Removal
- Surface Prep: Setting the Stage for Successful Paint Removal from Motorcycle Fairings
- Essential Techniques for Safe and Effective Paint Removal on Motorcycle Fairings
Chapter 1: Revitalizing Motorcycle Fairings: The Power of Chemical Guys Paint Remover
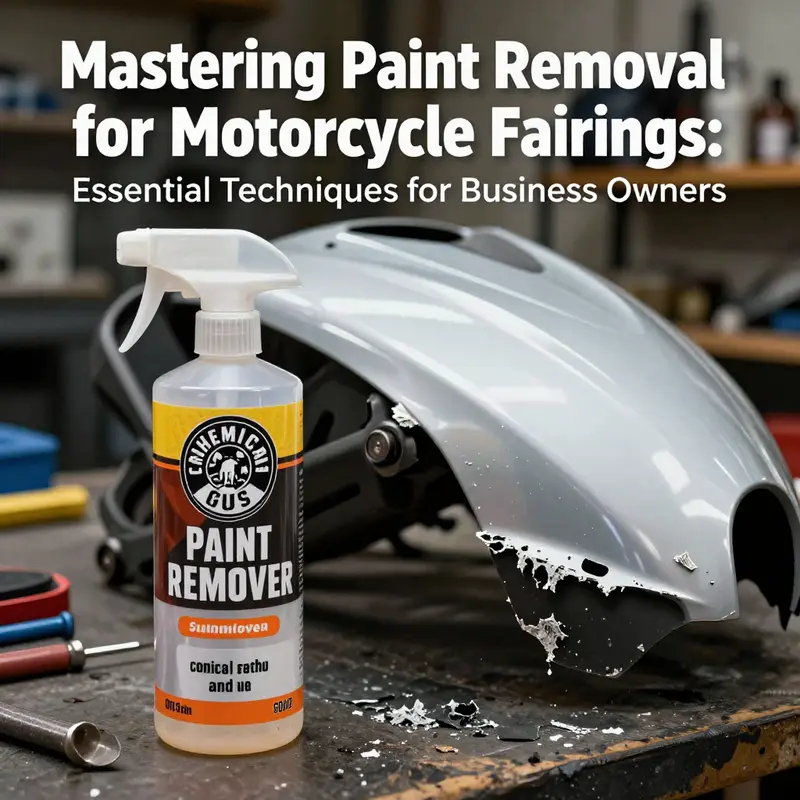
1. Unpacking the Effectiveness of Chemical Guys Products for Motorcycle Fairings
Effective motorcycle maintenance involves not just the mechanics of the engine but also the upkeep of exterior finishes and fairings. When it comes to restoring the surfaces of motorcycle fairings that have endured wear from the elements or previous paint jobs, the choice of cleaner and paint remover can make a significant difference. Chemical Guys has established a strong reputation in the automotive care industry, known for products that clean, protect, and restore surfaces. Among them, the Chemical Guys All Clean+ Citrus Based All Purpose Super Cleaner stands out for its multifaceted application, although it may not be the go-to choice for actual paint removal.
Chemical Guys showcases the All Clean+ as a citrus-infused, eco-friendly cleaner that works excellently on an array of automotive surfaces. Its primary attributes include the ability to remove oil, grease, and dirt, making it ideal for comprehensive vehicle maintenance. However, those seeking to strip paint from motorcycle fairings should be aware that the All Clean+ is fundamentally an all-purpose cleaner rather than a dedicated paint remover. Therefore, while it delivers impressive results in cleaning and preparing surfaces for paint application, it lacks the necessary strength for effectively removing layers of paint or tackling persistent overspray.
When assessing the All Clean+’s suitability for motorcycle fairings, it’s essential to understand its intended functions. Designed to target dust, grime, and contaminants, this cleaner contains natural citrus extracts that offer powerful cleansing properties without harsh chemicals. This characteristic makes it a gentle option for delicate motorcycle plastics, such as ABS, commonly used in fairings. Users can effectively clean surfaces and restore their shine with this product, thus preparing fairings for a new coat of paint, if needed. The application involves a straightforward method: simply spray the cleaner onto the surface, wait for about 30 seconds, and wipe it off with a soft cloth or sponge, rinsing with water afterward to eliminate residues.
However, the conversation about paint removal warrants caution. Attempting to use the All Clean+ to strip paint, particularly for severe paint layers or stubborn overspray, is ill-advised. Because this product does not possess strong solvent characteristics, it could potentially lead to damage. Users might find that remnants of paint remain, and improperly dealing with such residues can complicate subsequent painting projects, potentially leading to poor adhesion of new paint layers. Thus, for tackling paint removal, dedicated chemical strippers specifically formulated for that purpose are recommended.
In addition, the efficacy of the All Clean+ as a preparatory cleaner cannot be overlooked; it effectively eliminates impurities from the fairing surface, ensuring that any new paint applied will adhere better. As a best practice, it should be used before the painting process rather than during the paint removal stage. Similarly, users should be mindful not to utilize this product under direct sunlight or high temperatures, which may cause premature drying and lead to unsightly streaks or watermarks.
In conclusion, while the Chemical Guys All Clean+ Citrus Based All Purpose Super Cleaner serves as an outstanding multi-functional cleaner for motorcycle fairings, its identification as a legitimate paint remover is misleading. For enthusiasts looking to restore their motorcycle fairings to pristine condition, understanding the product’s capabilities is crucial. When actual paint stripping is the goal, it is imperative to turn to specialized products known for their efficacy in that department, such as acetone-based removers. This ensures the integrity of the fairings is maintained throughout the maintenance process, allowing riders to enjoy a clean and vibrant appearance on the road.
For more insights on motorcycle fairing options and maintenance solutions, check our collection of fairings to find the perfect fit for your bike at Summit Fairings.
2. Effective Application Techniques for Chemical Guys Paint Remover
Applying Chemical Guys Paint Remover to motorcycle fairings requires a methodical approach to ensure the finish remains intact while the old paint is safely removed. To achieve the best results, the following steps must be meticulously followed, combining safety, efficiency, and thoroughness.
Preparation is key. Before applying the remover, the fairing surface must be cleaned diligently. Use a mild degreaser to strip away dirt, grease, and any wax that might impede the effectiveness of the paint remover. A clean surface ensures that all contaminants are removed and allows the chemical to penetrate and interact with the paint layer effectively.
Once cleaned, select an appropriate workspace. It’s imperative to work in a well-ventilated area, as the fumes from paint removers can be harmful. Consider setting up a workbench outside or in a garage with ample airflow. Ventilation is crucial for your safety and aids evaporation, which enhances the effectiveness of the chemical.
When it comes to the application itself, the choice of applicator matters. A soft applicator pad or a brush works best to ensure even coverage. Begin by applying the paint remover generously, making sure to cover the painted area thoroughly, but avoid excessive pooling of the liquid. Following the manufacturer’s instructions for the recommended dwell time—typically between 5 to 10 minutes—is essential. This waiting period allows the formula to soften the paint, making it easier to remove.
During this dwell time, it’s also important to monitor the solution and ensure it doesn’t dry out completely. If the remover dries on the surface, it can become tougher to remove the paint and may even lead to scratching the fairing when you attempt to scrub it off. Thus, keeping the paint remover moist is beneficial for achieving optimal results.
After the necessary waiting period, it’s time to move on to scrubbing. Use a non-abrasive pad or brush to gently scrub the area in circular motions. This technique assists in breaking down the paint layer efficiently. Exercise caution and apply moderate pressure; inadequate pressure may yield unsatisfactory results, while excessive force could damage the substrate beneath. If you can see the paint starting to lift, that’s a positive sign that the remover is working as intended.
As the paint begins to come away, use a clean cloth or sponge to wipe it off. It might take several passes to completely remove stubborn spots. If any paint remains after your initial efforts, reapply the remover and repeat the scrubbing process. Persistence is key, and sometimes multiple applications are necessary to achieve a fully clean surface.
With the paint thoroughly removed, the next step is rinsing. It’s critical to rinse the area immediately with water to stop the chemical action of the remover. This step not only neutralizes the chemical but also ensures any residue is washed off completely, preventing potential reactions with new paint or coatings.
Following the rinse, perform a final cleaning using soap and water. This step guarantees that any lingering chemicals are eradicated. Ensure the surface is completely dry before proceeding to any refinishing or repainting work. Moisture trapped beneath new paint can lead to imperfections and peeling in the future.
In conclusion, applying Chemical Guys Paint Remover to motorcycle fairings can be straightforward if the right techniques are employed. Each step, from preparation to rinsing, plays a crucial part in preserving the integrity of the fairing while effectively removing unwanted paint. For those seeking specific fairings or replacements, take a look at the extensive range available for different motorcycle models, including Honda CBR fairings, to restore your motorcycle to its original glory after paint removal.
3. Navigating Safety Protocols and Environmental Considerations with Chemical Guys Paint Remover
When undertaking the task of paint removal from motorcycle fairings, it is essential to prioritize safety and environmental considerations alongside effectiveness. Chemical Guys Paint Remover is recognized for its efficient paint stripping capabilities; yet, it also emphasizes the importance of using such products in a safe and responsible manner.
The formulation of Chemical Guys Paint Remover is tailored to be effective while minimizing risks associated with chemical exposure. Understanding this aspect starts with being aware of its composition. The formula typically comprises a blend of solvents designed to effectively lift paints and coatings without adversely affecting the underlying plastic or composite materials featured in motorcycle fairings. However, despite its efficient design, it is important for users to comply with safety protocols to protect themselves and the environment.
Wearing protective gear during the application process is of utmost importance. Users should ensure they don protective gloves and goggles to shield their skin and eyes from potential irritants. This is particularly crucial given that paint removers can contain substances that cause irritation upon direct contact. Additionally, working in a well-ventilated area helps disperse any harmful vapors released into the air during the paint stripping process. In enclosed spaces, the buildup of fumes can pose serious health risks, underscoring the necessity of proper ventilation.
Before beginning the paint removal process, it is advisable to read the product instructions thoroughly. Familiarizing oneself with the recommended application techniques and safety precautions can prevent accidents and ensure the best results. Always conduct a test in a concealed area of the fairing to observe how the paint remover interacts with the material. This not only safeguards the fairings but also helps fine-tune the application method.
In addition to personal safety, the environmental impact of using paint removers should not be overlooked. Chemical Guys is dedicated to eco-friendly practices, and their product formulations often include biodegradable ingredients. Such formulations are preferable compared to harsher chemical alternatives, which may be detrimental to the environment when improperly disposed of. Using a product that prioritizes non-toxic and biodegradable properties significantly reduces the potential for pollution, particularly affecting water sources and ecosystems.
Despite its environmentally friendly attributes, users must maintain proper disposal practices. It is paramount to adhere to local regulations when disposing of paint removers and other chemicals. Dumping leftover products unregulated can result in significant pollution and is detrimental to the environment. By following proper disposal methods, users can contribute to minimizing their ecological footprint.
While Chemical Guys Paint Remover is designed specifically for effective paint removal, it is essential to consider that not all cleaning products marketed for automotive use have the same efficacy or safety profiles. For those seeking a gentler option or a non-chemical method, alternatives exist. Using a mixture of hot water and mild degreaser can assist in removing light paint overspray. However, for stubborn paint layers or tough stains, dedicated chemical strippers are generally more efficient.
As a final note, while Chemical Guys Paint Remover provides a focused solution for paint removal, the importance of user safety and environmental stewardship cannot be overstated. This ensures that while motorcycle enthusiasts enjoy the benefits of restoring and customizing their vehicles, they do so responsibly. Understanding the safety guidelines, combined with embracing eco-friendly practices, fosters a healthier approach to motorcycle maintenance. Proper practices lead to not only better results in paint removal but also a more sustainable relationship with the environment and the motorcycle community. For more guidance on proper paint removal processes and products, visit reliable sources that offer detailed information on motorcycle fairing care.
Chapter 2: Effective Paint Removal Techniques for Motorcycle Fairings
1. The Myth of Baking Soda Paste: Why It Falls Short for Motorcycle Fairings
When considering DIY paint removal options for motorcycle fairings, many riders unconsciously gravitate towards readily available household items, with baking soda and water paste often touted as a safe solution. While baking soda is a household staple, known for its gentle cleaning properties and versatility in various applications, its efficacy in removing paint from delicate motorcycle fairings is largely overstated and, in many aspects, a detrimental choice.
Baking soda’s popularity as a cleaning agent comes from its mildly abrasive nature. It excels in tasks such as cleaning grout lines or removing minor stains from surfaces. However, when it comes to the intricacies of motorcycle fairings, which are typically composed of sensitive materials like ABS plastic or fiberglass, the use of an abrasive material—however mild—poses a significant risk.
The potential hazards of applying baking soda paste to motorcycle fairings lie primarily in its abrasiveness. Given that these fairings are designed for aerodynamics and aesthetics, they have a smooth finish that can easily be marred by scraping and scratching. Even if used sparingly, the baking soda mixture can lead to surface damage when scrubbed vigorously or left on too long. This could result in a dull finish, irreversible scratches, or worse, cracks in the fairing itself. Given the cost and effort involved in maintaining motorcycle fairings, this is a risk that few riders should be willing to take.
Moreover, reports from experienced motorcyclists and automotive experts have consistently pointed to the limitations of baking soda paste as a paint remover. In most cases, the paste is ineffective against more persistent paint applications, particularly those that are thick, layered, or have been compounded over time. As a rule of thumb, if a medium is not specifically designed for paint removal, it is unlikely to yield satisfactory results. Thus, for riders facing tough paint challenges, relying on the paste only leads to frustration and wasted time.
Instead, if riders wish to pursue a DIY route, they may benefit from considering alternatives that provide the necessary potency without the risks associated with baking soda. For instance, utilizing a mild degreaser with warm water and a soft cloth can sometimes lift lighter paint overspray or residual marks without exacerbating the potential for damage. Additionally, other non-abrasive methods like using a heat gun can effectively soften the paint, allowing for gentle scraping without the risk of scratching the surface.
For best results in paint removal from motorcycle fairings, chemical strippers designed specifically for automotive applications remain the gold standard. Formulated to effectively strip layers of paint without harming the underlying material, these products deliver reliable outcomes when applied correctly. Moreover, they often come with guidelines on safe application techniques, allowing riders to remove paint efficiently, while minimizing the risk of damage to their motorcycle’s fairings.
Proper safety measures should always accompany usage of any chemicals or abrasive methods. Riders should ensure adequate ventilation, wear gloves and protective eyewear, and conduct tests in inconspicuous areas prior to full application.
In summary, while the idea of using a baking soda and water paste for cleaning is appealing due to its accessibility, it ultimately lacks the required effectiveness and safety for motorcycle fairings. With so much at stake regarding the aesthetics and functionality of these materials, it makes more sense to invest in products that cater to the specific needs of motorcycle maintenance. To discover suitable alternatives, and delve into expert-recommended paint stripping techniques, visit resources that specialize in the maintenance of motorcycle fairings, where professional insights offer clarity and guidance on this important aspect of bike upkeep.
2. The Myths of Vinegar as a DIY Paint Remover for Motorcycle Fairings
When it comes to maintaining and restoring the appearance of motorcycle fairings, many riders often turn to household items as potential solutions. One such remedy that frequently circulates in DIY circles is vinegar. Known for its cleaning properties, vinegar seems like a tempting option for anyone looking to strip paint from their motorcycle fairings cheaply and easily. However, despite its popularity as a general cleaning agent, utilizing vinegar for paint removal is widely considered ineffective and potentially damaging.
Motorcycle fairings are constructed from materials such as ABS plastic or fiberglass—substances that demand specific care due to their sensitivity and the toughness of the paint that adheres to them. The paint used on fairings is deliberately formulated to withstand harsh conditions, including exposure to UV rays, weather, and mechanical wear. This resilience means that typical household solvents like vinegar, which is essentially a mild acetic acid, often lack the necessary potency to effectively dissolve automotive paint. In fact, the chemical interaction between vinegar and the paint can lead to several undesirable outcomes.
First, while vinegar may initially seem to soften or lift away some layers of paint, its acid nature can start to etch the surface of the fairing itself. Prolonged exposure to vinegar can result in cloudy or hazy spots that permanently mar the appearance of your fairings. This is a significant risk for something as visible and cosmetically impactful as motorcycle fairings. The resulting damage could necessitate costly repairs or even complete repainting to rectify, making the financial savings of a DIY approach virtually nonexistent.
The myth that vinegar is a viable paint remover is further compounded by anecdotal success stories where users claim to have achieved results. However, these claims often stem from specific cases with thin layers of paint or from surfaces less sensitive than motorcycle fairings. Relying on such stories can lead to inconsistencies in results, leaving riders frustrated when their attempts do not yield the expected outcomes.
For those genuinely looking to strip paint from their motorcycle fairings, it’s vital to consider dedicated alternatives. Chemical removers formulated specifically for use with plastics offer a far safer and more reliable option. These products are designed to provide effective paint removal without harming the underlying material. For example, products like specialized paint strippers have been created with formulations that target the resilience of automotive finishes while being gentle on the fairing materials.
Moreover, certain mechanical methods can be effective for more localized paint issues. For example, using very fine-grit sandpaper, such as a 2000+ grit, can help gently abrade away unwanted paint, though this method is labor-intensive and requires a steady hand to avoid scratching the surface. This approach is best reserved for smaller touch-up spots rather than extensive areas covered in multiple layers of paint.
Furthermore, for the highest quality results with minimal risk, consulting a professional service is often the best route. Professional detailers have the experience and tools necessary to achieve a flawless finish, ensuring that the integrity of your motorcycle fairings is preserved.
In conclusion, while vinegar may be hailed as a versatile household cleaner, its ineffectiveness and potential for causing damage make it unsuitable as a paint remover for motorcycle fairings. Riders looking to restore their bikes should instead invest in specialized products or seek professional help. This can save both time and money in the long run while ensuring that the fairings remain in optimal condition, ready to withstand the rigors of the road. Emphasizing the importance of using the right tools for the job ultimately leads to a better, safer, and more satisfying restoration experience.
3. Harnessing the Power of Rubbing Alcohol for Motorcycle Fairing Restoration
When it comes to restoring motorcycle fairings by removing paint, many enthusiasts are on the lookout for effective yet accessible solutions. One such potent alternative that often goes overlooked is rubbing alcohol, specifically isopropyl alcohol (IPA) with concentrations of 70% or higher. Commonly found in many households, rubbing alcohol serves a dual purpose: it excels in medical applications and shines as a versatile cleaning agent. In the realm of motorcycle care, its solvent properties allow it to stand out as an efficient DIY option for tackling light paint residues effectively.
The mechanism by which rubbing alcohol operates in paint removal lies in its solvent capabilities. By breaking down the binder of dried paint, it facilitates the lifting of paint overspray or splatters from surfaces without the risk of ruining the delicate finishes typical of motorcycle fairings. However, prudence is crucial; applying this solution safely and effectively requires proper technique and a few preliminary steps to ensure successful outcomes without damage.
To begin, proper surface preparation is essential. Clean the area where paint removal is necessary, utilizing warm, soapy water to remove dirt and debris. Allow the surface to dry thoroughly before moving on to the application of rubbing alcohol. This preparation helps ensure that the alcohol can effectively reach the paint without hindrances.
Next, conducting a test in an inconspicuous area serves as a safeguard against unforeseen reactions. Apply a small amount of rubbing alcohol to a cloth and dab it on a hidden section of the fairing. Observe for any discoloration or adverse effects on the finish. If the surface remains unaffected, you can confidently move forward with the removal process.
For the actual removal procedure, start by dampening a clean cloth with isopropyl alcohol. Using gentle pressure, rub the affected area in a circular motion, targeting the paint overspray or stubborn spots. It’s important to maintain a light touch; excessive force could inadvertently damage the protective clear coat of the fairing.
After the paint is removed, it’s beneficial to wipe down the area with a dry, clean cloth to eliminate any residual alcohol. This step not only removes excess solvent but also helps in ensuring that the surface is clean and ready for any subsequent refinishing or treatments.
A few precautions should be kept in mind when using rubbing alcohol. Lower concentrations may not yield the desired results, particularly with stubborn paint. A high concentration, ideally 90% or more, is preferable for optimal performance. Additionally, be aware of the compatibility of rubbing alcohol with various finishes. It might react poorly with sensitive decals or coatings, leading to discoloration or degradation. Thus, keeping contact between the alcohol and the surface to a minimum is advisable to reduce any chances of damage.
So while rubbing alcohol can be a fantastic DIY route for light paint removal, users should engage with it judiciously. Always perform patch tests and limit application times to ensure the preservation of the motorcycle’s finish. Following these guidelines ensures that enthusiasts can restore and maintain the aesthetics of their motorcycle fairings with care and precision.
For additional resources or specific fairing types you might be working with, don’t hesitate to explore more about Honda, Yamaha, and Suzuki fairings to ensure the best outcomes in your project.
Chapter 3: Ensuring Safety While Stripping Paint from Motorcycle Fairings
1. Essential Personal Protective Equipment for Safe Paint Removal on Motorcycle Fairings
When embarking on the task of removing paint from motorcycle fairings, the importance of personal protective equipment (PPE) cannot be overstated. Paint removers are often formulated with potent chemicals that can pose serious health risks. These risks range from skin irritations and chemical burns to respiratory issues caused by inhaling harmful vapors. Therefore, prioritizing PPE while handling such substances is vital for maintaining safety and well-being.
Chemical-resistant gloves are the first line of defense. Using nitrile or neoprene gloves ensures that your skin does not come into direct contact with the paint remover. Chemical strippers can cause burns or allergic reactions, particularly for individuals with sensitive skin. It’s essential to check the integrity of your gloves periodically to prevent accidental exposure.
Next on the list is high-quality eye protection. Safety goggles or a full-face respirator should be worn to shield your eyes and face from potential splashes and airborne particles. The vapors released during paint removal can irritate the eyes, leading to discomfort and long-term health issues. Goggles with a snug fit can prevent dust and chemicals from entering your eyes, making them a necessary component of your safety regimen.
A properly rated respirator is equally crucial. Your choice of respirator should include organic vapor cartridges specifically designed for filtering out harmful fumes commonly released by paint removers. Without this crucial piece of equipment, you risk inhaling volatile organic compounds (VOCs), which can irritate your respiratory system and lead to serious health concerns over time. Working in an environment with adequate ventilation is helpful, but it should never replace the use of a respirator when dealing with strong solvents.
In addition to goggles and a respirator, proper ventilation cannot be overlooked. When planning your project, it’s best to work outdoors or in a space equipped with adequate airflow, such as a well-ventilated garage or workshop. If necessary, implement additional ventilation strategies like fans or exhaust systems to help dissipate risky vapors. This practice not only makes your workspace safer but can also improve the overall effectiveness of the paint removal process.
Limit your exposure time, even when wearing PPE. It’s advisable to take regular breaks to reduce the risk of adverse health effects from prolonged exposure to vapors and chemicals. Allow yourself time to recuperate between applications, ensuring that your workspace remains as safe as possible.
Protective clothing should also be part of your safety arsenal. Consider wearing a lab coat or coveralls made from chemical-resistant material. This provides an additional layer of protection against accidental spills that could lead to skin exposure. Be mindful to avoid loose clothing or dangling jewelry, which can inadvertently trap chemicals and increase your exposure risk.
After you’ve completed the paint removal process, post-use safety considerations are equally important. All exposed skin should be washed thoroughly with soap and water, and any contaminated clothing should be treated immediately to mitigate skin reactions. Always follow local regulations regarding the disposal of hazardous waste, including leftover paint remover and used PPE.
Lastly, consulting reliable sources, such as the U.S. National Institute for Occupational Safety and Health (NIOSH), can provide additional guidelines on selecting appropriate PPE and safe practices for handling chemicals. Following these safety protocols ensures that you can effectively remove paint from motorcycle fairings while protecting yourself from potential hazards, allowing you to focus on restoring your motorcycle’s aesthetic without compromising your health.
For those interested in upgrading their motorcycle fairings, explore a range of options at Summit Fairings to find the perfect fit and style.
2. Creating a Safe Workspace: Ventilation and Environmental Precautions for Paint Removal
When engaging in the task of removing paint from motorcycle fairings, creating a safe workspace is paramount to ensure both personal safety and environmental well-being. Airborne toxins from paint removers can pose serious health risks, and it’s crucial to navigate the challenges posed by volatile organic compounds (VOCs) and hazardous chemicals involved. The decisions made regarding ventilation and waste disposal during this process not only protect the individual performing the work but also safeguard the community and natural surroundings.
The first priority when working with paint removers is to ensure adequate ventilation. A well-ventilated area is essential to mitigate the risks associated with the toxic fumes released during the paint removal process. Performing this task outdoors is the ideal scenario; however, if that’s not possible, a workspace equipped with proper exhaust systems, such as a dedicated spray booth, can serve as an effective alternative. Using paint remover in enclosed spaces like garages or basements can create an accumulation of harmful vapors leading to respiratory irritation, headaches, or even long-term nervous system damage. As a rule of thumb, always err on the side of caution—open windows and create cross-ventilation whenever possible.
Before starting, one should consider the type of protective gear to wear. Donning safety goggles and respiratory masks can shield against inhalation of toxic fumes, while gloves protect the skin from harsh chemicals. This personal protective equipment (PPE) is an essential addition to any paint removal toolkit, particularly when dealing with strippers formulated for tougher tasks. Always taking the time to check PPE for wear and ensuring proper sizing can contribute significantly to comfort and effectiveness.
While considering ventilation, think about the possible environmental implications as well. The disposal of used paint remover and any associated materials is a responsibility that comes with the territory. Chemicals should never be poured down drains or discarded in regular trash, as they can contaminate local water sources, contributing to ecological harm. Instead, one must adhere to local regulations regarding hazardous waste disposal. Seeking guidance from municipal waste authorities or certified hazardous material handlers can provide clarity on how to safely manage waste from the paint removal process.
Furthermore, it’s essential to maintain awareness about accidental spills during this procedure. Keeping absorbent materials or spill kits readily available is a smart preventative measure. In the unfortunate event of a spill, swift action using these materials can prevent the spread of harmful substances and ensure a safer environment both during and after the task.
Storage practices also deserve attention. Unused paint removers should be kept in tightly sealed containers away from heat sources and direct sunlight to prevent chemical degradation and leaks. This proactive approach can minimize potential hazards and ultimately ensure that stored materials do not become unexpected risks.
Integrating these safety practices into your paint removal process helps to create a safer experience for you and your surroundings. Furthermore, familiarity with chemical safety guidelines compiled by agencies such as the U.S. Environmental Protection Agency (EPA) can provide additional insights into responsible handling, disposal, and emergency response to hazardous materials.
As motorcycle enthusiasts dedicate time and resources to maintaining and restoring their rides, approaching paint removal with a focus on creating a safe work environment is beneficial not only for the individual but also for the community as a whole. Knowing that the steps taken to ventilate, protect, and dispose of hazardous chemicals can ultimately lead to a more enjoyable and responsible restoration experience is a rewarding perspective. By following sound safety protocols, you can ensure a successful paint removal process while simultaneously caring for the environment. For more insights into motorcycle fairings and related topics, check out the Honda CBR 1000RR Fairings collection.
3. Navigating Material Sensitivities and Safety Protocols in Paint Remover Use
When embarking on the journey of removing paint from motorcycle fairings, understanding material sensitivities and implementing rigorous safety protocols are vital to achieving a flawless finish without compromising the integrity of the fairings. Motorcycle fairings, generally crafted from materials like ABS plastic, polycarbonate, or fiberglass, each pose unique challenges when it comes to paint removal processes. Engaging with these materials requires a methodical approach that balances effectiveness with caution.
Material Sensitivities
ABS plastic, one of the most prevalent materials used in both OEM and aftermarket fairings, is particularly susceptible to harsh chemical paint removers. Products containing acetone or high alkaline compounds can lead to significant damage, displaying issues such as crazing—tiny cracks that disrupt the smooth surface—and discoloration that can alter the vibrant hues of any fairing. Structural weakening is another concern, as the loss of integrity compromises not just aesthetics but also safety during rides.
Polycarbonate, while relatively more resilient than ABS, still necessitates a discerning eye regarding chemical compatibility. Before diving into any project, it’s prudent to verify the material composition of your specific fairing. Consult the motorcycle’s manufacturer manual, or reach out to the supplier for precise guidance on acceptable products. For owners of fiberglass fairings, employing a less aggressive approach is advisable, as common solvents can lead to surface etching or deterioration of the fiberglass resin.
Ensuring that you select a paint remover explicitly designed for use on automotive or motorcycle plastics can prevent the devastating fallout of incompatible materials. Look for labels that indicate safety for ABS plastics or those noted as “non-abrasive,” reducing the likelihood of damaging your fairing during the paint stripping process.
Safety Protocols
Protection is a dual concern in this endeavor—protecting both the motorcycle fairing and the individual conducting the work. To that end, undertaking a patch test is indispensable. Before applying any product broadly, use a small, inconspicuous area of the fairing to monitor for adverse reactions. This preliminary step can save time and resources, averting damage that may warrant costly replacement of fairings.
Using the right application method is equally critical. Paint removers should be applied sparingly with a soft cloth or brush to prevent the chemical from pooling, which can lengthen exposure times and magnify the risk of damage. Avoid lingering contact between the remover and the surface; adhere strictly to the manufacturer’s recommendations for application durations and techniques. Following these guidelines fosters a successful removal process while preserving the fairing’s aesthetic appeal.
The working environment also plays a key role in safety. Conducting the task in a well-ventilated area minimizes the risks of inhaling harmful fumes—a precaution necessary for both personal health and adherence to safe practices. Deploy protective gear such as gloves, goggles, and if necessary, a respirator mask to shield against fumes that can irritate the respiratory tract or skin.
Once the paint has been adequately removed, it is imperative to clean the surface thoroughly with a mild soap and water solution. This step clears any residual chemicals that could interfere with subsequent painting or reassembly processes. Ensuring that the fairing is completely dried prior to reapplication of paint will further guarantee that the new finish adheres correctly and aligns aesthetically with the rest of the motorcycle.
Through a careful balance of material understanding and robust safety protocols, paint removal can transform the motorcycle fairings from drab to fab, enhancing the motorcycle’s appearance while safeguarding one of its most crucial structural elements.
For additional insights on paint removal methods tailored to various motorcycle models, consider exploring resources that specialize in fairing variations, ensuring you find the right approach specific to your ride.
Chapter 4: Safety First: Essential Precautions for Using Paint Remover on Motorcycle Fairings

1. Navigating Safety: Protecting Yourself and Your Motorcycle Fairings During Paint Removal
When embarking on the task of removing paint from motorcycle fairings, safety must be your foremost concern. The chemicals found in paint removers are potent and can present serious health hazards if not managed correctly. To ensure a safe and effective paint removal process, it’s vital to incorporate precise safety precautions throughout each stage of the operation.
First and foremost, the use of personal protective equipment (PPE) is non-negotiable. Before you even think about reaching for a paint remover, outfit yourself properly. Chemical-resistant gloves, ideally made from nitrile or neoprene, are essential. These gloves will shield your skin from potential irritation or burns caused by contact with the paint remover, which can provoke allergic reactions in some individuals. Never underestimate the need for eye protection—safety goggles or a full-face shield are crucial. Fumes and splashes can occur during the application of paint remover, and a sudden sting in the eyes can derail your project in seconds. Furthermore, wearing a respirator equipped with organic vapor cartridges is important. These facepieces filter out harmful volatile organic compounds (VOCs) that paint removers often emit, safeguarding your respiratory health.
As you prepare to work on the fairings, consider your clothing choices carefully. Long-sleeved shirts and protective coveralls will reduce the risk of skin exposure as well. The workspace itself should not be neglected. Always strive to work in an area that is well-ventilated. Ideally, if circumstances permit, take the task outside or to a fume hood; this will help ensure that any noxious vapors dissipate effectively.
Next comes surface preparation, an often-overlooked step that plays a vital role in your safety and effectiveness during paint removal. Clean the fairing meticulously with a suitable degreaser and a soft cloth. This initial cleaning removes any dirt, grease, and wax that could interfere with how well the paint remover adheres to the surface. It is crucial that the fairing is completely dry before proceeding with the application of any chemical products, as moisture can affect the paint remover’s efficiency.
Regarding application techniques, it’s paramount to follow the manufacturer’s guidelines. When you’re ready to apply the paint remover, use a brush or applicator pad to spread it evenly over the surface. Aim for a consistent layer about 1-2 mm thick; applying too much will not only waste product but also risk damage to the fairing. Remember that each paint remover has its specific dwell time, which determines how long you should allow the remover to work; ignoring this step could lead to inadequate results or even harm the motorcycle’s surface.
Removing the paint should be approached with care. Use a plastic scraper or a soft-bristled brush to carefully lift and remove the softened paint. Patience is key; rushing can lead to scratches and unsightly marks on the fairing. Avoid any metal tools as they can dig into the surface and cause irreversible damage.
Post-removal cleaning is just as important as the previous steps. Once you’ve stripped the paint away, rinse the fairing with water immediately to halt any ongoing chemical reactions. Follow up with a wash using a mild detergent and clean water. Any residual chemicals left on the surface can break down the plastic over time, leaving your fairing susceptible to damage.
Finally, remember the environmental implications of using hazardous materials. Paint remover and the removed paint sludge are classified as hazardous waste; they should never be poured down the drain or disposed of with regular trash. Instead, ensure you are following local regulations for hazardous waste disposal by delivering these materials to a designated collection facility. For the safety of yourself and the environment, following these practices is vital as you navigate the removal process.
In every effort you undertake, adhering to safety practices and the manufacturer’s instructions will help you ensure that the task not only goes smoothly but also protects your health and your motorcycle fairings’ integrity. This mindful approach sets the groundwork for the subsequent application techniques you will explore for optimal results.
2. Surface Prep: Setting the Stage for Successful Paint Removal from Motorcycle Fairings
When it comes to restoring the vibrant appearance of motorcycle fairings, the initial step often overlooked is the preparation of the surface. Properly preparing the surface is not only essential for the efficacy of the paint remover, but it also minimizes the risk of causing damage to the fairing itself. Ensuring that the motorcycle fairing is ready for the paint removal process involves several crucial steps that, when carefully executed, lay the groundwork for a cleaner and more efficient finish.
The first step in preparing the surface is to conduct a thorough cleaning. This clean slate is vital, as the presence of oils, grease, dirt, and debris can significantly impact the effectiveness of the paint remover. Automotive surfaces often accumulate waxes, environmental contaminants, and grime that can hinder the paint remover’s ability to penetrate the layers of paint effectively. Using a strong degreaser specifically designed for automotive surfaces can improve results significantly; such cleaners are formulated to break down contaminants without leaving behind residues that might interfere with the stripping process. Once the cleaner has been applied, it is important to use a soft cloth or sponge to meticulously wipe the surface, ensuring that every nook and cranny of the fairing is addressed.
After the application and scrubbing with degreaser, rinse the surface thoroughly with clean water. This step not only removes any chemical residues but also prepares the fairing for the next crucial phase of preparation: drying. It is imperative to allow the fairing to dry completely before proceeding with the paint remover application. Moisture trapped under the paint remover can adversely affect its performance, sometimes leading to uneven paint stripping or causing the underlying material to swell or warp. A well-ventilated area is ideal for drying, and ensuring that excess moisture is eliminated will help achieve a smoother, cleaner removal process.
In addition to cleaning and drying, careful handling of the fairing is essential during this stage. Motorcycle fairings are often made from delicate plastic or composite materials that can scratch or dent easily. Taking the time to handle the fairing with care during the preparation phase helps prevent superficial damage that could compromise the aesthetic or structural integrity of the component. Utilizing padded surfaces for resting the fairing while cleaning can help avoid inadvertent scratches.
Interestingly, it’s also during this preparatory stage that one should consider the potential use of a test application. Before diving into the full paint removal process, it is advised to apply the remover to a small, inconspicuous area of the fairing. This not only serves to check for any adverse reactions between the paint remover and the fairing’s material but also allows the user to gauge the effectiveness of the chosen remover. Monitoring the reaction in a small section can save a significant amount of time and frustration should any issues arise, allowing adjustments to be made without jeopardizing the entire fairing.
Once the surface is thoroughly cleaned, dried, and prepared, you can confidently move forward with the application of the paint remover. The careful attention paid to preparation will yield a much more efficient stripping process, leading to a better final outcome when repainting or redesigning the fairings. By implementing these steps, motorcyclists can ensure that their endeavors not only lead to effective paint removal but also preserve the integrity and appearance of their beloved motorcycle’s fairings. Success hinges on these foundational actions; when the surface is primed correctly, the rest of the paint removal process is far more likely to succeed.
To explore various options for motorcycle fairings, check out the extensive selections available for models like the CBR600RR in 2013 to 2020, ensuring that your paint removal and restoration efforts are supported by compatible parts tailored for your motorcycle.
3. Essential Techniques for Safe and Effective Paint Removal on Motorcycle Fairings
Properly removing paint from motorcycle fairings requires a strategic approach to avoid damaging the underlying materials while achieving a clean surface. The techniques you employ are integral to ensuring that the removal process is not only effective but also safe. Utilizing the right procedures can maintain the integrity of the fairings, which are often made from sensitive plastics like ABS.
Preparation and Safety First: Before starting the paint removal process, it’s crucial to devote time to preparation and safety. Always work in a well-ventilated area; this is paramount as paint removers can emit harmful fumes. A garage with open windows or an outdoor space is ideal. Additionally, personal protective equipment (PPE) is essential. Equip yourself with chemical-resistant gloves, safety goggles, and a respirator mask rated for organic vapors to shield your skin, eyes, and lungs.
Furthermore, protecting your workspace is vital. Lay down plastic sheeting or drop cloths to safeguard the surrounding surfaces and items from splatters. Ensure that any areas that should not be stripped, such as rubber seals or chrome trim, are carefully taped off with painter’s tape to avoid unintended damage.
Choosing the Right Remover: Selecting a suitable paint remover is critical to the success of your project. Look for products that are specifically formulated for plastic and composite materials. Harsh caustic strippers suited for metal could severely damage the plastic of your fairings. Opt for non-abrasive removers marked as safe for use on plastic. Such formulations often provide effective results while ensuring the fairings remain unharmed.
Conducting a Test Run: Testing the paint remover in an inconspicuous area is a crucial step. Choose a hidden spot on the fairing, such as the underside or an inner edge, to apply the remover. This will help you determine whether the product might discolor or etch the plastic before you proceed with full application.
Application of the Remover: When you’re ready to apply the remover, do so generously and evenly using a clean, lint-free cloth or a disposable applicator brush. Work in small sections—approximately 6×6 inches—focusing on one area at a time to prevent the remover from drying out before it can take effect. Allow the remover to sit on the surface according to the manufacturer’s instructions, typically between 5 to 15 minutes. Be vigilant; do not let it dry on the fairing, which can complicate removal and potential damage.
Removing the Paint: The next step involves carefully scraping the softened paint off the fairing. Use a soft-bristled, non-abrasive scrubbing pad or a plastic scraper. Metal scrapers can scratch or gouge the delicate plastic. Lightly and gently work in circular motions, applying minimal pressure to ensure you’re not damaging the surface beneath. If you encounter particularly stubborn paint, it can be necessary to reapply the remover and wait a few extra minutes. The key is to be patient—aggressive scrubbing can have adverse effects.
Cleaning Up Post-Removal: After successfully removing the paint, it’s essential to clean the surface thoroughly. Use a damp cloth to wipe down the area, ensuring that you remove any remaining residue from the remover and paint particles. If possible, follow up by rinsing the area with clean water, then dry it with a clean, lint-free towel. Depending on the remover used, a neutralizing solution may be required to ensure the plastic’s condition is restored, removing any traces of the chemicals.
Final Steps and Inspection: Conduct a final inspection of the fairing. Look for any remaining paint, scratches, or other damage. Light sanding with very fine-grit sandpaper may be necessary to smooth out any imperfections. Once the fairing is completely clean and dry, you can proceed with any repairs or the repainting process.
By executing these techniques cautiously, you can effectively and safely strip old paint from your motorcycle fairings, ensuring their continued performance and aesthetics effectively.
Final thoughts
Understanding the proper techniques for paint removal on motorcycle fairings is essential for business owners looking to maintain their inventory or offer restoration services. By utilizing products like Chemical Guys Paint Remover or implementing DIY methods for lighter jobs, professionals can ensure that they’ll preserve the integrity of motorcycle fairings while enhancing overall appearance. Prioritize safety with the right gear and a thorough understanding of the process to effectively rejuvenate motorcycle fairings and provide customers with the best service possible.
Ready to elevate your ride? Summit Fairings delivers premium, custom-fit fairings that blend style and durability. Whether you’re chasing speed or turning heads, we’ve got your bike covered. Don’t wait—transform your machine today. Click, customize, and ride with confidence. Your perfect fairing is just a few clicks away. Act now!
About us
We are one of the leading motorcycle fairing export sites, with over 3,000 styles across almost all motorcycle models. Buy from summitfairings.com, and pay 10-40% less than the prices on other sites. If you have any questions, we promise we will have your answer within six hours.