Painting fiberglass motorcycle fairings is a crucial aspect for business owners focusing on motorcycle aesthetics and performance. Thorough preparation ensures adherence and durability, while selecting the right materials can significantly impact the finish quality. This guide walks you through the essential steps from surface preparation, through paint selection, to application techniques and maintenance considerations, ultimately providing insights that will empower you to deliver exceptional results to your customers. Understanding these components holistically will enhance your service offerings and customer satisfaction in the dynamic motorcycle market.
From Clean to Prime: The Art and Science of Surface Preparation for Fiberglass Motorcycle Fairings
The surface on fiberglass motorcycle fairings is not just a canvas for color; it is the foundation that determines how well the pigment bonds, how long the finish lasts, and how true the final look will be under sun, rain, and road grime. In a project where weight, aerodynamics, and aesthetics meet, proper surface preparation is the quiet, patient work that makes all the other steps possible. When a fairing is properly prepared, paint adheres with confidence, flaws behind the glassy finish disappear under the gloss, and the color you lay down gains depth rather than drifting across a compromised surface. The work begins with a clean slate and ends with a surface that behaves like a premium substrate, one that resists peeling, bubbling, and micro-scratches even after the bike has spent long days on the road. The process is sequential, but the mindset is holistic: every action you take, from the first degreasing wipe to the final buff, should aim to create a cooperative surface rather than a stubborn membrane that pushes back against the coating you apply.
The first principle is cleanliness. Fiberglass is porous and, at a microscopic level, can trap oils, waxes, and silicone from prior finishes or handling. A thorough degreasing step is not optional; it is the layer that unlocks adhesion. Use a degreasing solution appropriate for fiberglass and compatible with the resin system in the fairing. Apply it with a clean cloth, paying particular attention to tight recesses around mounting points and edge edges where oils can accumulate. The goal is to remove contaminant residues without etching or softening the substrate. If you skip this step or rush through it, you will end up fighting adhesion later, no matter how carefully you apply primer and paint. The surface will reveal the forgone step in the form of micro-peels or an inconsistent finish long after the paint has cured.
Once the surface is clean, the next task is to create a controlled texture that will give the primer something to bite into. Light abrasion with 400 to 600 grit sandpaper is recommended to establish this key. The idea is not to remove material or flatten the fibrous layup to dull the contour; it is to generate a uniform micro-scratch pattern that provides mechanical interlocking without creating gouges that must be filled later. Work methodically, following the contours and curves rather than focusing on flat planes alone. For fairings with complex geometry—fins, vents, and aerodynamic noses—the sanding should be gentle and evenly distributed. After this step, wipe away the loosened dust with a tack cloth. The tack cloth is not merely a convenience; it is a precision instrument that ensures the surface is dust-free before primer deposition. Dust remnants can become islands under the primer that later show up as tiny craters or pinholes once the paint goes on.
Imperfections inevitably appear when you scrutinize a fiberglass surface under bright light. Small scratches, minor dents, or fibers that protrude slightly beyond the surrounding plane need attention. At this stage, filling becomes a careful, deliberate process. Use a lightweight fiberglass filler designed for repair on fiberglass and plastics. Apply thin coats to the imperfections, allowing each layer to cure according to the manufacturer’s instructions. Sand the area smooth after curing so that the repaired spot sits flush with the surrounding surface. The aim is seamless continuity, not merely a filled look. Overfilling or over-sanding the repair creates a mismatched plane that demands endless touch-ups later in the painting workflow. A properly filled surface is one that, when viewed under the same bright light used for inspection, reads as a single, uninterrupted field of curvature and form.
Dryness is not an afterthought but a prerequisite. The surface must be completely dry and free of particulates before primer is introduced. Any lingering moisture or dust that escapes during this moment can trap moisture beneath the primer, which can cause blistering, peeling, or a cloudy finish after the topcoat is applied. If you live in a location with high humidity or if the weather is unpredictable, continue the prep process indoors in a controlled environment where temperature and humidity can be monitored. This is the moment where a modest investment in time pays off in the long run, because the primer’s bond to fiberglass depends on a dry, clean surface that won’t fight the resin with micro-level moisture or dust carried in from the outside world.
With the surface properly prepared and dry, you can move into priming. A two-part epoxy primer is the preferred choice for fiberglass because it offers superior adhesion, chemical resistance, and durability compared with single-component primers. The two-part system creates a crosslinked bond that penetrates the tiny voids in the fiberglass and plastics, forming a robust foundation for the subsequent paint layers. Apply the primer in thin, even coats rather than heavy, sweeping applications. The goal is to build up a uniform layer that follows the fairing’s contours without pooling in low spots or leaving edge line ridges. Follow the manufacturer’s guidelines for mixing ratios, pot life, drying time between coats, and full cure time. In practice, this often means applying two to three light coats, allowing adequate flash-off time between coats to prevent solvent entrapment that can lead to solvent pop or surface wrinkling later.
Work conditions play a decisive role in the success of priming. Ensure the workspace is well ventilated and away from direct drafts that could accelerate drying unevenly. Relative humidity should be controlled, and temperatures should remain within a moderate range that won’t cause the primer to skid or dry too quickly. A warm, dry, dust-free environment is ideal, but a properly prepared paint booth or a dedicated workshop with controlled climate can deliver consistent results. If the primer dries in an environment that is too cool or too humid, the cure can be imperfect, leaving a finish that looks fine at first glance but reveals micro-voids when the sun hits the surface at an angle or during a long ride in bright daylight. Dust control remains critical even after priming; a light wipe with a tack cloth before the next coat is a prudent habit.
After the primer has cured, you may consider a light sanding to further refine the surface. A very fine sanding with 600 to 800 grit paper is often all that is needed to knock down any minor texture created by the primer film and to create a perfectly smooth, uniform plane for color. The key here is to sand with the primer set and cured and to avoid over-sanding through the primer into the resin or filler layers. The surface should feel almost glassy to the touch, with no ridges or micro-roughness when you run your hand along it. A quick wipe with a tack cloth or a clean microfiber cloth ensures any new dust is removed before you start applying color.
With the surface prepared and primed, the painting phase begins. At this stage, the role of the surface prep is no longer behind the scenes; it becomes the silent partner of your color and clear coats. Automotive-grade enamel or urethane-based paints are common choices for their durability and resistance to UV exposure. The techniques here are parallel to those used in professional automotive finishing: multiple ultra-thin coats rather than a few thick layers. The problem with thick coats is that solvents take longer to evaporate, which can trap moisture and produce sagging or solvent pop. The art is in applying coat after coat, letting each layer flash off to a clear level of tackiness before the next one. This careful cadence produces a uniform, uniform color without orange peel or mottling on the surface. A steel-wool soft touch between coats is not recommended; instead, rely on light sanding with a very fine grit between passes if needed to maintain a flawless plane.
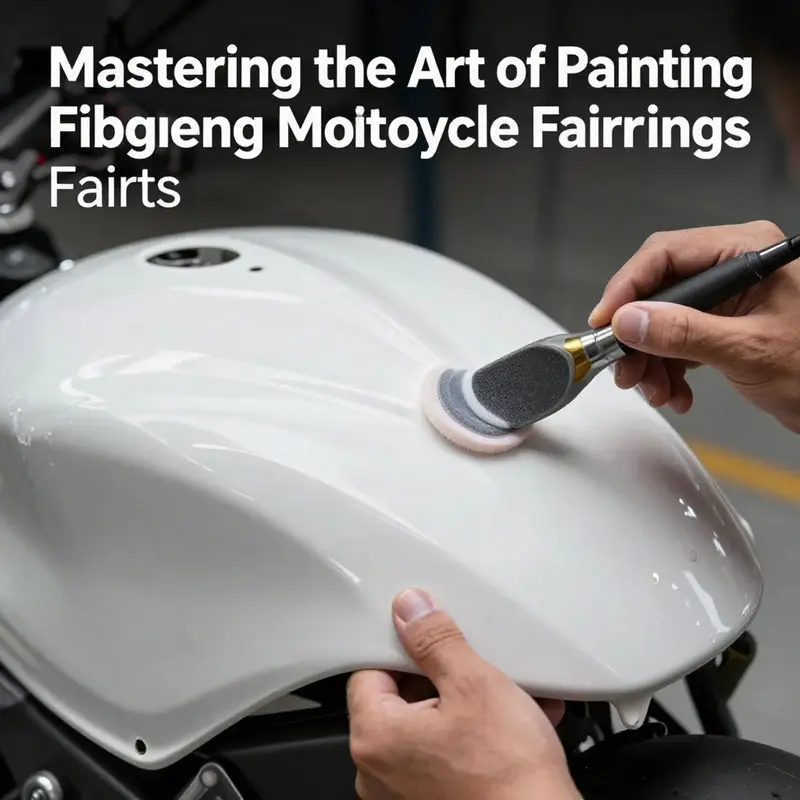
The color coat is followed by a protective clear topcoat. A urethane-based clear coat delivers resistance to UV rays, minor scratches, and weathering—a practical choice for motorcycles that spend significant time on the road and in the sun. Allow the clear coat to cure fully, as directed by the product instructions, and then, if a higher gloss is desired, perform a careful buffing after full cure. Buffing should be performed with a foam or soft cloth pad and a mild cutting compound that is appropriate for urethane finishes. The idea is to bring out the depth and clarity of the color without introducing heat that could distort the resin matrix within the fairing or obscure the new surface texture created by the previous steps. The result is a glassy, durable surface that reflects light cleanly and resists the daily hazards of road grime and UV exposure.
For riders who crave personalization, the prep process plays a crucial role not only in durability but in how decals, graphics, or custom artwork will lay down. A well-prepared surface takes decals without wrinkling, peeling, or causing color bleed. In aftermarket options, some fairings are designed to come with a glossy finish that accepts decals directly or can be reworked with a fresh coat of color. When you shop for fiberglass fairings, you may encounter marketplaces and suppliers that emphasize lightweight construction and aerodynamic shaping alongside finishes that readily accept paint. If you’re exploring aftermarket options for fiberglass fairings, you can look into the Honda fairings collection, which offers a range of shapes and contours that are compatible with the preparation and painting workflow described here. This can simplify planning, especially when you aim to maintain a consistent look across multiple panels on a single bike.
The practical rhythm of surface preparation also has a mental rhythm. Each step follows the previous one like a well-rehearsed sequence. If you linger over the degreasing step, you lose the momentum that keeps solvents from evaporating too quickly or too slowly during priming. If you rush through sanding, you risk leaving the surface with hidden flaws that will reveal themselves after paint. The discipline is not about relentless repetition but about thoughtful iteration: clean, sand, wipe, fill, dry, prime, sand, paint, clear, and buff. It is a choreography that rewards patience, planning, and attention to detail. In the end, the finishing job is about how the surface responds to your paint system: a smooth, predictable bond and a finish that holds up to the responsibilities of daily riding and occasional track days alike.
As you close the loop from raw fiberglass to finished color, remember that the surface you prepared is the key to the entire project’s success. It carries your color with confidence, it resists the temperature and sun, and it embraces the decals and lines you apply with precision. The reliability of the final result begins with those first steps: a thorough degrease, a careful mechanical key, a clean and dust-free environment, a proper repair where needed, and a primer that creates a robust, flexible bond. Those choices define the difference between a finish that looks good for a season and a finish that endures for years of riding. Whether you are restoring an old set of OEM fiberglass panels or breathing new life into a modern aftermarket fairing, the art of surface preparation remains the same: prepare with intention, protect with care, and finish with discipline.
Internal link for further reference on compatible stages of project planning can be found here: Honda fairings collection.
External resource for broader guidance on paint selection and application techniques for motorcycle fairings can be consulted at the following external reference: https://www.motorcycle.com/how-to-choose-paint-for-motorcycle-fairings/
Durable, Flexible Finishes: Mastering the Art of Painting Fiberglass Motorcycle Fairings
Painting fiberglass motorcycle fairings is more than a cosmetic choice; it is a careful orchestration of substrate preparation, chemistry, and finishing layers designed to endure heat, UV exposure, fuel vapors, and the flex of a rider’s ride. The fiberglass shell, prized for its light weight and sculpted contours, behaves differently from metal or rigid plastic. It can drink finishes unevenly, crack under repeated flexing, or yellow under long sun exposure if the selected system isn’t up to the task. A finish that lasts as long as the bike’s bones, yet remains easy to touch up and repair, requires a deliberate sequence of materials and techniques. When done right, the result is a seamless, durable coat that respects the fairing’s geometry while elevating its look. The journey begins with the substrate, moves through the primer and adhesion strategies, travels across the color system, and ends with a clear, glossy shield that defies the elements. It is a dialogue between the rider’s ambitions and the material’s limits, a balance of science and craft that rewards patience and precision more than haste and shortcuts.
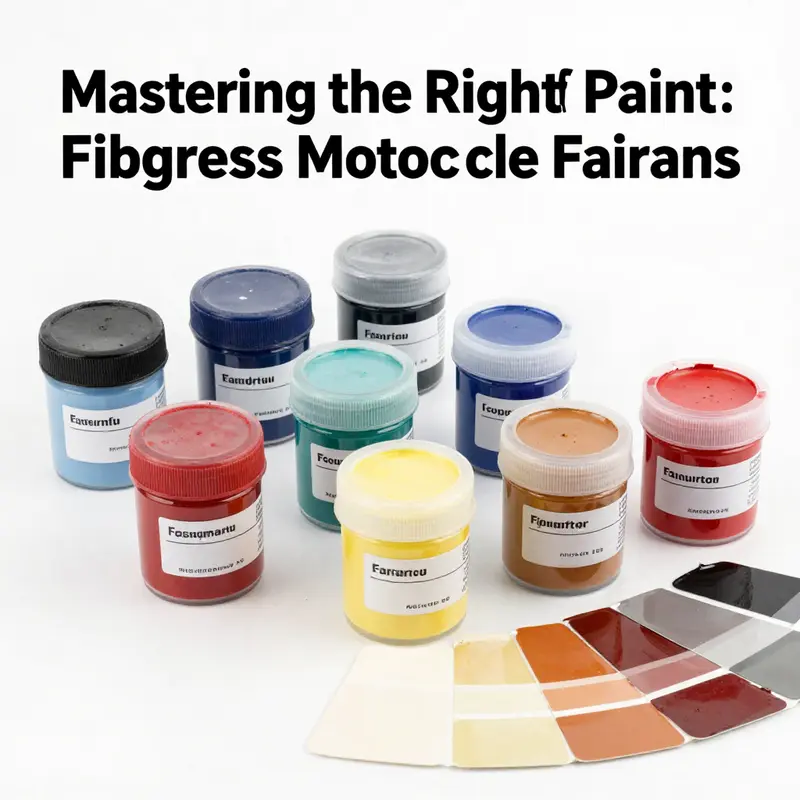
The first decision in this process is the paint system itself. For fiberglass, standard single‑component acrylics, while convenient, tend to crack, fade, or peel after heat cycles and prolonged sun exposure. They lack the elasticity needed when panels are subjected to the vibrations and flexure of a motorcycle’s operation. The recommended path points toward high‑performance two‑part polyurethane paints or specialized automotive refinish coatings designed for flexible substrates. These systems are engineered to resist cracking under flex, to stay pliant enough to move with the fairing, and to resist fuel vapors and solvent exposure that can soften or dull cheaper finishes. The two‑part polyurethane, in particular, offers a robust balance of toughness and flexibility, delivering a durable color that can stand up to long road miles and the occasional heat spike from a sunny ride. If a rider favors bold metallics or specialty finishes, there are refinishes formulated to retain gloss and color integrity while maintaining the necessary substrate flexibility.
Before any color touches the surface, preparation is king. A fairing, even when freshly manufactured from reinforced fiberglass, benefits from a proper clean and key. Begin with a thorough wipe-down using a degreasing cleaner to remove any oils or contaminants left from molding or handling. Contaminants as small as fingerprints can undermine adhesion, so a meticulous cleaning sets the stage for a reliable bond. After cleaning, lightly abrade the surface with 400 to 600 grit sandpaper. The goal is not to remove material but to create a micro-roughness that gives the primer something to grab onto. A successful key is the difference between a finish that peels after a few hot days and one that remains stable for years. Following the scuffing, wipe again with a tack cloth to remove fine dust. The surface should feel slightly rough to the touch, not smooth as glass, when you’re ready for primer.
Primer for fiberglass can be a two‑part epoxy or another high‑adhesion system designed specifically for fiberglass and plastics. The primer’s job is simple in concept but decisive in outcome: it promotes adhesion, seals the porous nature of fiberglass, and provides a uniform base that won’t react with subsequent coats. A PF (primer-for-fiberglass) or epoxy primer can form a resilient foundation that resists moisture ingress and minimizes the risk of future peeling. Without a proper primer, even the best color system may fail at the edges, around fasteners, or in heat‑and‑sun hot spots. After applying primer, allow it to cure fully according to the manufacturer’s guidance, then inspect for any pinholes or unevenness. If needed, a light sand with a finer grit and a tack wipe can refine the surface before the color goes on.
With a sound primer in place, the color begins its work. The choice of topcoat is not just about hue; it is about a finish that remains stable under UV exposure and fuel exposure, and one that can maintain an even look across the fairing’s many curves and contours. The most reliable route for fiberglass fairings is a two‑part polyurethane or a specialized automotive refinish formula designed for flexible substrates. These coatings cure to a hard, abrasion‑resistant film that resists chipping on exposed edges yet remains flexible enough to move with the panel during temperature cycling. In practice, this means softer, more forgiving coatings are out; firmer, elastic, UV‑resistant systems are in. The result is color that stays bright, resists fading, and doesn’t crack along the seams where panels articulate during riding.
Application technique matters as much as the chemistry. The preferred tool for even coverage is a spray gun set to deliver thin, controlled coats. Multiple light coats are superior to a single heavy layer; they reduce runs and sag while building color depth. Each coat should “flash off”—that is, allow enough solvent evaporation for the next layer to flow smoothly without trapping solvent underneath. The exact flash-off times depend on ambient temperature and humidity, but the clinician’s rule is to watch the solvent edge disappear from the surface before applying the next pass. In a typical shop setting, three to four light coats of color, allowing proper flash-off between coats, will yield a uniform finish with minimized imperfections. After the final color layer has cured to a tack‑free state, a clear topcoat is applied. A urethane‑based clear coat is often the best choice for UV protection, scratch resistance, and overall gloss retention. It’s worth noting that all color and clear coats should be applied in a well‑ventilated area with appropriate PPE, as the solvents and isocyanates involved can be hazardous.
The clear coat does more than add gloss. It seals the pigment, smooths the micro‑texture of the color layer, and provides a durable barrier against the weather and road debris. A full cure of the clear coat is essential before any polishing or buffing—premature handling can mar the surface or leave micro‑dust embedded in the cured film. When cured and thoroughly set, the fairing can be gently buffed to a show‑quality gloss. The polishing process should favor fine abrasives and soft polishing compounds, using a rotary polisher with light pressure to avoid cutting into the color layer. The goal is not to remove material but to refine the surface to an optimum level of clarity, achieving a deep, glassy finish while preserving the color depth and the integrity of the clear coat.
Durability is a function of more than chemistry; it also hinges on how you treat the finished panel. The need to resist fuel exposure means selecting a finish that can tolerate minor fuel contact without staining or softening. UV resistance matters because motorcycles live outdoors and receive lots of sun exposure. The best systems provide both UV resistance and chemical resistance, so the color maintains its brightness and the clear remains steadfast against yellowing or hazing. A well‑matched primer, a proper color system, and a sealing topcoat combine to provide an enduring, high‑gloss finish that stays vibrant for years of riding.
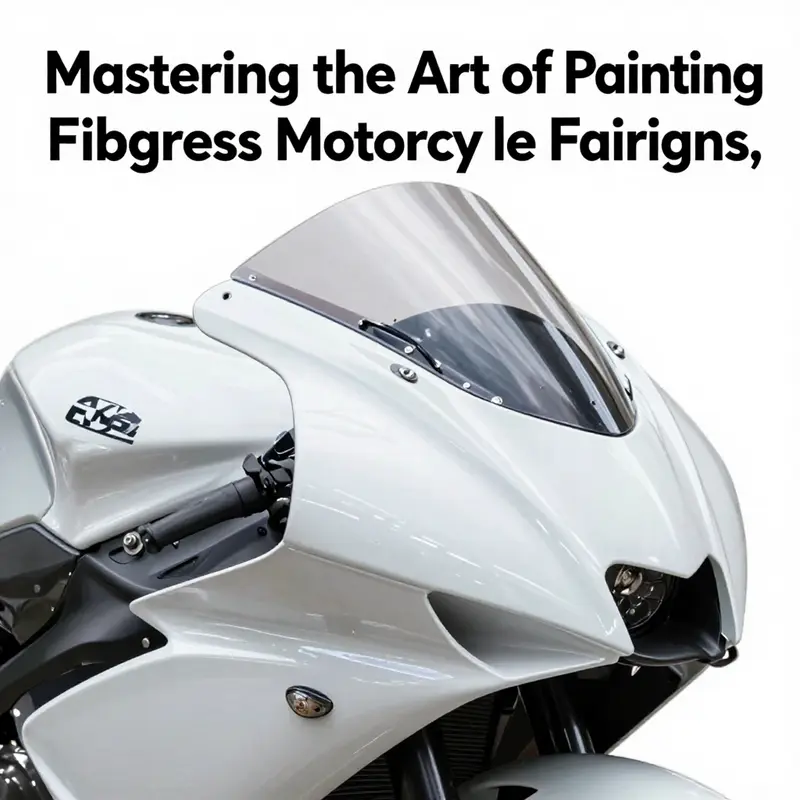
For those who seek a more personalized look, aftermarket fiberglass fairings—engineered with reinforced glass composites that can be lighter than traditional plastics and shaped for aerodynamic performance—often come pre‑primed or ready for custom finishes. These components are designed with the potential for aftermarket decals, logos, or bespoke color schemes in mind, making the painting process particularly appealing to riders who want a factory‑fresh appearance or a one‑of‑a‑kind look. When considering aftermarket fairings, it is wise to align the painting strategy with the specific material and finish recommendations from the supplier or the finish system you choose. If you’re aiming for a visually cohesive result that matches or exceeds OEM aesthetics, a thoughtful combination of proper surface preparation, a robust primer, an elastic color system, and a weather‑resistant clear coat will serve you well. And if you’re considering pairing the paint decisions with a certain shell or style, one practical route to visualize options is to browse a broad fairing catalog that aggregates various designs and shapes. For instance, explore the Honda fairings collection to imagine how color and finish interplay with contouring and edge work. Honda fairings collection offers a catalog view that can inspire how a given color family or finish grade might look on a particular silhouette, while keeping the core emphasis on durability and resistance in the foreground.
In some cases, professional application becomes a smart choice, especially for complex or high‑visibility surfaces. A trained refinisher will manage the subtleties of substrate conditioning, humidity control, spray parameters, and cure schedules with a practiced efficiency that minimizes risk and maximizes uniformity. Even with the best equipment and materials, practice matters. A well‑equipped shop can deliver consistently excellent results, but a careful do‑it‑yourself approach, when paired with proper primers, controlled environments, and patient layering, can produce nearly professional results that satisfy the most discerning rider. The key is to respect the science behind the finish while applying the craft of painting with a steady hand and an eye for detail. If you are unsure about any step, consult manufacturer guidelines for the chosen primer, color, and clear coat. Adhering to those instructions is the difference between a finish that thrives for years and one that requires frequent touchups.
Beyond the mechanics of the paint system, there is the question of color permanence and refresh cycles. The repairability of fiberglass fairings is a practical consideration; if a panel sustains chips or scratches, maintenance should be straightforward. A properly cured topcoat can be repaired in layers, with spot refinishing and blending to match the surrounding color. The repair approach should respect the underlying primer and color layers to maintain adhesion and gloss, ensuring that the repaired area integrates with the surrounding finish rather than standing out as a mark of repair. In other words, the best finish looks like a single, flawless skin from far away and behaves as a resilient barrier up close.
Choosing the right paint for fiberglass fairings, then, is a balance between material science and practical riding life. It is about selecting a system that remains flexible enough to ride with the panel’s natural movements, while still delivering the color depth, gloss, and longevity that keep a bike looking sharp as it ages. It is about surface preparation that respects the physics of adhesion. It is about layering that builds from a solid foundation through a color coat that delivers even coverage, to a clear that preserves clarity and resilience. It is about finishing with care, in a ventilated space, wearing appropriate safety gear, and allowing each stage to cure properly before moving to the next. It is about setting up a painting process that can be repeated with consistent results, whether you are refinishing a single panel or reimagining an entire fairing set.
For readers who want to deepen their understanding and verify best practices, an external guide provides practical, in‑the‑field insights into selecting weather‑resistant, durable finishes for motorcycle fairings. See How to Choose Paint for Motorcycle Fairings – A Practical Guide for a comprehensive overview of the options, including considerations for substrate flexibility and long‑term performance: https://www.autoblog.com/how-to-choose-paint-for-motorcycle-fairings.
From Primer to Polish: The Integrated Craft of Painting Fiberglass Motorcycle Fairings

Painting fiberglass motorcycle fairings is a discipline that blends meticulous surface science with expressive finish work. The goal is not merely color but a durable, glossy skin that can endure daily riding, sun exposure, and the occasional tumble without surrendering its clarity. Fiberglass, with its resin matrix and porous surface, demands a careful sequence of steps so that the paint adheres firmly, sands smoothly, and remains stable over time. The process begins long before a color is chosen or a spray gun is loaded. It begins with a clean slate, literally and figuratively, where every molecule of oil, wax, or mold release residue is banished from the fairing’s surface and every irregularity that could cast a shadow in the final finish is addressed. In practice, that means a disciplined regimen of cleaning, abrading, priming, painting, and sealing, performed in a controlled environment that governs temperature, humidity, and dust, so that each coat can behave as it should rather than surprise the painter with a sagging run or a dull edge. The first act in that ritual is surface preparation, which is less about preparation for its own sake and more about enabling adhesion and uniformity. A light, deliberate sanding across the entire panel helps remove the resin’s surface gloss and any residual release agents from the molding process. The aim is not to remove material but to create a micro-key—a fine, roughened texture that allows primers and paints to bite in rather than glide across a slippery surface. Start with a coarser touch, around 180 to 220 grit, to knock down imperfections and expose a fresh surface. Then move through progressively finer grits—about 320 to 400—to erase sanding marks and lay a smooth bed that invites even primer deposition. Each stage should culminate in a thorough wipe-down with a clean tack cloth to collect the fine dust created by the sanding. This tactile brushing away of particles matters as much as the mechanical sanding, because the presence of dust at this juncture can seed tiny defects that later show up as fisheyes or micro-scratches under the clear coat. The next move is to address any residual oils, silicones, or polish residues. A dedicated degreaser is applied generously, working with lint-free towels that lift contaminants rather than drag them across the surface. After degreasing, rinsing with clean water followed by complete drying is essential. Any moisture left behind at this stage can become a trap for solvents later, leading to solvent pop or micro-blistering in the primer layer. When the fairing is finally dry, the surface feels almost tacky to the touch, a sign that it is ready for priming. Primers for fiberglass or plastic substrates are designed to promote adhesion and to seal against osmotic intrusion of moisture. The primer choice is pivotal: a high-quality epoxy or urethane primer—two-part formulations are common in this arena—provides a robust base that resists lifting and peels. A single layer can establish the fundamental bond between the fiberglass and the subsequent topcoats, but multiple thin coats, allowed to dry and then lightly sanded between applications, are often required to reach a perfectly smooth plane. The sanding between coats is not a boring ritual; it is a crucial bridge between adhesion and finish. Each pass with 400 to 600 grit paper between primer coats serves to erase any pinpricks and to further flatten the primer’s surface. It is a quiet, almost meditative step that pays off when the topcoat goes on. Once the primer has cured, the surface is re-evaluated under proper lighting. Any remaining imperfections—pinholes, dust nibs, or small runs—are treated with spot filling and cautious re-sanding to ensure the base is pristine. Only then does the painter move to paint. The topcoat choice is a balance of durability, UV resistance, and color fidelity. High-build automotive paints, which are designed to cover quickly and smoothly, are a common option, as are urethane-based coatings that provide excellent UV resistance and chemical durability. The painting environment matters almost as much as the paint itself. A dust-free or at least well-contained space—often a clean garage with controlled airflow or a makeshift spray booth—minimizes fallout that can land in wet coats and cause tiny imperfections to bloom under the final clear layer. The spray technique is a study in patience. An ideal approach uses a spray gun set to appropriate pressure and uses multiple thin coats rather than one thick application. Each pass should be even, with the gun held at a consistent distance from the surface to prevent heavy edges or drips. The painter must respect the material’s flash-off time—the short window after each coat when solvents start to evaporate and the film begins to begin hardening. Rushing this step invites solvent entrapment and cloudiness in the cured film. As coats accumulate, the surface should begin to look uniform in tone and texture, with no visible solvent sags or orange-peel irregularities. When the color reach is complete, a clear topcoat seals the finish, adding UV protection, impact resistance, and abrasion resistance. The clear layer, typically urethane-based for its resilience and clarity, acts as a protective armor while still allowing the base color to glow beneath. The final act of the finish is buffing, a controlled and deliberate process that brings out the depth of shine. A fine polishing compound, applied with a soft buffer at modest speed, can erase microscopic surface imperfections and refine the overall gloss. The result is a mirror-like sheen that makes the contours of the fairing—even the subtle curves that were engineered for aerodynamic performance—read as if cut from glass. The path to that level of finish is rarely a straight line. It requires vigilance toward environmental factors such as temperature and humidity, which influence solvent evaporation rates and film formation. Too much humidity can trap moisture under the clear, blunting clarity; excessive heat can accelerate drying and promote cracking or spidering. The painter learns to adjust air movement, temperature, and drying times to accommodate the conditions, thereby preserving the integrity of each coat. Beyond the technical steps, there is a broader philosophy at play. Fiberglass fairings, including aftermarket variants designed for sportbike configurations, are engineered with a glossy finish in mind, not only for aesthetics but also for decals and graphics to adhere cleanly. A well-prepped surface enhances not just the color’s brightness but the true crispness of lines in any design. When decals or custom artwork are involved, the painter may apply masking materials with care, ensuring that edges stay sharp and that the underlying finish remains untouched by solvent or adhesive residue. The result is a finish that can support complex graphics, subtle tonal shifts, or a bold, high-contrast palette without compromising durability or adhesion. For readers seeking a practical point of reference for related parts and repair options, the broader fairing ecosystem offers a range of components and finishes that align with this approach. See the fairings collection for a sense of how different shapes and contours respond to preparation and coating. This reference point helps ground the painting process in real-world shaping and material realities, reminding us that every fairing brings its own subtle challenges to the prep bench. For more visual and technical context about the broader fairing landscape, consider a detailed external guide that walks through the full process end to end, including step-by-step demonstrations and troubleshooting tips. As you read or watch, you’ll notice the rhythm of cycles—clean, abrade, prime, paint, clear, and buff—repeating in slightly different tempos depending on the fairing’s condition and the painter’s goals. The consistency of this cycle is what turns a rough fiberglass sheet into a high-gloss, weather-resistant armor that can endure riders and road alike. A curious reader might wonder about the practical durability of such finishes over seasons of sun, rain, road grit, and the occasional abrasion. The science behind durability rests on the film’s integrity; the primer must bond the substrate to the color coat, which in turn must couple with the clear coat. Each layer must be free of contaminants and allowed to cure fully before the next is introduced. A well-executed sequence yields a finish that resists yellowing, chalking, or hazing, while maintaining color integrity even after exposure to UV rays. The artistry becomes a matter of how well this sequence is carried out in in-between moments of the day—how patiently the painter waits for a coat to dry, how carefully the edges are masked, and how consistently the spray pattern is maintained across the fairing’s curves. There is also a practical note about testing before committing to the entire piece. It is wise to practice on a scrap piece of fiberglass or a previously painted panel to verify primer compatibility, topcoat behavior, and the spray technique. Testing helps prevent surprises on the live part and offers a low-stakes space to adjust pressure, fan size, or thinning levels. In the spirit of continuous improvement, many painters document their coating schedules and environmental conditions, building a personal playbook that becomes a reliable guide for future projects. And while the core sequence remains stable—the key steps of cleaning, sanding, priming, painting, and sealing—the nuances adapt to the specific fairing shape and the desired aesthetic. Aerodynamic contours often demand careful edge work along seams and radii so that the color transition remains even and free of pinholes or craters at the joints. The painter’s eyes, trained to detect subtle inconsistencies, are the final instrument of quality, supported by the mechanical discipline of spray technique and curing control. This holistic approach, balancing material properties with procedural discipline, yields results that are not merely cosmetic but enduring. It is a reminder that painting fiberglass fairings is as much about preparation and patience as it is about color and finish. For readers who want to dive deeper into the practicalities and see examples of the methods described, consider exploring additional resources that detail the complete workflow. For related insights on part selections and finish options, there is a useful reference page in the fairings catalog that organizes the various styling and finish choices in a way that aligns with this chapter’s emphasis on durability and aesthetic fidelity. fairings collection offers a glimpse into how different shapes and designs respond to preparation and coating techniques. External guidance also exists that walks through the full painting workflow with visuals, providing a complementary perspective to the narrative described here. For a broader, image-rich, step-by-step guide, consult external resources that illustrate the sequence from surface prep to final polish. A comprehensive walkthrough can be found at this external reference: A Complete Guide to Painting Fiberglass Motorcycle Fairings.
Gloss, Guard, and Longevity: The Craft of Finishing and Maintaining Painted Fiberglass Motorcycle Fairings
The finish on fiberglass motorcycle fairings is more than a glossy surface. It is the final act in a careful dance of preparation, chemistry, and restraint that translates raw composite into a protective, resilient skin. When the paint is laid and the clear coat seals, a fairing becomes not just a visual statement but a functional shield against the sun, wind, rain, and the inevitable road debris that marks every ride. The art and science of finishing do not end with the last spray; true craftsmanship extends into maintenance, care routines, and thoughtful touch-ups that preserve the integrity of the finish over years of exposure and use. A well-executed finish starts with the understanding that fiberglass, while forgiving in some respects, demands precise adhesion and a barrier at every stage of the process. The surface must be clean, the primer must bite, and the paint must lay down in smooth, controllable layers. Any misstep at this stage can become a long-term weak point: micro-cracks in the clear coat, hazing from sun damage, or fading that dulls the lines of the fairing itself. The goal is a finish that looks fresh after thousands of miles and remains easy to care for, even when the weather or the road throws its worst at it. In practice, that means embracing a maintenance mindset as purposeful as the initial painting work.
At the heart of durable maintenance is a routine built on gentle, non-abrasive care. Start with cleaning that respects the integrity of the clear coat and the paint beneath. Use pH-neutral cleaners designed for automotive or motorcycle finishes. Harsh or solvent-based polishes can degrade the protective layer over time, leading to fading, cloudiness, or even micro-scratches that catch the eye every time you glance at the fairing. The goal is to remove oils, bird droppings, bug residue, and road grime without grinding the surface, so a soft microfiber cloth becomes your constant companion. When you wash, work in the shade or a shaded area to reduce water spotting and keep cleaners from drying too quickly on the surface. After washing, a careful dry is essential. Patience here prevents water spots that can etch tiny trails into the clear coat and become more noticeable with time.
Beyond routine washing, maintenance pivots on protecting the finish from UV and environmental assault. A high-quality wax or sealant, applied every three to six months, provides an additional barrier against UV rays, moisture, and minor abrasions from gravel, branches, or parking-lot brushing. The exact frequency depends on how much sun the bike experiences, the climate, and how aggressively you ride through gritty or coastal environments. In hotter, drier climates with strong sun, you may lean toward more frequent applications, while sheltered or cloudier climates can stretch the interval a bit. The key is to ensure the surface is clean and dry before application and to use products compatible with the layered finish you have on the fairing. A wax or sealant is not a substitute for proper cleaning; it sits on top of a pristine surface and helps it shed moisture and contaminants with ease. When you apply these protective layers, sensory cues matter: a glassy feel, a thick, uniform film, and no streaks or halos indicate a good seal. If you notice any uneven patches, revisit the area with a mild cleaner, re-wash, and reapply. This cycle of care keeps the gloss consistent and the color even, which, in turn, preserves the perceived depth and contour of the fairing.
Touch-ups, while less glamorous than a full respray, are a practical reality for riders who push their bikes hard on rural lanes or track days. If a scratch or chip appears, address it promptly with paint that matches the surrounding color as closely as possible. Follow with a compatible clear coat to maintain the uniform finish and to ensure the touched-up area does not stand out as a weak point. The principle here is not perfect color matching in every pixel but seamless integration that you can live with under normal lighting. The topcoat plays a crucial role in this integration; a fresh clear layer can help blend a small repair into the larger field of gloss and depth. You may find that a touch-up projects a tiny ridge or variation in texture; if so, a light, even sanding under controlled conditions followed by another thin coat of clear can restore the surface to a consistent feel and appearance.
For riders considering a broader aesthetic refresh, aftermarket or OEM-certified fiberglass fairings offer pathways to new lines and finishes without starting from raw material. These options typically come with a ready base that accepts decals or a new paint scheme with a glossy, uniform surface that is already optimized for adhesion and durability. When considering a swap or upgrade, it is worth evaluating how the chosen fairings will interact with ongoing maintenance: does the surface invite easy cleaning, or are there more pronounced steps required to keep it looking its best? The practical choice often depends on how much you value a turnkey finish versus the satisfaction of a hands-on, custom approach. In the broader ecosystem of options, one practical route is to explore the Honda fairings collection, which offers a range of shapes and contours designed to fit common panels while maintaining a high standard of finish. This can be especially appealing when you want a reliable base that accepts decals or your own color choice without compromising the underlying resin or the layers above it.
The care routine itself benefits from a thoughtful cadence. When you wash, avoid aggressive rubbing and never mix abrasives with the paint’s surface. If you park outside, consider how long the fairings face the sun each day and how that exposure shifts the color temperature over time. Even subtle changes in shade can become noticeable after a few seasons, especially on lighter colors where sun fade appears as a chalky veil. In these cases, your maintenance plan should include periodic inspection sessions, where you look closely for micro-marring, hazing, or small fading patches. Early detection allows you to plan touch-ups before the damage grows.
A well-maintained fiberglass finish also rewards the rider with a consistent, deep gloss that enhances the bike’s lines. The reflective quality of a properly cured and protected clear coat makes the contours pop and helps the color underneath look more even. It is in this interplay of light and gloss that the finish becomes more than a color on a panel; it becomes part of the motorcycle’s visual language. To keep this language legible, you need to be deliberate about your cleaning tools and the timing of your maintenance. A schedule that aligns with your riding season—spring and fall check-ins, mid-summer top-ups, and winter storage preventive care—helps you stay ahead of problems caused by temperature swings and moisture. Drying methods matter too: after washing, it is best to dry with a microfiber towel rather than air-drying, which can leave unexpected ripples or surface moisture that could lead to spotting or milky areas under the clear coat.
The decision between repainting versus touch-ups often hinges on the scale of damage and the desired final look. Large panels with fading or deep scratches may justify a professional repaint, especially if the rider intends to keep the fairings for years and values a perfectly uniform surface. Small to mid-size imperfections are well within a DIY maintenance plan, provided you have the right matching paint and the discipline to apply it in thin, controlled layers. The goal remains a surface that handles the daily grind without showing the evidence of hard riding. In this sense, maintenance becomes a practical extension of the original finishing work, not an afterthought. When you perform touch-ups, it is essential to reseal the area with a clear coat so the repair remains invisible under normal light and weather, and so the repair area benefits from the same level of UV and moisture protection as the surrounding finish.
The broader context of maintaining painted fiberglass also touches on the materials you choose for cleaning and protection. While wax and sealants do the heavy lifting for UV and moisture barriers, the underlying paint system’s compatibility with these products is critical. A mismatch can cause hazing or separation between layers, undermining the uniform appearance you worked so hard to achieve. Therefore, when selecting products, read labels to verify compatibility with automotive or motorcycle finishes and with polyurethane clear coats. The right combination protects the investment you’ve made in the finish and supports longevity, even as you log miles and navigate the elements. For riders who enjoy the look of a decal-rich or color-customized panel, the finishing and maintenance approach remains the same: regular gentle cleaning, a protective top layer, and timely touch-ups that preserve both color and gloss.
In the practical world of riding, one often faces trade-offs between ease of care and visual impact. Fiberglass fairings, with their inherent rigidity and lighter weight, respond well to a finish that is forgiving of minor imperfections while still offering a strong shield against the elements. A durable finish does not require constant, aggressive polishing or abrasive tools; it rewards a measured, patient approach that respects the integrity of the completed surface. The same philosophy guides the way riders handle decals or graphic changes. If a new design or color scheme is desired, prepare the surface with the same cleaning and priming steps, then apply the chosen graphics with care, followed by a fresh clear coat and a final gloss polish once cured. The idea is to create a finish that remains faithful to the new look for years, even as the bike endures rain, heat, and the occasional curb rash that can occur during spirited riding.
For those who are assembling or upgrading their collection of fairings, the path to a cohesive, durable finish is often a balance between original geometry, material performance, and the aesthetics you want to achieve. A robust maintenance routine can keep even a complex color scheme looking smooth and consistent, while a thoughtful approach to touch-ups and decals helps you maintain that sense of personal expression without compromising protection. As you navigate these choices, you can explore the available options for Honda fairings in the market, which provides a practical reference point for fit and finish expectations across different panels and generations. The question then becomes not only about the look you want today but about the long-term health of the surface that will bear the brunt of sun, wind, and road debris for years to come.
Guided by a steady hand and a clear plan, finishing and maintenance become a single ongoing project rather than a one-off task. The approach described here aligns with the broader practice of caring for painted fiberglass across many bike models and brands. It emphasizes respect for the material, a disciplined care routine, and a willingness to invest time in thoughtful repairs when needed. The result is a finish that remains visually compelling and physically resilient, ready to carry its rider through years of riding and weather without surrendering its gloss or protective coating. If you are curious about options for new or replacement fairings that preserve the aesthetic and performance benefits of fiberglass, consider exploring the Honda fairings collection to see how contemporary designs balance form, fit, and finish. This exploration can inform not only a purchase decision but also a maintenance philosophy that treats every panel as a canvas and every ride as an opportunity to practice the craft of care.
External resources can also deepen your understanding of paint selection and finishing techniques. For a detailed guide on choosing paint for motorcycle fairings, see How to Choose Paint for Motorcycle Fairings – A Practical Guide. https://www.bikeexif.com/how-to-choose-paint-for-motorcycle-fairings
Final thoughts
In summary, painting fiberglass motorcycle fairings involves careful attention from surface preparation to the final finishing touches. By understanding and implementing the right techniques, business owners can not only achieve a stunning appearance but also enhance the durability and appeal of their products. Offering such custom services can significantly elevate your business’s standing in the motorcycle community. With the right knowledge in hand, you can confidently provide your clients with the premium finishes they desire, ultimately boosting customer satisfaction and solidifying your reputation.