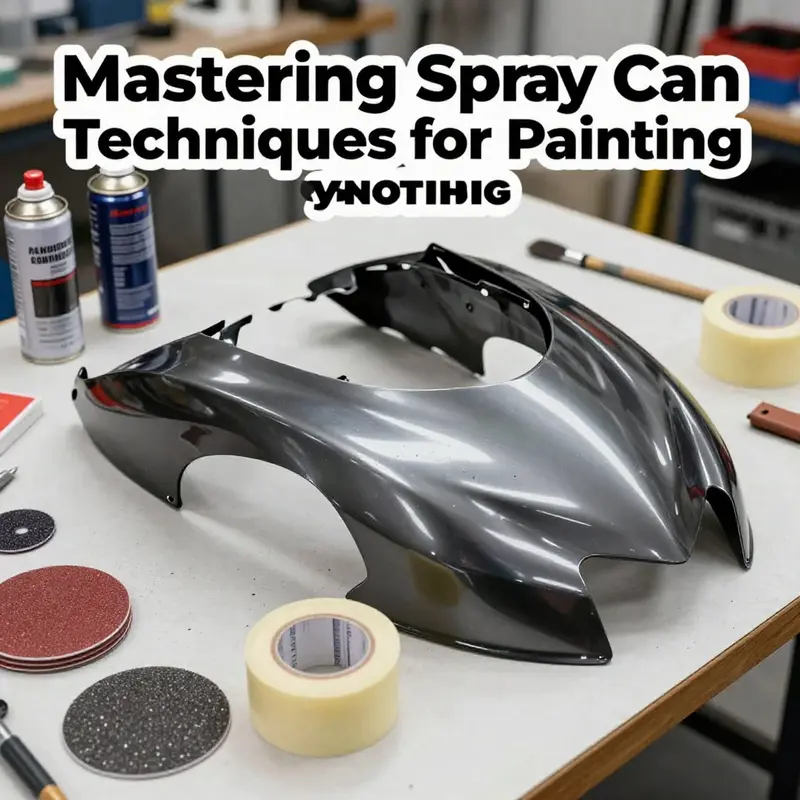
Introduction
Painting motorcycle fairings with spray cans provides a practical solution for businesses looking to enhance the visual appeal of their motorcycles. Achieving a high-quality finish, however, requires an understanding of key processes, from preparation to clear coating. This guide will delve into the best practices for each stage of painting, ensuring business owners can achieve impressive results while maintaining durability and professional appearance. Each chapter will break down the essential steps involved—preparation, priming, application, and finishing touches—offering insights that can help transform any motorcycle into a stunning work of art.
Tables of Contents
Chapter 1: Safety First: Essential Precautions for Painting Motorcycle Fairings with Spray Cans
- Ensuring a Safe and Effective Painting Process for Motorcycle Fairings
Chapter 2: Mastering the Essentials: Preparing for a Flawless Paint Job on Motorcycle Fairings
- Equipping Yourself for Success: Essential Supplies for Motorcycle Fairing Preparation
Chapter 3: Mastering the Art of Priming Motorcycle Fairings: Techniques for a Flawless Finish
- Essential Preparation Steps for Applying Primer to Motorcycle Fairings with Spray Cans
Chapter 4: Mastering the Art of Priming Motorcycle Fairings: Expert Application Techniques
- Precision Techniques for Applying Primer to Motorcycle Fairings with Spray Cans
Chapter 1: Safety First: Essential Precautions for Painting Motorcycle Fairings with Spray Cans
1. Ensuring a Safe and Effective Painting Process for Motorcycle Fairings
Painting motorcycle fairings with spray cans can be an engaging and rewarding endeavor. Yet, as with any form of DIY customization, safety must be at the forefront of your preparations. This subchapter delves into the critical safety precautions you must take to protect yourself and create a successful painting environment.
Personal Protective Equipment (PPE)
The first line of defense against potential hazards during the painting process is personal protective equipment (PPE). This gear is essential to safeguard against the chemicals found in automotive paints and solvents. Start with protective gloves; they serve to shield your skin from harmful substances that could cause irritation or long-term skin issues. Opt for nitrile gloves, as they offer excellent protection and are resistant to many solvents used in paint applications.
Next, a respirator or face mask is non-negotiable. Paint fumes can be hazardous to your health, particularly when inhaled over extended periods. A mask designed to filter out organic vapors and fine paint particles will significantly reduce your exposure to toxic fumes. Furthermore, safety goggles are crucial for protecting your eyes from overspray and any airborne particles that might be released while sanding or spraying the fairings. Goggles should fit snugly and provide a good seal against particles entering from the sides.
Ventilation
Creating a suitable environment for painting significantly impacts your safety and the quality of your finish. It’s imperative to work in a well-ventilated area. If you have access to an outdoor space, that is ideal. Fresh air greatly dilutes vapors and provides a safer working atmosphere. When painting indoors, always utilize a dedicated spray booth or ensure that your workspace has adequate exhaust systems. This setup not only facilitates air circulation but also minimizes the risk of inhaling harmful vapors.
Fire Safety
Given that many aerosol sprays are flammable, it’s crucial to adopt fire safety measures. Before you start painting, ensure your workspace is clear of any open flames or sources of ignition, such as heaters, sparks from electrical equipment, or even smoking materials. Prepare a fire extinguisher within reach and ensure that it’s suitable for chemical fires. Additionally, familiarize yourself with its operation in case of an emergency. Being prepared can make all the difference.
Surface Preparation
Proper surface preparation is another layer of safety that impacts both your health and the end quality of your paint job. Start by thoroughly cleaning the fairing surface with a dedicated degreaser designed for automotive or motorcycle use. This step eliminates grease or contaminants that might interfere with paint adhesion and, in turn, affect the longevity of your work.
Sanding is the next phase. Lightly sanding the fairing is pivotal in achieving a quality finish, as it allows for better paint adhesion by creating a slightly textured surface. As you sand, always wear a mask to prevent inhaling dust particles, and consider using a vacuum or damp cloth afterward to collect the dust effectively. Following this, use a tack cloth to ensure that the surface is clean and free from residue. Dust particles can jeopardize your paint job, leading to imperfections that mar an otherwise perfect finish.
The Painting Process
When you dive into the painting process, remember that safety does not end with preparation. Ensure that you maintain the principles of safety while applying the paint. Shake the spray cans thoroughly before use, and inspect your workspace for any potential hazards. Make sure the area is still well-ventilated, and continue to wear your gloves, mask, and goggles throughout this phase. Some individuals prefer to wear additional layers of clothing to protect against potential paint overspray and improve personal safety.
The way you handle the spray can also has safety implications. Always hold the can at a safe distance from the surface you are painting. This distance not only aids in achieving even coverage but also minimizes overspray that could end up on unintended surfaces, including your skin or clothing. Keep your movements steady and deliberate, as applying paint in long, even strokes can reduce the risk of drips, which may require touch-ups and further exposure to solvents.
Curing Process and Final Touches
Once the painting and application of the clear coat are complete, the work isn’t done concerning safety. Curing the paint requires patience. Make sure your painted fairing is placed in a secure area where it won’t be disturbed. Allow the paint to cure undisturbed for at least 24 to 48 hours before handling, to avoid smudging or fingerprints that can ruin the finish.
After the curing period, inspect the painted surface with care. You might find minor imperfections, such as bubbles or dust particles trapped in the paint. For touch-ups, utilize matching paint with finesse to avoid more significant issues. It’s here that your safety equipment continues to play a vital role as you refine your work.
Consider applying a protective wax or sealant after final inspection to enhance the durability of your paint job. This additional layer provides not only enhanced protection from environmental elements but also a stunning shine, completing your customized finish.
By prioritizing these safety precautions in your preparation and painting processes, you’ll not only protect yourself but greatly increase the effectiveness of your paint job on motorcycle fairings. A meticulous approach to safety facilitates both an enjoyable experience and a striking transformation of your motorcycle’s appearance. Remember, a well-prepared painter is a successful one, and your safety is of paramount importance. For those looking for appropriate fairings to paint, you can explore the collections available at Summit Fairings. This resource provides a plethora of options tailored to your motorcycle needs, making your customization journey even easier.
Chapter 2: Mastering the Essentials: Preparing for a Flawless Paint Job on Motorcycle Fairings
1. Equipping Yourself for Success: Essential Supplies for Motorcycle Fairing Preparation
Transforming the look of your motorcycle fairings through paint requires more than just creativity and vision; it necessitates an assortment of quality supplies and tools. When you delve into the process of preparing motorcycle fairings for painting with spray cans, the importance of well-chosen materials cannot be overstated. Preparation serves as the critical foundation upon which a professional-quality finish rests, and every step in the process is intertwined with the supplies you choose. Therefore, equipping yourself with the right tools sets the stage for a successful outcome.
In the realm of surface preparation, sandpaper of varying grits is paramount. Ranging from P400 to P1000 grit, sandpaper serves the dual purpose of removing the existing gloss on your fairings while providing a textured surface to facilitate better paint adhesion. Start your sanding journey with a coarse grit such as P400, which efficiently abraded the surface without excessively compromising its integrity. As you progress, transition to finer grits, such as P600 or P1000, to smoothen the surface and eliminate any irregularities that could mar your final paint job.
Complementing your sandpaper is the need for effective degreasing agents. Whether you opt for a dedicated automotive cleaner or simply use isopropyl alcohol, the goal is the same: achieving a residue-free surface. Grease, oils, and other contaminants cling stubbornly to fairings, jeopardizing paint adhesion. When selecting a degreaser, ensure it is safe for the type of plastic used in your fairings—polycarbonate or ABS—so that you do not inadvertently damage the surface you are trying to prepare.
In cases where your fairings have minor dents or deeper imperfections, body fillers come into play. Ensure you use a quality filler designed for automotive applications. Epoxy-based fillers are particularly effective and can be molded to address various contour issues. After carefully applying the filler according to the manufacturer’s instructions—following mixing and curing times—remember to add more texture and smoothness through sanding. Consequently, achieving a seamless surface will not only enhance glue bonding but will also create a visually appealing aesthetic when the paint is applied.
The primer is another essential component that should not be overlooked. The foundation for your paint job begins with a high-quality primer specifically formulated for plastics. A well-chosen plastic primer, designed for materials such as polycarbonate or ABS, ensures superior adhesion and creates a uniform base layer for paint application. As with other materials, allow the primer to dry fully, as insufficient drying time can lead to paint failure and unattractive finishes. Pay careful attention to the manufacturer’s drying instructions—different brands may specify varying times, and familiarizing yourself with these guidelines is a prudent measure.
Having discussed the fundamental supplies for surface preparation, let’s shift our focus toward protective and masking supplies. Proper masking is crucial in ensuring clean lines and preventing overspray on areas where paint is not desired, such as lights, mirrors, and rubber seals. High-quality masking tape plays a critical role in this process. It is vital to choose tape that adheres well and can be removed without pulling up paint. Proper masking should be done meticulously, ensuring there are no air pockets or wrinkles; this attention to detail can make or break a flawless paint job. Additionally, consider using protective masking film over larger, more complex areas. This will safeguard your components while offering a reliable barrier against overspray.
Next comes the most pivotal aspect: the spray cans themselves. Quality cannot be compromised when selecting high-quality spray cans designed specifically for plastics. Such cans include adhesion promoters that heighten the likelihood of a successful painting technique. Before applying paint to your fairings, remember to shake each can thoroughly for 1-2 minutes—this action mixes the components adequately and ensures that your paint flows smoothly during application. Testing the spray on a piece of scrap material can further mitigate any concerns about color or spray pattern, allowing you to refine your technique before tackling your fairings directly.
In preparing to paint, don’t underestimate the importance of safety equipment in your workspace. Using a respirator mask with organic vapor cartridges is essential to protect against inhalation of fumes from paint and primers. In addition to protecting your lungs, nitrile gloves will keep your skin safe from hazardous materials, while safety goggles are crucial for preventing eye exposure to both chemicals and particulate matter that might be released during sanding or spray application. Working in a well-ventilated area is not just a preference; it’s a necessity to keep you safe from harmful vapors and to facilitate the paint drying process effectively.
As you assemble your toolkit, remember that each item—a small investment in profiles, texture, and longevity—plays a role in enhancing the overall quality of your paint job. The intertwined relationship of every aspect of preparation cannot be overstated. Sandpaper sculpts the barriers of adhesion, while degreasers strip surfaces of contaminants. Fillers and primers smooth and establish a canvas, while protective gear shields the artist behind the masterpiece. Your approach to preparation will dictate the ease and success of the painting process, making the right choices imperative.
After the meticulous task of preparation is complete, ensure you take time to become familiar with the details of your specific painting conditions. Temperature, humidity, and airflow can all markedly influence the result of your paint job. Ideally, painting should take place in a controlled environment—comfortable temperatures between 20-25°C (68-77°F) and humidity levels below 60% create optimal circumstances for paint adhesion and curing.
In the grander scheme of motorcycle customization, the act of painting motorcycle fairings transcends mere aesthetics; it represents the spirit of individual expression on the road. Therefore, taking the time to choose and gather the appropriate SUPPLIES for preparation not only enriches the quality of your work but also enhances the joy of personalizing your motorcycle. It is a tapestry woven with intention, care, and a dash of passion; embark on this journey equipped with an arsenal of tools that will transform your dreams into reality. For an engaging selection of fairings to personalize with your new paint job, consider browsing a variety of options available at Summit Fairings, showcasing designs tailored to fit your motorcycle model.
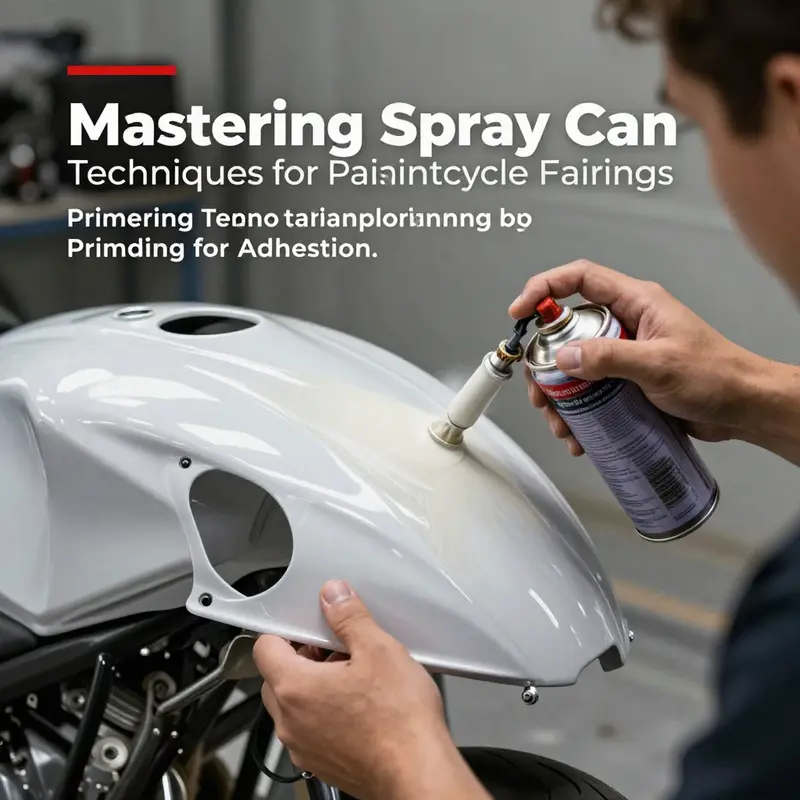
Chapter 3: Mastering the Art of Priming Motorcycle Fairings: Techniques for a Flawless Finish
1. Essential Preparation Steps for Applying Primer to Motorcycle Fairings with Spray Cans
Preparing motorcycle fairings for the priming process is crucial in ensuring the quality of your paint job. This phase sets the groundwork for not just adhesion but also longevity, resulting in a tailor-made, professional appearance when completed. Achieving a smooth and durable finish cannot be rushed; it requires patience and attention to detail from the initial cleaning stage to the eventual application of primer.
The first step in the preparation process involves thorough cleaning. This step cannot be stressed enough, as any contaminants present—such as oils, grease, or dirt—will impede the bonding between the primer and the fairing’s surface. Using a dedicated automotive cleaner or a suitable degreaser is essential; it effectively eliminates unwanted residues. After applying the cleaner, ensure you allow the surface of the fairing to dry completely. If moisture is left on the surface, it can lead to uneven adhesion and pockets of paint failure during the curing process.
Following cleaning, sanding the surface is the next pivotal step. This task helps to create a slightly textured surface that enhances adhesion. Depending on the material of your fairings, a fine-grit sandpaper rated between 600 and 1200 grit is recommended. It’s beneficial to utilize a sanding block or a random orbital sander, which will help you achieve an even surface without creating deep scratches. Be careful during this process; the goal is not to gouge the plastic but to provide tiny grooves for the primer to grip effectively. Once sanding is complete, be sure to wipe down the entire fairing with a tack cloth or a lint-free rag dampened with isopropyl alcohol. This final touch is imperative in removing any sanding dust that could interfere with the primer’s bonding.
With the surface now clean and sanded, it’s time to move on to applying the primer. Not all primers are created equal; select a high-quality spray primer specifically formulated for plastic or composite materials. This type of primer is designed to adhere better to the motorcycle fairings, ensuring a strong bond. When you’re ready to spray, hold the can at a consistent distance of 15 to 20 centimeters from the surface and maintain the nozzle perpendicularly directed or at a slight angle to ensure even coverage. It is highly recommended to apply in long, overlapping passes. This method allows for a more uniform layer without heavy spots that can lead to drips or runs, which can mar your final finish.
When applying the primer, lighter, multiple coats are preferable to a single heavy application. Applying two to three thin, even coats lets each coat flash dry, typically in 10 to 15 minutes, before proceeding with the next layer. Waiting between coats is crucial as it allows the previous layer to set adequately, preventing pooling or sagging which may occur when the layers are too thick.
In addition to the technical aspects of priming, consider the environmental conditions surrounding your project. The ideal working environment features a well-ventilated area with controlled temperature, generally between 20 and 25 degrees Celsius. Keeping the humidity levels between 40% to 60% is equally important, as lower humidity levels can aid in quicker evaporation of solvents in the paint. When conditions are ideal, you greatly reduce risks such as imperfections like orange peel, which can significantly detract from the appearance of your motorcycle fairings.
Painting should also avoid direct sunlight and windy conditions, as these factors can lead to issues with paint flow and even drying. A dusty workspace poses its own challenges as well; dust particles can settle into your wet primer, leading to an uneven surface that can mar the aesthetic qualities of your final paint job.
Once you have completed the primer application, it is critical to let it cure fully. Be sure to follow the manufacturer’s instructions for curing time, as it differs from product to product. It’s essential to allow for a complete cure before proceeding with the base color spray paint application. This waiting period is necessary to ensure the primer has set properly, providing you with the optimal surface for subsequent coats.
In summary, the preparation techniques for priming motorcycle fairings with spray cans require careful execution and an understanding of the materials and conditions involved. By diligently following the steps of cleaning, sanding, applying primer, and ensuring proper environmental conditions, you lay down a foundation on which your finishing paint will adhere securely and last over time. The effort you put into this preparation phase pays off substantially in the quality and aesthetics of your motorcycle’s final appearance.
Chapter 4: Mastering the Art of Priming Motorcycle Fairings: Expert Application Techniques
1. Precision Techniques for Applying Primer to Motorcycle Fairings with Spray Cans
The process of painting motorcycle fairings is not simply about achieving a vibrant color; it starts with a pivotal step that lays the foundation for the entire project: priming. Properly applying primer is crucial in ensuring that the paint adheres effectively and that the finish exhibits durability and aesthetic appeal. This subchapter will guide you through detailed techniques for applying primer to motorcycle fairings using spray cans, transforming your motorcycle’s appearance while serving your creative ambitions.
Preparing the Surface: The Key to Success
Before you even think about picking up that spray can, adequate preparation of the fairing is paramount. An effective priming job starts with ensuring that the fairing surface is impeccably clean. Use an automotive cleaner designed for thorough cleansing, which will eliminate any residual oils, dirt, or grease. With motorcycle fairings typically made from plastics or composites, proper cleaning prevents contamination that can impede primer adhesion.
Next comes sanding. Employ a fine-grit sandpaper—around 400-600 grit—to gently scuff the surface of the fairing. This step is essential because it creates a textured surface that enhances the primer’s grip. After sanding, use a tack cloth to wipe down the fairing and ensure all dust particles and particles are eliminated. This attention to detail right at the start pays dividends later when painting begins.
Creating the Optimal Environment for Primer Application
The environment in which you work can significantly affect the effectiveness of your priming process. Choose a well-ventilated area to avoid inhaling any fumes, and ideally, this workspace should be free from dust, drafts, and debris. A dedicated spray booth is ideal, but if that’s not an option, a garage with open doors and adequate air movement is suitable.
Temperature also plays a critical role, with the optimal painting environment being between 20°C to 25°C (68°F to 77°F). Temperatures that are too cold can delay drying time, while heat can lead to the paint drying too quickly, potentially causing issues such as cracking or peeling.
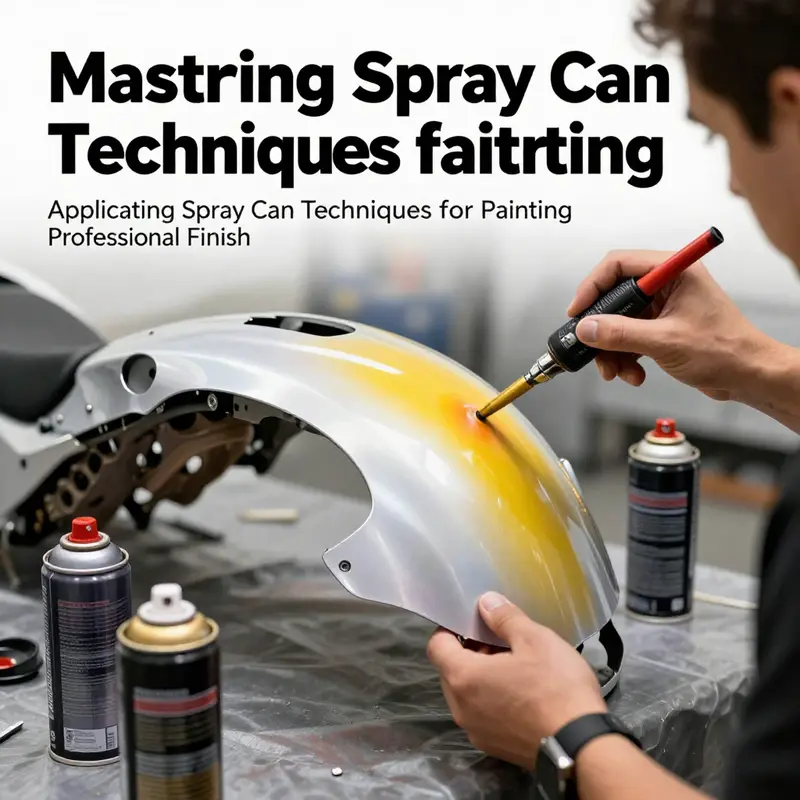
Mastering the Spraying Technique
When you are ready to spray, start with vigorous shaking of the primer can for at least one minute. This action ensures the contents are well mixed, important for delivering a consistent application. Before using the primer on your motorcycle fairing, it’s wise to perform a test spray on a piece of scrap material. This trial run allows you to assess the spray pattern and flow, ensuring everything is set for the actual application.
Hold the can approximately 12-18 inches from the surface of the fairing. Maintaining this consistent distance throughout the spraying process is vital to achieve an even coat without drips or runs. Apply the primer in long, sweeping arcs, resembling a painter laying down even strokes on a canvas. Each pass should overlap slightly with the previous one to guarantee uniform coverage.
One key principle to remember is to apply several thin coats rather than a single thick one. Thinner layers allow for better drying and adherence, drastically reducing the chances of runs or uneven surfaces. Aim to apply 3 to 5 light coats of primer, allowing each coat to dry for at least 15 to 30 minutes before applying the next layer. This layered application technique not only improves the finish quality but ensures that the primer cures effectively, giving it the best chance to bond to the fairing.
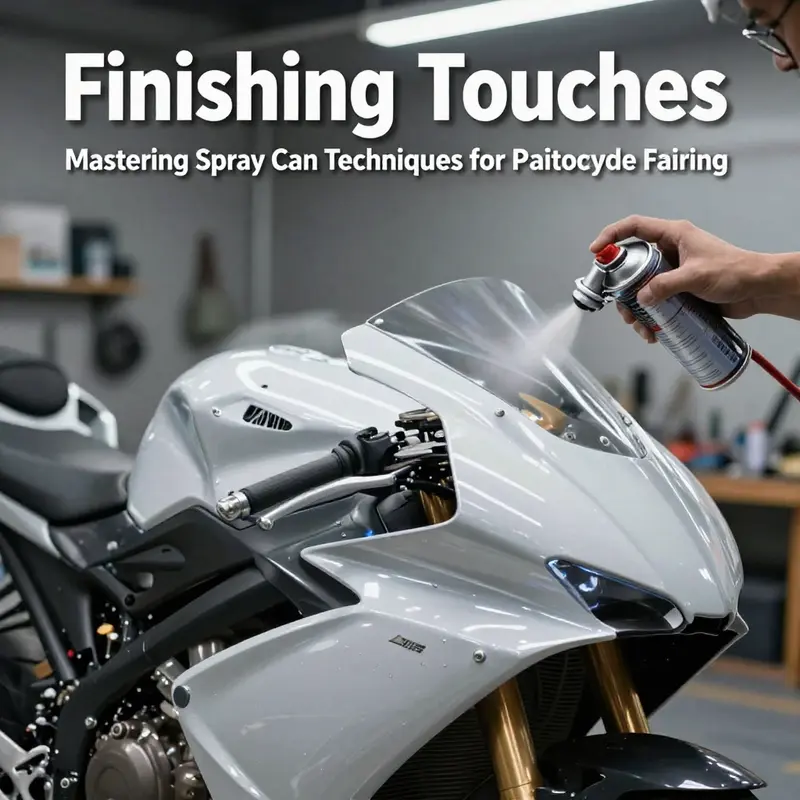
Finishing Touches Before the Basecoat
Once you have completed your primer application, you must be patient—allow the final coat to cure thoroughly for at least 24 hours. Curing is distinct from drying; while the surface may feel dry to the touch, chemical curing allows the primer to set to its full potential, further enabling adhesion for the next layers.
After the curing period, inspect the surface. Even with the best of intentions, it can be common for minor imperfections like dust particles or small drips to emerge. If you spot these flaws, lightly sand the surface again using wet/dry sandpaper in the 800-1000 grit range. This extra step will help smooth out any imperfections, creating an ideal base for your color coat.
Spray Can Primer Selection
Choosing the right primer is just as significant as how you apply it. When selecting a primer, look for formulas specifically designed for use with plastics and composites. Such primers ensure optimal bonding and longevity in your paint job. Many automotive brands offer spray primers tailored for versatility and ease-of-use, combining properties like quick drying with good flexibility—perfect for the vibration and movements typical in a motorcycle’s riding environment.
Also, remember that not all primers are compatible with the intended paint type. Therefore, if you opt for a specific brand of spray paint later on, ensure that the chosen primer is designed to work with it, enhancing the synergy between the different layers of paint.
Conclusion: The Moment to Shine
A systematic approach to priming motorcycle fairings with spray cans is indispensable for achieving a high-quality finish. By investing time in preparation, ensuring a conducive environment, and mastering spraying techniques, you’ll craft a surface that boasts durability and aesthetic appeal. Painting motorcycle fairings can truly become a rewarding process, transforming a simple set of panels into a stunning and personal expression of design. As you embark on this journey, remember to revel in the details—it is in these subtle nuances that your motorcycle’s new look will shine.
For those seeking specific fairing kits or additional customization options, explore collections to find tailored solutions suitable for various motorcycle models, ensuring that your upgrade works harmoniously not just with artistry but also with engineering.
Final thoughts
Successfully painting motorcycle fairings with spray cans involves a series of well-structured steps, each vital for achieving a professional look and lasting quality. By thoroughly preparing the surface, applying the right primer, using effective painting techniques, and finishing with a durable clear coat, business owners can offer impressive customization options for their clients. Embracing these techniques not only enhances the aesthetic value of motorcycles but also opens up new avenues for business growth and customer satisfaction.
Ready to elevate your ride? Summit Fairings delivers premium, custom-fit fairings that blend style and durability. Whether you’re chasing speed or turning heads, we’ve got your bike covered. Don’t wait—transform your machine today. Click, customize, and ride with confidence. Your perfect fairing is just a few clicks away. Act now!
About us
We are one of the leading motorcycle fairing export sites, with over 3,000 styles across almost all motorcycle models. Buy from summitfairings.com, and pay 10-40% less than the prices on other sites. If you have any questions, we promise we will have your answer within six hours.