Introduction
Ensuring motorcycle fairings are properly prepped for paint is a critical step that directly impacts the quality, durability, and overall finish of the final product. For business owners in the motorcycle repair, customization, or manufacturing sectors, mastering this process means reducing costly reworks, improving customer satisfaction, and boosting your brand’s professionalism. The process begins with thorough cleaning and surface preparation techniques designed to free the fairing of dirt, grease, and contaminants that block paint adhesion. Once clean, the right sanding methods create the perfect matte surface to promote primer and paint bonding. After preparing the surface through sanding, masking is essential to protect areas from unwanted paint overspray and sharpen finish lines, which help maintain customer expectations of precision. Finally, for many shops dealing with plastic fairings, special considerations in materials and techniques are necessary to achieve long-lasting results. Each chapter expands on these integral stages, providing detailed, actionable insights tailored to business settings, ensuring your operations achieve optimal outcomes every time motorcycle fairings are painted.
Tables of Contents
Chapter 1: Cleaning and Surface Preparation Techniques for How to Prep Motorcycle Fairings for Paint
- Mastering Cleaning and Degreasing: Essential Steps to Ready Motorcycle Fairings for Paint
- Mastering Sanding Methods for Superior Paint Adhesion on Motorcycle Fairings
- Achieving an Immaculate Base: Deep Cleaning and Polishing for Flawless Motorcycle Fairing Paint Prep
- Mastering Metal and Plastic Fairing Prep: Etching, Cleaning, and Scuffing for Optimal Paint Adhesion
- Mastering Masking and Surface Protection for Flawless Motorcycle Fairing Paint Prep
Chapter 2: Sanding Methods Specific to How to Prep Motorcycle Fairings for Paint
- Mastering Grit Progression: The Key to Flawless Sanding on Motorcycle Fairings
- Mastering the Cross-Hatch Sanding Technique for Superior Motorcycle Fairing Prep
- Tailored Sanding Techniques for Plastic and Fiberglass Motorcycle Fairings
- The Crucial Role of Cleaning in Effective Sanding for Motorcycle Fairing Paint Preparation
- Refined Sanding Progression: Achieving Flawless Primer and Color Finishes on Motorcycle Fairings
Chapter 3: Precision Masking and Surface Detailing for Flawless Motorcycle Fairing Paint Prep
- Essential Cleaning and Surface Preparation Techniques for Masking and Detailing Motorcycle Fairings
- Mastering Repair and Filling: Creating a Smooth Canvas for Motorcycle Fairing Paint
- Precision Masking Essentials for Flawless Paint Prep on Motorcycle Fairings
- Flawless Priming and Painting Techniques Within Masking and Detailing Preparation
- Essential Masking and Finishing Techniques for Precision and Professionalism in Motorcycle Fairing Painting
Chapter 4: Essential Techniques for Preparing Plastic Motorcycle Fairings Before Painting
- Mastering Cleaning and Surface Prep for Plastic Fairings to Ensure Flawless Paint Adhesion
- Mastering the Art of Scuffing Plastic Fairings for Optimal Paint Adhesion
- Enhancing Paint Durability: Mastering Plastic-Specific Primers for Motorcycle Fairings
- Gentle Handling and Protection Strategies to Preserve Plastic Fairings During Paint Prep
- Mastering Base and Clear Coat Application on Plastic Fairings for Lasting Gloss and Protection
Chapter 1: Cleaning and Surface Preparation Techniques for How to Prep Motorcycle Fairings for Paint
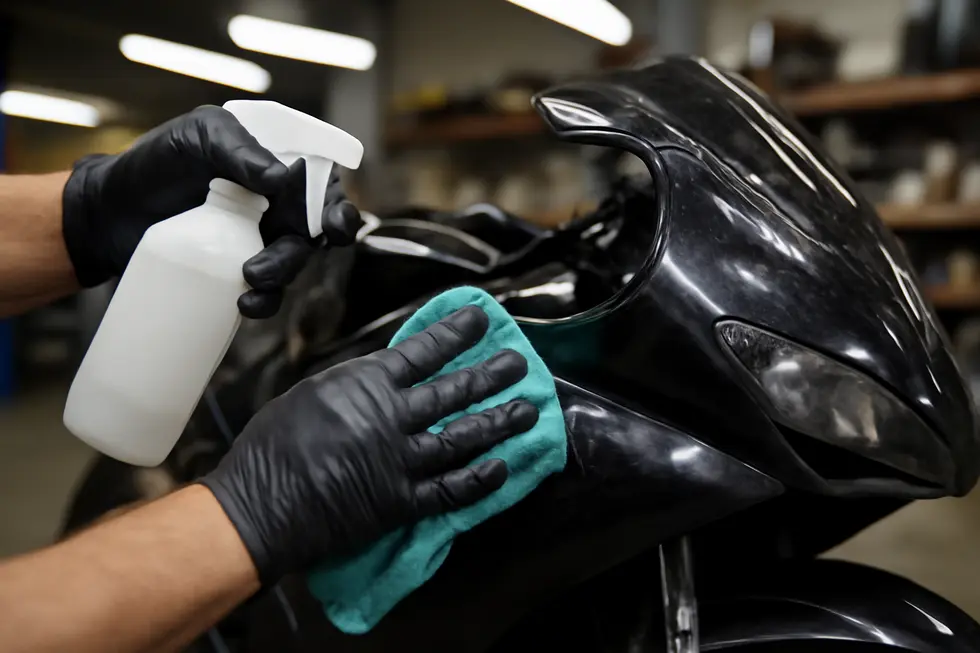
1. Mastering Cleaning and Degreasing: Essential Steps to Ready Motorcycle Fairings for Paint
Proper cleaning and degreasing lay the foundation for a successful paint job on motorcycle fairings. Start by washing the fairings thoroughly using warm water combined with a mild detergent; this removes surface dirt and grime without scratching delicate plastic parts. Use a soft sponge or microfiber cloth to ensure no damage occurs during this step. Once rinsed and dried, apply a paint-safe degreaser formulated for automotive surfaces to eliminate oils, grease, and invisible contaminants that hinder paint adhesion. It’s crucial to avoid harsh solvent-based cleaners, which can degrade plastics. Target stubborn residues by spraying the degreaser and rinsing with plenty of water, ensuring all residue is removed. Following this, carefully wipe the surface with a clean microfiber towel to remove any leftover cleaner. The fairings are then ready for light sanding to create a slightly rough surface profile that promotes paint adherence. Before moving on, use a tack cloth or alcohol-dampened microfiber cloth to clear away any dust or oils, ensuring a pristine base for primer. For further insights and product recommendations, visit this detailed guide on fairings preparation techniques. This meticulous cleaning and degreasing process ensures the paint will bond evenly, producing a durable and professional finish.
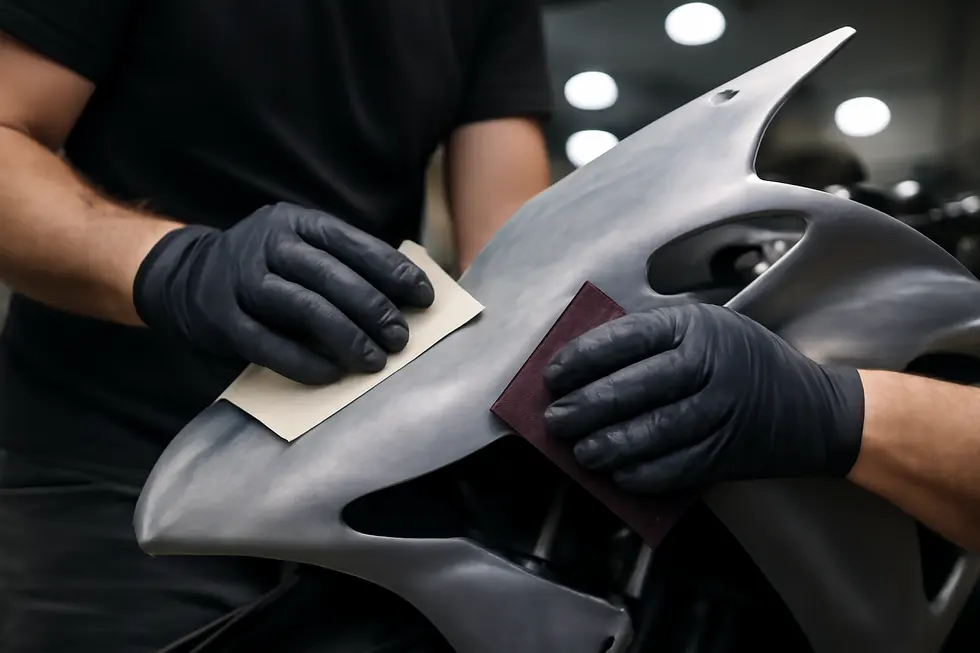
2. Mastering Sanding Methods for Superior Paint Adhesion on Motorcycle Fairings
Achieving a flawless paint finish on motorcycle fairings begins with mastering the sanding process. After thoroughly cleaning to remove dirt, grease, and wax, sanding creates the essential texture that enables paint to bond strongly and last. For plastic or fiberglass fairings, start with medium grit (around 400-600) to scuff the surface and eliminate old clear coats, scratches, or loose paint flakes without causing damage. Progressing to finer grits (800-1000) smooths the surface while preserving the necessary roughness for adhesion. Wet sanding is advisable to minimize dust and create a uniform finish. Once sanding is complete, meticulously wipe the surface with a lint-free cloth dabbed in isopropyl alcohol or a suitable prep solvent to remove dust and oily residues. Applying a primer specifically designed to promote adhesion on plastic or fiberglass is vital to ensure paint durability. Carefully mask areas that should stay paint-free to protect edges and intricate parts. When fairings show deep scratches or gouges, filling and sanding are necessary before priming. Following these precise sanding and surface prep steps will dramatically improve paint bonding and yield a smooth, professional look. For further visual demonstration of these techniques, see the video guide available at paintformotorcycles.com. For high-quality replacement parts ready for preparation, explore Summit Fairings’ extensive collection to ensure your project starts with premium components.
3. Achieving an Immaculate Base: Deep Cleaning and Polishing for Flawless Motorcycle Fairing Paint Prep
Preparing motorcycle fairings for repainting demands meticulous cleaning and polishing to ensure paint adheres flawlessly. Begin with a deep wash using a pH-balanced shampoo designed for delicate surfaces, employing a two-bucket method to prevent scratches by keeping rinse and wash water separate. This removes surface dirt and grime thoroughly. Next, advance to paint decontamination with a clay bar treatment to extract embedded impurities that ordinary washing overlooks, creating an ultra-clean canvas.
Following decontamination, a light polish or single-stage polishing refines the surface, eliminating minor oxidation, swirl marks, and scratches. This step not only smooths the fairing but optimizes the surface texture for better primer and paint adhesion, improving final finish quality. Before painting, perform a final wipe down with gentle cleaners and soft microfiber cloths, avoiding harsh chemicals that could leave residues or cause new surface damage.
This integrated approach ensures a contaminant-free, smooth substrate for painting, preventing adhesion issues and uneven coverage. For detailed visual guidance, see time-tested tutorials emphasizing these crucial prep steps. Additionally, you can explore more about preparing and painting fairings at Explore Summit Fairings, Your Go-To Destination for Motorcycle Fairings.
4. Mastering Metal and Plastic Fairing Prep: Etching, Cleaning, and Scuffing for Optimal Paint Adhesion
Preparing motorcycle fairings for paint requires tailored cleaning and surface prep techniques for both metal and plastic components to ensure lasting adhesion and finish quality. Bare metal surfaces demand thorough degreasing followed by chemical etching, which removes contaminants and microscopically roughens the surface, allowing the primer to bond effectively. After applying an etching solution, any acidic residues must be neutralized and wiped clean to prevent future paint defects. If residue forms, gentle sanding and re-cleaning may be necessary. For plastic fairings, a milder approach is essential: clean with a plastic-safe solvent like isopropyl alcohol to eliminate oils, then lightly scuff with fine (600-800 grit) abrasive pads to create a suitable texture. This scuffing ensures the paint adheres without damaging the fairing’s flexible plastic. Both surfaces require a final dust-free wipe to remove sanding debris before primer application; epoxy primers reinforce metal prep, while plastic adhesion promoters are preferred for synthetic materials. This careful regimen significantly reduces risks of peeling or flaking, resulting in a durable, professional paint job. For in-depth guidance on metal prep techniques, consult resources such as external detailed etching instructions. Moreover, explore comprehensive insights on selecting and prepping your motorcycle fairings at Summit Fairings blog.
5. Mastering Masking and Surface Protection for Flawless Motorcycle Fairing Paint Prep
Achieving a professional paint finish on motorcycle fairings depends heavily on meticulous masking and protective steps that follow thorough cleaning and sanding. After removing all dirt, grease, and contaminants, lightly scuff the surface with fine abrasive pads—typically 600 to 800 grit—to create the ideal texture for primer and paint adhesion. Once the surface is prepared, carefully mask off all components that should remain paint-free, such as headlights, trim, or engine parts. Using high-quality automotive masking tape ensures clean lines without residue and prevents paint bleed. Secure masking paper or plastic wrap around taped areas to shield from overspray during painting. For plastic fairings, which often have UV-resistant gelcoats, light sanding and accurate masking suffice before applying compatible basecoats. Before primer application, double-check the masking to avoid costly touch-ups. Applying epoxy primer on bare plastic or metal surfaces strengthens adhesion and protects from rust, enhancing durability. This layering of cleaning, scuffing, and precise masking creates a foundation for smooth, long-lasting paintwork, reducing post-paint imperfections and ensuring your motorcycle fairings maintain a flawless appearance. For further insights on selecting the best fairings that hold paint excellently, visit the explore the best motorcycle fairings at Summit Fairings.
Reference: [2] Masking techniques and primer application details.
Chapter 2: Sanding Methods Specific to How to Prep Motorcycle Fairings for Paint
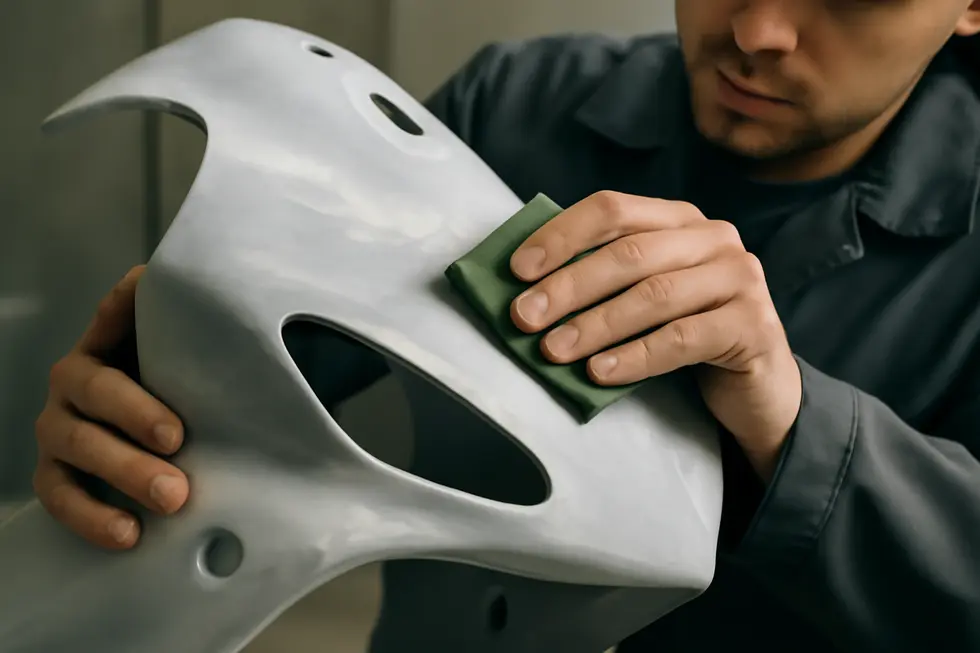
1. Mastering Grit Progression: The Key to Flawless Sanding on Motorcycle Fairings
Achieving a smooth, even surface on motorcycle fairings depends heavily on mastering grit progression during sanding. The process begins by removing imperfections and old paint with a coarse grit, typically between 320 and 400. This first step levels the surface without causing damage to the fairing material. Following this, sanding progresses to a finer range of 600 to 800 grit, which refines the surface and eliminates scratches left by the coarser paper. The final stage uses ultra-fine grits, ranging from 1000 to 1500, to create a sleek, scratch-free finish that is perfectly ready for primer and paint application.
Using wet sanding techniques for grits above 600 not only reduces airborne dust but also enhances the smoothness of the fairing surface. It’s crucial to clean the surface thoroughly between each grit change to avoid contaminating the finer grit pads with coarser debris—this attention to detail prevents uneven textures or visible scratches that spoil the paint’s appearance.
This meticulous grit progression ensures superior paint adhesion and durability, giving motorcycle fairings a professional, high-quality finish. For a deeper understanding of grit progression and sanding techniques suited for composite materials like fairings, automotive refinishing resources offer valuable insights. More detailed preparation tips can also be found by exploring Summit Fairings’ blog on high-quality motorcycle fairings.
External reference: https://www.alibaba.com/showroom/rimming.html
2. Mastering the Cross-Hatch Sanding Technique for Superior Motorcycle Fairing Prep
The cross-hatch sanding method plays a crucial role in preparing motorcycle fairings for paint by establishing an ideal surface for primer and paint adherence. This technique involves sanding in overlapping perpendicular strokes, forming an X-shaped pattern that avoids deep grooves caused by sanding in a single direction. Such consistent abrasion produces a uniform texture free of directional scratches that might otherwise show through the final paint layer. This uniform dullness enhances adhesion by increasing surface area and mechanical grip, which is essential to prevent paint peeling and ensure durability.
Additionally, cross-hatch sanding balances abrasion evenly across the surface, minimizing the risk of over-sanding or gouging in any one area. This balance is especially important on delicate or plastic fairings, where maintaining smooth contours is essential. As a standard step before primer application, using 600 to 800 grit sandpaper or a scotch-brite pad with a cross-hatch method strengthens the base to accept subsequent paint layers effectively.
Employing this sanding strategy complements thorough cleaning and masking methods to lay the groundwork for a flawless finish. For those looking to deepen their understanding of preparing surfaces for paint, resources like Eastwood’s guide provide valuable insights into this critical step. For more motorcycle fairing insights, explore how surface prep integrates with other essential steps at the Summit Fairings blog.
3. Tailored Sanding Techniques for Plastic and Fiberglass Motorcycle Fairings
Proper sanding of motorcycle fairings demands an understanding of the material involved—primarily plastic and fiberglass—since each responds differently to abrasion. Plastic fairings, often made from ABS, require a gentle approach using finer grit sandpaper between 400 and 600. This light sanding dulls the glossy surface just enough to encourage primer adhesion without causing deep scratches or generating heat that could warp the plastic. Meticulous cleaning before and after sanding ensures contaminants don’t undermine the paint bond.
In contrast, fiberglass fairings tolerate a more aggressive initial sanding, starting with an 80 to 120 grit sandpaper to remove imperfections and prep repaired areas. This step is vital for smoothing resin and fiberglass cloth layers applied during repairs. The surface is gradually refined with finer grits, up to 400-600, to create a uniform base. Because fiberglass sanding produces fine dust, thorough cleaning afterward is essential to prevent finish flaws.
Both materials benefit from careful feathering of edges in repair zones to maintain a smooth transition, optimizing paint adhesion and durability. The distinct sanding workflows for plastic and fiberglass fairings are crucial for achieving a seamless, professional paint finish. For further insights into fiberglass repair and sanding, this instructional video offers comprehensive guidance. Additional preparation tips for plastic surfaces can be found through reliable plastic repair resources.
Explore more about fairing materials and preparation techniques on the Ultimate Source for Affordable Motorcycle Fairings.
4. The Crucial Role of Cleaning in Effective Sanding for Motorcycle Fairing Paint Preparation
Proper cleaning is the foundation for successful sanding when prepping motorcycle fairings for paint. Removing all dirt, grease, oils, and other contaminants ensures that sanding achieves its purpose—creating a smooth, adhesive surface free from debris that could cause paint defects like peeling or bubbling. Before sanding, fairings must be washed thoroughly with soap and water, then degreased using cleaners suitable for plastics or fiberglass, depending on the material. This thorough decontamination reveals surface imperfections such as scratches or cracks that need addressing before painting.
A clean, dry surface also prevents dirt particles from embedding during sanding, especially when wet sanding with finer grits to achieve a flawless finish. Post-sanding, another wipe down removes residual dust, making the surface fully receptive to primers and paints. Neglecting cleaning compromises paint adhesion and can result in uneven texture or premature failure. By emphasizing meticulous cleaning, you establish the essential groundwork for sanding to deliver a smooth, durable base to achieve high-quality results. For further insights into effective fairing prep and cleaning techniques, refer to the Plastic Repair Centre on fairing prep and cleaning.
5. Refined Sanding Progression: Achieving Flawless Primer and Color Finishes on Motorcycle Fairings
A smooth, defect-free surface is essential to a professional motorcycle fairing paint job, achieved through a careful sanding progression from primer to final color finishing. After applying primer, start sanding with a coarser 320 grit paper to level imperfections and move progressively up to 600 grit wet sanding. This smoothes the surface and strengthens adhesion for subsequent layers.
Applying a contrasting guide coat after primer helps reveal high and low spots when sanding, ensuring an even base. Wet sanding with fine grit papers reduces dust and prevents scratching, crucial for flawless paint results. Once the basecoat and clearcoat are applied and cured, ultra-fine sanding between 1500 and 3000 grit eliminates textures like orange peel or dust nibs, leaving the surface exquisitely smooth.
The final step involves polishing and buffing using an orbital polisher with fine foam pads and gentle compounds or waxes. This restores gloss and depth, making the paint finish strikingly vibrant. Prior preparation, including cleaning and repairing surface damage, lays the groundwork for these advanced sanding steps.
This meticulous approach ensures your motorcycle fairings receive excellent paint adhesion and a durable, mirror-like finish. For more in-depth guidance on these processes, detailed tutorials and tool recommendations are available in a comprehensive DIY paint guide and through expert sources like the Explore the Best Motorcycle Fairings at Summit Fairings.
Chapter 3: Precision Masking and Surface Detailing for Flawless Motorcycle Fairing Paint Prep

1. Essential Cleaning and Surface Preparation Techniques for Masking and Detailing Motorcycle Fairings
Cleaning and surface preparation form the cornerstone of effective masking and detailing when prepping motorcycle fairings for paint. Thoroughly removing grease, oils, dirt, and waxes is vital to prevent contaminants from undermining paint adhesion. This begins with washing the fairings using soap and water or specialized cleaners, followed by degreasers or isopropyl alcohol wipes to tackle stubborn residues. Once clean, lightly sanding with 600-800 grit sandpaper or scotch-brite pads gently dulls glossy surfaces, creating microscopic ‘teeth’ that promote primer and paint bonding without damaging the plastic substrate.
Masking is then applied meticulously to shield trims, vents, and sections not receiving paint, ensuring sharp lines and preventing overspray. When repainting, addressing minor imperfections such as swirl marks through polishing further perfects the surface before priming. For plastic fairings, these preparation steps are especially important; they require fine sanding techniques tailored to delicate surfaces to maintain integrity while enhancing adhesion.
This thorough sequence—deep cleaning, surface scuffing, careful masking, and optional decontamination—lays the groundwork for a durable, smooth finish. Skipping these stages often results in peeling, bubbling, or uneven texture. By adhering to these precision steps, you enable a professional-grade paint job that lasts and looks impeccable.
For more insights on selecting and prepping fairings, explore our guide on the best motorcycle fairings at Summit Fairings.
Reference: Techniques demonstrated by Time War Custom Paint emphasize meticulous prep for plastics as essential prior to primer and paint application.
2. Mastering Repair and Filling: Creating a Smooth Canvas for Motorcycle Fairing Paint
Proper repair and filling form the backbone of an impeccable motorcycle fairing paint job. After the initial cleaning and surface scuffing with 600-800 grit abrasives or Scotch-Brite pads, damaged areas demand careful attention. Loose paint, cracks, chips, or dents must be removed to leave a stable foundation. Automotive-grade polyester body fillers, mixed with hardener, restore the fairing’s original contours when spread evenly over imperfections. Once the filler cures, a progression of sanding steps—from coarse 80 grit to the finer 600-800 grit—shapes, blends, and smooths the repair seamlessly into the surrounding surface. The goal is a consistent, even base without visible ridges or transition lines. Equally vital is meticulous masking; taping off areas prevents overspray, preserving sharp lines and protecting parts not requiring paint. This repair and filling routine is specially tailored for plastic ABS fairings, using fillers designed to endure vibration and flex without cracking. Observing proper curing times and employing skim-coat techniques enhance durability and finish quality. For a visual guide to these foundational steps, the video “How to Paint Your Harley-Davidson in Factory Black Wrinkle Finish” provides clear examples of cleaning, scuffing, masking, and preparation essential for a lasting paint job. For more insights into well-crafted fairings that complement these prep processes, explore the best motorcycle fairings at Summit Fairings.
3. Precision Masking Essentials for Flawless Paint Prep on Motorcycle Fairings
Achieving a sharp, professional finish when prepping motorcycle fairings for paint heavily depends on precision masking. Before any tape goes on, it is essential to clean and sand the surface thoroughly to eliminate grease, dirt, and dust—this ensures paint adheres only where intended. Utilizing automotive-grade masking tape designed for painting guarantees firm adhesion without residue or damage, crucial for protecting mounting points, vents, logos, and adjacent panels. Masking these areas with tape combined with overlapped paper or plastic sheeting prevents overspray and paint bleed-through, maintaining crisp edges.
For intricate details or multi-color designs, creating tiny tape hinges allows decals or layers to be positioned and adjusted precisely before painting. Primer application follows carefully behind this protection, ensuring no unwanted areas receive coating. When spraying paint coats, applying multiple thin layers avoids runs and seepage beneath tape edges. Removing masking tape at the right moment—while paint is still tacky but not dry—preserves clean lines without peeling.
After paint curing, polishing and waxing enhance the smooth gloss of the finish. This approach to masking and detailing, as outlined in professional guides and tutorials such as those from Time War Custom Paint, secures a high-quality, durable result that elevates any motorcycle fairing paint job.
For an expanded look at motorcycle fairing options and customization, see this detailed resource on explore the best motorcycle fairings at Summit Fairings.
Further insights on decal positioning and masking hinge methods can be found through specialized video tutorials on automotive painting techniques.
4. Flawless Priming and Painting Techniques Within Masking and Detailing Preparation
Achieving a professional paint finish on motorcycle fairings relies heavily on meticulous priming and painting intertwined with precise masking and detailing. After thorough cleaning and sanding, it’s essential to apply multiple thin, even coats of primer, which creates a uniform surface and protects metal parts from corrosion. Each coat requires about 10-15 minutes of drying to avoid runs and ensure adhesion. Once primed, wet sanding with fine-grit paper smooths the surface, enhancing paint adherence and finish quality.
Masking off non-painted areas remains crucial throughout this process, preventing overspray and preserving sharp edges around mounting points, logos, or hardware. When painting, several light layers are applied with careful drying intervals, building depth while minimizing imperfections like orange peel or drips. For intricate detailing—such as stripes or custom logos—additional masking stages allow multi-color applications with clean separation.
To seal and protect the color coats, a clear coat can be added, offering gloss and durability against environmental wear. After sufficient curing, removing masking materials carefully prevents damage to the fresh paint. Finally, fairings can be reinstalled, showcasing a smooth, resistant finish that withstands the rigors of use. For a step-by-step tutorial reflecting these techniques, Time War Custom Paint’s instructional videos provide invaluable visual guidance.
5. Essential Masking and Finishing Techniques for Precision and Professionalism in Motorcycle Fairing Painting
Masking and detailing are pivotal steps in prepping motorcycle fairings to achieve a flawless paint finish. Using high-quality painter’s tape combined with masking paper or plastic helps protect areas like mounting points, edges, or decals from unwanted paint. Applying tape firmly and trimming with a sharp blade ensures clean, sharp paint lines, even on complex curves or contours. When working with decals, gently warming vinyl makes it flexible for wrinkle-free application, while masking tape can act as a precise hinge to position graphics accurately.
Beyond masking, surface detailing continues after primer application with fine sanding to maintain a uniform base. Once painting is complete, carefully removing tape at a sharp angle prevents peeling fresh paint. To enhance the finish, wet sanding followed by polishing and buffing with foam pads and wax delivers a smooth, glossy surface. Using soft brushes and microfiber cloths during final cleaning safeguards the finish from scratches. These meticulous steps guarantee sharp edges, clean transitions, and a durable, professional paint job.
For additional guidance on decal application and finishing, the comprehensive Eastwood DIY auto paint guide offers valuable insights applicable to motorcycle fairings.
Chapter 4: Essential Techniques for Preparing Plastic Motorcycle Fairings Before Painting
1. Mastering Cleaning and Surface Prep for Plastic Fairings to Ensure Flawless Paint Adhesion
Properly preparing plastic motorcycle fairings begins with thorough, careful cleaning using a gentle, non-ammonia based cleaner to avoid damage. A microfiber cloth works best to remove dirt, grease, and other contaminants without scratching or reacting negatively with the plastic surface. After cleaning, lightly sanding the fairings with 600- to 800-grit sanding pads or scotch-brite pads is essential. This process scuffs the surface just enough to promote mechanical adhesion, creating a key for primers and paints without compromising the plastic’s integrity. A light touch is necessary to avoid warping or scratching beyond the surface.
Following sanding, a meticulous wipe-down removes residual dust and abrasion debris, ensuring a clean and dry base for primer or paint. It is important to avoid aggressive preparation methods such as sandblasting, which are unsuitable for plastic and reserved for metal parts like frames or fuel tanks. Selecting primers and paints designed specifically for plastic surfaces further guarantees long-lasting adhesion and finish durability. These combined steps form the foundation for a smooth, professional paint job that respects the delicate nature of plastic fairings.
For detailed visual guidance on prepping plastic surfaces effectively, consider instructional resources that emphasize these best practices, such as those found through Time War Custom Paint’s tutorials. Additionally, visit the Summit Fairings blog for expert advice on selecting quality fairings and prep tips.
2. Mastering the Art of Scuffing Plastic Fairings for Optimal Paint Adhesion
Proper scuffing is a crucial step when prepping plastic motorcycle fairings for paint, as it creates the ideal surface profile for primer and paint adhesion without damaging the plastic. This process involves lightly abrading the glossy finish using fine abrasive materials—typically sanding pads or sandpaper between 600 and 800 grit. These grits are gentle enough to dull the surface uniformly without causing deep scratches or gouges.
Using pads specially designed for plastics, such as red or gray automotive sanding pads, helps maintain the fairing’s structural integrity while delivering a consistent dull finish. It is important to scuff evenly across all intended painting areas until a uniform matte appearance is achieved. Overly aggressive sanding can thin or weaken the plastic, leading to poor results and potential damage.
After scuffing, thorough cleaning is essential to remove all dust and debris; this final wipe ensures that no particles interfere with the primer or paint’s adherence. Starting with a gentle wash using mild soap and soft microfiber sponges helps avoid scratching before the scuffing process begins. This disciplined approach ensures a reliable mechanical bond, promoting long-lasting, professional-looking finishes on plastic fairings.
For further insight into surface prep best practices for plastic fairings, see Time War Custom Paint’s instructional videos.
3. Enhancing Paint Durability: Mastering Plastic-Specific Primers for Motorcycle Fairings
Achieving a long-lasting, professional paint finish on plastic motorcycle fairings demands careful use of plastic-specific primers. Unlike metal or fiberglass, plastics such as ABS or polypropylene have smooth, non-porous surfaces that resist traditional paint adhesion. After thorough cleaning and gentle sanding to create keying texture, applying a specially formulated plastic primer is critical. These primers chemically bond with the plastic substrate, forming a flexible surface that accommodates the fairing’s movement without cracking or peeling the paint.
Following the adhesion promoter, a high-build primer smooths minor imperfections, ensuring an even base for the topcoat. Selecting an appropriate plastic primer designed for flexibility and strong bonding not only prevents premature paint failure but also enhances the overall durability of the finish. This process delivers a flawless paint layer that endures the typical stresses and vibrations of riding.
For further guidance and real-world application demonstrations on plastic fairing preparation, refer to instructional resources such as this detailed video tutorial from Time War Custom Paint: https://www.youtube.com/watch?v=MsHKbB4AJ0o.
Explore more about quality fairings and preparation tips at Summit Fairings’ blog.
4. Gentle Handling and Protection Strategies to Preserve Plastic Fairings During Paint Prep
Protecting plastic motorcycle fairings during paint preparation requires careful handling and the use of appropriate materials and techniques. Start by cleaning the fairings with mild soaps and soft cloths to avoid dulling or damaging the surface—harsh chemicals or rough abrasives can weaken the plastic finish. When sanding, use fine-grit (600-800) sandpaper gently to scuff the surface, ensuring the pressure is light enough to prevent deformation or thinning. Mask off surrounding areas meticulously using high-quality painter’s tape and plastic sheeting to avoid overspray and maintain a clean work area.
Working in a clean, dust-free environment is crucial, as contaminants can embed into the softened plastic surface during prep, undermining paint adhesion and finish quality. Additionally, shielding the fairings from prolonged sun exposure before and after painting helps preserve their structural integrity and color vibrancy. For repairs, specialized techniques like melting plastic edges require skill but can restore damaged areas without compromising strength.
Post-paint, applying a protective wax layer offers extra defense against UV damage and environmental wear, prolonging the life of the finish. These gentle, precise strategies form the foundation for achieving a flawless, durable paint job that protects and enhances plastic fairings. For more detailed insights, refer to expert guidance such as explore the best motorcycle fairings at Summit Fairings.
5. Mastering Base and Clear Coat Application on Plastic Fairings for Lasting Gloss and Protection
Properly applying base and clear coats on plastic motorcycle fairings is essential for achieving a durable, high-gloss finish that resists peeling and fading. Begin by thoroughly cleaning the sanded plastic surface to eliminate all contaminants and dust. Light sanding with fine-grit paper ensures the paint adheres uniformly, avoiding imperfections. When spraying the base coat, choose a paint formulated specifically for plastics or automotive use, applying several thin, even layers instead of a thick coat. Each layer should dry for about 30 minutes to prevent runs or cracking. Once the base coat is set, proceed with multiple thin clear coat layers, ideally using a two-component (2K) urethane clear, which provides superior UV resistance and hardness compared to single-stage options. Allow approximately 10 minutes between clear coats to ensure proper layering. After application, the clear coats require full curing, which may take 24 to 48 hours, depending on the product and environment. Avoid sanding between base and clear coats to maintain a flawless surface, but once fully cured, light polishing can enhance the shine further. Using these measured steps with quality automotive plastics products guarantees excellent adhesion, durability, and a professional look—without needing specialized equipment. For more detailed tips on selecting and handling plastic fairings, explore reliable insights on affordable motorcycle fairings.
Final thoughts
Proper preparation of motorcycle fairings before painting is the backbone of any successful paint job, directly influencing the finish’s durability and appearance. From the initial cleaning that removes obstacles to adhesion, through specific sanding techniques that prime the surface for paint, to the careful masking that ensures professional detailing, each step builds upon the last to deliver consistently superior results. Special attention to plastic fairings further elevates paint longevity and finish quality, making these practices indispensable for business owners committed to excellence. By ingraining these methods into your operational standards, your business not only enhances the aesthetic and functional value of motorcycle fairings but also reinforces your reputation for professionalism and attention to detail.
Ready to elevate your ride? Summit Fairings delivers premium, custom-fit fairings that blend style and durability. Whether you’re chasing speed or turning heads, we’ve got your bike covered. Don’t wait—transform your machine today. Click, customize, and ride with confidence. Your perfect fairing is just a few clicks away. Act now!
About us
undefined