Proper priming of motorcycle fairings is crucial for achieving a flawless finish and long-lasting durability. In the world of motorcycle customization, fairings must not only look good but also withstand the rigors of the road. This article delves into the critical processes involved in primer application, ensuring business owners are equipped with valuable insights. We will explore surface preparation techniques, application methods, and tips for choosing the right primer based on materials. Each chapter will build upon the last, culminating in a comprehensive understanding of how to achieve the best results when priming motorcycle fairings.
Mastering Surface Preparation: A Crucial Step for Motorcycle Fairings
Proper surface preparation is the cornerstone of achieving a flawless finish on motorcycle fairings, and this holds true whether you are painting, applying a vinyl wrap, or simply priming for paint. Understanding the intricacies of this process not only enhances the durability of the finish but also ensures that the aesthetic appeal of the motorcycle remains intact for years to come. Fairings, which are typically made from materials like ABS or polycarbonate, experience significant exposure to environmental challenges such as UV rays, moisture, and road debris. Hence, investing the time and effort in preparing the surfaces before any further work is imperative.
The Importance of Removal
Before diving into cleaning and sanding, the first step involves carefully removing the fairings from the motorcycle. This step might seem trivial, but it is essential for ensuring complete access to the surfaces that require treatment. Working on fairings while still attached to the motorcycle can lead to unintended damage to nearby components. Take your time with this process; it will pay off later, allowing for a more precise and thorough preparation without the hindrance of surrounding parts.
Cleaning: The Foundation of Preparation
With the fairings removed, it’s time to focus on cleaning. Begin by using a degreaser or a specialized plastic cleaner to rid the surfaces of any oils, dirt, wax, or contaminants that could compromise the adhesion of the primer. Contamination can stem from a variety of sources—road grime, previous wax applications, or even the oils from your hands. Employing a thorough cleaning solution ensures that these barriers to adhesion are eliminated. Make sure to follow the manufacturer’s recommendations for the cleaning products to ensure compatibility with the material of the fairings.
Sanding for a Textured Surface
Once the fairings are clean, the next step is sanding the surface lightly with fine-grit sandpaper, typically in the range of 400 to 600 grit. This process is vital, as it creates a slightly textured surface or “tooth” that improves the primer’s grip significantly. Sanding serves a dual purpose: it not only enhances adhesion but also helps in smoothing out any minor imperfections present on the surface. Additionally, if the fairings still flaunt a glossy factory finish, sanding helps eliminate this sheen, which could inhibit the bonding process of the primer.
Final Cleaning Phase
After sanding, an important final cleaning phase ensues. Dust and debris can easily be stirred up during the sanding process, creating a new layer of contaminants. To remove this, use a tack cloth or a lint-free rag dampened with isopropyl alcohol to wipe the surfaces. This action ensures no dust or residue remains, setting the stage for optimal primer adherence. Skipping this step might lead to issues down the road, such as peeling or blistering of the primer and any subsequent paint applications.
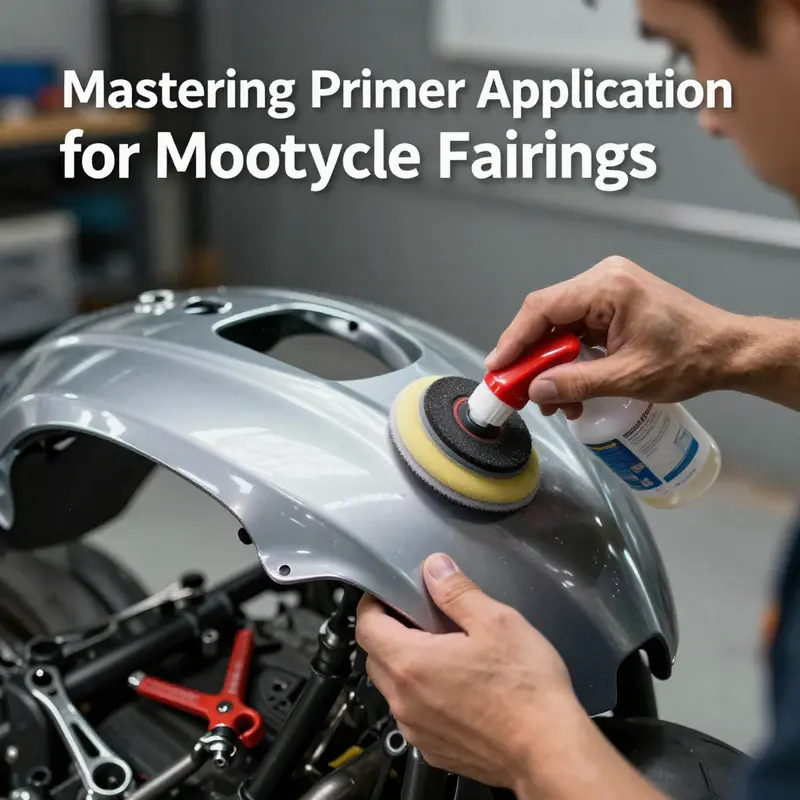
The Art of Primer Application
Following the exhaustive cleaning and texturing efforts, you are finally ready to apply the primer onto the fairings. Choosing the right primer is essential; a high-quality automotive or motorcycle bodywork primer designed specifically for plastics like ABS is recommended. Such primers are engineered to create a strong bond with the thermoplastic materials of the fairings. For instance, some self-etching primers chemically react with the surface to enhance grip further, providing an extra layer of reliability.
When applying the primer, it’s crucial to follow the manufacturer’s instructions regarding the application method (spray, brush, etc.) and to maintain a consistent distance from the surface. Thin, even coats are ideal, as they allow for proper curing without drips or runs that could mar the finish.
Curing and Final Thoughts on Preparation
One cannot hastily move on to the final painting or finishing stage after applying the primer. Allow adequate curing time as per the instructions provided by the primer’s manufacturer—often a few hours or even overnight is necessary for optimal adhesion and durability. Rushing this critical step could compromise the integrity of the finish, resulting in subpar performance against the elements.
In conclusion, mastering the surface preparation process is a pivotal component of protecting and enhancing the aesthetics of motorcycle fairings. By diligently following these steps—removing the fairings, cleaning them thoroughly, sanding with attention to detail, conducting a final cleaning, and applying the right primer—you lay a solid foundation for a finish that will withstand the test of time and ride. Taking these steps ensures that your motorcycle not only looks great but is also safeguarded against the rigors of daily use. To dive deeper into surface preparation techniques and explore resources specifically designed for motorcycle fairings, visit Motorcycle Surface Preparation.
Mastering Primer Application Techniques for Motorcycle Fairings

Applying primer to motorcycle fairings is a crucial undertaking that significantly impacts the durability and appearance of your motorcycle’s finish. This process is far more than simply spraying on a coat of paint; it involves detailed preparation and skilled application techniques that ensure the paint adheres well and withstands the rigors of both time and environmental conditions.
Surface Preparation: Laying the Foundation for Success
The journey to achieving a professional-looking paint finish begins with the surface preparation of the fairings. A thorough cleaning is the first step, and it cannot be overstated how vital this is. Using a degreaser or an alcohol wipe, clean every inch of the fairing to remove oils, dirt, and other contaminants. This is essential because any residue left on the surface can prevent the primer from adhering properly, leading to potential peeling or bubbling in the finish.
Once the fairing is clean, the next step is sanding, which is typically performed with 400 to 600 grit sandpaper. This sanding process creates a slight texture on the surface, allowing the primer to bond more effectively. It is important to apply even pressure to avoid creating any deep scratches that could impact the look of the final finish. After sanding, use a tack cloth to wipe down the surface again. This step ensures that all sanding dust is eliminated, leaving a clean and smooth surface ready for priming.
Primer Application: Techniques for a Flawless Finish
When it comes to choosing a primer for motorcycle fairings, you must opt for a high-quality product specifically designed for plastic or ABS materials. The compatibility of the primer with the fairing material is essential, particularly for aftermarket fairings which are often made from thermoplastics like ABS or polycarbonate. Many top-tier products available on the market today come with self-etching properties, which help enhance the primer’s grip on the plastic surface.
Now let’s dive deeper into the application process. Before starting, you need to properly mix the primer with the correct ratio of hardener as recommended by the manufacturer. This meticulous adherence to mixing ratios is crucial; improper ratios can lead to issues such as inadequate curing and subpar adhesion.
Once mixed, the primer is loaded into a spray gun which should be properly calibrated for optimal performance. Set the air pressure of the sprayer to approximately between 28 and 32 psi, conducive for achieving an even spray pattern without overspray or runs.
As you begin to apply the primer, remember that technique is key. Hold the spray gun about 12 to 15 inches away from the surface of the fairing. Using a consistent and overlapping spray pattern, apply the primer in thin, even coats. It’s important to apply one light coat first, as heavy applications can lead to runs or sagging, diminishing the quality of the finish.
Allow the first coat some time to flash off – generally between 5 to 10 minutes. This waiting period prepares the surface for an additional coat, should one be necessary. It is advisable to err on the side of caution and apply multiple thin coats rather than one thick coat because layering increases adhesion and provides a smoother end result. Each additional coat should be applied after the previous one has dried sufficiently.
Curing and Environmental Considerations
A critical aspect often overlooked in the priming process is the curing of the primer. After the last coat is applied, allow sufficient time for the primer to cure fully according to the manufacturer’s instructions—as this is what will ultimately set the stage for the paint application. Curing time can vary, but generally resting overnight is a safe bet. A well-cured primer surface greatly enhances the longevity and durability of the paint finish.
Environmental conditions play a key role here too. Optimal performance is achieved when you work in a clean, well-ventilated area with controlled temperature and humidity. Avoid painting in extreme heat or cold, and keep the workspace free from dust and debris. These factors will significantly influence the adhesion and finish of your primer and subsequently, your paint.
Final Notes: Ensuring Longevity and Aesthetic Appeal
Choosing the right products coupled with meticulous preparation and skilled application techniques lays the groundwork for a high-quality paint finish on motorcycle fairings. Understanding the materials at play and how they interact—is crucial. Many aftermarket fairings sourced from regions like Guangzhou and Foshan, China, often benefit immensely from matching them with a compatible primer.
The Essential Guide to Selecting the Right Primer for Your Motorcycle Fairings
When embarking on the journey of painting or finishing your motorcycle fairings, one of the most pivotal steps lies in selecting the right primer. This crucial preparatory stage is not merely a formality; it plays an integral role in the overall outcome of your painting project. The primer is the unsung hero that enhances adhesion and ensures long-lasting durability, protecting your fairings from the harsh elements they regularly face, such as ultraviolet radiation, moisture, and exposure to road debris.
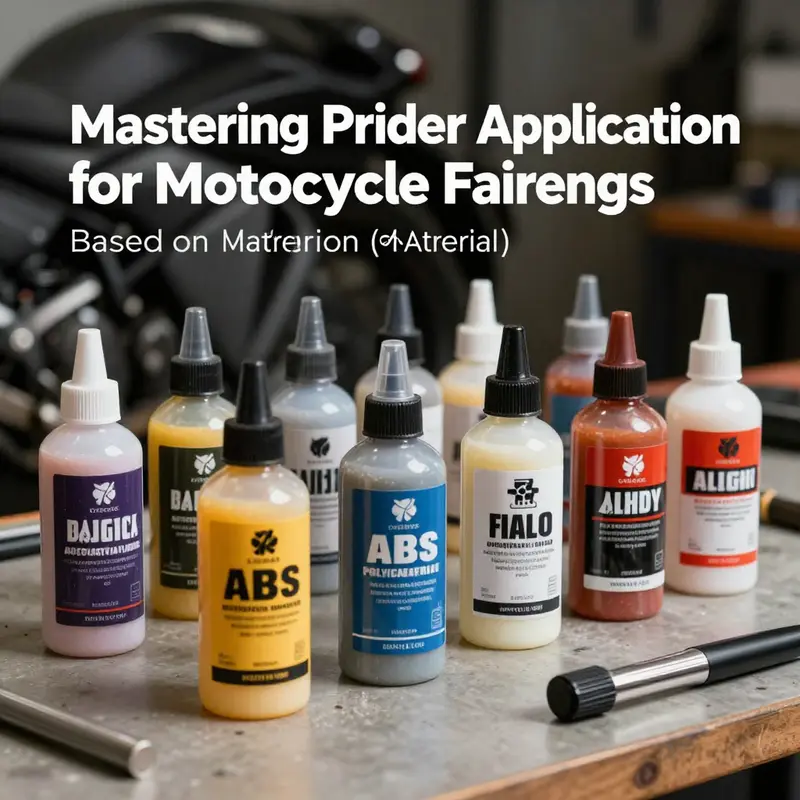
Different motorcycle fairings are typically constructed from distinct materials, and this variance necessitates careful consideration when choosing a primer. Without the correct primer, you may face peeling, bubbling, or premature wear of the paint job, resulting in unsightly damage. Thus, understanding the composition of your fairings, whether they are made of ABS plastic or carbon fiber, is essential to ensure you achieve that flawless finish.
Understanding ABS Fairings
ABS, or Acrylonitrile Butadiene Styrene, is one of the most common materials used in the manufacturing of motorcycle fairings. Its popularity stems from its remarkable properties, including impact resistance, lightweight nature, and cost-effectiveness. However, while ABS is a versatile and durable material, it does have its challenges, particularly when it comes to adhesion with standard automotive primers.
To achieve the best results, using a primer specifically formulated for ABS plastics is crucial. Standard automotive primers may not provide the necessary adhesion and could lead to a variety of problems, including peeling or blistering over time. Therefore, a primer that is either epoxy-based or specifically designed to bond with thermoplastic surfaces will be your best ally.
This type of primer often incorporates adhesion promoters that chemically interact with the polymer matrix of the ABS, creating a robust foundation for your topcoat. Moreover, the process of priming begins with surface preparation, which is akin to laying the groundwork for a solid construction project.
Surface Preparation for ABS Fairings
Proper surface preparation involves several steps. Firstly, it’s vital to carefully clean the fairing with either a dedicated plastic cleaner or isopropyl alcohol. This step removes any oils, dust, or contaminants that may hinder adhesion. Following the cleaning, light sanding is recommended using fine-grit sandpaper, typically around 600 to 800 grit. This sanding creates a slightly textured surface, enhancing the primer’s ability to adhere effectively. It is crucial to avoid silicone-based cleaners or abrasives during this process, as they can leave residues that would compromise adhesion in the long run.
Once the surface is prepared, you can move on to the primer application. Always follow the manufacturer’s guidelines regarding the proper technique and conditions for the spray application, as different products will have unique requirements. After applying the primer, allow ample time for curing—this typically ranges from several hours to overnight—before proceeding to the topcoat application. Following these steps will help ensure that your newly painted fairings have a professional finish that will withstand the tests of time and nature.
Delving into Carbon Fiber Fairings
As motorcycle technology continues to advance, the popularity of carbon fiber fairings has surged, particularly among high-performance and sport bikes. Known for their exceptional strength-to-weight ratio, these fairings bring both style and functionality to the riding experience. However, the approach to priming carbon fiber is markedly different from that of ABS fairings.
Carbon fiber, while being incredibly strong and lightweight, is also non-porous and resistant to many chemicals, rendering many standard primers ineffective. To ensure proper adhesion, a specialized, high-performance two-part epoxy primer or a carbon fiber bonding primer is necessary. These specific primers contain reactive components that create both mechanical and chemical bonds with the carbon surface, enhancing the reliability of the paint application.
Surface Preparation for Carbon Fiber Fairings
Surface preparation for carbon fiber fairings is equally critical and involves distinct techniques tailored to this material. Initially, it is paramount to clean the surface thoroughly with acetone to remove oils and any mold release agents that may have been used in the manufacturing process. After cleaning, lightly sanding the surface with fine-grit sandpaper (such as 1200 to 2000 grit) creates an ideal surface for bonding. For some applications, it may also be beneficial to treat the carbon fiber with a sizing agent or etching solution to further enhance adhesion capabilities.
Once primed, the carbon fiber fairings must also follow the curing process recommended by the primer manufacturer. Not adhering to these specifications could jeopardize the robustness of your finish, making it crucial to be meticulous about each step from cleaning through to curing.
Choosing the Right Primer: A Summary
In summary, the choice of primer directly correlates to the type of material used in your motorcycle fairings. For ABS fairings, the ideal primer is one specifically designed for bonding with ABS plastics—ensuring a sturdy and reliable adhesion. Conversely, carbon fiber fairings necessitate a two-part epoxy primer or a specialized bond primer that accommodates the unique properties of this material. Taking the time to understand the necessary preparation and application techniques coupled with the right primer will yield a professional and enduring finish on your motorcycle fairings.
As you gear up for your motorcycle fairing project, remember that the right primer does more than enhance aesthetics; it safeguards your investment and ensures that your bike can weather the elements. For detailed product recommendations and technical specifications, you can consult comprehensive resources such as the official 3M Automotive Refinish Primer Guide which offers valuable insights into the properties and application tips for various surface materials, including motorcycle fairings. With the right knowledge and preparation, your bike will not just look good—it will be protected against the rigors of the road.
Final thoughts
Successful priming of motorcycle fairings hinges on proper surface preparation, adept application techniques, and intelligent selection of the right primer. By mastering these elements, business owners can significantly improve the aesthetic and functional longevity of their motorcycle fairings. Crafting a seamless and durable finish not only satisfies customers but also enhances brand reputation. Prioritizing the right practices will lead to higher-quality products and consistently satisfied riders.
Ready to elevate your ride? Summit Fairings delivers premium, custom-fit fairings that blend style and durability. Whether you’re chasing speed or turning heads, we’ve got your bike covered. Don’t wait—transform your machine today. Click, customize, and ride with confidence. Your perfect fairing is just a few clicks away. Act now!
About us
We are one of the leading motorcycle fairing export sites, with over 3,000 styles across almost all motorcycle models. Buy from summitfairings.com, and pay 10-40% less than the prices on other sites. If you have any questions, we promise we will have your answer within six hours.