Introduction
Motorcycle fairings are crucial not only for the bike’s aesthetics but also for its aerodynamics and protection. Scratches on these surfaces can diminish visual appeal and potentially affect resale value, making efficient repair methods essential for business owners in the motorcycle service and customization industry. Understanding how to remove scratches from motorcycle fairings empowers businesses to offer expert maintenance and restorative services that enhance customer trust and loyalty. This guide breaks down the process into four comprehensive stages: starting with initial cleaning and scratch assessment, moving through gentle techniques for light scratch removal, then addressing deeper damage with sanding and repainting, and finally, applying protective coatings for lasting results. Each chapter builds on practical knowledge aimed to optimize your service workflow and outcomes, enabling you to meet client expectations professionally and effectively.
Tables of Contents
Chapter 1: How to Remove Scratches from Motorcycle Fairing: Initial Cleaning and Assessment
- Mastering the Essential Cleaning and Scratches Inspection for Motorcycle Fairings
- Mastering Scratch Evaluation: Essential Steps to Diagnose and Prepare Your Motorcycle Fairing for Repair
Chapter 2: How to Remove Scratches from Motorcycle Fairing: Techniques for Light Scratch Removal
- Meticulous Cleaning and Surface Preparation: The Essential Starting Point for Removing Light Scratches
- Mastering the Art of Polishing: Effective Use of Scratch Removers on Motorcycle Fairings
Chapter 3: How to Remove Scratches from Motorcycle Fairing: Addressing Deep Scratches with Sanding and Paint
- Mastering Sanding and Surface Preparation to Restore Deep Scratches on Motorcycle Fairings
- Restoring Deep Scratches on Motorcycle Fairings: From Precise Painting to Flawless Finishing
Chapter 4: How to Remove Scratches from Motorcycle Fairing: Final Protection and Maintenance
- Mastering Scratch Removal: Essential Techniques and Tools for Restoring Motorcycle Fairings
- Preserving Your Motorcycle Fairing: Essential Protective Techniques and Sustainable Care
Chapter 1: How to Remove Scratches from Motorcycle Fairing: Initial Cleaning and Assessment
1. Mastering the Essential Cleaning and Scratches Inspection for Motorcycle Fairings
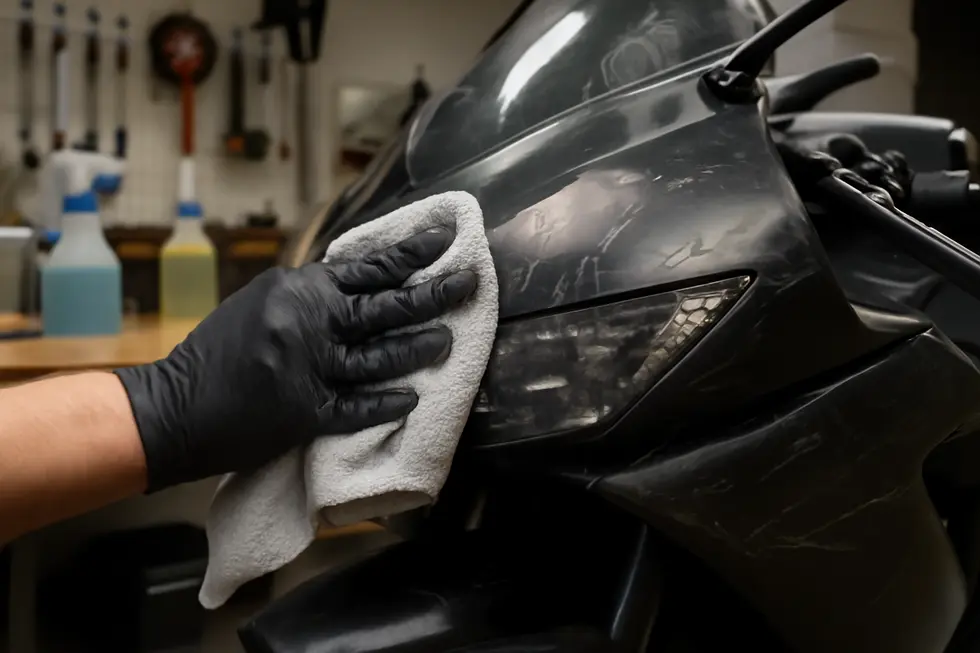
The foundation for successfully removing scratches from a motorcycle fairing lies in a meticulous cleaning and inspection process. This crucial first step ensures that dirt and contaminants do not interfere with assessing the damage or the subsequent repair steps. Begin by gently rinsing the fairing to eliminate loose particles that could further scratch the surface during washing. Use a mild, pH-balanced soap or a gentle cleaner mixed with water, applied with a soft microfiber cloth or wash mitt to avoid additional abrasion. Harsh chemicals and abrasive cleaners are detrimental at this stage, risking further harm to the fairing’s finish.
After washing, thoroughly rinse to remove all soap residue, and dry with a clean microfiber towel, preventing water spots that could obscure imperfections. For stubborn bonded contaminants such as tar or embedded iron particles that resist conventional washing, a clay bar treatment is highly effective. When applied carefully, the clay bar lifts these tough impurities without inflicting new scratches, maintaining surface integrity.
Once the surface is pristine, the critical phase of scratch inspection begins. Proper lighting, preferably natural daylight, is key to accurately evaluating the condition. Scratches vary in depth and severity — from superficial abrasions that affect only the clear coat or surface to those penetrating deeper layers requiring more intensive repair. This initial inspection informs the choice of repair techniques and materials. Avoid any abrasive tools or aggressive chemicals during this scrutiny to prevent exacerbating the damage.
Fairings protected by paint protection film (PPF) warrant special attention. Use recommended gentle cleaning agents and soft microfiber applicators to preserve the film’s defense properties while allowing for an accurate scratch evaluation.
To document the damage clearly, take high-quality photos post-cleaning and before any repair attempts. This step aids in tracking progress and helps guide the repair process effectively.
This thorough cleaning and careful, well-informed scratch assessment form the essential groundwork for all subsequent restorative efforts. By preparing the surface properly, you set the stage for polishing, sanding, or touch-up painting with confidence and precision. For more insights on maintaining and selecting top-tier motorcycle fairings, visit our detailed resource on explore the best motorcycle fairings at Summit Fairings.
For an expert guide into cleaning and scratch assessment techniques, see the referenced detailed source [2].
2. Mastering Scratch Evaluation: Essential Steps to Diagnose and Prepare Your Motorcycle Fairing for Repair
Effectively removing scratches from a motorcycle fairing starts with a carefully executed evaluation process that ensures accuracy in diagnosis and appropriates the corrective actions. This assessment begins immediately after the initial cleaning phase, which is vital to unveil the true extent of any damage. Using a gentle approach, the fairing surface should be wiped with a microfiber cloth dampened with isopropyl alcohol or a dedicated motorcycle shampoo. This step eliminates dirt, oils, and road grime, preventing these elements from masking scratches or causing further damage during inspection.
Once the surface is clean, the next step involves a thorough visual inspection under strong, natural or artificial lighting. This allows you to distinguish between surface-level scratches confined to the clear coat and those that penetrate deeper into the paint layers or the underlying plastic material. The presence of chips, cracks, or discoloration will signal more extensive damage, while light scratches typically appear as fine lines or subtle abrasions.
A tactile test further refines this diagnosis: gently running a fingernail over the scratch reveals its severity by whether it catches or glides smoothly over the surface. If the nail catches, the scratch is likely deep and will require more than simple polishing—possibly involving sanding or filling. Conversely, if the scratch feels smooth or barely noticeable to touch, it likely responds well to polishing compounds designed to restore the surface.
Documenting these findings with clear photos is a prudent step. Visual records help in tracking repair progress and guide decision-making on whether professional intervention or replacement is warranted, especially when dealing with complex or severe damage. It also supports careful communication if consulting with a repair specialist.
Before proceeding with any repairs, if removal of the fairing is necessary to access the affected area, it should be done cautiously with the correct tools and support to avoid introducing further scratches or necessary damages. Employing soft padding and appropriate stands during disassembly and reassembly protects the fairing’s finish and structural integrity.
This comprehensive evaluation and gentle handling strategy not only prepares the fairing for the appropriate repair method but also safeguards the motorcycle’s aesthetics and value. For detailed guidance on removing and handling fairings safely, consider exploring videos that provide step-by-step instructions, such as tutorials specifically for Yamaha YZF-R6 fairings, which emphasize careful tool use and handling to prevent additional damage.
For those seeking more information on selecting and maintaining motorcycle fairings, a reliable resource is the Explore the Best Motorcycle Fairings at Summit Fairings.
Additionally, a practical video tutorial for fairing removal and handling can be found here: https://www.youtube.com/watch?v=0tyCFuoKJJE
Chapter 2: How to Remove Scratches from Motorcycle Fairing: Techniques for Light Scratch Removal
1. Meticulous Cleaning and Surface Preparation: The Essential Starting Point for Removing Light Scratches
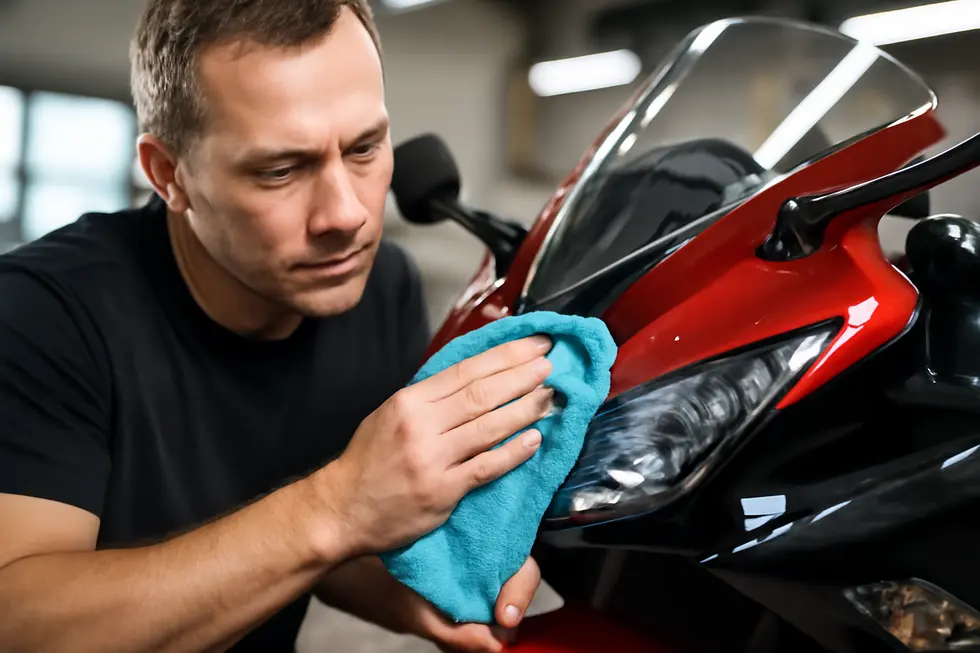
Achieving a flawless finish when removing light scratches from motorcycle fairings depends heavily on meticulous cleaning and careful surface preparation. The initial step involves thoroughly washing the fairing with a mild soap or specialized motorcycle cleaner mixed with water. This removes accumulated dirt, grease, and debris that could interfere with the scratch removal process or cause further damage if left on the surface. It’s important to use a gentle cleaning method combined with a soft microfiber cloth to prevent additional abrasions. After washing, the fairing must be dried completely with a clean microfiber cloth to ensure no moisture remains beneath polishing compounds, which could affect their effectiveness.
Once the fairing surface is spotless, a careful inspection follows. This step is crucial to determine the exact nature of the scratches, assessing whether they are superficial enough to benefit from polishing methods or if they require more intensive techniques. Close examination under natural light or a bright lamp can reveal subtle variations in the surface that aren’t initially obvious. Differentiating between light scuffs and deeper gouges allows you to tailor your approach and apply the most effective treatment.
Protecting areas around the scratches is another vital part of preparation. Surrounding components, decals, or painted sections should be shielded from potential damage during polishing or abrasion. Taping off these parts with painter’s tape or a similar protective barrier helps limit unintended contact with rubbing compounds or polishing pads, preserving the rest of the fairing’s finish.
While many riders prefer to work with the fairings installed, removing the damaged panel is often recommended to allow better access and reduce the risk of scratching adjacent areas. If removal is chosen, it must be done cautiously with the correct tools—such as screwdrivers or Allen wrenches—following model-specific instructions to avoid damaging fasteners or paint. This step not only provides a more manageable workspace but also facilitates a precise and thorough application of scratch removal products.
Just before applying any polishing or rubbing compound, wipe the target area once more with a clean microfiber cloth to eliminate any remaining dust or residue. This precaution prevents swirl marks or further minor scratches that could result from trapped particles during polishing.
By dedicating time to this comprehensive cleaning and preparation, you create an ideal surface for light scratch removal, maximizing the effectiveness of polishing treatments. The process ensures the fairing is clean, accessible, and primed to regain its original smooth, glossy appearance with minimal effort.
For those interested in exploring more about quality motorcycle fairings and maintenance tips, visit Discover Affordable Motorcycle Fairings at Summit Fairings.
Additional practical demonstrations on polishing techniques and surface prep can be found in detailed video tutorials on YouTube.
2. Mastering the Art of Polishing: Effective Use of Scratch Removers on Motorcycle Fairings
Light scratches on motorcycle fairings often diminish the sleek look of your bike but can be efficiently addressed without complex repairs. The key to restoring these minor imperfections lies in the careful use of polishes and scratch removers designed specifically for delicate automotive plastics and painted surfaces. These products contain mild abrasives that work by gently leveling the surface, reducing the visibility of scratches while preserving the integrity of the fairing’s finish.
Before application, it is essential to ensure the fairing is impeccably clean. Residual dirt or grit can cause additional abrasion during polishing, which may exacerbate the damage. Using mild soap and water followed by thorough drying prepares the surface appropriately. Once clean, a soft microfiber cloth or foam applicator should be used to apply a small amount of polish or scratch remover to the affected area.
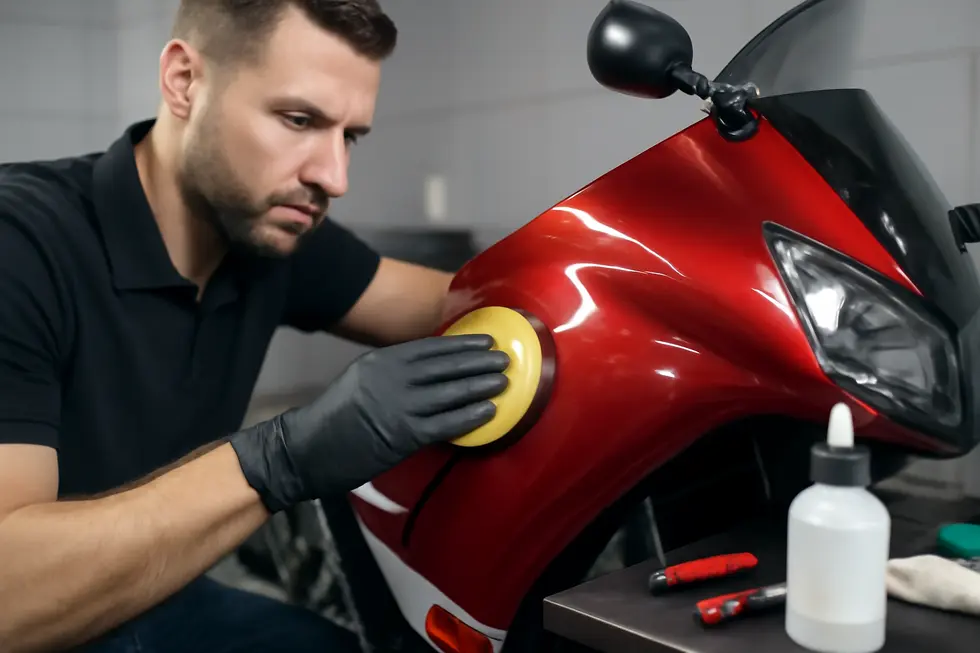
Applying the product with gentle, circular motions encourages even abrasion that smooths out minor surface inconsistencies. Avoid heavy pressure or aggressive rubbing, which can lead to uneven results or harm the paint. After working the product into the scratches, any residue should be carefully wiped away with a clean microfiber cloth. Inspect the area and repeat the process if necessary until the scratches are noticeably softened or blended into the surrounding finish.
Once the scratches are sufficiently diminished, finishing with a protective wax or sealant is crucial. This step not only enhances gloss but also creates a barrier protecting the fairing against environmental factors and future abrasions. Many automotive waxes and sealants are compatible with plastic fairings, but selecting one formulated for motorcycle surfaces ensures optimal results and durability.
It is important to test any polish or scratch remover on an inconspicuous part of the fairing beforehand. This precaution confirms product compatibility and prevents unexpected reactions with the paint or plastic. Some modern car coating sprays integrate polishing and protective qualities, offering a streamlined alternative for light scratch care.
Employing these techniques preserves the original paint and plastic surfaces without requiring removal or repainting of the fairing, making maintenance manageable and practical. For enthusiasts seeking more insights on fairing care and repair, exploring dedicated resources like the Summit Fairings blog can provide additional tips and inspiration.
For hands-on guidance and visual demonstrations, external tutorials such as those found on YouTube can enhance understanding of polish application techniques and highlight small-trick details that improve outcomes. Integrating polishing and protective treatments as part of regular motorcycle upkeep safeguards your fairing’s appearance and helps maintain its value over time.
Chapter 3: How to Remove Scratches from Motorcycle Fairing: Addressing Deep Scratches with Sanding and Paint

1. Mastering Sanding and Surface Preparation to Restore Deep Scratches on Motorcycle Fairings
Effectively removing deep scratches from a motorcycle fairing requires a careful balance of sanding and surface preparation to achieve a smooth, restored finish. The process begins with thoroughly cleaning the fairing surface to eliminate any dirt, grease, or debris that could interfere with the sanding and finishing steps. Dirt trapped during sanding can cause further damage or uneven abrasion, so using mild soap and water followed by drying is essential.
Once the surface is clean, wet sanding is the preferred technique for dealing with deep scratches. This involves using ultra-fine sandpaper, typically starting at around 2000 grit, soaked in water to lubricate the surface and minimize the risk of overheating or excessive abrasion. Wet sanding gently levels the area around the scratch, blending it with the surrounding paint or plastic without causing significant additional damage. It’s important to apply light, even pressure in circular or straight motions, ensuring the sanding is gradual and controlled.
After the initial sanding, moving to finer grit sandpaper, such as 3000 grit, helps to further smooth the surface and prepare it for polishing. Throughout this stage, maintaining lubrication with water mixed with a few drops of mild soap prevents clogging and keeps the plastic or paint layer from wearing away unevenly. Testing this technique on a less visible part of the fairing first is recommended, as wet sanding will permanently remove clear coats or paint if used improperly.
After sanding, the surface must be cleaned again to remove all residue. This is crucial for the next step: polishing. Employ a polishing compound designed specifically for plastics or automotive finishes to restore gloss and even out minor surface imperfections left by sanding. Multiple rounds of polishing might be necessary, depending on the depth of the original scratch. This gradual refinement not only improves appearance but also ensures a smooth base for any protective treatments.
To safeguard the repaired area and prolong the finish, apply a protective coating such as a UV-protectant spray or plastic restorer formulated for motorcycle fairings. This layer helps prevent future fading, oxidation, and minor scratches by creating a durable shield.
Patience throughout these steps is key. Allowing abrasives and polishers to work naturally, without excessive pressure, yields the best results. While deep scratches that penetrate through paint layers may ultimately require professional repainting or repair, mastering sanding and surface preparation can dramatically improve moderately deep damage.
For more insights into maintaining and restoring motorcycle fairings, explore the comprehensive resources available at Summit Fairings’ blog. Additionally, professional methods adapted in this approach are detailed further in this external guide on car paint oxidation causes and restoration.
2. Restoring Deep Scratches on Motorcycle Fairings: From Precise Painting to Flawless Finishing
Removing deep scratches from a motorcycle fairing requires a meticulous approach that combines careful preparation, painting, and expert finishing techniques to restore the surface’s integrity and gloss.
Before any paint can be applied, it is essential to begin with thorough cleaning of the affected area to eliminate dirt, grease, and any contaminants that could interfere with adhesion. If the scratches are deep enough to expose the plastic substrate or primer underneath, gently smoothing the damaged edges with very fine-grit sandpaper—around 3000 grit—helps create a seamless transition and prevents further peeling.
With the surface prepped, the next phase involves painting. Masking off adjacent areas is critical to protect the rest of the fairing from overspray and ensure a clean, professional finish. If bare plastic is visible, a primer must be applied to promote proper paint adherence and durability. The process then continues with several thin coats of paint matched precisely to the motorcycle’s original color. Each layer should be allowed to dry completely before applying the next to build a consistent, even coverage.
Once the paint has dried, the application of a clear coat follows. This transparent layer seals and protects the newly painted surface while restoring the fairing’s glossy appearance. Applying multiple thin clear coat layers enhances durability and ensures the repair blends seamlessly with the surrounding finish.
After the clear coat has fully cured, the surface is refined through a process called wet sanding. Using ultrafine grit sandpaper (around 3000 grit) with water, the technician smooths out any imperfections, orange peel texture, or slight inconsistencies in the clear coat layer. This step is vital for achieving a perfectly level surface that will shine brilliantly once polished.
The final stage involves polishing with a specialized compound and a foam pad, either applied by hand or with a power buffer. This step removes fine sanding marks, elevates the gloss, and harmonizes the repaired spot with the original finish. For those seeking extra protection, applying a ceramic coating afterwards can add a layer of scratch resistance and enhance shine, though it will not repair any existing damage.
This comprehensive approach guarantees that deep scratches are not only concealed but that the motorcycle fairing is restored to a smooth, durable, and visually appealing condition. For additional insights on expertly repairing and caring for motorcycle fairings, including related preparation tips, the detailed tutorials on Summit Fairings’ blog offer valuable guidance.
For expert demonstrations on steps such as wet sanding and polishing, referencing professional paint buffing tutorials can also provide practical visual support to master these essential finishing techniques.
Chapter 4: How to Remove Scratches from Motorcycle Fairing: Final Protection and Maintenance
1. Mastering Scratch Removal: Essential Techniques and Tools for Restoring Motorcycle Fairings
The process of removing scratches from motorcycle fairings is both an art and a science, requiring careful attention to detail and the right combination of techniques and tools. It begins with a thorough cleaning of the affected area to eliminate dirt and debris. This first step is crucial, as any contaminants left on the surface can worsen scratches during repair. Using mild soap and water, the fairing is gently washed and dried to create a clean canvas for restoration.
Determining the depth of the scratches guides the choice of method. Light surface scratches respond well to polishing compounds specifically designed for plastics or automotive paints. These compounds work by gently abrading the surface, blending the scratch lines into the surrounding paint to make them less visible. Application with a soft microfiber cloth in slow, circular motions ensures even coverage and avoids further damage. For deeper scratches, a more involved approach is needed. Very fine grit sandpaper, generally between 1500 and 2000 grit, is used to carefully smooth the edges of the scratch without removing too much material. This sanding step softens the visual impact of the damage and prepares the area for polishing, which restores gloss and uniformity to the finish.
In cases where scratches penetrate through paint layers or cause cracks, simple polishing or sanding won’t suffice. The repair expands to include filling materials that restore surface integrity and touch-up paint that matches the original color. Using these products demands precision; thin layers are applied and allowed to cure before a final polish refinishes the surface. Handling fairing panels during this process calls for care—removing them with proper tools like screwdrivers or Allen wrenches reduces the risk of creating new scratches, especially if one follows model-specific guides.
After restoring the surface, the application of a protective wax or sealant seals in the work done and safeguards the fairing against environmental damage and future scratches. Quick-to-use wax coatings sprayed or rubbed onto the surface provide a durable barrier and enhance shine. Working in a shaded, dust-free environment during polishing and sealing preserves the quality of the finish.
Selecting the right products and tools is pivotal—microfiber cloths and buffing pads minimize abrasion, while products designed for plastic surfaces prevent damage that might occur with harsher chemicals. It’s advisable to test any product first on an inconspicuous spot to observe compatibility.
For those seeking detailed visual guidance, practical demonstrations can be found in tutorials showing proper fairing removal and scratch repair techniques. This video tutorial offers a helpful walkthrough for handling and refinishing a motorcycle fairing carefully.
Comprehensive knowledge of these techniques and tools empowers motorcycle owners to maintain the flawless appearance of their fairings and extend their lifespan with confidence. For more insight into sourcing quality fairings and complementary products, exploring Summit Fairings’ blog can be highly beneficial.
2. Preserving Your Motorcycle Fairing: Essential Protective Techniques and Sustainable Care
Effectively protecting a motorcycle fairing after repairing scratches is crucial to maintaining its appearance and durability over time. The foundation of long-lasting protection starts with gentle, consistent cleaning to safeguard the surface finish. Use mild soap and water paired with a soft cloth or sponge, avoiding harsh chemicals or abrasive materials that can compromise the fairing’s gloss or potentially scratch it further. This careful cleaning removes dirt and contaminants that might otherwise dull protective coatings or damage the finish.
Following cleaning, applying a protective layer is essential to enhance the fairing’s resilience against environmental hazards. Traditional motorcycle-safe waxes create a durable barrier that repels dirt, water, and ultraviolet light, which are common contributors to fading and surface degradation. Regular waxing not only preserves the fairing’s shine but also helps mask minor imperfections, providing an accessible maintenance step that can be repeated seasonally.
For riders seeking a higher level of protection, professional ceramic coatings present a remarkable option. These silica-based coatings chemically bond to the paint or clear coat, forming a semi-permanent shield that offers superior hardness and water repellency. The hydrophobic effect caused by these coatings makes washing easier since dirt and grime slide off more readily, reducing cleaning frequency and effort. Moreover, ceramic coatings provide excellent resistance to UV rays, oxidation, and minor abrasions, significantly prolonging the visual appeal and structural integrity of the fairing. Although professional application is recommended, this investment pays off for riders prioritizing long-term care.
Beyond coating applications, preventive measures substantially influence the longevity of the fairing’s finish. Consistently parking the motorcycle in shaded or covered locations minimizes direct sun exposure that leads to paint fading and material weakening. When indoor storage is not an option, using a UV-protective motorcycle cover adds a valuable layer of defense against sunlight, dust, and moisture. These covers also reduce the risk of incidental scratches caused by environmental debris or animals.
Routine inspection is another critical aspect of maintenance. Checking fairing fasteners for tightness helps prevent vibrations that can loosen parts and cause micro-damage to the fairing over time. Addressing such issues early preserves the structural fit and finish, reducing the need for more extensive repairs.
For those aiming for pristine care, professional detailing can prepare the fairing surface optimally before applying any protective treatment. This deep cleaning and surface refinement remove embedded contaminants and minor blemishes, enabling waxes or coatings to adhere more effectively and last longer.
Collectively, these approaches form a comprehensive strategy to protect your motorcycle fairing after scratch removal, ensuring it remains vibrant and resilient against future wear. To explore additional insights and expert advice tailored to motorcycle fairing protection, visit this detailed resource on affordable motorcycle fairings and care.
Final thoughts
Restoring motorcycle fairings from scratches is a skill that adds significant value to your business by enhancing customer satisfaction and prolonging the life of their bikes’ appearances. Each stage—from thorough cleaning and accurate scratch assessment to specialized techniques tailored for light or deep scratches, and concluding with protective maintenance—forms a critical part of a reliable repair routine. By integrating these carefully outlined steps into your service offerings, you ensure professional-level results that meet the high standards of motorcycle enthusiasts and owners alike. Embracing these methods not only improves operational efficiency but also builds your company’s reputation as a trusted specialist in motorcycle fairing care and restoration.
Ready to elevate your ride? Summit Fairings delivers premium, custom-fit fairings that blend style and durability. Whether you’re chasing speed or turning heads, we’ve got your bike covered. Don’t wait—transform your machine today. Click, customize, and ride with confidence. Your perfect fairing is just a few clicks away. Act now!
About us
undefined