Introduction
Motorcycle fairings are critical not just for aerodynamics and aesthetics, but also for protecting vital mechanical components. For businesses in the motorcycle repair and customization industry, mastering the repair of broken fairings is indispensable. Understanding the material-specific repair methods and the precise steps involved ensures durable, professional results that safeguard structural integrity and appeal. This guide breaks down the entire repair process into six essential chapters: distinguishing repair methods based on fiberglass or plastic fairings, detailed removal and surface preparation techniques, specialized repair procedures for fiberglass and plastic materials, plus finishing touches including curing, sanding, painting, and final reinstallation. Each chapter builds on the last, equipping business owners with in-depth knowledge to streamline repair workflows, increase service reliability, and boost customer confidence in their motorcycles’ restored condition.
Tables of Contents
Chapter 1: How to Repair Broken Motorcycle Fairings Based on Material Type: Fiberglass vs Plastic
- Essential Repair Techniques and Materials for Fiberglass and Plastic Motorcycle Fairings
- Mastering Surface Preparation and Finishing for Fiberglass and Plastic Fairing Repairs
Chapter 2: How to Repair Broken Motorcycle Fairings: Step-by-Step Removal and Surface Preparation
- Mastering Fairing Removal and Initial Surface Prep for a Flawless Repair
- Essential Surface Preparation Techniques for Durable Motorcycle Fairing Repairs
Chapter 3: Mastering Fiberglass Techniques for Effective Motorcycle Fairing Repairs
- Careful Damage Evaluation and Expert Fiberglass Application for Durable Motorcycle Fairings Restoration
- Ensuring Lasting Strength and Seamless Appearance: Curing, Finishing, and Maintenance of Fiberglass Repairs
Chapter 4: How to Repair Broken Motorcycle Fairings Using Plastic Welding and Adhesive Methods
- Mastering Plastic Welding: Techniques and Cost-Effective Solutions for Motorcycle Fairings Repair
- Enhancing Durability with Epoxy Adhesives and Fiberglass Reinforcement in Motorcycle Fairing Repairs
Chapter 5: Mastering the Finishing Touches: Essential Curing, Sanding, and Painting Techniques for Motorcycle Fairing Repairs
- Ensuring Strength and Style: Effective Curing, Sanding, and Painting Methods for Durable Motorcycle Fairing Repairs
- Achieving a Durable and Seamless Finish: Expert Sanding and Painting Techniques for Motorcycle Fairing Repairs
Chapter 6: How to Repair Broken Motorcycle Fairings: Reinstallation and Quality Checks for Safe Use
- Mastering Fairing Reinstallation: Ensuring Secure Fit and Optimal Safety After Repair
- Critical Quality and Safety Checks for Reliable Motorcycle Fairing Reinstallation
Chapter 1: How to Repair Broken Motorcycle Fairings Based on Material Type: Fiberglass vs Plastic
1. Essential Repair Techniques and Materials for Fiberglass and Plastic Motorcycle Fairings
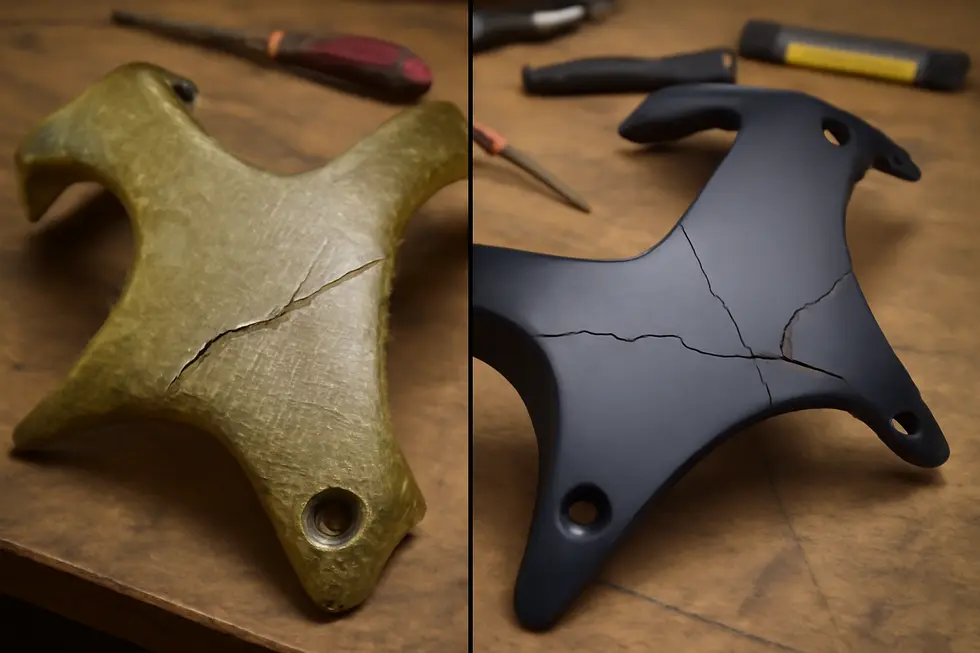
Understanding the distinct repair processes for fiberglass and plastic motorcycle fairings is key to restoring strength and appearance effectively. Fiberglass fairings are commonly repaired by applying resin combined with fiberglass cloth or mat. The process starts with thorough cleaning and sanding of the damaged area to remove contaminants and create a rough surface. Loose or weakened fibers are trimmed away to ensure a solid base. Next, a layer of polyester or epoxy resin is spread, followed by carefully placing fiberglass cloth over the damage. More resin saturates the cloth, reinforcing the repair. While polyester resin is widely favored for its cost-efficiency and ease, epoxy resin is chosen for its superior adhesion and durability, albeit at a higher price. After curing, sanding smooths imperfections before painting or applying a gel coat restores the fairing’s original finish. In contrast, plastic motorcycle fairings—commonly made from ABS, polypropylene, or polycarbonate—require fundamentally different repair methods. Identifying the plastic type is critical, as this guides the repair approach. Plastic welding is a preferred technique, where controlled heat melts the plastic edges and welding rods, fusing the break back together with strong bonding. Alternatively, specialized adhesives formulated for automotive plastics can tightly bond cracks and fractures. Like fiberglass repairs, surface preparation with cleaning and sanding is crucial for lasting adhesion. Large breaks may also benefit from fiberglass reinforcement, but compatibility with the plastic substrate must be ensured to avoid issues like delamination. Following repair, sanding and painting finalize the restoration. Mastery of these specific materials and techniques guarantees that motorcycle fairings regain their structural integrity and visual appeal, ensuring both safety and aesthetics on the road. For further insights into selecting the right components and repair tips, explore resources at Explore the Best Motorcycle Fairings at Summit Fairings.
2. Mastering Surface Preparation and Finishing for Fiberglass and Plastic Fairing Repairs
The success of repairing broken motorcycle fairings hinges largely on meticulous surface preparation and finishing, which vary distinctly between fiberglass and plastic materials. Fiberglass fairings demand thorough cleaning to remove dirt and grease, followed by sanding or V-grooving the damaged area to enhance mechanical adhesion. Repair layers of fiberglass mat or veil soaked in resin rebuild the structure while sanding between layers ensures a smooth, durable surface. Once cured, applying primer, paint, and a clear coat protects the repair and restores the fairing’s original aesthetics.
Plastic fairings require equally rigorous cleaning before repair but differ in treatment. Creating a beveled or V-grooved edge around cracks facilitates the bonding of plastic-specific adhesives or fillers, which are essential for lasting repairs. After curing, the repair must be sanded smooth and primed with a plastic-compatible primer when necessary. Specialized plastic paints followed by a clear coat help prevent peeling and provide a glossy, resilient finish.
Fiberglass repairs often result in stronger structural reinforcement due to the embedded fibers, while plastic repairs depend more on the quality of adhesive bonds and filler materials. Both repair processes share common essentials: cleaning, abrasion for better adhesion, and layered finishing to protect and beautify. Attuning your technique to these material-specific requirements ensures that your motorcycle fairings can withstand the rigors of riding while looking refined. For more detailed insights on fairings and repair tips, explore specialized resources available at Explore the Best Motorcycle Fairings at Summit Fairings.
Chapter 2: How to Repair Broken Motorcycle Fairings: Step-by-Step Removal and Surface Preparation
1. Mastering Fairing Removal and Initial Surface Prep for a Flawless Repair
Removing broken motorcycle fairings requires a careful, methodical approach to prevent further damage and ensure a strong repair foundation. Begin by parking the bike on a stable, level surface and disconnecting the battery’s negative terminal to avoid electrical shorts. Protective gloves and eye gear are essential to safeguard against injuries and accidental scratches. Use the right tools—typically Phillips and flat-head screwdrivers, Allen keys, and plastic pry tools—to gently undo screws, bolts, and clips. Take extra care not to force clips or pry aggressively, as this can crack already damaged plastic or distort clips.
Start by identifying which panels to remove first, usually proceeding from upper to lower sections. Keep track of each fastener’s exact location for reassembly and document the process with photos. Carefully disconnect any wiring harnesses, ensuring connectors remain intact. Once removed, the damaged area must be thoroughly cleaned to eliminate dirt, grease, and loose debris. If working with fiberglass parts, cutting a fiberglass mat slightly larger than the break and mixing resin with hardener creates a strong base for repair. Apply resin to the prepared surface, press the mat firmly, then brush another resin layer on top before letting it cure. Proper sanding after curing smooths the surface, preparing it for finishing.
Adhering to these steps protracts fairing life and preserves motorcycle aesthetics. Following recommended torque specs and procedures from the service manual further reduces risks during disassembly. For those seeking a visual walkthrough, comprehensive removal tutorials demonstrate these techniques in detail. This meticulous preparation ensures any following repair will adhere securely, restoring both function and form.
2. Essential Surface Preparation Techniques for Durable Motorcycle Fairing Repairs
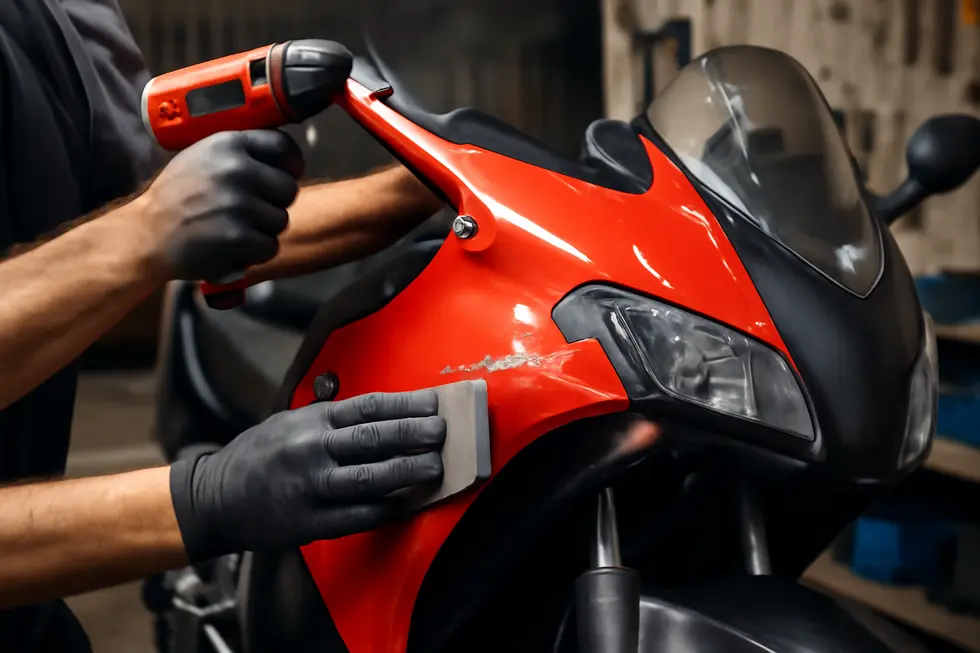
Proper surface preparation is the foundation of any successful motorcycle fairing repair, ensuring strong adhesion and lasting durability. Start by thoroughly cleaning the damaged area with soap and water to remove loose dirt, followed by wiping with isopropyl alcohol or a degreaser to eliminate oils and residues. This step is critical since contaminants can weaken bonding agents and fillers.
Next, carefully bevel or V-groove the edges of any cracks using a rotary tool or file. This increases the surface area, allowing repair materials to penetrate deeply and bond securely, which is particularly important for plastic fairings. The groove also helps create a seamless structural reinforcing layer once filled.
Sanding follows, using medium to fine grit sandpaper (180–320 grit) over and around the damaged area. This removes glossy finishes and roughens the surface, enhancing mechanical adhesion for fillers, adhesives, and paints. After sanding, a final wipe with a solvent like isopropyl alcohol removes dust and residual oils, leaving a pristine surface.
For fiberglass fairings, inspection for delamination or hidden damage guides additional preparation. Sanding and cleaning ensure the fiberglass resin and cloth will properly bond, securing the repair’s structural integrity.
Before these steps, carefully remove the fairing, taking care to disconnect the battery and avoid harming wiring or paint. Following these detailed preparation methods ensures the repair materials adhere flawlessly, restoring both strength and appearance to your motorcycle fairings. For further insights on fairing options and styles, explore comprehensive resources such as the Explore the Best Motorcycle Fairings at Summit Fairings.
Chapter 3: Mastering Fiberglass Techniques for Effective Motorcycle Fairing Repairs
1. Careful Damage Evaluation and Expert Fiberglass Application for Durable Motorcycle Fairings Restoration
Repairing broken motorcycle fairings with fiberglass begins by thoroughly assessing the damage to determine its full extent. This includes identifying visible cracks, holes, and any hidden weaknesses that may impact the integrity of the repair. Careful documentation of the damage helps plan the repair steps and estimate necessary materials.
Preparation is crucial: the damaged area must be cleaned meticulously to remove dirt, grease, and loose fragments, ensuring optimal adhesion. Light sanding roughens the surface around the break, allowing the resin to bond effectively. Any sharp edges or missing sections need trimming or filling for a smooth, stable base. Masking off adjacent areas protects them from resin spills during application.
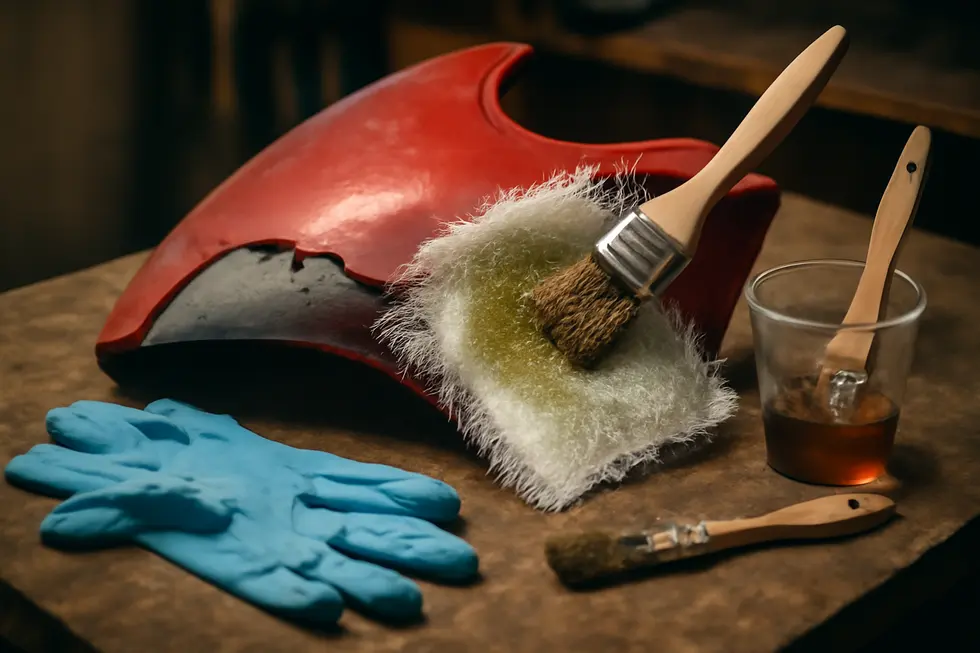
Fiberglass cloth or mat is then cut to a size slightly larger than the repair area. The resin and hardener are mixed carefully, following manufacturer’s specifications to achieve the correct curing properties. The first resin layer is applied to the prepared surface before placing the fiberglass cloth on top. Saturating the cloth thoroughly with resin using a brush is vital to eliminate air bubbles and enhance strength. Multiple resin-fiberglass layers can be added for additional reinforcement if necessary. After curing, the repair hardens and is sanded smooth to blend with the original surface. Finally, primer and paint restore the fairing’s appearance and provide protection. This method balances strength and flexibility, essential for polyester or fiberglass-made fairings.
For further exploring options and fairing types, Summit Fairings offers extensive insights on quality motorcycle fairings.
2. Ensuring Lasting Strength and Seamless Appearance: Curing, Finishing, and Maintenance of Fiberglass Repairs
Curing, finishing, and maintenance are crucial steps that transform a freshly applied fiberglass repair into a durable and visually appealing restoration. After laying the fiberglass cloth or mat with resin, it is essential to allow the material to cure fully, typically at room temperature, following manufacturer guidelines. This process often requires 24 hours or more to reach optimal hardness, ensuring the repaired section regains its structural integrity and bonds firmly with the original fairing. Rushing this step can compromise strength, so patience is key.
Once cured, the repair surface usually remains rough and uneven. Careful sanding with progressively finer grit sandpaper smooths out any imperfections. If needed, applying a thin layer of body filler helps to mask minor defects, followed by additional sanding for a uniform finish. Thorough cleaning afterwards removes dust and oils, creating an ideal surface for painting or applying protective coatings.
Long-term maintenance safeguards the repair’s resilience and aesthetics. Avoiding harsh chemicals and extreme temperatures prevents degradation of the resin matrix. Gentle cleaning with mild soap and water keeps grime at bay without harming the finish. For enhanced protection, applying specialized coatings can improve scratch resistance and ease of cleaning, although these treatments are more common for other composite materials. Periodic inspections allow early detection of cracks or delamination, enabling prompt repairs that extend the fairing’s lifespan.
Together, these careful curing, finishing, and maintenance practices ensure that repaired fiberglass fairings are structurally sound and visually restored to complement your motorcycle’s style. For a step-by-step visual guide on these processes, consider exploring expert tutorials that illustrate the full fiberglass repair journey.
For more detailed insights and resources on motorcycle fairings, visit the explore the best motorcycle fairings at Summit Fairings blog.
Chapter 4: How to Repair Broken Motorcycle Fairings Using Plastic Welding and Adhesive Methods
1. Mastering Plastic Welding: Techniques and Cost-Effective Solutions for Motorcycle Fairings Repair
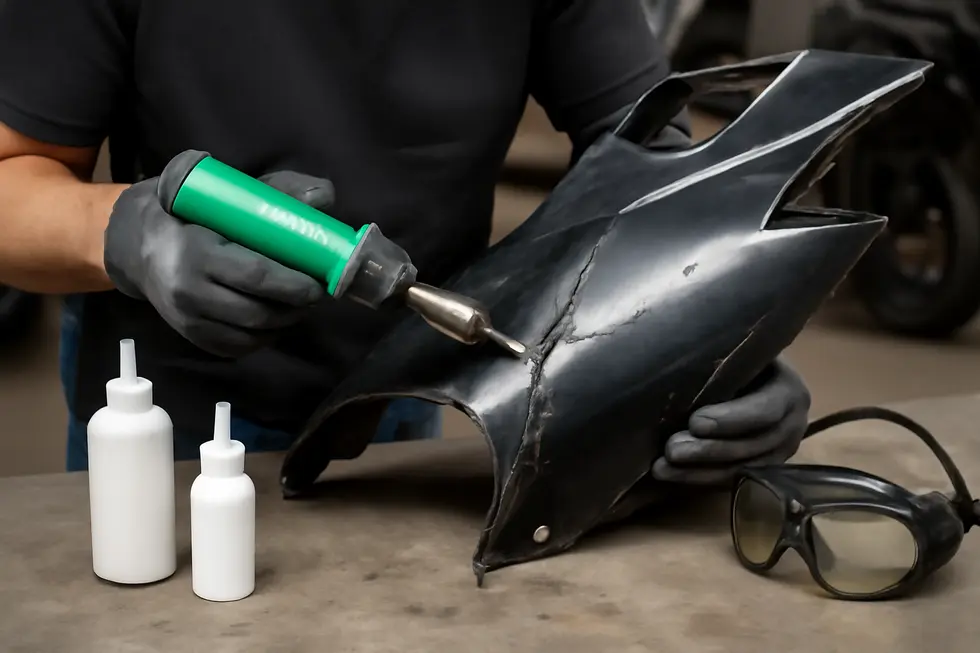
Plastic welding has revolutionized the repair of broken motorcycle fairings by offering strong, durable fixes that closely resemble the original components. One of the most efficient methods is hot staple welding, which involves heating metal staples and embedding them across cracks from the inside of ABS plastic panels. This technique quickly bonds edges with minimal equipment and produces a reliable reinforcement without bulky residues.
Another advanced option uses specialized plastic welding kits with heated tips and filler rods designed to match materials like TPO or polypropylene. These kits melt both the damaged edges and filler simultaneously, creating seamless joints often stronger than the original fairing. Reinforcement with stainless steel mesh can further enhance durability, though this approach requires more precision and preparation.
From an economic perspective, plastic welding stands out as a low-cost alternative to full panel replacements. Kits vary from affordable basic tools suited for DIY riders to more professional setups, making these repairs accessible while maintaining aesthetic appeal after sanding and painting. Developing the skill to control temperature and alignment is crucial for optimal results, but many instructional resources are available to ease this learning curve.
By selecting the right welding technique based on plastic type and repair scope, riders can restore both the structural integrity and appearance of their fairings efficiently. For enthusiasts seeking more insight into motorcycle bodywork solutions, exploring comprehensive guides and resources can further enhance repair knowledge and outcomes.
2. Enhancing Durability with Epoxy Adhesives and Fiberglass Reinforcement in Motorcycle Fairing Repairs
Repairing broken motorcycle fairings with adhesive and fiberglass reinforcement methods demands careful preparation and precise application to restore both strength and appearance. The process begins with thoroughly sanding and cleaning the damaged area to provide an ideal surface for bonding. High-strength two-part epoxy resins designed specifically for composites offer exceptional heat resistance and structural integrity, making them ideal for rejoining fractured plastic or composite fairings. Clamping the pieces securely during the curing period, which typically lasts around 24 hours, ensures a durable, load-bearing bond that outperforms common adhesives such as superglue or silicone.
Fiberglass reinforcement elevates repairs by embedding fiberglass mesh or cloth into the adhesive layer, dispersing stress and resisting crack propagation. This technique is often combined with plastic welding or epoxy adhesives to create a composite repair that mimics the original structural properties of the fairing. For fiberglass fairings, applying a quality primer followed by a gel coat improves both protection and finish, safeguarding the repair against environmental damage while smoothing the surface for painting.
Together, epoxy adhesives and fiberglass mesh deliver repairs that last through road vibrations and impacts, prolonging the fairing’s service life. This approach not only restores essential structural function but also contributes positively to sustainability by minimizing waste and reducing the need for replacement parts. For further insights into achieving reliable repairs and quality finishes, exploring specialized guidance on motorcycle fairings can be invaluable.
Chapter 5: Mastering the Finishing Touches: Essential Curing, Sanding, and Painting Techniques for Motorcycle Fairing Repairs
1. Ensuring Strength and Style: Effective Curing, Sanding, and Painting Methods for Durable Motorcycle Fairing Repairs
Ensuring Strength and Style: Effective Curing, Sanding, and Painting Methods for Durable Motorcycle Fairing Repairs
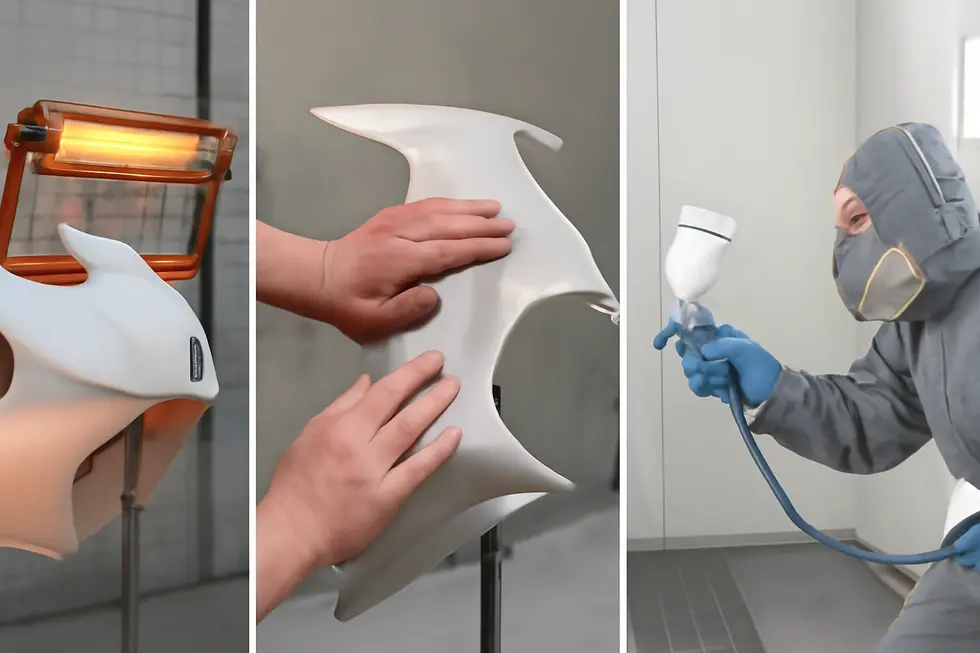
Repairing motorcycle fairings demands precision in curing, sanding, and painting processes to secure lasting strength and restore visual appeal. Once the damaged area is cleaned and prepped, applying the appropriate resin or adhesive is crucial. Epoxy resins and specialized composite adhesives require unwavering contact between parts, often maintained with clamps or tape. The curing phase is pivotal—proper time and conditions, typically around 24 hours, allow the repaired section to reach maximum hardness and bond integrity. Some advanced materials even call for temperature-controlled curing to optimize results.
Following curing, expertly sanding the repair area smooths out irregularities and blends the patch with the surrounding fairing. Starting with coarse grit sandpaper to level excess resin, one gradually moves to finer grits, ensuring the repaired surface is flush and ready for painting. This sanding step is vital for mechanical adhesion and minimizes visible repair lines.
Painting completes the restoration, beginning with a primer layer that enhances paint adhesion. Applying multiple thin coats of base paint ensures uniform color matching and coverage. Sealing with a clear coat not only protects the paint from wear and weather but also imparts a polished, glossy finish. Techniques like wet sanding between coats and final polishing elevate the appearance to a professional standard.
Achieving a seamless, durable repair requires these integrated curing and finishing steps. For further insights into fairing choices and styling, explore resources such as Explore the best motorcycle fairings at Summit Fairings.
2. Achieving a Durable and Seamless Finish: Expert Sanding and Painting Techniques for Motorcycle Fairing Repairs
Repairing motorcycle fairings to restore both their strength and appearance hinges critically on the curing, sanding, and painting phases. Once the repair—whether plastic welding or fiberglass resin application—is complete, the fairing must be fully cured. This essential step allows the materials to solidify and harden, preventing weakening or deformation during further processing.
Following curing, sanding transforms the roughened repair into a smooth, paint-ready surface. Employing multiple grades of sandpaper starting from coarser grits to finer ones ensures any bumps or irregularities blend evenly with the original fairing. Wet sanding is particularly effective here, as it minimizes dust, refines the surface texture, and enhances adhesion for the primer and paint.
Painting the repaired fairing involves thoughtful layering. A primer coat first seals the surface, providing a uniform base essential for color adhesion and durability. The subsequent color coats are applied carefully to restore the original hue and depth, often utilizing professional-grade paints that promise longevity and resistance to environmental stress. To finalize, clear coats protect the paintwork and add a glossy finish; these are cured through air drying or controlled baking, locking in toughness and shine.
To elevate the finish further, a final phase of wet sanding and polishing refines the surface, eradicating minor imperfections and boosting gloss. This multi-step finishing process ensures the repaired fairing seamlessly integrates with the bike’s original aesthetics while enduring the rigors of riding conditions. For additional insights and tips on selecting and handling quality motorcycle fairings, explore the expert resources at Summit Fairings’ blog.
Chapter 6: How to Repair Broken Motorcycle Fairings: Reinstallation and Quality Checks for Safe Use

1. Mastering Fairing Reinstallation: Ensuring Secure Fit and Optimal Safety After Repair
Reinstalling repaired motorcycle fairings demands careful attention to alignment, fastening, and functional checks to guarantee both safety and aesthetics. Begin by loosely attaching the mounting brackets or bolts, which allows for precise adjustments. Gently position the fairing so that its grooves and slots align with the frame and adjoining parts, avoiding any force that could damage newly repaired areas. Once the fairing fits snugly, tighten all fasteners incrementally and firmly, using washers or rubber grommets where needed to cushion stress and prevent cracks.
After securing the fairing, reattach any integrated components like mirrors, air ducts, or headlights, confirming their correct placement and operation. Conduct thorough quality checks: ensure the fairing does not interfere with steering motions, suspension travel, brake lines, or control cables. Verify that fasteners are tight without overtightening, which could cause fractures. Inspect the repair for gaps or misalignments that might affect aerodynamics or stability, and confirm no wiring is pinched or obstructed.
Different materials—ABS plastic, fiberglass, and carbon fiber—require careful handling during installation to maintain their integrity. Regular cleaning with mild soap and timely repairs of cracks help prolong the fairings’ durability. Equipped with basic tools like screwdrivers, hex keys, and wrenches, you can confidently restore your motorcycle’s appearance and structural security. For further detailed insights on fairing options and maintenance, consult resources like the informative posts on Summit Fairings blog.
2. Critical Quality and Safety Checks for Reliable Motorcycle Fairing Reinstallation
After repairing motorcycle fairings, the reinstallation process demands meticulous quality assurance and safety verification to guarantee the fairings function properly and don’t endanger the rider. Start with a careful visual inspection to identify any remaining cracks, fractures, or surface damage that could weaken the structure. Attention should be paid to all mounting points; all bolts and screws must be securely tightened to manufacturer specifications. It’s important to retighten these fasteners after the first 50 to 100 miles of riding to prevent loosening caused by vibrations.
Alongside fastening integrity, checking the alignment of the fairings is critical. Improperly fitted panels can interfere with essential controls such as handlebars, mirrors, or lighting systems, potentially causing distraction or control issues. Ensuring clearance around these components avoids accidental contact or damage. Following physical checks, a thorough road test evaluates the bike’s stability and handling at varying speeds. Listen for unusual noises or vibrations that could indicate loose parts or poor installation.
Since damaged fairings often result from impacts, it is wise to examine nearby systems like brakes, suspension, and electrical wiring for hidden faults. These safety assessments complement the cosmetic repair and confirm the motorcycle’s overall readiness. Adopting a regular maintenance routine—including brake and tire inspections—helps maintain reliability and safety over time.
This comprehensive approach to fairing reinstallation, combining detailed inspection, secure fastening, proper alignment, and ride validation, ensures a repaired motorcycle is both visually restored and fully safe to ride. For an in-depth checklist on bodywork condition and mechanical health, consult resources such as SuperBike Factory’s extensive inspection guidelines. For more thorough guidance on fairing options and replacement, consider exploring Summit Fairings’ ultimate source for affordable motorcycle fairings.
Final thoughts
Repairing broken motorcycle fairings demands a detailed understanding of the fairing material and an organized, stepwise approach to restore both function and appearance. By distinguishing between fiberglass and plastic repairs and following precise procedures for removal, surface preparation, material application, curing, finishing, and reinstallation, businesses can deliver professional-grade results. These repairs not only enhance the bike’s structural integrity but also elevate customer satisfaction and confidence. Mastery of these repair skills enables motorcycle service providers to expand their offerings, improve turnaround times, and uphold safety standards, ultimately strengthening their market position and reputation.
Ready to elevate your ride? Summit Fairings delivers premium, custom-fit fairings that blend style and durability. Whether you’re chasing speed or turning heads, we’ve got your bike covered. Don’t wait—transform your machine today. Click, customize, and ride with confidence. Your perfect fairing is just a few clicks away. Act now!
About us
undefined