Repairing holes in motorcycle fairings is a crucial aspect of maintaining the aesthetics and functionality of any bike. For business owners in the motorcycle industry, understanding these repair techniques not only enhances service offerings but also improves customer satisfaction. Each chapter of this guide delves into a specific phase of the repair process, from preparation to priming and painting, ensuring a complete understanding of the steps required for a successful repair. By mastering these methods, businesses can provide high-quality repairs that meet the expectations of even the most discerning motorcycle enthusiasts.
null

null
From Gap to Glide: Mastering Filling Techniques to Repair Holes in Motorcycle Fairings
A motorcycle’s fairing is more than a shield against wind and road spray. It is a form and function component, tuned for aerodynamics, aesthetics, and the rider’s confidence. A hole in the fairing disrupts all three. It may start as a small spot of compromised plastic, but over time, vibration, temperature swings, and moisture can turn a modest blemish into a structural concern or a visual scar that draws every eye. Repairing such damage, therefore, is not a cosmetic hack but a careful engineering moment. The goal is not merely to fill a cavity; it is to restore stiffness, seam integrity, and a seamless surface that forces air to behave as the manufacturer intended. When you approach a hole with this mindset, you begin to see that the repair is a bridge between materials science and craft, a dialogue between resin, fabric, and paint, all working in harmony to return your fairing to its original performance envelope.
To start, the decision about filling technique hinges on the size and location of the hole, plus the fairing’s material. Fairings are commonly made from polypropylene, ABS, or blends, each with its own bond chemistry and finish requirements. A tiny puncture or gouge in a non-structural area can often be addressed with an epoxy-based putty designed for plastics. Such putties, whether epoxy or polyester in formulation, are straightforward to apply, cure at room temperature, and grind to a near-perfect feather edge. They are excellent for small holes because they adhere well to clean, abraded plastic and sand smoothly away to create a uniform surface. For larger or structurally compromising openings, a fiberglass reinforcement laid over the repaired area, saturated with epoxy resin, provides the kind of strength that resists crack propagation and vibration during hours of highway micro-torsion. This is not mere patchwork; it is a composite repair that returns both stiffness and impact resistance to the compromised panel. If you are unsure which path to take, err on the side of reinforcement. A hole large enough to feel flexible under a tap likely needs a fabric-backed repair to avoid future delamination or crack growth.
Before any filler touches the hole, a disciplined surface preparation protocol sets the stage for durable adhesion. Begin with careful cleaning using a degreasing agent that dissolves wax and oil residues from riding gear and the environment. Dirt and oil create a barrier that can cause fillers to lift or peel. Wipe the area dry; then lightly sand the edges of the hole to create a micro-roughness that gives the filler something to bite into. This edge work is critical. A clean, feathered edge ensures the repair blends into the surrounding surface and reduces the risk of a visible ridge after finishing. If the hole is near a seam or a joint, inspect for hairline cracks emanating from the gap. Stop-holes at the ends are a time-tested precaution: drill a small stop-hole at each end of any crack to prevent it from propagating. This simple step saves you from chasing a spreading seam later in the process.
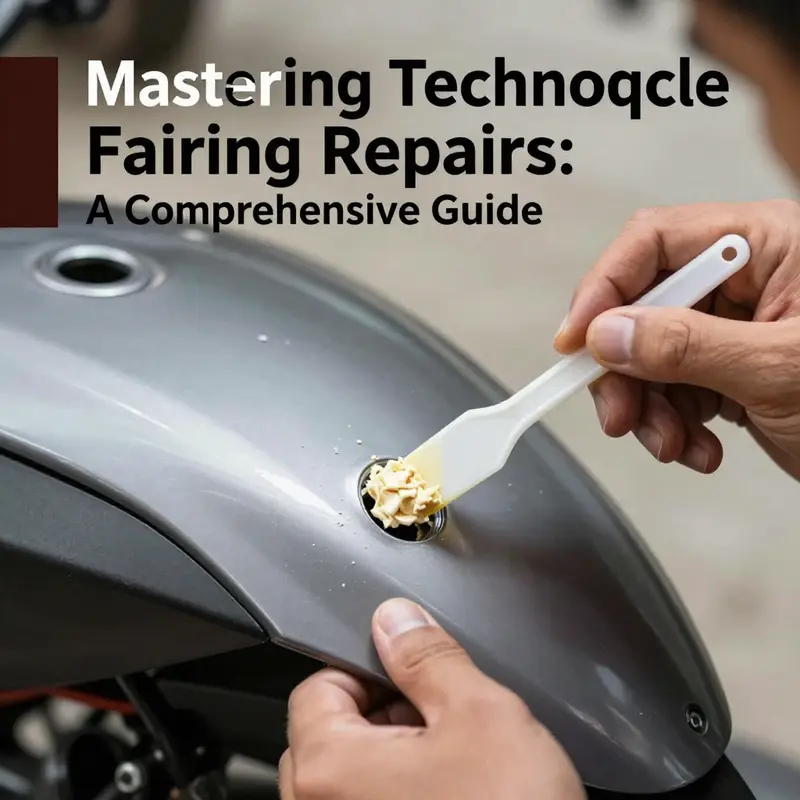
With preparation complete, you move to the filling stage. For small holes, automotive body filler that cures hard, either epoxy-based or polyester-based putty, is appropriate. It is applied directly into the damaged area, slightly overfilled, and smoothed with a plastic spreader or a flexible card. The trick is to build a tiny buoyant ridge that can be ground down flush with the surrounding surface. The curing time follows the manufacturer’s guidance, typically several hours or overnight in cooler climates. The key here is patience. Rushing curing invites shrinkage, pinholes, or a subtle step that betrays the repair when the light hits the fairing at a certain angle.
Larger or more structurally meaningful holes require a two-step approach that couples resin with reinforcement. A cut piece of fiberglass cloth is sized slightly larger than the hole. A base layer of epoxy resin is laid down over the damaged area; the cloth is placed on top and saturated with additional resin. The cloth acts as a structural skin, distributing load and damping the micro-movements that would otherwise encourage a crack to reopen. The repair cures for several hours or longer, depending on temperature and humidity. After curing, you must carefully sand the reinforced area to a smooth transition. The aim is a seamless contour that accepts primer without showing a boundary line. This step often determines whether the subsequent paint can replicate the original gloss and depth of color.
Surface preparation, again, remains decisive even after reinforcement. Cleaning with a degreaser is important, but you also want to remove residual fibers and any raised grains from sanding. Lightly abrade the surrounding surface to enhance adhesion. The goal is to create a continuous substrate that accepts subsequent layers without lifting. In this respect, finishing is as important as the fill. A crisp, uniform surface is not just cosmetic; it is a functional foundation for how paint adheres and how the final gloss reads under rider or sun.
Priming becomes a more nuanced step when plastics are involved. Plastic-primer must be compatible with polypropylene or ABS plastics—the typical materials in modern fairings. The primer acts as a bridge, presenting a chemically friendly surface to the paint. It seals the repaired region, reduces suction that can pull color into the repair, and provides a uniform color base so the topcoat reads evenly. The process is simple in its concept but exacting in practice: apply thin, even coats, allow full cure between passes, and keep the work area dust-free. Each coat should dry before the next, which helps preserve the integrity of the repair and prevents compaction of the surface that could create ridges when color is laid down.
Painting then takes the repair from restoration to a true match. The color-matched, plastic-specific paints are designed to flex with the plastic’s expansion and contraction, which is essential for fairings given the heat of sunlight and the chill of night air. Rather than a single thick application, multiple thin coats are the rule. Layering paints ensures color depth and minimizes solvent interactions that can cause crazing or peeling. After color, a clear coat can be added to protect the work and match the gloss of the surrounding fairing. The finished surface should transition visually from repaired zone to original material without a visible seam. You want the eye to read the fairing as a single, cohesive shape once again.
A careful repair is more than its outer skin. It must survive the realities of ride and road—vibration, wind pressure, and occasional impact from debris. The best approach balances materials science with practical craft. The epoxy-based fill, while straightforward for small holes, may eventually show through if the base is stressed or if the color match is imperfect. The fiberglass reinforcement, while stronger, demands meticulous preparation and finishing to avoid a stiff, grainy patch that catches light in an obvious way. Either technique should be selected with an eye toward the fairing’s function and the rider’s expectations for durability. As you work, remember that the repair’s success is not defined by a flawless patch but by the absence of future cracks, the resilience of the bond, and the visual fidelity of the final paint job.
In weaving together these techniques, one principle remains central: measure twice, repair once. Take the time to assess the hole’s dimensions and the fairing’s load path. If a hole lies near a corner of the fairing or along a high-stress area where the panel bends or shakes, roping in a reinforcement is prudent. If the hole is isolated and shallow, a well-placed epoxy putty can be sufficient. The choice should be guided by the hole’s impact on the panel’s integrity and by how the repair will withstand the everyday rigors of riding.
For riders who want to keep exploring options, it can be useful to browse collections that emphasize compatibility with popular fairing styles. As you consider hardware and finishes, a broader view of options becomes valuable. Honda owners, in particular, may benefit from looking at the Honda fairings collection to understand common shapes, mounting points, and finish requirements that influence repair choices. This broader context can help ensure that the repair not only looks right but also respects the panel’s original geometry and attachment interfaces. Honda fairings collection offers a sense of the available shapes and finishes that align with many factory designs, even when you are working on a DIY repair.
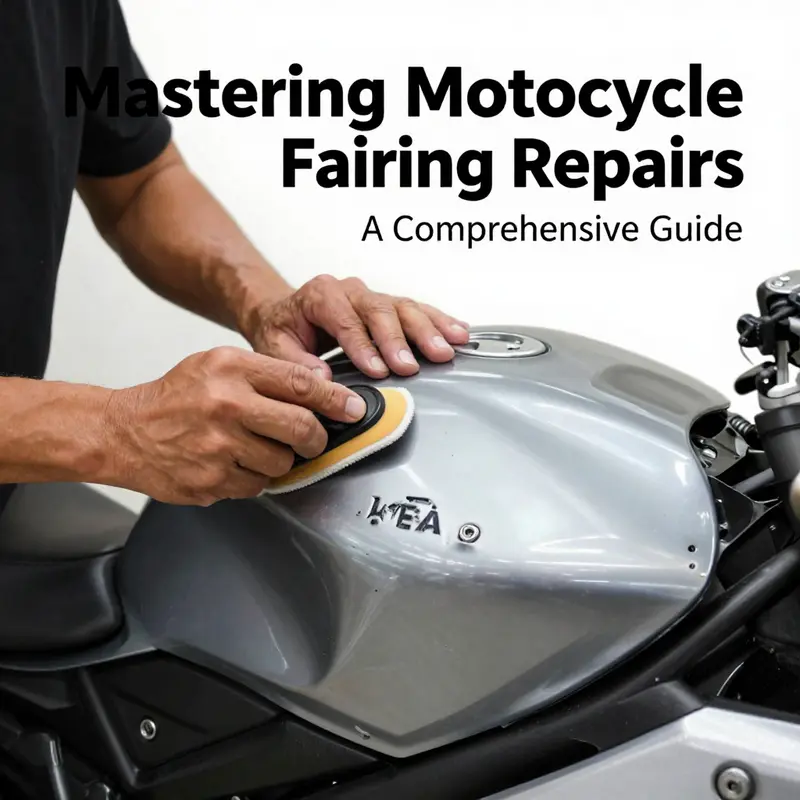
When you finish the repair and let the final coats cure, step back and scrutinize the surface from multiple angles. A true repair should disappear from casual inspection, with no telltale ridges, pinholes, or color mismatch. A well-executed job gives the rider a sense of trust that the fairing is once again a single, cohesive skin that weathered the storm of use rather than a patchwork. If you notice any residual texture or a glint that betrays the repair under harsh light, a light buffing with a polishing compound designed for plastics can help. The goal is a finish that is as uniform as possible, allowing the eye to travel smoothly across the panel without interruption.
This chapter does not exist in isolation. It sits between the broader concerns of structural integrity and cosmetic fidelity—two strands that come together in the act of repair. The lessons learned here extend to future fixes, where a careful assessment of material properties, a measured approach to reinforcement, and a disciplined finishing sequence can transform a damaged fairing back into a dependable, visually pleasing component. In the end, the repair is not merely about closing a hole; it is about restoring the fairing’s integrity, its aerodynamics, and the rider’s confidence that their machine remains a cohesive whole.
External resources can provide additional context, technique variations, and safety practices that enrich the process. For a broader overview of fairing repair procedures, consult an experienced guide such as the external resource linked here: https://www.motorcycle.com/motorcycle-repair/fairing-repair-guide/. In practice, the best outcomes come from combining accessible, repeatable steps with an eye for the unique contours and materials of your bike. A cautious approach, attention to curing, and a careful paint schedule are your allies in turning a rough-edged hole into a seamless, ride-ready surface. The repair, done with patience and precision, becomes a quiet testament to the rider’s commitment to their machine and to the craft of keeping a classic design humming on the road.
Cure to Close the Gap: The Essential Waiting Period for Hole Repairs in Motorcycle Fairings
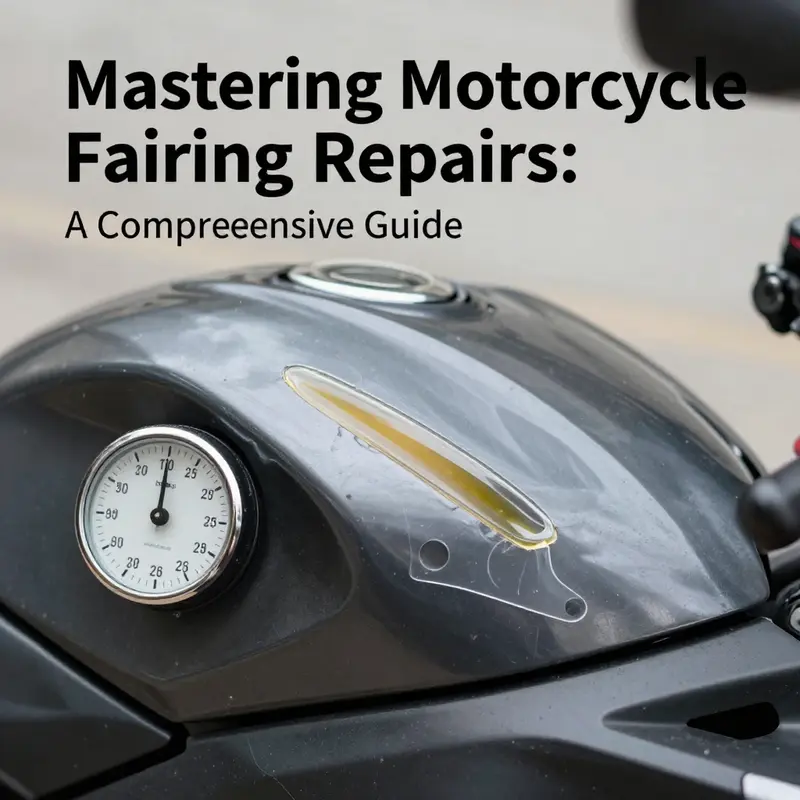
When a hole is repaired in a motorcycle fairing, the most influential phase often sits quietly after the fill is in place: the curing period. It is the hinge between a good temporary fix and a durable, ride-ready repair. The filler, whether polyester-based or epoxy, begins a chemical transformation the moment it leaves the nozzle or putty knife. It uses solvent evaporation, resin cross-linking, and sometimes heat to reach a level of hardness that can be sanded, primed, and painted without compromising adhesion or structural integrity. The length and quality of this phase determine not only how the patch will look but how well it will withstand the vibrations, temperature swings, and adhesives of daily riding. So, the curing stage deserves its own careful attention, not as a mere afterthought but as a decisive step in the repair narrative.
In practical terms, most common automotive fillers used for fairings require a full cure time of about 24 hours at room temperature, which is typically around 20–25°C. This is not a flimsy suggestion but a baseline drawn from established product datasheets and industry practice. The idea is simple: even if a filler might seem dry to the touch after a few hours, the surface can appear set while the internal matrix remains cross-linked and evolving. Sanding, shaping, and even primer application should wait until the material has reached its full strength. The difference between a patch that sands cleanly and one that feels spongy or chips away under light pressure can hinge on those hours spent waiting. In environments where the temperature dips below 15°C, curing slows. The chemistry slows too, and the clock stretches. Respecting higher curing temperatures is not just about speed; it is about ensuring the patch does not lose form as the resin shrinks and air pockets seek release through the surface.
Visual cues can help gauge progress, but they are not substitutes for time. A fully cured patch should feel firm to the touch and should not leave any fingerprint impression when pressed lightly with a gloved finger. It should also remain stable when gently tapped with a non-metal tool; any hollow sound or noticeable movement under a light press can indicate incomplete curing or trapped voids that could telegraph through the finishing layers later. The curing phase is also when the repair begins to shed its edge. If the fill settles too aggressively or a ridge forms at the boundary between old plastic and new repair, deeper feathering may be required later, which in turn makes the waiting period even more essential. This is why the manufacturer’s time guidelines cannot be replaced by instinct or haste.
Durability in the curing phase is closely tied to how well the repair has been prepared before the filler ever touched the hole. Cleanliness, a dry surface, and proper surface roughening are prerequisites that set the stage for a reliable cure. A fairing that carries dirt, wax, or silicone residues can trap volatiles or prevent intimate contact with the substrate, producing a bond that fails under stress. The steps you took before curing—drilling stop-holes at crack ends, cleaning with isopropyl alcohol, and applying the filler generously and evenly to overfill slightly—play a direct role in how sound the cure will be. If any of those steps were rushed or skipped, you might find the cure period reveals the flaws more clearly, with micro-cracks or pinholes becoming more perceptible only after the surface has set.
The range of fillers used for fairings shows a spectrum of curing behavior. Polyester and epoxy resin-based fillers are common, including those designed for automotive or motorcycle bodywork with mechanics in mind. The general rule remains consistent: plan for 24 hours of cure at standard room temperature, then proceed to sanding and finishing. Some fast-curing formulations do advertise readiness for light sanding within 1–2 hours, but even these typically require a full cure of 24 hours for optimal durability and to minimize the risk of cracks or delamination under temperature and vibration during riding. The explicit instruction on the product label or technical data sheet should guide you, as brand formulations vary in resin content, hardener ratios, and pot-life. For instance, well-known repair fillers used in the field often specify a minimum of 24 hours of drying time before mechanical work begins, with temperature effects clearly stated. If you attempt to sand or prime earlier than the recommended window, you invite the chance of micro-movements within the cured matrix that can radiate through paint as hairline cracks or uneven sheen later on.
As a practical matter, the cure must be allowed to progress in a stable environment. A clean, dust-free workspace with steady temperature is ideal. A fan or forced-air circulation can help control humidity, but direct heat sources should be avoided because they can cause uneven curing and premature surface hardening on the exterior, while the interior remains undercured. It is worth noting that in professional settings, technicians might use controlled booths to maintain uniform conditions, but home workshops can mimic this by choosing a moderate, well-ventilated space and avoiding drafty corners or windows that alter temperature. If the air is too dry or too humid, curing can shift subtly, altering the final surface texture and bond strength. The aim is a uniform cure across the repaired region that mirrors the rigidity and resilience of the surrounding plastic.
The connective tissue between curing and finishing becomes especially clear when you consider the finishing steps that follow. A properly cured patch accepts subsequent layers—primers, paints, and finally a clear coat—more predictably. If cure has been compromised, you can expect poor adhesion, surface bubbling, or paint peeling in the months ahead. For plastics used in fairings—polypropylene and ABS plastics are common—the primer itself must be compatible with the resin system of the filler and the plastic. A primer designed for polypropylene or ABS supports the subsequent color coat by providing a good key and sealing the repair. A properly cured fill will feather into the surrounding surface with minimal resistance to sanding, producing a smooth transition that is ready for primer and paint in a few careful steps.
The sanding that follows curing is itself a rite of passage. Start with relatively coarse grit to shape and flatten the overfilled area—roughly 80 to 120 grit—to knock down any high spots and to blend the patch with the fairing’s contour. Progressively, you would move to finer grits—around 220 to 400—to erase sanding scratches and to create a canvas that accepts primer evenly. The texture left by this progression matters; a consistently feathered edge will vanish under paint, while a jagged edge will telegraph through the final finish. The key is patience and discipline: each stage removes a layer of imperfection, but only after the full cure has been confirmed as complete. The goal is not simply to remove material but to refine the transition so the healed area is indistinguishable from the rest of the panel when viewed at riding distance.
From a reader’s perspective, it helps to consider the bigger picture of the repair process. The cure is the foundation that allows the subsequent steps to behave as they should: sanding without dusting, priming with even coverage, and painting with a consistent gloss and color match. The curing window is also why some riders choose to plan their fix with a broader schedule, allowing a day to set up the patch, another day for final shaping, and a third for priming and painting in favorable light. It is a patient craft, but the rewards are durable aesthetics and a fairing that can withstand the wind and road abuse it was designed to resist.
For those who are looking to explore related parts of the repair journey or expand their options for future projects, there are resources beyond the patch itself. For example, if you are considering a broader refresh or replacement, you might explore a dedicated collection of fairings such as the Yamaha fairings, which offers a range of shells that can complement or replace repaired sections when needed. This is not about replacing a repair with a surface-level cover but about ensuring you have options that fit your ride and maintain its look and aerodynamics. You can view the Yamaha fairings collection for context and compatibility as you plan your next steps in maintaining or upgrading your bike’s exterior.
In the end, the curing period is not merely about waiting. It is the decisive moment when a patch earns its rightful place on the motorcycle, becoming part of the bike’s long-term integrity rather than a temporary fix. The advice from the field—keep to the recommended cure time, verify that the environment is suitable, and follow through with careful sanding and priming—remains consistent across brands and fillers. By honoring this phase, you lay a stable foundation for the color and finish that will protect the fairing from the trials of speed, weather, and vibration. The result is a repair that stands up to the road and to time, a seamless blend that lets the rider focus on the ride rather than the repair.
External resource: https://www.3m.com/3M/en_US/automotive/aftermarket/products/repair-body-filler/
From Fill to Finish: Precision Sanding for Seamless Motorcycle Fairing Repairs
When a hole is repaired in a motorcycle fairing, the real test comes after the filler has set. The finish you achieve through sanding determines not only how the repair looks but how it wears against wind, debris, and the stresses of riding. This chapter follows a single, continuous arc—from the moment the repair is cured to the final feathered surface ready for primer and paint. The goal is a surface that feels as smooth as the rest of the fairing and presents no visible edge to disrupt the bike’s aero profile. In this work, sanding is more than cleanup; it is a bridge between the rigid repair and the pristine skin of the plastic shell, a transition that must be flat, uniform, and forgiving to the touch. The steps are deliberate, each one building on the last, and the patience you bring to this phase pays dividends in the final finish. Before you begin any aggressive sanding, ensure the repair material is fully cured according to the manufacturer’s instructions. Sanding too soon risks tearing the filler, creating ridges, or reintroducing microcracks that can telegraph through paint. A properly cured fill provides a stable base from which a true shape can emerge, a foundation that will hold up under the temperatures, flex, and vibration a motorcycle fairing experiences in daily use.
The journey toward a seamless surface starts with the choice of grits and the discipline of how you move the sanding tool. An initial coarse pass sets the tone for the entire job. Start with a grit in the 80s to 120 range. This is not a time for delicate finishing; it is the stage to remove the bulk of the excess filler and to bring the repair shoulder toward the original contour. A sanding block or a low-speed power sander helps maintain a flat plane and reduces the risk of gouging the surrounding material. The motion should be steady and uniform, like drawing a gentle arc across the surface, with equal pressure across the line of the repair. One of the keys at this stage is to avoid creating new hollows by pressing too hard in one spot or letting the pad ride over the edge of the repair. If you see a pronounced ridge, back off slightly, and work it with a broader, lighter pass rather than pressing harder in a narrow zone. The goal is to flatten the repair to a point where you can barely tell where the hole was once, yet the texture remains consistent with the rest of the fairing.
As the bulk of the excess material is removed, the next phase invites you to refine the contour more finely. Move progressively through finer grits: 150, then 220, and finally 320. Each step serves two purposes. First, it erases the scratches left by the previous grit, and second, it begins to reveal the edge geometry of the surrounding fairing. The trick is to keep the sanding pad flat, never tilting it toward the repair, and to use a light touch. Let the abrasive do the work rather than applying heavy pressure. If you notice the surface developing tiny chatter marks or if the repair edge begins to show a speckled line where color inconsistency will appear after painting, slow down and re-check your technique. At this stage, you want to walk a fine line between removing enough material to feather the repair and preserving enough texture so that the repair blends, not stands out. It is not about shaving away the last bit of the filler in one go; it is about guiding the surface toward uniformity in a series of micro-adjustments.
The final smoothing phase, optional but highly recommended for a professional-grade finish, often uses 400 or 600 grit. This is where you turn a good repair into something that could pass for factory work. With very fine grit, you’re increasingly smoothing the micro-scratches created by the earlier passes and leveling any micro-ridges that still cling to the surface. This stage is especially important if you intend to apply a clear coat over the paint or if you want a mirror-like sheen on the final finish. The final pass must be extremely gentle. If you press too hard or rush, you risk rounding off fine details or thinning the edge where the repair meets the original fairing. To assess your progress, run your fingers over the repaired area with light pressure and then inspect it under bright, oblique light. The surface should feel uniformly smooth, with no rough spots or feathered lines catching the light differently from the surrounding plastic.
Between sanding steps, dust control becomes a quiet but essential ally. After each grit, wipe the surface with a damp microfiber cloth or use compressed air to clear the dust from crevices and texture. Residual dust trapped in the repair can become a white speck in the paint film, undermining adhesion and finishing quality. A tack cloth at the end of the final sanding pass helps pick up the last fines that could mar the finish. Constantly check the surface with your eyes and your hands. Lighting is your co-pilot here; look for any dull patches, ridges, or pencil-thin lines that betray an uneven transition. A good rule of thumb is to perform a continuous, slow pass across the area, pausing only to wipe and inspect. If you encounter a low spot or a seam line, return to the appropriate grit and feather the edge with more careful, less aggressive passes. The objective is an area that is indistinguishable, to the eye and to the touch, from the surrounding fairing.
The sanding process does not stand in isolation. It is the hinge between the repair and the next steps—priming, painting, and clear coating—that ultimately deliver a finish with both aesthetic appeal and environmental durability. Proper sanding improves adhesion by creating a micro-roughness that the primer can bite into, while also ensuring the paint can lie down in a uniform film without ridges or color variation along the repair line. When you reach the stage where the repaired patch is truly feathered and the texture matches the original, you are ready for priming. A plastic primer designed for common fairing plastics like polypropylene or ABS will fill the very small pores and micro-scratches and provide a uniform base for color. Thin, even coats are preferable to a single thick layer. Multiple light passes help to maintain the integrity of the surface while achieving good coverage. The paint you apply afterward should be color-matched and formulated for plastics; it should be flexible enough to tolerate the movement of the fairing under temperature changes and abuse. The final clear coat locks in the smoothness you have labored for and adds UV resistance, impact protection, and gloss that harmonizes with the rest of the shell.
Throughout this journey, the eye remains the most important tool. Always step back and view the repair from multiple angles and distances. Stand beside the bike to gauge how the repaired area reads in context with the other panels. If the repair is part of a larger maintenance project, the final sanding should be coordinated with the overall finish plan to ensure the repaired area does not reflect differently under ambient lighting at different times of day. For readers who are actively restoring a particular model or generation, a quick detour through the appropriate fairing collection can be illuminating. For readers working on Honda fairings, check the Honda fairings collection as a reference point for shape, contours, and typical edge radii that guide your feathering work. This isn’t about copying a pattern; it is about understanding the baseline from which you are working so you can tailor your sanding approach to the actual geometry of the part you have in hand. The link provides a gateway to common fairing shapes, helping you calibrate expectations about how much material to remove and where to feather a seam to remain aerodynamic and visually continuous. Honda fairings collection
As you finalize the chapter of the sanding phase, remember that materials and environment play a supporting role. High-quality filler and precise curing are foundational, but the final look is determined by the discipline you bring to the sanding stage and the care you take to maintain clean, consistent technique. If you are meticulous during every pass, you will find the repair disappears into the surface, and the wind will carry your finished panel with less disruption. That seamless transition is the silent payoff of sanding well: a fairing that looks whole, rides true, and speaks to the cyclist who values both performance and craft. For readers who want deeper practice with sanding techniques or more detailed step-by-step visuals, an external resource provides practical demonstrations and additional tips on material handling and surface preparation. External reference: Autobody101 offers a comprehensive guide to sanding techniques and finishing protocols that complement the methods described here. https://www.autobody101.com
From Rough Repair to Glossy Finish: Mastering Priming and Painting a Hole in a Motorcycle Fairing
When a hole appears in a motorcycle fairing, the repair often begins with filling and shaping, but the work doesn’t truly reach its finish until priming and painting seal the fix and blend it with the surrounding surface. Priming is the invisible stage that makes the repair durable and the color match believable. It creates a uniform base that grabs the paint evenly, blocks moisture that could seep into porous filler, and provides a bridge between the repaired area and the existing plastic. Done well, priming and painting turn a patchwork into a surface that looks and feels like the original panel, with no telltale line or texture difference betraying where the patch lives. The chapter you’re reading is about guiding that transition from practical repair to a seamless aesthetic, while staying mindful of the materials that compose most fairings and the conditions under which a durable finish can be achieved. A well-executed prime and paint job doesn’t merely look good; it helps preserve the integrity of the repair against sun, rain, and road debris, preserving both function and value for as long as the bike remains in service.
Preparation is the quiet backbone of the priming and painting process. Even after the hole is filled and cured, the surrounding edge of the repair must be readied so the primer can bite firmly and spread evenly. Start with a thorough cleaning to strip away any remaining dust, grease, or wax. A clean surface means the primer won’t harbor contaminants that could later compromise adhesion or produce a cloudy film. Then, before you apply primer, scuff the entire repaired area with a fine abrasive to create a slightly rough texture for better bonding. The goal isn’t to flatten the surface but to leave it with enough tooth for the primer to grip. Keep the edges of the repaired patch feathered into the surrounding panel so the transition remains quiet and invisible after painting.
Once the patch is clean and abraded, the actual priming stage begins. Choose a primer that’s suitable for the type of plastic used in most motorcycle fairings, typically polypropylene or ABS. The primer’s job is multi-layered: it seals the filler itself, it provides a uniform base that the paint can adhere to, and it blocks moisture from diffusing into the repair, which could cause osmotic blistering or a hazy finish over time. For a durable result, apply the primer in thin, even coats rather than one heavy layer. Allow each coat to dry according to the manufacturer’s guidelines, and refrain from rushing to the next step. Temperature and humidity matter here; a dry, dust-free environment with moderate temperatures prevents the primer from drying too quickly on the surface or, conversely, dragging across the patch when the film is still soft.
After the primer has dried, a careful sanding phase begins again, this time focused on creating a surface as smooth and flush as possible with the rest of the fairing. Start with a relatively fine grit and progress gradually to an ultra-fine finish. A typical progression might move from a gentle 800 grit to a more refined 1500 or 2000 grit, always checking that the repaired area feels uniformly smooth to the touch and visually indistinguishable from the surrounding panel when viewed at normal riding distances. The aim is not to hollow out the patched area or leave evidence of sanding, but to ensure the primer layer is uniformly bonded and level with the original contour. A cautious touch here pays dividends in the look of the final paint job and in the long-term durability of the repair.
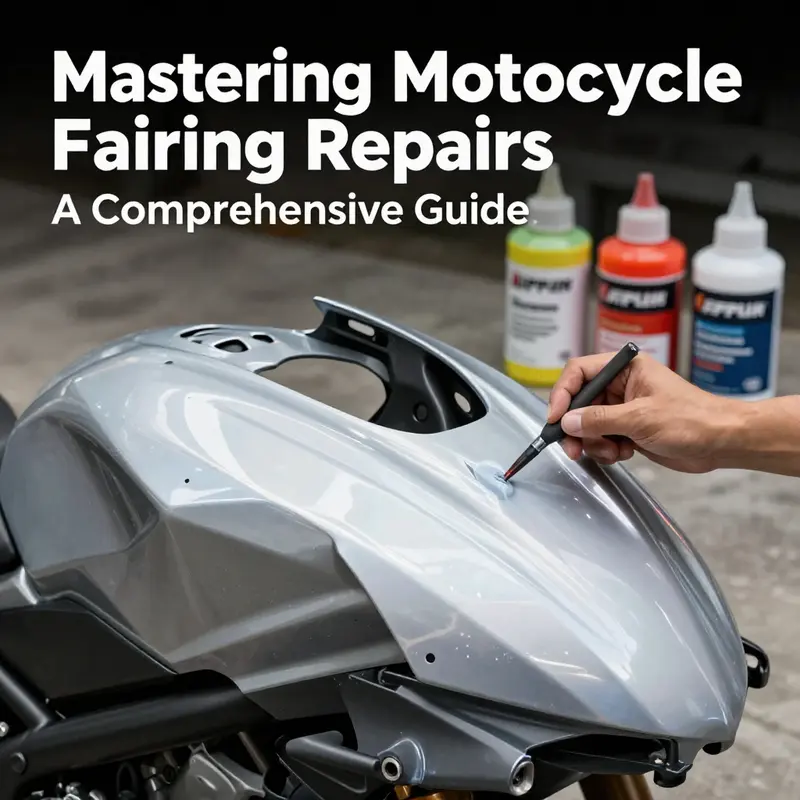
With a smooth primer surface achieved, the next stage is painting. Color-matched automotive spray paints formulated for plastics are the practical choice, as these products are designed to adhere to plastic substrates and to maintain their flexibility in the face of temperature changes experienced by a motorcycle. The color match is essential, because a mismatched shade will be noticeable even if the repair is structurally sound. When applying paint, the technique matters as much as the color choice. Use thin, even coats and maintain a consistent distance from the surface throughout each pass. Short bursts with a steady, sweeping motion produce a smooth, even layer, whereas long, uneven passes increase the risk of runs and sags. Between coats, let the paint flash off; this short interval helps the subsequent layer adhere more effectively and minimizes the risk of solvent pooling, which can create an uneven texture.
The environment around the spray booth—whether a dedicated paint booth, a clean garage, or any space kept free of dust—plays a pivotal role in the final finish. Dust particles settling into wet paint can ruin gloss clarity and highlight any imperfections. If possible, work in a room that’s free from heavy air currents and place the bike on a stand to avoid vibrations that might disturb the spraying motion. Temperature stability is equally important; extremely hot or humid conditions can affect solvent evaporation rates and, as a consequence, the film uniformity of the paint. The goal is to arrive at a color and texture that looks natural in a broad range of lighting conditions you’re likely to encounter, from bright sun to overcast dawns.
Once the color has dried to the point where it’s no longer tacky, a clear coat is applied to lock in the color and add a layer of protection against UV exposure, minor abrasions, and moisture. The clear coat should be compatible with the base color and the underlying primer, forming a cohesive system that retains gloss and resists scratches. The pattern of application mirrors the paint steps: several thin layers with proper flash times, not a single heavy coat. Each layer should contribute to a depth that blends with the factory finish rather than creating a separate visual sheet that sits on top of the paint. There’s a finesse to this stage—the clear should be coat after coat until you’ve achieved the desired level of gloss and protection, with a final cure that completes the process.
Curing times, though sometimes overlooked in casual repairs, are crucial to the longevity of the finish. The primer needs to dry fully, the base color must cure without fogging or lifting, and the clear coat should reach full hardness before exposure to moisture or aggressive use. In a typical scenario, this means allowing the final layers to cure for a period ranging from several days to a full week, depending on environmental conditions and the products used. Patience here pays off in a finish that won’t crack or peel at the edge of the repaired hole the first time you wash the bike or park it in direct sunlight.
The texture and the color in the repaired area should read as a natural extension of the fairing—no obvious line should betray where the patch begins. If you’re working on a fairing that has a complex color or a metallic or pearlescent finish, the color-matching process becomes more nuanced. In such cases, it is worth performing a small test panel or a discreet area to dial in the shade before proceeding with the full repair. Even when the repair is spot-on in color, texture matters as well. Your goal should be a surface that, under typical riding conditions, catches light in the same way as the surrounding panel, preserving the original feel of the fairing’s curvature and surface sheen.
The practical details of finishing extend beyond the spray gun or the brush. It is worth considering the long game: the repair’s resistance to sunlight and weather, the chances of micro-scratches accumulating over time, and how the finish holds up to normal maintenance. A well-applied primer and paint layer is not just about cosmetics; it is about preserving the repaired material and ensuring that the patch remains as durable as the factory surface. Regular maintenance, including gentle washing and careful drying, helps maintain the integrity of the finish. A light polish after the cure period can restore some of the original luster, but avoid aggressive compounds that could abrade the new paint or the primer beneath it. If you plan to ride frequently in hot sun or salty coastal air, consider rechecking the finish after the first season. The small investment of a retouching session can prevent a more extensive repair later on.
For readers seeking additional context on how to source compatible panels or parts when working on a Honda or similar family of fairings, there are curated collections available that can be a practical resource for assessing color and finish compatibility. These collections offer a broad range of bodywork components, enabling you to compare original and replacement surfaces and better gauge color accuracy before you begin paint work. In practice, it’s helpful to view options that align with your bike’s model and year, so the repair blends naturally with the rest of the bike’s visual language. You can explore these collections to get a sense of the diversity of panels and finishes and to confirm your approach aligns with what the bike would have looked like straight from the factory. For a more general reference, you might consider looking through a broad Honda fairings collection before narrowing down to a specific model.
In addition to the internal resources, there are external references that provide guidelines on the technical aspects of automotive coatings and adhesive systems. A respected resource you can consult for technical application guidelines and broader context is a leading paint and coatings resource that covers how plastics respond to primers, how different film builds behave under UV exposure, and how to select compatible topcoats for plastic substrates. This external reference can complement the practical steps described here by widening your understanding of adhesion chemistry, film formation, and long-term durability. When working through a repair, drawing on both practical, hands-on experience and authoritative technical guidelines helps ensure the outcome endures beyond the immediate fix.
Embedding a link to a relevant catalog can be helpful for those who want to imagine the finish in the broader context of available parts and panels. A practical internal reference for readers who want to explore compatible fairing options is the Honda fairings collection, which provides a sense of the style and curvature you might be restoring. This link is included here to support readers in evaluating color and finish compatibility in the broader ecosystem of motorcycle bodywork: Honda fairings collection.
In summary, priming and painting a repaired hole in a motorcycle fairing is a careful orchestration of surface preparation, adhesive-ready priming, and disciplined painting technique. The aim is not only to hide the patch but to recreate the original aesthetic with a finish that endures. When done with attention to the material, the environment, and the interplay between color and texture, the repair becomes part of the bike’s story rather than a quick fix. The result is a seamless transition where the eye cannot easily distinguish repaired areas from factory work, and the repaired panel remains a robust part of the bike’s exterior for miles to come.
External resource for further study: https://www.ppg.com/automotive
Final thoughts
Effective repair of motorcycle fairings not only enhances the visual appeal of the bike but also increases its lifespan. By employing the techniques discussed throughout this guide, business owners can ensure that their repair services are top-notch, fostering customer loyalty and satisfaction. Understanding each step—from preparation to painting—allows for a comprehensive approach to motorcycle maintenance. Employ these methods in your shop to boost both repair quality and service reputation.