Introduction
Motorcycle fairings not only enhance aerodynamic performance but also represent a significant aesthetic element of any bike. For business owners involved in motorcycle repair or customization, mastering the art of fairing repairs is crucial to meeting customer expectations and maintaining profitability. This guide explores the essential stages of repairing motorcycle fairings, beginning with the meticulous process of removal and preparation to ensure optimal repair conditions. It then details effective material repair techniques, addressing cracks, breaks, and dents with precision. Finally, it covers expert finishing and reinstallation steps to restore both the integrity and appearance of the fairings. Each chapter equips business proprietors with practical knowledge designed to improve repair quality, reduce turnaround times, and uphold high standards in motorcycle maintenance and customization.
Tables of Contents
Chapter 1: Removing and Preparing for How to Repair Motorcycle Fairings
- Mastering the Art of Removing Obstructive Components for Smooth Motorcycle Fairing Repairs
- Mastering Bolt Removal: The Key to Safe Detachment of Motorcycle Fairings
- Mastering Careful Prying and Panel Support for Smooth Motorcycle Fairing Removal
- Mastering Wiring Disconnection and Safe Handling for Efficient Fairing Removal and Preparation
- Thorough Inspection, Cleaning, and Surface Preparation for Durable Motorcycle Fairing Repairs
Chapter 2: Material Repair Techniques for Motorcycle Fairings: Mastering the Essentials
- The Crucial Role of Cleaning and Surface Preparation in Durable Fairing Repairs
- Mastering Plastic Welding and Fiberglass Crack Repair to Restore Motorcycle Fairings
- Mastering Sanding and Surface Preparation for Flawless Motorcycle Fairing Repairs
- Mastering Repainting and Finishing to Restore Motorcycle Fairing Integrity and Aesthetics
- Restoring Metal Fenders: Essential Dent Removal Techniques for Motorcycle Repairs
Chapter 3: Finishing and Reinstalling Steps in How to Repair Motorcycle Fairings
- Mastering Precise Alignment and Secure Mounting of Motorcycle Fairing Shells
- Ensuring Flawless Fit: Detecting and Adjusting Interference during Fairing Reinstallation
- Secure Attachment Techniques and Protective Measures for Durable Fairing Reinstallation
- Mastering Fitment Adjustments: Achieving Seamless Alignment During Motorcycle Fairing Reinstallation
- Mastering Fastening Techniques to Safeguard and Secure Repaired Motorcycle Fairings
Chapter 1: Removing and Preparing for How to Repair Motorcycle Fairings

1. Mastering the Art of Removing Obstructive Components for Smooth Motorcycle Fairing Repairs
Successfully repairing motorcycle fairings begins with thorough preparation, and a crucial part of this is removing any obstructive components that hinder access to the damaged fairings. This step demands meticulous care to avoid inflicting further damage on delicate parts while ensuring every element is accounted for during reassembly. Components such as seats, panels, headlights, and air ducts often cover the fairings or their mounting points, making it impossible to proceed without first taking them off.
The removal process commences by identifying these obstructive parts and carefully disassembling them in a systematic order. It is important to collect all necessary tools ahead of time, including screwdrivers with appropriate heads, plastic pry tools, and containers or organizers for small screws and clips. A plastic pry tool is favored over metal tools because it gently pops components off without scratching or cracking plastic surfaces. This is particularly vital for preserving the finish and structural strength of panels adjacent to the fairings.
Starting with detachable parts like seats or external covers, loosen and remove bolts and fasteners while keeping track of where they belong. The use of labeled containers or magnetic trays helps prevent loss of tiny screws or clips that are often easy to misplace. Taking clear photos during every stage of disassembly can greatly facilitate remembering the exact placement and orientation of components for the eventual reassembly. This habit also assists in troubleshooting should any discrepancies arise later.
While removing obstructive parts, it is crucial to support the fairing itself to avoid accidental dropping or flexing, which could deepen existing cracks or cause new breaks. Holding the fairing firmly in place as you loosen mounting bolts preserves its integrity. In some cases, applying light pressure at strategic points while prying off adjacent parts eases removal without stressing the overall structure.
Once initial panels and seats are removed, focus shifts to smaller yet vital components like headlights and air ducts that often conceal further mounting bolts or clips securing the fairing. These components require cautious handling to avoid damage to wiring harnesses or delicate lenses. Slowly and carefully detaching these parts reveals the full layout of screws and brackets around the fairing, granting comprehensive access to every repair zone.
After the obstructive parts have been cleared, it is advisable to inspect the mounting points on both the fairing and the motorcycle frame. This inspection helps identify any warped, cracked, or stripped fastening areas needing repair or reinforcement before reinstalling the fairings. Proper mounting is essential to prevent undue stress that leads to recurring cracks after repair.
By mastering the art of removing these obstructive components, motorcyclists create an ideal working environment that maximizes the chances of a successful fairing repair. The process calls for patience, careful organization, and the use of non-damaging tools to protect each part’s finish and function. With clear documentation and thoughtful handling, the stage is perfectly set to advance into detaching and unscrewing bolts without risk.
For riders looking to visualize these techniques in action, a detailed disassembly video of a Harley Davidson Roadglide illustrates the step-by-step removal of obstructive elements and fairings. This resource highlights the helpful use of plastic pry tools along panel gaps, how to expose hidden bolts by removing adjacent parts, and how to maintain firm support of the fairing during the process. Watching such demonstrations can build confidence and deepen understanding of this critical preparation phase.
Explore more about comprehensive motorcycle fairing care and repair techniques at Explore the Best Motorcycle Fairings at Summit Fairings.
For detailed visual guidance, see this Harley Davidson Roadglide disassembly video with step-by-step instructions on removing obstructive parts and fairings: https://www.youtube.com/watch?v=JWZMBYyxMQM
2. Mastering Bolt Removal: The Key to Safe Detachment of Motorcycle Fairings
Removing motorcycle fairings safely requires a focused approach to detaching bolts and fasteners with precision and care. This step is crucial as it lays the groundwork for full access to damaged areas needing repair while preserving the integrity of delicate components. The process begins with a thorough visual inspection to locate every visible and concealed bolt, clip, screw, or fastener that secures the fairing panels to the motorcycle frame. Missing even a single fastener can cause damage when attempting to pull panels away, so methodical attention is essential.
Typically, the initial bolts to target are those holding readily visible parts such as the windshield mounts, speaker grills, brackets, or any decorative attachments on the fairing. Supporting these parts while loosening their screws is important to prevent sudden drops or scratches. For example, when detaching a windshield, it should be gently held in place until all bracket screws are removed or adequately loosened. This prevents it from falling and potentially cracking.
Often, fairings have hidden screws or clips that require reaching behind panels or sliding fingers into narrow gaps. These fasteners can be subtle, tucked under edges or behind other components, and may demand gentle prying with plastic trim tools to expose without marring surfaces. It is common on some models for bolts at the top of panels to have thread keepers or retainers that prevent full removal; in such cases, loosening rather than unscrewing them completely helps keep parts organized and avoids losing small components.
Many motorcycles utilize factory zip ties or cable ties expertly securing wiring harnesses and cables running through or near fairings. Instead of immediately cutting these ties and risking disconnection of electrical systems, carefully assessing where slack can be created is necessary. Cutting only those zip ties that hold cables rigid without interrupting wiring ensures the cables remain intact while allowing the fairing panels enough freedom to be maneuvered. For instance, the Yamaha MT-09’s front fairing removal benefits from selectively cutting these ties to create slack for modifications or repairs without permanent disconnection.
Proper tooling is another critical factor. Using the correct screwdrivers, socket wrenches, or Allen keys sized specifically for the motorcycle’s fasteners ensures bolts do not become stripped or damaged. Magnetic or organized containers for screws and bolts keep all removed pieces together, avoiding frustrating hunts during reassembly. Throughout the detachment, supporting loose parts steadily with one hand while applying controlled turns on fasteners with the other prevents accidental drops and possible damage to painted surfaces or glass components.
For example, Harley-Davidson Road Glide fairing removal illustrates this approach well. The procedure begins with unscrewing six bracket screws holding the windshield mounts (three on each side) while carefully supporting the windshield. Speaker grills are then freed by releasing hidden clips. Outer fairings secured with large bottom bolts come next, but top bolts with thread keepers are only loosened partially to maintain part integrity. Simple push-pull connectors such as headlight plugs are then disconnected before completely detaching the panels. This stepwise, disciplined progression prevents damage to electrical systems or fairing structure during removal.
Maintaining order during this process not only eases later reinstallation but also minimizes stress on fragile plastic or fiberglass materials that can crack if improperly handled. Employing rubber grommets or washers on mounting bolts during removal and reassembly helps distribute load evenly and avoid stressing the mounting holes. Avoiding overtightening screws secures panels without causing new fractures.
Mastering bolt and fastener removal directly impacts the success of subsequent repair phases. It provides clean, undamaged surfaces ready for cleaning, bonding, and refinishing work. When executed methodically, it turns a potentially daunting task into an approachable step that protects the motorcycle’s value and appearance.
For visual learners and those seeking detailed guidance, video tutorials on models like the Harley-Davidson Road Glide demonstrate each of these careful steps in real time, showcasing the importance of patience, proper tool use, and organized workflow. Such resources are invaluable complements to written instructions for anyone undertaking the comprehensive process of fairing repair.
For further insight into motorcycle fairings and their maintenance, explore expert content at Summit Fairings’ blog.
An excellent detailed video resource demonstrating these bolt removal techniques on a Harley-Davidson Road Glide can be found here: https://www.youtube.com/watch?v=H94tYKTP3tw
3. Mastering Careful Prying and Panel Support for Smooth Motorcycle Fairing Removal
Successful repair of motorcycle fairings begins long before any bonding or painting—it starts with the delicate art of removing and preparing the panels without causing further damage. Fairings, often made from fragile plastics or fiberglass, are designed to fit snugly on the frame, held firmly by clips, screws, and bolts. This secure fit means removal demands both finesse and the right tools to avoid cracks and scratches that could undermine repair efforts.
To start, employing non-metallic pry tools—made from plastic or nylon—is essential. These tools allow you to gently release clips and tabs without marring the surface or damaging mounting points. Metal screwdrivers or rigid tools might slip or gouge the fairing, so investing in proper pry tools safeguards the finish and structural integrity. Working systematically, insert the pry tool carefully at clip locations, gradually levering the panel free while avoiding excessive force. Patience is key here; forcing a stubborn clip can easily crack the panel or break mounting tabs. If clips feel particularly resistant, moving on to the next clip and returning later often eases tension and reduces risk.
During removal, it is equally important to support the fairing panels properly. Placing them on soft, padded surfaces—such as foam mats or thick towels—prevents scratches and cracks from accidental drops or shifts while working. As panels are detached, their edges and corners become especially vulnerable; cushioning these contact points can preserve overall panel condition for easier repair or reuse. Supporting panels with both hands or a helper also minimizes twisting or bending stresses.
Attention must also be given to the organization and gradual loosening of fasteners. Bolts and screws should be removed slowly and methodically, noting their exact placement and orientation. Maintaining an orderly fastener system avoids confusion during reinstallation and reduces chances of applying excessive torque to weaker areas. Loosening all bolts incrementally before complete removal ensures panels come free evenly, decreasing the likelihood of stress fractures near mounting points.
Once the panels are off, inspect every mounting bracket, clip location, and fairing edge for hairline cracks, warping, or broken tabs. These areas are often overlooked but critical for ensuring a durable repair. If mounting points are weak or damaged, reinforcing them before reinstallation prevents future failures that could compromise your repair work.
When the time comes to reinstall the panels after repair, extra care ensures longevity and prevents repeat damage. Using rubber grommets or washers where bolts contact the fairing helps distribute pressure evenly, reducing point loads that can lead to cracks. Moreover, bolts should be tightened just enough to secure the panel firmly without overtightening, which risks stress fractures or stripping plastic threads. Tightening in a crisscross or balanced pattern evenly supports the panel’s shape.
The combined use of proper prying tools, soft panel support, careful fastener management, and protective hardware during reinstallation promotes a smooth removal and preparation process. This thoughtful approach minimizes unnecessary damage and aligns with best practices for preserving the fairing’s integrity throughout repair.
For those seeking practical, step-by-step visual assistance, instructional resources like the 1993 Honda VFR750F fairing removal walkthrough demonstrate these careful prying and panel support techniques in detail. Such videos can deepen understanding and enhance skill for enthusiasts and professionals alike.
Finally, when replacement panels become necessary, selecting high-quality kits that emphasize factory-precise fit supports easier installation and less risk of damage. These kits facilitate a smoother repair experience and help maintain the motorcycle’s original appearance and structural standards.
For further insights into quality components that complement careful repair preparation, explore detailed options and guidance on choosing motorcycle fairings from specialized suppliers here.
For visual learning, consult external expert walkthroughs such as Vintage Motorcycle Repair’s Honda VFR750 fairing removal tutorial, which closely aligns with the best practices described here.
4. Mastering Wiring Disconnection and Safe Handling for Efficient Fairing Removal and Preparation
When embarking on motorcycle fairing repairs, mastering the process of wiring disconnection and safe handling is vital to ensure a smooth, damage-free removal and preparation stage. The intricate electrical components integrated within or mounted behind motorcycle fairings, such as indicator lights, instrument clusters, and auxiliary wiring, require deliberate attention to prevent short circuits, connector damage, or personal injury.
The very first step in this electrical disconnection process is to isolate the motorcycle’s power source by disconnecting the battery. This crucial safety measure eliminates risks of accidental shorts, sparks, or shocks that could complicate the repair workflow or cause permanent damage to the motorcycle’s electrical system. Removing the ground cable first is often recommended to further minimize hazards.
With the battery safely isolated, proceed by carefully locating all wiring connectors that interface with the fairings. These connections can include plugs for turn signals, headlights, brake lights, or dashboard indicators commonly incorporated into the fairing design. It’s essential to approach each connector with gentle precision—avoid tugging directly on wires, which risks stretching or breaking delicate strands. Instead, grasp the connector plugs firmly, pressing any release tabs or unlocking clips to disengage the connectors cleanly. Supporting the harness near its base while disconnecting prevents strain on the wiring.
Visual inspection plays a critical role at this stage. Take time to thoroughly examine wiring harnesses for any signs of wear or damage such as frayed insulation, corroded pins, or pinched cables that might have occurred through road vibration or previous improper handling. Documenting these issues before removal allows you to replace or repair compromised components prior to reassembly, enhancing overall reliability.
To maintain organization and eliminate confusion during the eventual reinstallation, labeling each disconnected connector with tags or masking tape is highly recommended. This simple step ensures each plug is returned to its original socket without guesswork, saving time and preventing electrical faults born from incorrect reconnections.
While removing fairings, ensure your workspace is clean and dry to prevent dirt or moisture contaminating wiring contacts or the fairing surfaces themselves. Use plastic trim tools rather than metal instruments to pry panels gently—this protects painted finishes and reduces chances of structural cracks. Additionally, secure screws, fasteners, and small hardware in clearly marked containers to avoid loss.
Avoid bending wiring harnesses sharply or exerting excessive force that could weaken the internal wiring. Maintaining natural routing paths protects cables and connectors, preserving their longevity.
Before reassembling the repaired fairings, double-check that each electrical connection fits securely and aligns correctly. Completely seated connectors provide dependable electrical continuity and reduce the risk of intermittent faults. Following this, reconnect the battery last, confirming that no wires remain exposed or incorrectly routed that could cause a short.
Through deliberate wiring disconnection and careful handling of all electrical components during fairing removal and preparation, you mitigate hazards and potential rework. This foundation supports a more efficient repair process and helps maintain the motorcycle’s safety and functionality after completing fairing restoration.
For additional insights on safely handling motorcycle components during repairs, this comprehensive guide to motorcycle fairings and accessories offers valuable information.
Reliable best practices for wiring disconnection are also established in manufacturer-recommended safety manuals, ensuring your approach aligns with professional standards. By respecting these precautions, you set the stage for effective subsequent steps such as inspection, cleaning, and surface preparation during fairing repairs.
Reference: manuals.plus (motorcycle safety info)
5. Thorough Inspection, Cleaning, and Surface Preparation for Durable Motorcycle Fairing Repairs
Successful repair of motorcycle fairings begins long before fillers or paint are applied; it hinges critically on a comprehensive process of inspection, cleaning, and surface preparation. These foundational steps set the stage for any subsequent work and significantly impact the durability and appearance of the final repair.
When you first remove the fairings from the motorcycle, take time to conduct a meticulous inspection in a well-lit, clean workspace. Carefully examine every inch of each panel to identify cracks, scratches, dents, and any broken mounting points. Pay close attention to the alignment and fitment of panels relative to their mounting brackets. Misaligned or damaged mounting holes can cause stress on the plastic or fiberglass, leading to further cracks or breakage if not addressed early. Using natural or bright artificial light helps reveal subtle flaws that might otherwise be missed.
Once you’ve pinpointed all the damage, the next step is to clean the fairings thoroughly. Contaminants such as dirt, grease, and oil are common on motorcycle plastics due to exposure to road grime and handling. These residues adversely affect the ability of adhesives, fillers, or paints to bond properly. Start by washing the panels with a mild detergent or degreaser, using soft cloths or sponges to avoid scratching the surface. Rinse with clean water and dry completely with a microfiber towel to prevent any residue or lint from contaminating the surface further.
Some stubborn grime embedded in textured or finely detailed areas may require the use of isopropyl alcohol or specialized plastic cleaners to ensure all oils and residues are removed. Remember, a clean surface is essential to achieving excellent adhesion during the repair and refinishing process.
With the fairings clean, prepare the damaged areas by lightly sanding them with fine-grit sandpaper—typically between 400 and 600 grit. This sanding smooths rough edges around cracks and scratches, removing any loose fragments that could compromise structural integrity or finish quality. The sanding also provides vital mechanical adhesion for fillers and paints to grip, preventing future delamination or peeling. After sanding, it’s important to remove any dust or debris using a tack cloth or an alcohol wipe, ensuring a completely dust-free surface before moving forward.
Structural reinforcement is necessary for cracks or breaks that compromise the fairing’s strength. In many cases, applying an epoxy resin patch behind the damaged area or using a fiberglass cloth saturated with resin will restore rigidity. For creative DIY reinforcement, small flattened pieces of copper pipe or similar thin metal glued inside the break can act as internal splints before filling gaps with epoxy putty or super glue. These reinforcements help distribute stress, reducing the risk of the crack reopening after repair.
Special care should be given to mounting holes, which are vulnerable points where pressure can cause further damage. When reinstalling, using rubber grommets around screws or bolts protects the plastic or fiberglass from cracking under compression. If mounting holes have become misaligned due to repair or damage, minor grinding or adjustment can restore proper fitment without exerting undue stress on the panels.
This entire cycle of inspection, cleaning, and preparation is vital for achieving lasting repairs. Following this methodical approach ensures that fillers and paints applied afterward adhere securely and look professional while restoring both form and function. Motorcycle fairings that have been thoroughly prepped help maintain the bike’s aerodynamics, protect internal components, and preserve aesthetic appeal.
For additional insights into detailed repair processes tailored to motorcycles, exploring resources such as instructional videos for popular models can offer practical guidance on removal, preparation, and finishing techniques.
To deepen your understanding of quality motorcycle fairing replacement and customization, consider visiting Summit Fairings’ expert resource offering an explore the best motorcycle fairings at Summit Fairings.
By adhering to this disciplined preparation routine, enthusiasts and technicians alike ensure that fairing repairs are not only durable but also visually seamless, prolonging the service life and attractiveness of the motorcycle.
External Resource Reference: https://blog.summitfairings.com/explore-the-best-motorcycle-fairings-at-summit-fairings/
Chapter 2: Material Repair Techniques for Motorcycle Fairings: Mastering the Essentials
1. The Crucial Role of Cleaning and Surface Preparation in Durable Fairing Repairs
The foundation for any successful motorcycle fairing repair lies in meticulous cleaning and surface preparation, indispensable steps that directly impact the bond strength of fillers and adhesives, as well as the final finish quality. Fairings, often made from plastics or composite materials, attract dirt, grease, oils, and residues from paint and rust, all of which hinder effective adhesion and compromise repair longevity if not thoroughly removed.
Before applying any filler or bonding agent, the damaged area must be cleaned with the right solvents or plastic-compatible cleaners that dissolve surface contaminants without damaging the substrate. This step involves precisely removing all traces of dirt, oil films, grease spots, old paint flakes, and even microscopic dust particles. Failing to do so results in weak bonds and visible imperfections after painting.
Following cleaning, the surface must be gently abraded with sandpaper to create a slightly roughened texture. This micro-roughness encourages mechanical adhesion by increasing the surface area and encouraging filler materials to grip the substrate effectively. Sanding also eliminates loose or delaminated fragments of the original material, which could otherwise cause cracks or peeling at the repair site. Typically, technicians use medium grit sandpaper first, then progress to finer grits to refine the surface ahead of filler application.
Crucially, all sanding debris must be completely removed, and the fairing surface allowed to dry thoroughly before moving forward. Residual dust or moisture undermines the bonding process, inviting failure. This preparation ensures that epoxy-based fillers and adhesives designed for plastic repair establish a cohesive and durable joint capable of enduring vibrations and environmental stresses inherent to motorcycle use.
This attention to preparation extends beyond the repair stage itself and plays a vital role in finishing techniques aimed at restoring the fairing’s visual appeal. Polishing and clear-coat applications demand a clean, debris-free surface for smooth, glossy results without blemishes or uneven texture. The same principles of cleaning and fine surface preparation apply during this phase, ensuring the color and gloss meet original or custom specifications.
The importance of cleaning and surface preparation in fairing repair cannot be overstated, as these tasks set the stage for every subsequent effort to restore strength and aesthetics to damaged panels. By dedicating time to these preliminary processes, repairers ensure that fillers, adhesives, and paint interact with the base material in an optimal environment, minimizing issues during curing and maximizing overall durability.
For those seeking detailed step-by-step guidance, manufacturers of plastic-specific epoxy repair kits provide comprehensive instructions emphasizing thorough cleaning and drying prior to mixing and applying repair compounds. Their insights reinforce that careful surface prep is the cornerstone of lasting repair success.
Beyond individual repairs, those interested in exploring replacement or aftermarket fairings might consider browsing specialized collections to compare options, styles, and fitment considerations that complement repair efforts or even avoid them through upgraded components. For more insights into high-quality fairing options, visit Summit Fairings’ blog to discover selections renowned for durability and aesthetics.
Ultimately, a thorough cleaning and precise surface preparation regimen elevates the entire repair process, marrying technical effectiveness with a polished final appearance—both essential for restoring motorcycle fairings to their full functional and visual potential.
For comprehensive cleaning and surface preparation instructions associated with plastic fairing repairs, the following resource offers valuable detail: https://jbweld.com/product/plasticweld-syringe
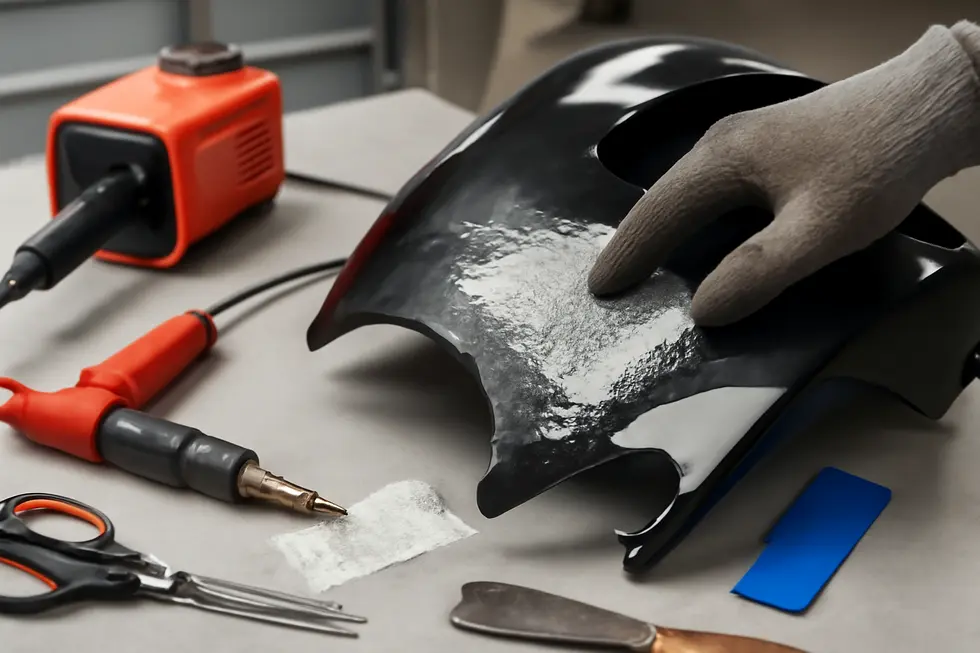
2. Mastering Plastic Welding and Fiberglass Crack Repair to Restore Motorcycle Fairings
Motorcycle fairings, often crafted from thermoplastic or fiberglass materials, require specialized repair processes to restore their strength and aesthetic appeal after cracks or breaks. Understanding how plastic welding and fiberglass crack repair work is essential to achieving durable, professional-quality results while maintaining the integrity of these vital components.
For thermoplastic fairings, plastic welding is a favored technique that fuses cracked areas by melting the plastic along the fracture line. This method uses a plastic welding kit or hot stapler that applies heat and inserts plastic staples or filler rods directly into the damaged zone. Before welding, it is crucial to meticulously clean the fairing surface to eliminate any contaminants such as dirt, grease, or old paint residues that could impede adhesion. Once clean, careful alignment of the cracked edges ensures the parts fit snugly, minimizing gaps and improving the weld’s effectiveness.
During welding, the applied heat melts the thermoplastic material at the crack, bonding the fragments as the filler rods or staples are embedded. These staples act as internal reinforcements, bridging the crack and restoring the fairing’s structural stability. The technique demands precision; excessive heat can deform surrounding areas, while insufficient heat may produce a weak bond. After the welding process, the fairing surface typically requires additional smoothing and sanding to eliminate unevenness caused by staples or melted material. This leads seamlessly into the final finishing steps involving primer application and repainting to match the motorcycle’s original color.
Fiberglass fairings, on the other hand, are repaired through a different but equally methodical process. Cracks in fiberglass require both cosmetic and structural remediation by reinforcing the damaged area from within. The initial step involves thorough cleaning and sanding around the crack to remove loose fibers and create an optimal bonding surface. Sanding also helps feather the edges of the crack, preventing sharp transitions that could cause future stress points.
Next, technicians apply fiberglass cloth or mat saturated with resin—either polyester or epoxy—to the interior side of the crack. This resin-impregnated fiberglass patch reinforces the area and rebuilds the fairing’s structural integrity. It is important to choose resin compatible with the fairing’s original material to ensure proper curing and adhesion. After the resin cures fully, sanding the patched area smooths out irregularities and prepares the surface for painting. Proper surface preparation here ensures the paint adheres well and blends invisibly with the surrounding fairing, returning the panel to its original visual appeal.
Both plastic welding and fiberglass repairs benefit greatly from meticulous cleaning and precise sanding before and after the repair. Removing dirt, old paint, and loose fragments is necessary for lasting bonds and flawless finishes. Sanding, starting from a coarse grit and progressing to finer papers, ensures surfaces are perfectly smooth for primer and paint applications. Ultimately, repainting involves matching factory colors and applying multiple clear coats, often with wet sanding between layers to eliminate imperfections like runs or dust nibs, delivering a seamless finish.
When repairs are executed properly, the fairings regain strength and appearance, extending the life of the motorcycle’s exterior components. However, in cases of severe damage where welding or fiberglass patching cannot restore full functionality or aesthetics, investing in OEM or custom fairing kits offers a reliable alternative. These kits provide original-fit panels designed to maintain structural safety and factory-accurate looks, enabling riders to fully renew their bike’s appearance.
For those interested in visual demonstrations and further detailed guidance, instructional resources showcasing the fiberglass repair process are valuable. One such detailed walkthrough covers the use of fiberglass cloth and resin techniques effectively in motorcycle fairing restoration and can be found here: https://www.youtube.com/watch?v=pwe0hqwAosM.
Mastering the art of plastic welding and fiberglass crack repair is a cornerstone of material repair techniques that protect and preserve the appearance and durability of motorcycle fairings. With careful preparation, precise application, and skillful finishing, riders can confidently restore their fairings to roadworthy and showroom condition.
For more insights into affordable and quality fairings, exploring options from specialized suppliers can complement repair efforts and upgrades—an excellent resource to explore is Summit Fairings’ comprehensive selection at Discover Affordable Motorcycle Fairings at Summit Fairings.
3. Mastering Sanding and Surface Preparation for Flawless Motorcycle Fairing Repairs
Sanding and surface preparation are pivotal steps in repairing motorcycle fairings, directly influencing the final appearance and durability of the repair. Achieving a seamless finish requires a careful balance of technique, tools, and patience to ensure that every scratch, dent, or crack is transformed into a smooth, ready-to-paint surface that matches the original factory quality.
The process begins once any cracks or gouges have been filled with specialized body fillers or resin-based compounds. At this stage, sanding is essential to level the surface, removing excess filler and shaping it to blend perfectly with the surrounding fairing. Typically, sanding starts with fine grit sandpapers, usually between 1500 and 2000 grit, which allow for controlled material removal without aggressive abrasion. Sanding should follow the grain or direction of existing scratches to minimize cross-scratch marks that could show through the paint. Gentle, consistent pressure ensures that the filler is sanded flat without digging into the underlying plastic or fiberglass.
After the initial smoothing, the area is ready for priming, which seals the surface and improves paint adhesion. Primer application further reveals any imperfections, allowing for additional light sanding to perfect the surface contour. This iterative approach of sanding and priming is crucial in building a flawless base.
Once primed, base coat paint corresponding to the motorcycle’s original color is applied with care. Achieving a uniform, even coating often involves multiple light layers, ensuring that the paint doesn’t pool or run. After the paint cures, a vital step in attaining a professional finish is wet sanding using very fine grit sandpaper, often 2000 grit or higher. Wet sanding lubricates the surface, dramatically reducing airborne dust and heat generated by friction. This technique smooths out tiny inconsistencies, blending the new paint with adjacent areas to avoid visible edges or “orange peel” texture.
Following sanding, clear coats are applied to protect the paint and restore the fairing’s glossy finish. Clear coats add depth and enhance resistance to weathering and minor abrasions. Between clear coat layers, careful wet sanding can eliminate imperfections such as runs or dust nibs, reinforcing the smoothness and sheen.
Polishing the cured clear coat with a fine polishing compound further elevates the surface quality. Polishing removes microscopic scratches and refines gloss, creating a mirror-like shine that mirrors the fairing’s original appearance. The final touch involves applying a protective wax or sealant that preserves the freshly restored surface against UV rays and environmental contaminants.
A few practical tips ensure success throughout these steps. Sanding strokes should be small, about 3 mm for delicate finishing, to avoid sanding through clear coats or base paints. Larger, broader strokes can quickly remove paint but increase risk of damage. Masking adjacent parts protects areas from unintended sanding or paint overspray. Proper blending during sanding and painting conceals repair zones, making scratches and filler virtually invisible and restoring uniformity.
Hands-on guides can greatly assist in mastering these techniques. Visual demonstrations outlining sanding pressures, grit progression, and finishing methods are valuable learning tools. For example, this motorcycle fairing repair tutorial offers a clear walkthrough of sanding, painting, and polishing, illustrating how to achieve panel-perfect results.
Incorporating these sanding and surface smoothing techniques within the broader repair workflow is essential to restoring both the aesthetic and structural integrity of motorcycle fairings. By committing to each stage with care, enthusiasts and professionals alike can deliver repairs that not only look factory-fresh but endure the rigors of riding. More tips on motorcycle fairings and related repair essentials are available through exploring the best motorcycle fairings at Summit Fairings, a comprehensive resource for parts and advice.
This meticulous approach to sanding and finishing ensures that repaired fairings regain their original smoothness, gloss, and protective qualities, forming the foundation for a high-quality, long-lasting restoration.
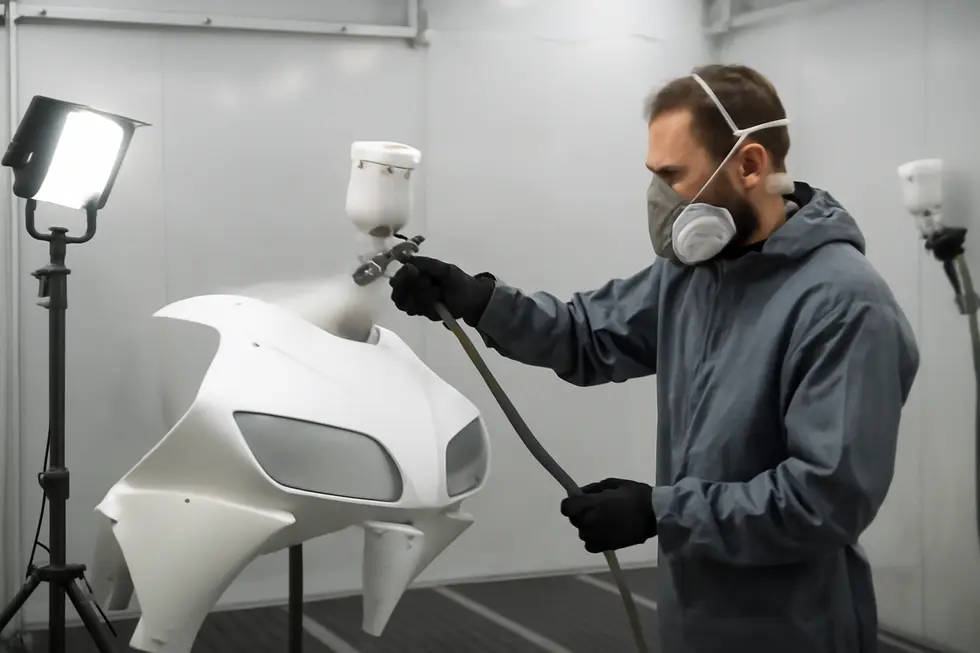
4. Mastering Repainting and Finishing to Restore Motorcycle Fairing Integrity and Aesthetics
The final steps in repairing motorcycle fairings—repainting and finishing—are pivotal for both restoring the fairing’s visual appeal and ensuring lasting protection against environmental stresses. These stages require careful attention to detail, rigorous surface preparation, and precise application techniques to rejuvenate the damaged areas effectively.
Repainting begins with thorough cleaning and meticulous sanding of the repaired surface. Removing grease, dirt, and residual contaminants is essential to promote proper paint adhesion. Following this, sanding smooths out imperfections and creates an even texture, crucial for a uniform paint application. Minor scratches can often be polished out with fine abrasives, while deeper gouges demand filling with plastic-compatible fillers. Once the filler cures, a progressive sanding regimen—from coarser to super fine grits—ensures the surface is perfectly flush and ready to receive paint.
Masking adjacent regions with precision tape protects undamaged panels from overspray, preserving the bike’s overall finish. This step requires patience to cover edges and complex curves thoroughly, especially around mounting points and intricate fairing designs.
Applying the paint itself involves layering to build a durable and attractive finish. The process begins with a primer coat that enhances adhesion and smooths out subtle surface inconsistencies, creating a solid foundation. Next, the base coat—matched precisely to the original color—is applied with controlled, even strokes, often using an airbrush or spray system to avoid runs and orange peel texture. Multiple thin coats are preferable to a single thick one, each layer allowed to flash off properly before the next.
The finishing touch is the clear coat, which seals in the color and provides resistance against UV rays, weather, and abrasion. This transparent layer adds depth and gloss, vital for restoring the fairing’s showroom shine. Applying several clear coats with adequate drying intervals builds up a robust barrier. Careful curing under recommended conditions maximizes hardness and clarity.
After the paint dries fully, post-paint correction techniques refine the surface to a professional standard. Wet sanding with increasingly fine grit papers removes minor flaws such as dust nibs or subtle orange peel effects, resulting in a silky smooth finish. Subsequent multi-stage polishing and buffing restore gloss and reveal a mirror-like shine. This stage demands patience and the right products; too aggressive a technique can dull or damage the finish, while too light an approach leaves imperfections untreated.
Attention to detail throughout repainting not only reestablishes the motorcycle’s aesthetic cohesion but also reinforces the fairing’s protective function, preventing premature wear caused by environmental factors. The durability and visual quality achieved impact the motorcycle’s overall appearance, often reflecting the owner’s pride and care.
For enthusiasts seeking hands-on guidance, numerous video tutorials demonstrate these repainting and finishing techniques on various motorcycle models. Visual resources covering scratch repair, paint layering, and clear coat application can accelerate learning and improve outcomes.
Carefully integrating these repainting and finishing methods with prior repair steps—such as cleaning, sanding, and structural patching—ensures a harmonious restoration that maintains both the strength and look of the original fairing. For further reading on selecting quality parts and complementary repair advice, visiting Summit Fairings’ blog on exploring the best motorcycle fairings provides valuable insights.
An excellent external resource demonstrating comprehensive paint correction and finishing techniques can be found in the video titled DIY Paint Correction Guide: Professional Techniques.
This final phase of repair demands patience and precision but ultimately ensures the motorcycle fairings return to their optimal appearance and performance, preserving the bike’s character and extending the life of the investment.
5. Restoring Metal Fenders: Essential Dent Removal Techniques for Motorcycle Repairs
When addressing motorcycle repairs, understanding the distinct material characteristics is vital, especially when comparing metal fender dent removal with fairing repairs. Metal fenders, typically crafted from steel or aluminum, demand a fundamentally different approach than the plastic or fiberglass composite materials common in motorcycle fairings. Repairing dents in these metal components focuses on reshaping the damaged area to restore structural integrity and visual smoothness without necessarily repainting. This process hinges on a combination of precision tools, material knowledge, and methodical techniques.
A widely practiced and highly effective method is Paintless Dent Repair (PDR). PDR works by carefully manipulating the metal from behind the dent, gradually coaxing it back into its original form without disturbing the existing paint finish. This technique preserves the factory coating, maintaining the aesthetic appeal while avoiding costly repainting. It is especially well-suited for smaller dents and shallow creases, where the metal has not been excessively stretched or cracked. Skilled technicians employ specialized rods and levers to access the backside of the fender, exerting delicate pressure to reverse the deformations. The finesse in this technique lies in recognizing the metal’s natural limits and working with its elasticity rather than forcing it.
Traditional metalworking methods remain a cornerstone in metal dent repair for motorcycle fenders. Utilizing body hammers, dollies, and other shaping tools, repairers tap and massage the metal surface from the backside, gradually re-establishing original contours. This mechanical process requires a stable backing surface that matches the fender’s curvature, providing crucial support against which dents can be reversed effectively. Before beginning any tapping or shaping, the area must be meticulously cleaned to remove grease, dirt, and debris. A contaminant-free surface reveals precise dent boundaries and facilitates accurate manipulation. This attention to cleanliness ensures neither the tools nor the metal surface introduce further imperfections.
Material differences influence the repair techniques and precautions. Aluminum fenders, known for their lighter weight and corrosion resistance, pose unique challenges due to their tendency to work-harden when manipulated. This means the metal becomes less ductile and more brittle if not carefully handled. Repairers often use controlled temperature adjustments and delicate tapping to avoid cracking or over-hardening the aluminum. Conversely, steel fenders generally offer greater elasticity, permitting more robust hammering techniques with less risk of damage. However, in the case of high-strength steels, localized heating may be required to soften the metal enough for reshaping. Recognizing these material properties is essential to select the right tools and avoid compromising the fender’s integrity.
While these metal fender dent removal processes focus on restoring original shapes without repainting, comprehensive repairs may sometimes necessitate additional finishing steps, such as light sanding or touch-up painting, especially if the paint has been scratched or chipped during impact. Nonetheless, the fundamental goal remains to maintain the original paintwork intact as much as possible, preserving factory finishes and value.
In contrast, motorcycle fairings, predominantly composed of plastic or fiberglass, require repair methods centering on filling, bonding, and refinishing rather than reshaping. Techniques for fairing repair include plastic welding, epoxy bonding, filler application, and successive sanding to achieve a smooth finish ready for repainting. Unlike metal dent repair, manipulating these materials by bending or hammering is ineffective and risks further damage. Repair success thus depends on correct preparation, appropriate filler or adhesive use, and expert refinishing rather than metal shaping.
For motorcycle enthusiasts who aim to understand both metal and plastic repair disciplines, recognizing these material distinctions is crucial. Properly identifying when a dent can be addressed through paintless dent removal or metalworking tools, versus when plastic welding and filling are required, ensures efficient and lasting restoration results.
For practical insight into metal fender dent removal, a detailed visual demonstration can be invaluable. This external resource offers a step-by-step guide illustrating how body hammers, dollies, and PDR tools interact to restore a motorcycle’s fender seamlessly: Metal Fender Dent Removal Video Guide.
For more detailed information on motorcycle fairings and their repair, exploring the Explore the Best Motorcycle Fairings at Summit Fairings page provides useful insights into materials and options that influence repair approaches.
Chapter 3: Finishing and Reinstalling Steps in How to Repair Motorcycle Fairings
1. Mastering Precise Alignment and Secure Mounting of Motorcycle Fairing Shells
Achieving a flawless finish and lasting durability in motorcycle fairing repairs depends heavily on how well the fairing shells are aligned and secured during the finishing and reinstalling phase. This step requires patience and precision to ensure that every panel fits snugly without stress, gaps, or misalignment that can compromise both appearance and structural integrity.
The process begins by fully preparing the motorcycle and the repaired fairings for reinstallation. After carefully removing the fairings originally, keep all bolts, screws, and small parts organized on a soft non-scratch surface to prevent loss or damage during handling. Before attaching anything back to the frame, closely inspect the motorcycle’s mounting points for wear or deformation. It is crucial to verify that the holes and brackets on the frame perfectly match the fairings’ mounting locations. If any adjustments or drilling are needed, address them at this stage before moving forward.
When refitting, start by loosely mounting the attachment brackets to the motorcycle frame. Tightening bolts only loosely at first allows room for fine-tuning the positioning of the fairing shells. Next, place the fairing panels onto these brackets, using built-in guides such as grooves, tabs, or slots designed to aid proper positioning. This native alignment hardware helps ensure the shells locate naturally and reduces the risk of forced fitting that might damage the plastic or fiberglass.
With the fairings installed loosely, begin adjusting the brackets and shells carefully so that adjoining edges of panels come together with even, flush joins. It is essential here to avoid any tension or warping—tight fitting is good, but forced misalignment can lead to cracks or stress fractures over time. Check the interaction between fairings and rigid motorcycle components such as the frame, headlight assemblies, and air ducts to guarantee no interference occurs. Each panel should contour closely to its adjacent parts, maintaining continuous lines that replicate the original factory fit.
Fine-tuning is an iterative process. Incrementally loosen or tighten fasteners on the brackets while focusing on achieving uniform gaps and proper panel orientation. This balancing act demands careful visual inspection and gentle manipulation. The goal is a seamless, professional finish where all pieces align without gaps, overlaps, or uneven spacing. The patience invested here pays off by preventing future issues such as vibration-induced cracking or fastener loosening.
Once the fairing shells’ alignment is finalized, it is time to securely fasten all mounting hardware. Fully tighten every bolt, nut, and screw holding both the brackets and the fairing panels directly. Employing washers or rubber grommets at fastening points is highly recommended since they distribute pressure and reduce vibration transmission. This precaution helps preserve the fairings’ structural integrity and extends their lifespan, especially when riding on uneven surfaces.
Additionally, reattach any supplementary components integrated with the fairings, such as mirrors, air ducts, or headlights. Confirm these parts sit correctly and are firmly fastened without restricting their function or blocking airflow. Their alignment is as vital as that of the main body panels, contributing to the overall aesthetic harmony and operational safety.
Before completing the reinstall, perform a detailed final inspection. Check the solidity of all installed pieces to ensure no looseness exists. Verify that the fairings do not interfere with the steering range, suspension travel, or other essential motorcycle functions. An initial short test ride is wise, followed by a recheck of fasteners to confirm none have shifted or loosened due to vibration.
Careful, methodical attention to these aligning and securing steps transforms a repaired fairing from a simple patched panel into a professional-quality restoration. This approach not only restores the motorcycle’s visual appeal but also guarantees the repaired fairings endure the rigors of riding with confidence and safety.
For enthusiasts seeking additional resources on fairing fitment and installation, exploring detailed guides from specialty sources can offer in-depth tips and model-specific insights. This ensures the best practices are applied tailored to your motorcycle’s unique design. One such comprehensive resource can be found at Explore the Best Motorcycle Fairings at Summit Fairings, which provides valuable information on selection and installation techniques.
Properly mastering the alignment and securing of the fairing shells concludes the critical finishing and reinstalling phase, setting the stage for flawless performance and a visually impressive result.
2. Ensuring Flawless Fit: Detecting and Adjusting Interference during Fairing Reinstallation
A critical phase in the finishing and reinstalling steps of repairing motorcycle fairings is to carefully check for interference and make necessary adjustments. This step ensures the repaired components fit perfectly without causing stress or damage to the fairing or other parts of the motorcycle. Even the most expertly repaired fairing will fail to perform well if fitment issues are overlooked during reassembly.
This process begins with a dry fit of the repaired fairings, which allows you to identify any areas where the pieces might not align smoothly. The purpose of dry fitting is to loosely position each panel without tightening any screws or clips. This trial assembly reveals any mounting points that do not line up as intended or cause the panel to bind against neighboring components such as the frame, wiring harnesses, fuel tank, or suspension parts. Detecting tight spots or rubbing areas early prevents damaging the fairing during the final reinstall.
Common causes of interference include slight warping due to repair filler application, minor dimension changes from sanding, or trimming foam inserts and mounting tabs that have become misaligned. If any of these issues appear, minor adjustments like trimming excess material from foam inserts or smoothing rough edges on clip mounts often resolve the problem. The goal is to achieve a precise fit where the fairing slides easily into place and all mounting holes align naturally. Avoid any forced installation, as this can introduce new cracks or deformities.
Another important consideration is the placement and condition of fastening hardware. Screws, bolts, and clips should be inspected for wear or damage and replaced if necessary to ensure a secure hold. When reinstalling, fasteners must be tightened evenly and to the proper torque—not too loose to cause rattling, but never overtightened to avoid plastic stress fractures. Using rubber grommets or washers where appropriate helps distribute pressure evenly and reduces the risk of cracking fragile plastics.
Meticulous attention during fitting is exemplified on detailed repair projects, such as those involving complex multi-panel fairings on sportbikes. For example, reassembling a Honda VFR750F after repairs requires repeatedly checking that all panels, including side lower and front fairings, fit without restricting access to the airbox or fuel tank. Adjustments to foam spacers or clip positioning are often necessary to ensure these panels settle properly without interference. This practice not only improves the visual finish but maintains the functionality of underlying components.
A stepwise approach towards reinstalling helps avoid errors that cause misalignment or recurring damage. After the initial dry fit, loosely fasten clips and screws in sequence, continuously checking alignment as you proceed. Gradually tighten hardware, frequently verifying that no part is under strain or being forced out of position. It’s advisable to keep track of all fastener locations and types throughout the process, referencing notes or photos taken during disassembly to avoid mixing incompatible parts that could create undue stress.
This detailed regimen of inspection, testing, and trimming is comparable to precision fits seen in other high-accuracy repair work, such as aircraft gear fairing panels where foam inserts were reshaped to allow a perfect mating surface. Likewise, in motorcycles, subtle adjustments ensure the repaired fairing not only looks original but also performs considering the dynamic forces it encounters during riding.
For those interested in diving deeper into comprehensive motorcycle fairing repair and fitting workflows, resources demonstrating the step-by-step procedures on popular models provide invaluable guidance. Such materials emphasize the importance of thorough finish inspections and incremental adjustments to achieve polished, durable results.
By integrating these careful checks during the finishing and reinstalling phase, you secure a smooth reintegration of repaired fairings that honors both aesthetic standards and mechanical integrity. This meticulous attention minimizes future repair needs and preserves the motorcycle’s overall performance and appearance.
Explore further detailed guidance and a wide range of fairing options at Discover Affordable Motorcycle Fairings at Summit Fairings, your trusted resource for quality parts and expert tips.
3. Secure Attachment Techniques and Protective Measures for Durable Fairing Reinstallation
Attaching additional components to motorcycle fairings during the finishing and reinstalling stage demands a careful balance between secure fastening and protecting both the fairings and the motorcycle’s underlying framework. This phase extends beyond merely positioning parts; it requires thoughtful preparation and the use of specific techniques to prevent damage, ensure alignment, and enhance durability.
The process begins with preparing the mounting surfaces and attachment points. These areas must be meticulously cleaned to remove grease, dirt, or residues that could hinder proper fitting or lead to corrosion. For attachment points on foam or flexible fairing sections, gentle reshaping may be necessary to ensure components fit snugly without excessive force. Forcing parts into place risks cracking brittle plastic or deforming cushioning materials, which can compromise structural integrity and appearance. Protective wraps or tapes—commonly thin plastic films or electrical tape—are often applied around fittings to shield delicate finishes and prevent scratches during installation. Such protective coverings serve as barriers against abrasion that can occur when handling or aligning components.
A key consideration is the order of reinstallation. Whenever possible, strategically positioning the fairings before assembling related mechanical elements such as axles, brake systems, or wheels eases installation. Installing fairings first reduces the chance of stress or misalignment caused by trying to maneuver bulky mechanical parts around already fixed panels. This approach also minimizes the risk of accidental impact damage to the fairing surfaces.
Material choice significantly influences the success of attachment and long-term resilience. Replacement or repaired fairings made from impact-resistant materials like 4mm ABS plastic provide better durability against mechanical stresses encountered both during installation and in daily riding. Such materials resist cracking and flexing, which helps maintain precise mounting and visual appeal over time.
When reinstalling hardware such as bolts, screws, and plugs, attention to torque and positioning is critical. Fasteners should be tightened securely to prevent loosening but not overtightened, as excessive force can cause stress fractures in plastic fairings or strip mounting threads. Using rubber grommets or washers between bolts and mounting surfaces distributes pressure evenly and cushions against vibration, enhancing both attachment strength and component longevity.
Adding protective accessories like frame sliders can further safeguard fairings. These devices absorb impact energy in case of falls or low-speed crashes, preventing direct blows to fairings or the motorcycle frame. Integrating such protective elements during the reinstalling phase complements the repair work by reducing the likelihood of recurrent damage.
Throughout this phase, patience and precision are essential. Careful alignment and gradual tightening prevent undue strain, while consistent use of protective measures shields surfaces from incidental abrasions. These combined practices help transform repaired fairings into sturdy, visually cohesive components that withstand road vibrations and environmental stresses.
For those seeking practical insight, examples of gear fairing installation demonstrate the effectiveness of protective plastic wrapping and foam reshaping to achieve flawless fitting. Observing assembly procedures that prioritize snug but gentle fastening—similar to oil change finishing steps where components must be securely but carefully reinstalled—reinforces the importance of technique over force.
By embracing these secure attachment techniques and protective steps, the finishing and reinstalling phase not only restores motorcycle fairings effectively but also ensures their longevity and rider confidence.
For an in-depth look at a comprehensive collection of durable and affordable motorcycle fairings that facilitate such repair and installation efforts, refer to this extensive resource on affordable motorcycle fairings.
Additionally, for guidance on applying protective wrapping and fitting adjustments during component installation, various external tutorials, such as gear fairing fitting walkthroughs, offer practical visual aid and detailed instruction.
4. Mastering Fitment Adjustments: Achieving Seamless Alignment During Motorcycle Fairing Reinstallation
When it comes to restoring a motorcycle’s fairings after repair, the final stages of finishing and reinstalling are crucial for both durability and aesthetics. Central to this phase is the art of modifying and adjusting fitment—a careful, deliberate process that ensures repaired panels align perfectly, maintain structural integrity, and avoid stress points that can lead to future damage.
Starting with test fitting, each fairing component should be mounted loosely to assess how well it matches with mounting points and neighboring panels. This preliminary step is essential because it reveals any misalignments or undesired gaps before fasteners are tightened permanently. Test fitting also helps detect if any underlying hoses, cables, or mechanical parts could be pinched or obstructed by the refitted panels.
Once the loosely fitted parts are in place, the next step involves fine-tuning their shape and position. Minor modifications may include gently sanding edges where panels meet to eliminate high spots or roughness that inhibit flush contact. Trimming tabs or small sections of plastic may also be necessary to accommodate slight warping caused by previous damage or repair processes. In some cases, carefully bending mounting brackets can bring panels into better alignment, but this should be done incrementally to avoid inadvertent damage.
Fasteners, such as screws and clips, should initially be inserted without full tightness. Keeping them loose enables slight adjustments during alignment checks, ensuring panels fit without distortion. Gradual tightening in a balanced sequence prevents warping—tightening screws on opposite sides alternately to distribute pressure evenly. This measured approach helps maintain the panel’s original contours and prevents stress concentration points that could trigger cracks in the future.
Simultaneously, attention must be given to internal components concealed beneath the fairings. Proper routing and clearance of cables, hoses, and electrical connectors are necessary to avoid pinching or rubbing, which can cause mechanical failure or safety hazards. Taking the time to verify these details during fitment adjustments saves effort and frustration later.
For example, when reinstalling side rear fairings on models like the Ninja 650, mechanics often follow a specific sequence: first, remove screws in a set order, then loosely refit the panels, making small positional tweaks until alignment is perfect. Only after confirming correct fit and ensuring no interference with surrounding parts are all fasteners tightened progressively. This technique minimizes the risk of uneven stress and preserves the longevity of repairs.
Analogous principles apply throughout motorcycle bodywork reinstallation. Just as a brake caliper must be loosened and realigned to avoid rotor rub, fairing panels require this gentle iterative adjustment to accommodate subtle variances and repaired imperfections. The goal is a blend of precision and flexibility, allowing the fairings to return to their original functional and visual form.
Overall, the process of modifying and adjusting fitment during finishing and reinstalling demands patience and a keen eye for detail. Rushing this stage or forcing parts into place often leads to misalignment, stress fractures, or compromised aesthetics. Instead, embracing measured, controlled adjustments ensures a professional finish and durable outcome that withstands both vibrations and the rigors of riding.
For enthusiasts seeking further guidance on quality fairing options and installation techniques, exploring resources like affordable motorcycle fairings at Summit Fairings can provide valuable insights and materials to complement repair efforts.
Adhering to this meticulous approach to fitment adjustment lays a solid foundation for subsequent inspection, cleaning, and surface preparation, ultimately contributing to a flawless, lasting motorcycle fairing restoration.
5. Mastering Fastening Techniques to Safeguard and Secure Repaired Motorcycle Fairings
Proper fastening is the final yet crucial stage in the process of repairing and reinstalling motorcycle fairings. Getting it right ensures that the fairings stay securely in place without compromising their structural integrity or aesthetic appeal. This delicate balance hinges on thoughtful alignment, careful pressure distribution, and controlled tightening to prevent any new damage from occurring in what is often the most vulnerable moment of the repair cycle.
When beginning the fastening process, avoid the common pitfall of fully tightening bolts and screws at once. Instead, fasteners and mounting brackets should initially be attached loosely. This approach allows for fine adjustments in positioning and alignment, ensuring that each fairing piece fits flawlessly with minimal stress. Fairings typically have grooves, slots, or tabs specifically designed for precise placement; taking the time to carefully locate and nest these features together helps avoid forced fits that can lead to cracks or fractures later on.
Equally important is the use of washers or rubber grommets beneath bolts and screws. These components serve a dual purpose: they disperse the pressure applied by the fasteners evenly across a wider area of the fairing material and absorb vibrations generated by motorcycle operation. Without these cushioning elements, localized pressure from the fastener heads or nuts can cause deformation, hairline cracks, or even complete breaks in the fairings, especially when dealing with flexible or composite plastics.
After securing the fairing components loosely and positioning them precisely, the tightening phase should be gradual and even. Fasteners must be tightened in a stepped sequence, alternating across multiple points when applicable, to prevent uneven stress concentrations. Uneven pressure can warp panels or strain mounting brackets beyond their limits, compromising both fit and durability.
Special care should be taken to avoid overtightening screws or bolts, particularly those threading into plastic inserts or mounts. Over-torquing can strip threads or embed excessive stress into the plastic, leading to cracks that often manifest only after a few rides. A properly calibrated torque wrench or a careful hand feel is recommended to apply steady, firm pressure without risking damage. If cross-threading occurs during fastening, resist the temptation to force the bolt. Instead, repair the thread or replace the damaged fastener to preserve the mounting points.
The correct choice of tools is also integral to damage prevention. Utilizing screwdrivers, hex keys, and wrenches that fit the fasteners precisely reduces slippage and wear both on the fastener heads and the fairing surface. Avoiding worn or ill-fitting tools minimizes the chance of stripping screws or gouging the fairing finish.
Once all fasteners are uniformly tightened, it is essential to perform a functional check before declaring the repair complete. Confirm that the fairings do not interfere with the motorcycle’s steering range, suspension movement, or any control mechanisms. Furthermore, verify that no bolts or screws remain loose, but also that none are so tight as to distort the mounting points. This balance supports long-term durability and rider safety.
In cases where repairs involve replacement brackets or aftermarket parts, matching original mounting hardware guidelines and torque specifications is critical. Deviations can cause fitment issues or accelerated wear at attachment points.
For enthusiasts eager to see these fastening techniques in practice, detailed instructional resources focusing on motorcycles like the Honda VFR750 provide invaluable visual guidance from loosening original fasteners to final tightening sequences. Such materials complement written instructions by illustrating alignment nuances and tool use.
Employing these fastening strategies not only safeguards the repaired fairings from damage but also preserves their visual appeal and ensures a secure fit that withstands road vibrations and stresses. By emphasizing alignment, gradual tightening, pressure distribution through grommets or washers, and the right tool choice, you complete the repair cycle with confidence that your motorcycle fairings will perform reliably and look impeccable.
For further insights on quality parts and fitting, exploring options from reputable suppliers can enrich your repair toolkit. See more about exploring the best motorcycle fairings at Summit Fairings for a wide range of components compatible with your repairs.
(For detailed video guidance on installation and fastening techniques, see the Ride or Die YouTube tutorial on fairing installation.)
Final thoughts
Mastering motorcycle fairing repairs is a strategic asset for business owners in the motorcycle industry, combining technical skills with attention to detail across removal, material restoration, and finishing phases. Each stage—from precise removal and thorough preparation, through effective material repair techniques, to expert finishing and thoughtful reinstallation—contributes to producing durable, visually flawless results. Implementing these processes improves operational efficiency and customer satisfaction, empowering your business to stand out in a competitive market. Consistent application of these best practices assures clients of quality and builds trust, paving the way for sustained growth and success in motorcycle repair and customization.
Ready to elevate your ride? Summit Fairings delivers premium, custom-fit fairings that blend style and durability. Whether you’re chasing speed or turning heads, we’ve got your bike covered. Don’t wait—transform your machine today. Click, customize, and ride with confidence. Your perfect fairing is just a few clicks away. Act now!
About us
undefined