Introduction
Motorcycle fairings are essential not only for aerodynamics but also for the visual allure of a bike. For business owners in the motorcycle industry, understanding how to effectively repair scratched fairings can significantly elevate the quality and appeal of their service offering. From meticulous cleaning and surface preparation to advanced painting and finishing techniques, and even complex repair or replacement options, each phase plays a crucial role in restoring fairings to their original condition. This guide walks through the key stages of repairing scratched motorcycle fairings, empowering you to enhance your service capabilities, improve customer satisfaction, and increase operational efficiency.
Tables of Contents
Chapter 1: Cleaning and Surface Preparation for How to Repair Scratched Motorcycle Fairings
- Mastering Thorough Cleaning Techniques to Optimize Surface Preparation for Motorcycle Fairing Repairs
- Mastering Surface Smoothing and Masking Techniques to Perfectly Prepare Scratched Motorcycle Fairings
Chapter 2: Painting and Finishing Techniques for How to Repair Scratched Motorcycle Fairings
- Mastering Surface Preparation and Priming for Flawless Motorcycle Fairing Repairs
- Mastering Paint Application and Protective Finishes to Restore Motorcycle Fairings
Chapter 3: Advanced Repair and Replacement Options for How to Repair Scratched Motorcycle Fairings
- Mastering Advanced Repair Techniques to Restore and Reinforce Motorcycle Fairings
- Strategic Approaches to Repairing and Replacing Damaged Motorcycle Fairings
Chapter 1: Cleaning and Surface Preparation for How to Repair Scratched Motorcycle Fairings
1. Mastering Thorough Cleaning Techniques to Optimize Surface Preparation for Motorcycle Fairing Repairs
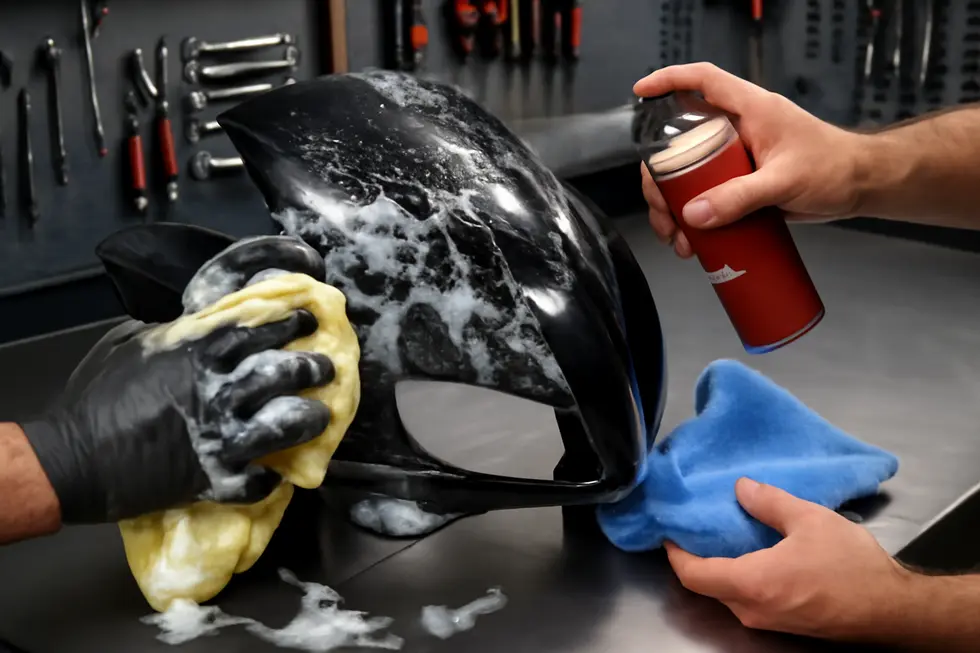
Preparing scratched motorcycle fairings for repair begins with an essential, meticulous cleaning process that lays the foundation for a durable and visually seamless restoration. Effective cleaning removes all dirt, grease, and microscopic debris that could inhibit proper adhesion of primers, paints, or protective coatings—ensuring a lasting finish.
Start by washing the damaged area using a mild detergent or a specialized degreaser diluted in water. Apply this mixture with a soft cloth or sponge to lift away surface contaminants gently. Avoid harsh solvents or abrasive cleaners, as these can damage the plastic fairing material or cause discoloration. For plastic surfaces, dedicated plastic-friendly cleaners or restorers can be beneficial for preserving the integrity of the fairing while removing oils and residues more effectively.
Once the surface is visibly clean, rinsing thoroughly with fresh water prevents any soap residues from remaining, which can interfere with further steps. After drying, proceed with light wet sanding using fine-grit sandpaper, generally between 600 and 800 grit, to create a slightly roughened texture around the scratch. Wet sanding, lubricated with soapy water, reduces friction-induced heat and minimizes the risk of further damage. This subtle abrasion helps smooth rough edges and promotes better bonding for primers or fillers applied later in the repair.
It is crucial to remove all sanding residue, as any dust or particles left on the surface can cause imperfections under paint or clear coats. Wiping the area gently with a wax and grease remover after sanding effectively eliminates these contaminants, leaving the surface ready to receive primer or filler treatments. Masking off areas adjacent to the repair site is an important precautionary measure during preparation. Using quality masking tape and paper, cover parts like the engine, handlebars, and frame to avoid any overspray or accidental damage to these components during subsequent painting or sealing steps.
When scratches are deep enough to expose underlying layers or cause surface depressions, filling these with appropriate plastic fillers restores the evenness and structural integrity of the fairing. After the filler dries and is sanded to a smooth finish, cleaning the area again ensures a pristine base for painting. Throughout this process, gentle polishing with plastic-safe compounds after completing repairs revives the original gloss and helps blend the fixed area seamlessly with the surrounding surface.
Adhering to these precise cleaning and preparation steps dramatically enhances the effectiveness of paint adhesion and the durability of the repaired area. For enthusiasts seeking professional-grade protection beyond repair, applying ceramic coatings post-polishing can provide a resilient, glossy finish that guards against environmental damage and future scratches. These coatings require scrupulous cleaning and paint decontamination beforehand, underscoring the critical role of thorough surface preparation.
For additional expert guidance on motorcycle fairing maintenance and repairs, refer to trusted industry resources like the Summit Fairings blog, which offers extensive tips and detailed techniques to help ensure quality outcomes and prolong the life of your motorcycle’s bodywork.
2. Mastering Surface Smoothing and Masking Techniques to Perfectly Prepare Scratched Motorcycle Fairings
Achieving a flawless repair on scratched motorcycle fairings begins with meticulous surface smoothing and strategic masking. These steps are essential not only for restoring the fairing’s aesthetic appeal but also for ensuring the longevity and durability of the repair.
The process initiates with a thorough cleaning regimen to eliminate any dirt, grease, or contaminants that may compromise adhesion of subsequent materials. Using gentle soap solutions or mild cleaners protects the delicate plastic surfaces of the fairing while providing a clean foundation. This cleansing is critical because even minor residues can cause paint or filler to peel or flake prematurely, undermining the entire repair effort.
Once the surface is pristine, sanding becomes the primary tool for smoothing out scratches and defining an even working area. Starting with a coarser grit, typically around 180, helps to gently smooth the rough edges of the scratch without aggressively stripping the fairing. Progressing gradually to finer grits, such as 240 or 320, refines the texture, creating a subtly uniform surface ideal for applying filler and primer. This gradual sanding progression prevents excessive material removal that could distort the fairing’s contours and guarantees a seamless transition between the repaired patch and surrounding areas.
For scratches that extend deeply into the fairing material, filling is indispensable. Application of suitable fillers, like glazing or spot putty, fills gouges to reestablish the original surface profile. After the filler cures fully, it must be carefully sanded flush with the surrounding fairing to maintain the smooth, continuous surface essential for a flawless finish. In this phase, precision is paramount, as uneven filler can cause visible imperfections after painting.
Masking is the often overlooked yet vital companion to sanding and filling. Before primer or paint application, precise masking isolates the repair zone and shields adjacent surfaces from overspray and dust. Utilizing automotive-grade masking tapes with paper or plastic sheeting permits sharp, well-defined edges and protects delicate areas from accidental damage. Proper masking ensures the repaired segment integrates naturally without unwanted paint borders or texture mismatches, contributing to a professional-quality outcome.
Following smoothing and masking, applying a high-build primer plays a pivotal role. Multiple layers of primer gradually level the surface further, hiding minute sanding marks and creating an ideal bonding substrate for the paint. This primer layer also reinforces protection by preventing further damage such as cracking or moisture intrusion beneath the paint.
These integrated techniques—careful cleaning, controlled sanding progression, skillful filling, and precise masking—are the backbone of preparing scratched motorcycle fairings for repair. They enable the final paint and clear coat to adhere optimally, enhancing durability and restoring the fairing’s sleek appearance. For riders and enthusiasts aiming for professional results, mastering these surface preparation strategies is indispensable.
For additional insights and expert advice on motorcycle fairings, consider exploring valuable resources that delve deeper into motorcycle fairing care and repairs such as this comprehensive guide at Summit Fairings.
Chapter 2: Painting and Finishing Techniques for How to Repair Scratched Motorcycle Fairings
1. Mastering Surface Preparation and Priming for Flawless Motorcycle Fairing Repairs
Achieving a professional, long-lasting finish when repairing scratched motorcycle fairings hinges on meticulous surface preparation and priming. The steps taken before even applying paint form the foundation for a seamless repair that blends perfectly with the surrounding fairing and endures daily wear.
The process begins with thorough cleaning of the damaged area. It is essential to remove all traces of dirt, grease, and contaminants, as even microscopic particles can prevent primers and paints from properly adhering. Washing the surface with a mild detergent and warm water clears loose debris, while using a wax and grease remover or isopropyl alcohol ensures the surface is completely free from oils or residues left by handling. Skipping this crucial step increases the risk of peeling or bubbling paint and compromises the overall durability of the repair.
Following cleaning, sanding takes center stage. Sanding serves a dual role: it smooths the edges of scratches and roughens the surface enough to allow the primer to grip securely. Typically, the process begins with a coarser grit sandpaper, such as 180 grit, to level unevenness and feather the edges around the scratch. This removes any raised or rough sections that may be visible after painting. The sanding then transitions to finer grits—240, 320, or higher—to gently refine the area without deepening scratches. This gradual approach shapes the surface into a smooth, consistent texture critical for flawless primer and paint layers.
After sanding, applying a high-build primer is the next essential step. High-build primers are formulated to fill minor imperfections like scratches and small depressions, creating a uniform base from which paint can spread evenly. Applying the primer in multiple thin coats—generally two or three—ensures even coverage and maximizes the filling effect. Each coat should be allowed to dry thoroughly to avoid trapping moisture under the layers, which can cause adhesion problems. The right primer prevents issues such as cracking or peeling later while enhancing paint adhesion and durability.
Once the primer has fully cured, wet-sanding is performed to achieve a smooth, flat surface perfect for paint application. This involves using very fine grit sandpaper (320 grit or finer) soaked in water to gently sand down any imperfections in the primer coat, such as texture, dust nibs, or uneven build-up. Wet-sanding reduces dust generation and enables a controlled smoothing process, resulting in a flawless base for final painting.
Throughout surface preparation and priming, attention to detail and patience cannot be overstated. Properly cleaned, sanded, and primed fairings allow the paint to bond strongly, creating a finished surface that is visually consistent, resistant to chipping, and able to withstand environmental factors.
For those seeking a deeper visual understanding and practical demonstration of prepping plastics and applying high-build primer, there are detailed tutorials available. These resources offer step-by-step guidance to ensure even beginners can confidently master these fundamental techniques. Additionally, exploring options for quality motorcycle fairings and related repair materials can further enhance the repair process and final results; a great resource for such insight is the blog on discovering unmatched choices in motorcycle fairings at Summit Fairings.
Taking the time to perfect surface preparation and primer application sets the stage for the next phase of repair: achieving smooth surface blending and secure masking for painting. This groundwork is what transforms a scratched, worn fairing into one that looks newly finished and professionally restored.
2. Mastering Paint Application and Protective Finishes to Restore Motorcycle Fairings
Achieving a flawless repair on scratched motorcycle fairings hinges on the precise application of paint combined with durable protective finishes. Once the fairing surface has been meticulously cleaned and prepped, the process of restoring its original appearance begins with gentle sanding. Using fine-grit sandpaper, the edges of the scratched area are carefully smoothed to create an even base that encourages proper paint adherence without worsening the damage. This critical step ensures the paint will lay evenly, avoiding a noticeable bulge or uneven texture.
If the scratch penetrates beyond the surface layer and exposes the underlying plastic or base material, applying a primer before paint becomes essential. The primer acts as a bonding agent that not only promotes stronger adhesion but also safeguards the fairing against environmental factors and potential future deterioration. It is important to apply the primer in thin, consistent layers, allowing each coat to dry fully to maximize its protective properties and support a longer-lasting finish.
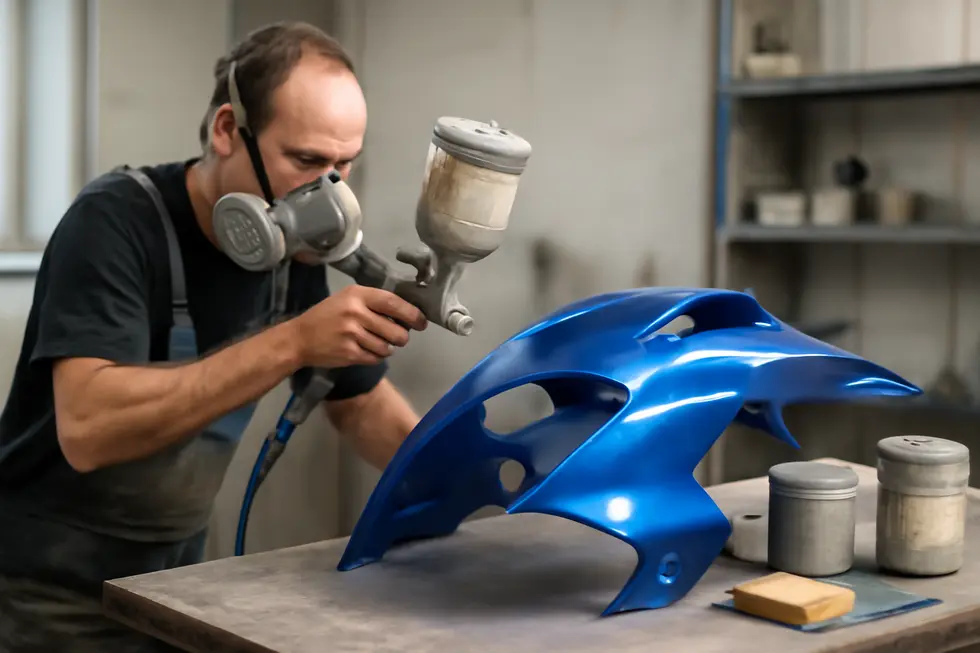
Matching the paint color perfectly to the motorcycle’s original shade is a vital part of the repair, as even slight mismatches can draw unwanted attention to the repair site. Automotive or motorcycle-specific paints designed to withstand outdoor conditions provide the best results. Applying the paint requires a patient approach: thin coats should be brushed or sprayed on carefully, waiting for each to dry before adding another. This layering technique builds depth and opacity, gradually restoring the fairing’s smooth, consistent surface.
Once the paint has dried thoroughly, applying a clear coat completes the protective and aesthetic restoration. This transparent layer seals the paint, lending a glossy finish that matches the rest of the fairing while shielding it from UV rays, moisture, and minor abrasions. The clear coat’s durability extends the life of the repair by preventing chipping and fading, making it an indispensable final step.
For severe scratches accompanied by cracks or breaks in the plastic, structural repair techniques such as plastic welding should precede any painting. Fusing the damaged edges restores the fairing’s strength and prevents further damage beneath the surface paint layer.
Beyond restoring the immediate damage, adding a high-quality ceramic coating offers long-term protection. This advanced finish provides a semi-permanent barrier against oxidation, UV exposure, and everyday wear. The coating not only preserves the paint’s vibrancy and gloss but also makes maintenance easier by resisting dirt and grime buildup. Complementing this, regular waxing and polishing with products compatible with ceramic coatings or paint protection films enhances the fairing’s shine and maintains the protective layers without causing harm.
Such attention to detailed paint application and protective finishing ensures the repaired motorcycle fairing regains both its aesthetic appeal and functional resilience. For enthusiasts seeking a comprehensive step-by-step guide and specialized techniques tailored to their models, exploring expert resources like the comprehensive tutorials available at Summit Fairings can provide invaluable insight for achieving a professional-quality repair. This level of care in painting and finishing transforms a simple scratch repair into a restoration that preserves the motorcycle’s value and appearance for miles to come.
Chapter 3: Advanced Repair and Replacement Options for How to Repair Scratched Motorcycle Fairings
1. Mastering Advanced Repair Techniques to Restore and Reinforce Motorcycle Fairings
Restoring scratched motorcycle fairings to a condition that closely resembles their original factory finish demands more than casual touch-ups. Advanced repair techniques expand on basic cleaning and sanding to carefully rebuild both the aesthetic and structural integrity of the damaged area. At the heart of these techniques lies meticulous surface preparation, specialist filler applications, precision sanding, and expert refinishing.
The process begins by thoroughly cleansing the affected area to eliminate any dirt, grease, and wax residues that could compromise adhesion. A gentle abrasion using fine-grit sandpaper, typically between 400 and 600 grit, smooths the scratch edges and creates a profile that encourages repair materials to bond effectively. This step is crucial—without it, subsequent layers may lift or peel, undermining the repair’s durability.
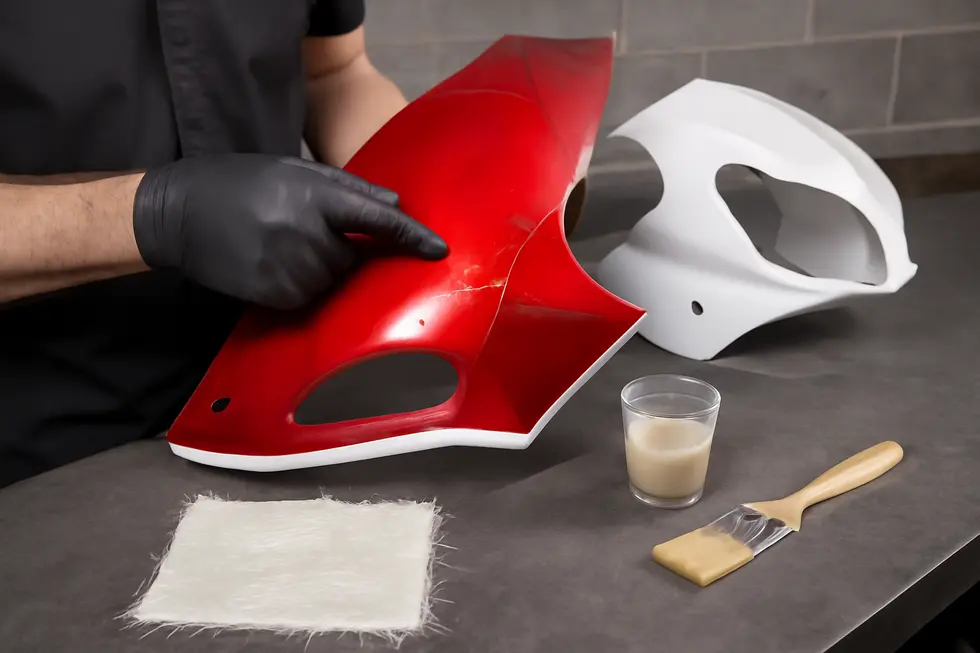
For deeper scratches and gouges that penetrate beyond superficial layers, simple sanding is insufficient. Here, specialized plastic or epoxy fillers designed for motorcycle fairings come into play. These materials are carefully applied to fill voids, then left to cure so they harden into a stable, sandable surface. Unlike basic putty, these fillers are formulated to bond with the thermoplastic materials commonly used in fairings, ensuring repairs resist cracking under vibration and flex.
Once cured, the repair area undergoes progressive sanding, moving through finer grits up to 1000 or even 1500. This gradual refinement blends the repaired spot seamlessly with the surrounding fairing surface, leaving no obvious ridges or unevenness. Such precision sanding is essential for achieving a finish that will accept primer, paint, and clear coat without revealing imperfections.
Priming with a plastic-compatible primer sets the stage for color application. This primer improves adhesion and helps block any filler color variations from showing through. Following primer, applying a perfectly matched paint delivers the visible restoration. Advanced repairs often employ spray guns or airbrushes, which allow for thin, even coats that replicate the original finish’s smoothness and uniformity, far beyond what can be achieved with brush or aerosol cans.
The final protective step involves a clear coat layer, which seals the paint and affords shade stability, gloss, and resistance to environmental exposure. For rigorous protection and longevity, some repairers add clear protective films or vinyl graphics directly over the repaired area. These films serve as an invisible shield against new scratches, helping the fairing retain its renewed appearance over time.
An optional but sophisticated method is controlled heat treatment applied to thermoplastic fairings. This technique carefully softens and re-shapes the plastic to correct distortions caused by impact or stress. However, heat treatment requires specialized skill to avoid warping or further damage, making it a method best left to experienced professionals.
Combining these advanced strategies is the hallmark of comprehensive motorcycle fairing repair. They aim not only to conceal damage but also to restore resilience, ensuring the fairing endures road conditions and retains its showroom shine. For those seeking elevated results, professional-grade materials and skilled workmanship often deliver the highest quality outcome.
For riders looking to explore advanced repair solutions and ensure durable, seamless restoration, resources and expert advice can be found at the Summit Fairings blog, a trusted source for motorcycle fairing knowledge and quality repair options.
2. Strategic Approaches to Repairing and Replacing Damaged Motorcycle Fairings
When confronted with scratched motorcycle fairings, understanding when to repair and when to replace is vital for preserving both aesthetic appeal and structural integrity. The decision hinges primarily on the extent of the damage and the nature of the scratches involved.
Minor surface scratches generally affect only the clear coat or the outermost layer of paint. In these situations, repair is often straightforward and economical. After meticulously cleaning the area to remove all dirt, grease, and wax residues, targeted polishing and the use of specially formulated sealants or touch-up pens can restore the fairing’s surface. These products fill in superficial scratches and renew gloss, offering protection from further wear. A follow-up wax application ensures long-lasting durability and blends the repair seamlessly with the rest of the finish.
When damage is more pronounced, such as deeper scratches or small cracks that penetrate beneath the surface paint, a more involved approach is necessary. Thorough surface preparation begins with cleaning followed by precise V-grooving—cutting a narrow V-shaped channel along the damaged line. This step is critical as it allows filler materials to adhere securely and fill the gouge effectively. High-quality fillers or patching compounds compatible with plastic or fiberglass substrates are applied next. Once cured, they must be carefully sanded down to match the surrounding surface’s contours before repainting. Primer application before painting enhances adhesion and protects underlying materials, especially when exposed plastic is visible. Color-matched paint is then applied meticulously to maintain uniformity with the rest of the fairing, and a clear coat sealant crowns the repair, restoring both gloss and resistance to environmental factors.
Severe damage, indicated by large cracks, broken panels, or compromised structural components, often necessitates full panel replacement. Repairing such extensive damage might not restore structural integrity fully or may prove uneconomical given time and material costs. In these cases, removing the damaged part and installing a replacement designed specifically for the motorcycle model ensures safety, proper fitment, and an uncompromised appearance. While temporary solutions—such as securing loose fairings with tie straps—can be employed briefly in emergencies, they are not substitutes for permanent repairs.
Effective repair and replacement depend heavily on thorough preparation, precise assessment, and the use of materials formulated for motorcycles. Advanced professional tools, like laser scratch repair machines, are available but often reserved for expert use due to high cost and complexity. For most enthusiasts, balancing the severity of the damage with cost-effective techniques results in optimal outcomes.
This nuanced approach to damaged fairings helps maintain a motorcycle’s visual appeal and structural soundness. For those looking for deeper hands-on guidance and high-quality replacement options, exploring specialized resources such as the detailed Summitfairings guide can provide valuable insights tailored to various repair scenarios.
By evaluating the damage accurately and applying the right strategy—whether minor polishing, filler repairs, or full replacements—motorcycle owners can extend the lifespan and enhance the look of their fairings effectively.
Final thoughts
Effectively repairing scratched motorcycle fairings involves a combination of thorough cleaning, precise painting, and sometimes more complex repair or replacement procedures. For business owners, mastering these steps ensures you deliver quality repairs that protect the investment and aesthetics of each motorcycle. From surface preparation to advanced restoration techniques, each layer of care directly enhances customer satisfaction and operational excellence. By integrating these proven methods, your business can stand out as a reliable, professional service provider, driving repeat business and strong word-of-mouth reputation.
Ready to elevate your ride? Summit Fairings delivers premium, custom-fit fairings that blend style and durability. Whether you’re chasing speed or turning heads, we’ve got your bike covered. Don’t wait—transform your machine today. Click, customize, and ride with confidence. Your perfect fairing is just a few clicks away. Act now!
About us
undefined