Restoring motorcycle fairings can be a daunting task for business owners, especially when considering the materials commonly used in manufacturing. Understanding the challenges associated with various plastics, such as PP+EP and ABS, is crucial for effective repairs. This guide will delve into the specifics of restoring these materials, examining the techniques available, the financial implications of restoration versus replacement, and cutting-edge advancements like mold-making and 3D printing. Finally, we’ll discuss the importance of leveraging professional services that ensure high-quality results. By grasping these aspects, business owners can make informed decisions that enhance their service offerings and customer satisfaction.
Fragile Bridges: Navigating the Realities of Restoring PP+EP Motorcycle Fairings
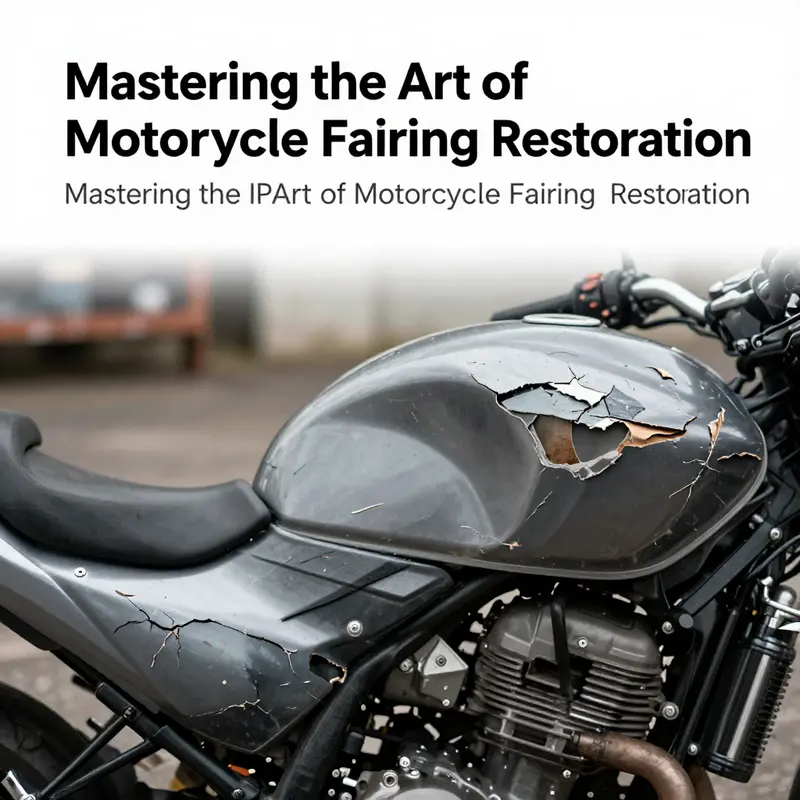
Restoring PP+EP fairings is more than patching cosmetic damage. It is a careful act of reconstruction that respects both the physics of the material and the expectations riders bring to their machines. PP+EP blends combine rigidity with flexibility, offering resistance to scratches yet inviting a different set of repair challenges than harder plastics. The reason this substrate matters is simple: adhesion is not automatic, and the repair sequence must be designed to work with a material that is inherently non-polar and has a relatively low surface energy. The successful restoration therefore begins long before any resin is mixed or heat is applied. It starts with material literacy: knowing what PP+EP is, how it behaves under load, and where the repair path may diverge from more forgiving plastics.
One of the most stubborn realities of PP+EP is that conventional repair methods often falter at the most basic bond. A common patch using standard adhesives or resin fillers will tend to peel away at the edges or crack again along the joint when the panel is flexed during riding or when heat cycles creep across the surface. The problem is not simply a lack of grip; it is a fundamental chemical mismatch. PP+EP resists wetting, which means liquids do not spread evenly, and any trapped air or moisture at the interface becomes a weak point. This drives home the necessity of using repair systems deliberately formulated for polypropylene-based substrates, and it explains why a DIY patch can quickly become a cycle of rework.
Surface preparation exists as a gatekeeper for any repair. In non-polar plastics, the goal is to raise the surface energy long enough for adhesion to take hold, then lock in that bond through a compatible primer or a chemical treatment. Simple sanding and degreasing might be enough for rough cosmetics, but a durable repair demands something more robust. Plasma or corona treatments are popular in advanced shops because they temporarily increase surface energy without dam-building heat. When these steps are skipped, the repair looks fine after painting but fails during the first sunlit highway run. The surface preparation sequence therefore becomes almost as important as the repair itself.
Heat is the quiet threat that can undo careful work. PP+EP softens at relatively low temperatures compared with other thermoplastics. Even the friction from sanding, the brief exposure to heated filler, or the use of a heated plastic-welder can push a softened edge into warping. In a fairing with complex curves, a slight shift in geometry changes how the panel seals against the frame or how it presents its line to the wind. This is why skilled technicians often set strict heat limits, monitor the area with a non-contact thermometer, and step back to evaluate changes in alignment after each pass. The risk of distortion makes thermal management during repair a kind of art.
Where to begin on structural damage? For cracks that are long but still shallow, welding remains the most robust path when done by someone with experience in plastic repair. The method uses compatible filler rods that melt in and around the joint, fusing the pieces into a continuous matrix. The advantages are real: a welded joint can flex in step with the surrounding material and resist pull-apart forces better than a surface patch. The caveat is the skill and control required. For PP+EP, the welder must balance heat so that the bond forms without perching heat in adjacent material that would creep into a new crack.
ABS offers an easier ride in some respects, but the same discipline applies: surface must be clean, primers must be compatible, and the finish must be coaxed to match. Still, the PP+EP case remains the most challenging because the failure mode often manifests as delamination at the repair line when exposed to flex and temperature shifts. Even successful welding needs careful post-weld finishing. Sanding must be gentle to preserve the contour; primers must be selected to bond with the modified surface; and the final paint must accommodate a subtle texture unless a deliberate gloss is the goal. Without this alignment, the repair becomes visible, undermining both aesthetics and perceived integrity.
Texture, color, and finish are the final frontier. PP+EP components tend to carry a matte or semi-gloss appearance that is not easy to reproduce with standard paint systems. The fix is not a single coat but a short sequence of primers, base coats, and clear coats that cooperate with the substrate’s flexibility. In some cases, a compatible flexible filler is used, paired with a clear that resists micro-cracking as the panel flexes. Achieving a seamless look means shooting color and texture at the right angle, testing under varied lighting, and sometimes building up multiple light passes to avoid a heavy patch that betrays the repair. The finished surface should feel continuous with the rest of the fairing, both visually and in touch.
Bike fairings are not flat slabs; they carry edges, ribs, and mounting points that must align precisely for a safe fit. The slightest deviation in contour can alter how the panel seals or how it carries crash protection. For this reason, many shops reserve PP+EP repairs to those who can reproduce the original geometry with care, while simpler cosmetic patches may be performed with adequate caution at home. The stakes are more than aesthetics: misfit parts increase wind noise, alter aerodynamics, and could create rattles that irritate on a long ride. The combination of mechanical accuracy and material behavior is why the best outcomes come from a staged plan, not improvisation.
When damage is severe—large cracks, keylines that extend across curves, or structural deformation—the math shifts. In these cases replacement often makes more sense financially and functionally. OEM or aftermarket panels offer proper fit, correct thickness, and a consistency of finish that patched areas rarely achieve. If repair-through-rebuild is pursued, it may involve mold-making for a custom panel or even 3D printing a replacement shell. These paths demand specialized equipment and experienced hands; they are usually beyond the reach of casual DIY projects. The decision is rarely about a single technique but about long-term durability, safety, and the rider’s expectations for performance.
For less dramatic damage, patching remains an option, but it must be guided by a clear-eyed assessment of durability. Cosmetic chips and small cracks may respond to a hot-stamp or a specialty epoxy designed for rigid plastics, but again, the bond quality depends on surface energy and proper preparation. Even in these situations, consider that the repaired area won’t behave identically to the surrounding substrate under high-speed, high-heat conditions. The goal becomes not just a fix but a restoration of the fairing’s life cycle—so that it can handle the next stretch of miles without calling attention to a flaw.
Practical guidance for enthusiasts comes from a mix of material science and skilled hands. Start by identifying the exact material family, test small areas when possible, and plan the repair with a clear map of heat exposure, surface treatment, and finishing steps. If the damage exceeds repair tolerance, look to replacement parts that fit the model perfectly, and only then consider custom fabrication options. For those who want to explore alternatives while preserving unbroken mounting geometry, reference to model-specific panels—like a particular model’s fairings—can provide a sense of fit and finish, and a direct path to compatible options such as CBR1000RR fairings 2012-2016.
Ultimately, the restoration of PP+EP fairings is not a single recipe but a discipline that honors the material’s quirks. Adhesion challenges, surface energy management, and heat sensitivity all demand a reasoned approach. When a repair can compromise safety or long-term performance, replacement becomes the preferable choice. When it can be done with durable confidence, it requires tools and techniques that are specifically compatible with polypropylene blends—tools that only experience, not bravado, can provide. The best outcomes emerge from patient evaluation, careful technique, and ongoing attention to how the repaired panel integrates with the rest of the bike’s surface and silhouette.
Further reading on the underlying material science behind these challenges is available in technical literature. The linked study underscores the importance of choosing repair systems that bond effectively to PP+EP and of applying surface treatments that enable lasting adhesion, performance under load, and resilience through heat cycles. External reference: https://www.sciencedirect.com/science/article/pii/S0014305723001689
Breathing New Life into ABS Fairings: Techniques for Restoring ABS Plastic Motorcycle Bodywork
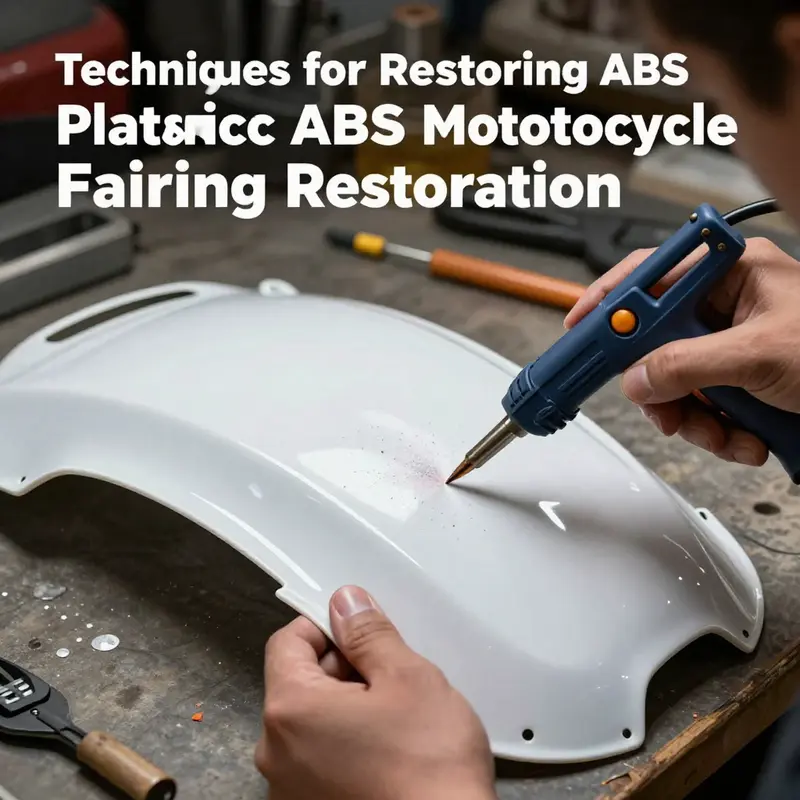
ABS plastic has become a backbone of modern motorcycle fairings because of its balance of strength, impact resistance, and ease of molding. Yet even the most carefully designed ABS panels aren’t immune to the effects of time and the road: UV exposure, weathering, road salt, and grit can dull color, scratch surfaces, and eventually expose small cracks. Restoring ABS fairings is not merely about cosmetics; it is about restoring the panel’s integrity so that aerodynamics, fitment, and protection of underlying structures remain reliable. When done with patience and the right approach, ABS restoration can extend the life of a fairing and maintain the appearance of a bike that deserves to be shown on the road. This chapter blends practical steps with an awareness of material behavior, offering a coherent path from cleaning to refinishing while keeping the sense of purpose that underpins automotive plastics work.
The first step in any ABS restoration is recognizing that surface cleaning is not a one-and-done task. A fairing that has accrued wax buildup, oxidation, or just general grime benefits from a thorough cleaning with mild soap and water. Harsh solvents and aggressive abrasives can remove or mar the topcoat and begin to dull the appearance of the plastic itself. A dedicated plastic cleaner designed for automotive or motorcycle surfaces can help with oxidation and restore some of the original luster, but it should be used with light, controlled passes and a soft microfiber towel. After cleaning, the fairing must be completely dry before any repair work begins. Residual moisture can interfere with adhesion and the curing of fillers or epoxy putties.
For minor scratches and surface blemishes, ABS responds well to careful polishing. A fine-grade compound in the 1500 to 2000 grit range, used with a dual-action polisher, can significantly reduce the visibility of swirl marks and shallow scratches. The key is to test first in an inconspicuous area to gauge how the heat and agitation affect the finish, then proceed with gradual passes across the affected area. If deeper scratches or small chips remain after polishing, a two-part epoxy putty formulated for plastics can fill them effectively. When choosing a filler, look for one that cures hard enough to sand smoothly and that adheres well to ABS without shrinking or cracking later on. The filler should be mixed according to the manufacturer’s instructions, then applied in thin layers to avoid excess weight and to ensure a flush surface after curing.
Curing is a quiet but critical phase. Allow ample time for the epoxy putty to reach its full strength in a dust-free environment. Once it has cured, sanding begins with a coarser grit to flatten the repair area and remove any excess filler, followed by progressively finer grits—800, 1200, and finally 2000—until the repaired zone is indistinguishable from the surrounding material. Throughout this process, frequent cleans with a gentle solvent-free wipe help remove dust and prevent embedding particles that would mar the finish. The objective is a seamless base so that the next steps yield uniform color and gloss, not a patchwork appearance that gives away the repair.
With the surface smoothed and prepped, attention turns to refinishing. ABS accepts clear coats well when the surface is properly primed and cleaned, but compatibility matters. A clear coat designed for plastic surfaces helps protect the finish from UV aging and weathering, reducing the likelihood of future fade and micro-cracking. When applying the clear coat, use multiple thin layers rather than a single heavy coat. This approach minimizes runs and ensures a uniform film thickness. Allow appropriate flash times between coats, then cure according to the product’s guidelines. A final buff with a soft microfiber cloth can bring out the depth and clarity of the finish, restoring the visual impression of the original panel.
Of course, restoration is not a one-size-fits-all procedure. ABS, while robust, can reveal its limits when confronted by severe damage. Large cracks, structural deformation, or complete detachment of a panel may exceed the practicality of cosmetic repair. In many cases, replacement becomes the more economical and reliable path, particularly if the damage compromises mounting points, alignment, or impact absorption. When a fairing must be replaced, the restoration mindset—for the surface you are saving—still informs the choice: match the color and finish, confirm correct fit with the motorcycle’s bodywork, and consider OEM or aftermarket replacement parts that align with the bike’s era and model.
In situations where replacement parts are scarce or unavailable, more advanced paths such as mold-making or even 3D-printed substitutes can be explored. These approaches require a higher level of expertise and investment, but they offer a way to preserve the bike’s shape and aesthetics when original panels are beyond practical repair. The decision often hinges on the costs of labor, the availability of original or compatible alternatives, and the importance of preserving exact mounting geometry.
The practical philosophy behind ABS restoration is anchored in a few core principles. First, surface cleanliness and gentle handling matter as much as the repair itself. Dirt and wax residues can interfere with adhesion, while rough handling can introduce new micro-scratches that complicate refinishing. Second, the repair approach should respect the material’s behavior. ABS tends to resist heat less aggressively than some other plastics, so heat-based repair methods must be controlled and carefully executed, with a clear plan for how to manage heat input and prevent warping. Third, color matching and UV protection demand patience. ABS can fade unevenly if the base coat and clear coat are not applied evenly, so meticulous masking, consistent spray technique, and a UV-stable clear coat are essential for a durable, visually coherent result.
From a practical standpoint, it’s worth considering the broader ecosystem of parts and expertise when planning a restoration. For many riders, the goal is to keep the bike looking cohesive without sacrificing safety or structural integrity. If you’re contemplating a complete color refresh or a close color match, it may be worth exploring the market for OEM or aftermarket ABS fairings that align with your model. A quality replacement panel can save time and ensure that the shape, mounting points, and aerodynamics remain faithful to the original design. For riders who enjoy the DIY challenge, this approach can also present an opportunity to practice color matching and finishing skills on a ready-to-install component, freeing the need to improvise patchwork on the bike itself. If you decide to browse replacement options, a practical starting point is to explore the Honda fairings collection, which offers a variety of complete panels designed to fit specific models. You can explore the collection here: Honda fairings collection.
If you are seeking a more technical, step-by-step reference that dives into ABS-specific repair nuances, consult the Motor Cycle Mechanics Institute guide on ABS plastic repair for motorcycle fairings. While the guide is a separate resource, it complements the hands-on approach described here by detailing precise material behavior, test methods, and repair nuances that apply across ABS projects. You can access the guide here: https://www.motorcycle-mechanics-institute.com/blog/abs-plastic-repair-for-motorcycle-fairings.
A final note on the environmental and safety considerations that frame any plastics work. Work in a clean, dust-free environment, and wear appropriate protective gear when handling solvents, sanding dust, or high-temperature tools. Prolonged exposure to fumes can be hazardous, and the use of ventilation is a prudent precaution. Maintain good containment for any cleanup fluids, and dispose of waste according to local regulations. The careful execution of each step not only preserves the appearance of the fairing but also minimizes the risk of introducing new damage during the restoration process. The aim is to restore the ABS panel so that it continues to perform as reliably as it did when it rolled off the factory line, and to do so with a finish that lasts for years of sun, rain, and road grime.
In sum, restoring ABS plastic motorcycle fairings blends patience, method, and an awareness of material limits. Cleaning, minor repair, and refinishing—executed with controlled technique and a respect for the plastic’s behavior—can yield results that are visually convincing and structurally sound. When damage stretches beyond cosmetic repair, replacement or custom fabrication becomes a sensible option, but the same core principles—cleanliness, proper preparation, and precise finishing—continue to guide the work. The objective is not merely to cover a blemish but to re-create a panel that feels as solid and cohesive as the rest of the bike, preserving both its aesthetic appeal and its protective function on the road.
Weighing Value and Durability: The Cost Equation in Restoring vs Replacing Motorcycle Fairings
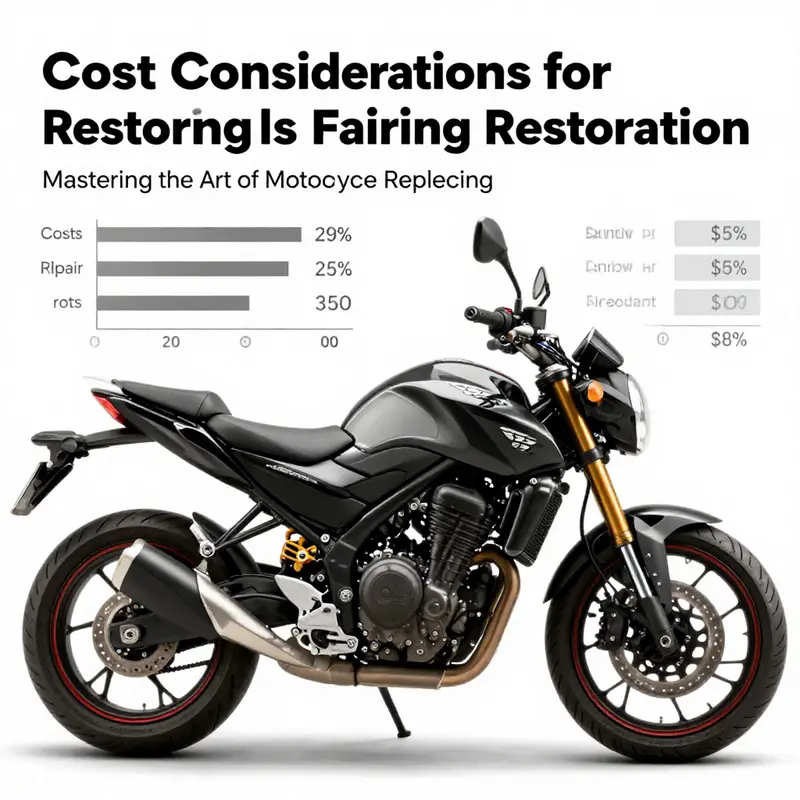
Restoring or replacing a damaged motorcycle fairing is never a simple once‑and‑done decision. The plastic’s age, the damage pattern, and the rider’s priorities converge into a cost equation that extends beyond a single invoice. For many riders, the fairing is more than just a shell; it is aerodynamic efficiency, structural protection, and the bike’s visual identity. When a fairing cracks or shatters after a fall, the instinct to fix it quickly can clash with the realities of material science and labor costs. The question becomes: should you invest in a restoration that rebuilds the original with careful welding and paint, or opt for replacement parts that restore form and fit but may test your budget? The answer rests on several interlocking variables, but the most influential is cost, viewed through the lens of durability, compatibility, and long‑term value. Different motorcycles use different plastics, with PP+EP blends and ABS being the most common. PP+EP, common in entry‑level or domestic bikes, can resist fatigue but tends to degrade with age and is prone to cracking after sharp impacts. ABS, by contrast, generally offers tougher impact resistance and easier repair, though it still requires skilled welding and careful surface preparation to achieve a seamless finish. These material realities immediately shape the cost math. A quick patch might seem cheap, but it rarely yields a lasting result on PP+EP, where flexible joints and microcracks can reopen under stress. On ABS, a properly executed weld can hold longer and tolerate heat better, but the adhesive layer and paint film must be matched closely to avoid color drift or gloss mismatch after months of exposure to sun and weather. For a professional restoration, the technique matters as much as the intention. In practice, the restoration path for PP+EP usually centers on plastic welding, using compatible filler rods to fuse the broken joint. The process begins with cleaning and drying the area, then heating the filler rod until it liquefies and flows into the seam. A trained technician controls the heat to avoid warping or burning the surrounding skin of the part. Once the joint has cooled, the surface typically requires careful smoothing, sanding, and filling to create a uniform plane. Afterward comes priming, color matching, and a finish coat to restore the original luster. The result should be a near‑invisible repair that can withstand another impact without immediate failure. All of this demands specialized tools, patience, and experience, and it is typically performed at auto body shops or specialist motorcycle repair centers rather than in a home garage. If the fairing is ABS, the same welding philosophy applies, but ABS often shows better adhesion and heat resistance. The key differences lie in surface preparation and the skill of the welder. ABS can accept slightly higher heat without scorching, making that last weld a bit more forgiving; yet it still requires meticulous cleaning and a measured approach to heat cycles, because overheating can cause yellowing, sink marks, or softening in the surrounding plastic. Even with ABS, industry‑standard practice calls for a precise weld, followed by sanding, filling where necessary, and a color‑matched paint job. The goal is not merely to seal a crack but to restore structural integrity and post‑repair appearance so the piece behaves as if nothing had happened. When damage is severe—large cracks that compromise the fairing’s structural performance, deformation that distorts aerodynamics, or detachment where mounting points are torn—the economics often shift. In such cases, replacement parts can offer a more reliable, predictable outcome than a fragile repair that might fail under extended highway stresses. The question then becomes whether to source aftermarket fairings or OEM components. Aftermarket sets are typically more affordable, with full fairing kits commonly ranging from three to eight hundred dollars, depending on model compatibility and finish quality. OEM parts, by contrast, can well exceed a thousand dollars for a full set, with labor and painting commonly stacking on top. Labor for a full fairing swap generally runs from one to three hundred dollars and can take three to six hours, depending on the bike and the shop’s workflow. For some riders, the expense and downtime of a complete replacement are acceptable or even preferable to ongoing patchwork. Restoration, by contrast, can be less costly up front, but it invites a longer timeline and requires specialized capabilities. A basic paint job, using a full spray kit and color match, typically runs from three hundred to six hundred dollars and can take eight to twelve hours of shop time, not counting the initial diagnosis. If a designer’s eye or a show‑ready finish is desired, a multi‑layer or custom paint job can push costs from eight hundred to two thousand five hundred dollars or more, reflecting the artistry involved in masking, layering, and clear coating. The numbers point to a broader truth: you do not pay for a repaired shell alone; you pay for model accuracy, color fidelity, and the assurance that the finish will stand up to sun, rain, and impact. Beyond the raw price, other considerations shape the decision in practical ways. Compatibility and fit remain crucial; many modern fairings share mounting points and attachment methods, but a misfit can ruin airflow, increase vibration, or create gaps that collect grime. For budget‑minded riders, aftermarket fairings that match the bike’s make and model often represent the best compromise between cost and performance, especially when the set is designed for the specific bodywork configuration. If you decide to explore aftermarket options, a glance through the Yamaha fairings collection can illuminate the range of choices available and help you assess whether the shape, windage, and mounting style align with your ride. See the Yamaha fairings collection for reference and to gauge how aftermarket parts compare in scale, finish, and price. Ultimately, the decision hinges on how you balance initial price, long‑term value, and desired aesthetics. For some, the certainty of OEM fit and the integrity of a factory‑matched surface justify the higher price, even if a restoration would be possible. For others, a high‑quality aftermarket kit paired with competent paint work delivers a nearly equivalent appearance at a lower out‑of‑pocket cost and with faster turn‑around. And for a subset of riders, the best choice may involve a hybrid approach: restore the damaged panels that carry principal loads and aesthetics, then replace troublesome sections with aftermarket units that carry identical mounting points and a compatible look. It is not a one‑size‑fits‑all calculation; it is a careful weighing of how much risk you’re willing to accept and how much downtime you can tolerate while your machine remains in service. In all scenarios, the quality of the outcome depends on preparation, technique, and finish. Surface preparation includes cleaning, desaming, and prime sealing to ensure consistent paint adhesion and a uniform sheen across repaired and replacement panels. The color matching has to account for age fading and sun exposure, particularly on older bikes with older finishes. A glossy, uniform surface hides minor repairs; a mismatched panel, by contrast, shouts that a fix was made, which can affect the bike’s overall value. When it comes to safety, the fairing is more than a cosmetic shell. It houses electrical harnesses, routing for cables, and in some models, critical mounting hardware that supports the windscreen, mirrors, and fairing stays. Any repair or replacement needs to preserve those interfaces and maintain secure, vibration‑free mounting to avoid rattles at speed. If you search for parts through aftermarket channels, you will encounter a spectrum of options in terms of material quality, finish, and warranty. The best route is to verify compatibility with your model year and confirm that the chosen parts are designed for that specific mounting scheme and panel geometry. Approaches that emphasize precise reproduction of OEM contours and attachment points tend to deliver the most reliable results, even when the process involves repainting and detailed fitment work. The cost dynamics described above do not capture the intangible value of confidence: knowing your fairings will stay attached at highway speeds and that the paint will resist UV exposure over months and years. That confidence often translates into reduced downtime and peace of mind when you are out on the road. For readers who want a practical quick reference, consider the broad cost framework: the choice to replace typically entails higher upfront parts cost and a moderate to high labor charge, paired with a shorter timeline to get you back on the road. The choice to restore is often cheaper in raw parts cost but demands a higher skill threshold and a longer repair window, with ongoing risk if the damage involved alignment or mounting points. The best route is to gather quotes from reputable repair shops or reputable distributors, compare the total package—parts, paint, labor, and warranty—and then decide based on the bike’s value, your riding style, and how much downtime you can tolerate. As a closing thought, it helps to remember that the industry offers more than a simple dichotomy between restoration and replacement. In some cases, the most rational choice is a combined strategy that preserves core structure with a careful, well‑executed repair, while replacing only the affected panels with aftermarket units that offer a good compromise between fit, finish, and run‑out after installation. This approach reduces risk and often preserves more of the bike’s original character than a full replacement would. When in doubt, seek a qualified motorcycle body shop’s assessment, and factor in brand and model specifics, which can swing pricing in either direction. The bottom line is clear: cost, durability, fit, and appearance are interwoven. A responsible decision balances these elements, aligns with your budget, and keeps you riding with confidence. External resources can provide additional perspective on the practicalities of fairing repairs and replacements. For a detailed overview of common practices and cost expectations, see the MotorBike guide on fairing replacement. https://www.motorbike.com/fairing-replacement-guide
Mold-Making and 3D Printing: Precision Restoration for Motorcycle Fairings
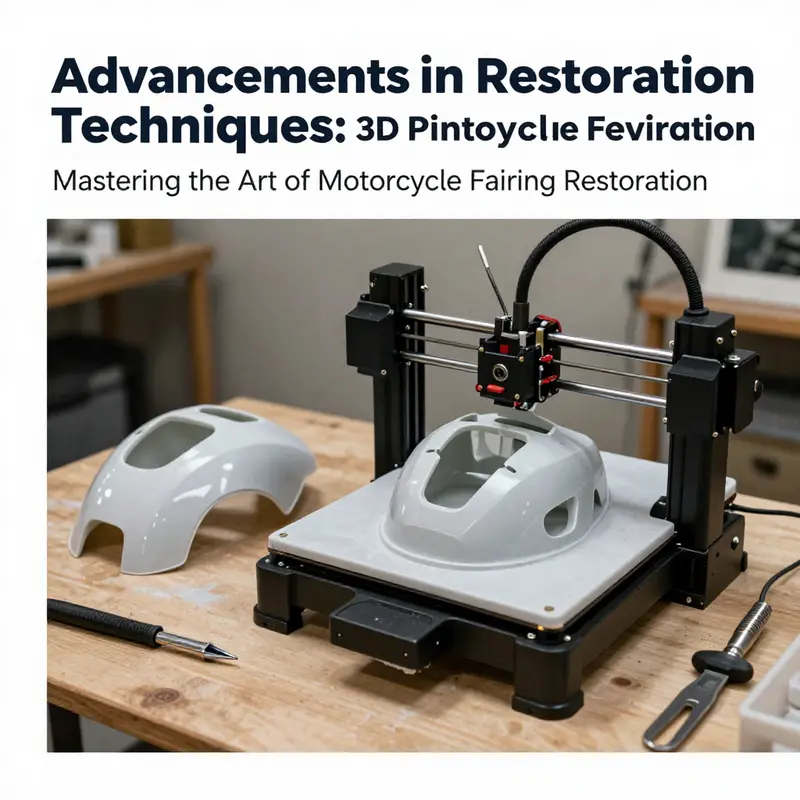
Restoring motorcycle fairings sits at the intersection of craft and engineering. This chapter explores a precise approach that uses mold making for accurate, repeatable forms and 3D printing for rapid prototyping and customization. When done well, these techniques restore not just appearance but fit, protection, and aerodynamics, maintaining the bike’s character while ensuring safe, reliable performance.
The mold making dimension begins with creating a high precision mold to reproduce a fairing shell or patch. CNC machining yields tool steel or aluminum cavities designed to withstand repeated forms, ensuring mounting points and attachment features align with the bike’s frame geometry. The result is dimensionally consistent parts across units and over time. The mold becomes an investment in reliability, not a disposable tool.
3D printing enters where original parts are missing or damaged. A typical workflow starts with laser scanning or digital reference models to capture contours and mounting recesses. The CAD model becomes the blueprint for a printed prototype or final component. Materials are chosen for heat resistance and structural performance, commonly including ABS, ASA, or polycarbonate. PLA is avoided when thermal stability is critical. Post processing, sanding, and surface finishing are essential for paint adhesion and seamless joins.
The appeal of additive fabrication lies in speed and adaptability. A shop can explore multiple shell geometries, adjust rake or mounting points, and verify fit before committing to tooling. The combination of mold based production and 3D printing creates a practical continuum: stable designs use molds for production grade pieces, while printing handles variation, prototyping, or hard to source sections. Finished surfaces are primed and painted to match the surrounding components, ensuring a cohesive look.
Practical considerations include sourcing materials, managing supply chains, and planning for finishing and assembly. For minor cosmetic issues, traditional repair still holds value, but for larger damage, mold replication plus additive manufacture can be more cost effective than patching or full replacement. The goal is fidelity to the original geometry and compatibility with fasteners and substructure.
In practice, a catalog oriented workflow aids consistency. Digital models and record libraries help technicians anticipate fit challenges and plan adjustments early in the process. A real world example might be a Yamaha fairing catalog used as a reference profile to calibrate processes while allowing safe customization where needed.
This integrated approach honors traditional bodywork craft while embracing the precision and speed of digital fabrication, delivering restored fairings that look right, fit right, and perform reliably.
Crafted Precision: The Crucial Role of Professionals in Restoring Motorcycle Fairings
Restoring motorcycle fairings is more than a quick cosmetic fix. It is a meticulous process that intersects material science, structural integrity, and finish quality. Far from being a simple patch job, it demands a level of precision that aligns with how fairings influence aerodynamics, rider protection, and the overall visual identity of a bike. The decision to pursue professional restoration, rather than a DIY patch, rests on a practical assessment of damage type, material composition, and the long-term demands of riding. In the hands of a skilled technician, the fairings become a true extension of the machine—a smooth, unified shell that supports performance and confidence as riders slice through air at speed or park in a crowd of admiring onlookers.
A practical starting point is recognizing the two most common materials used in modern fairings: PP+EP, which is polypropylene blended with ethylene propylene, and ABS, a tougher, more heat-resistant plastic. Each material presents distinct challenges and requires specific handling methods to restore performance and appearance. PP+EP, often found on entry-level or domestic motorcycles, tends to degrade over time and can crack after impact. Its resilience to adhesive repairs is limited; standard glues and typical epoxies fail to deliver a lasting bond. In these cases, professional plastic welding using compatible filler rods is the preferred method. The process involves heating the filler rod until it melts and fuses into the broken joint, effectively rejoining the pieces. After welding, the joint surface must be carefully sanded smooth and repainted to match the original finish. This level of work demands specialized equipment—such as a plastic welder—and practical experience, and it is typically carried out at auto body shops or dedicated motorcycle repair centers with the right ventilation, heat control, and spray booths to produce a durable, showroom-like finish.
ABS plastic, by contrast, is generally more forgiving in the welding process. It offers better adhesion and heat resistance, which can make a welded joint stronger and more reliable. Yet even with ABS, surface preparation remains critical. The same principles apply: a clean, properly prepared surface, appropriate welding technique, careful control of heat input to avoid warping, and meticulous color matching for a seamless appearance. Professionals understand how ABS responds to heat and how to blend repaired areas with the surrounding panels so that the repair is not only strong but visually indistinguishable from factory work. This combination of material knowledge and technique is what elevates a restoration from a salvage effort to a durable, long-lasting fix.
When damage is extensive—large cracks, deep deformation, or complete detachment—the calculus shifts. In many cases, replacement fairings become a more cost-effective and reliable option. Replacement parts, whether OEM or aftermarket, provide a baseline accuracy in fit and appearance that can be hard to replicate through repair alone. If replacement parts are unavailable, an option some shops explore is custom fabrication through mold-making or even 3D printing. These routes demand significant expertise and investment, and they are typically undertaken by specialists who can reproduce the exact curvature, thickness, and finish of the original components. The upshot is that a well-executed replacement or custom fabrication can restore the bike to its pre-accident profile with far less risk of compromising fit, aerodynamics, or structural integrity than a patch repair could introduce.
The professional path, however, is not solely about fixing damaged surfaces. It also encompasses upgrades that go beyond mere restoration. A skilled shop can address subtle improvements that enhance both aesthetics and function. For instance, technicians can deliver precise color matching and finish work that elevates the overall appearance to showroom standards. They can implement clear coatings that protect against UV damage and abrasion while maintaining clarity and gloss. Polishing, buffing, and smoothing of the repaired area are performed with a discerning eye for uniformity across panels, ensuring that transitions between repaired zones and original material are invisible to the eye. In addition, professionals bring a comprehension of how fairings interact with windscreens, brackets, mounting points, and ventilation ducts. They ensure that repairs do not alter the fitment geometry, which could affect airflow, cooling performance, or even rider safety. The result is a fairing that not only looks pristine but also preserves the intended aerodynamic behavior and mounting reliability.
Accident-related repairs insert an element of safety into the conversation that many riders may overlook. The fairing’s primary function is to protect the rider and the bike in a fall or collision. A repaired joint must withstand stress concentrations and repeated vibration without returning to a compromised condition. This is where professional intervention shines. Experts can implement welding repairs that respect the material’s heat tolerance and residual strength. They can apply plastic bonding techniques and, where necessary, employ stress-relief procedures to avoid future failures at joints or attachment points. The process is not purely cosmetic; it is a form of structural rehabilitation that aligns with the bike’s design expectations and the rider’s safety requirements. The emphasis on safety is reflected in the level of precision and quality-control standards that professional facilities uphold, from controlled temperature environments to calibrated spray booths and validated color-coding protocols for paints and clear coats.
Cost is a practical consideration that distinguishes professional restoration from casual fixes. The investment in professional restoration typically falls within a broad range, with estimates around two hundred fifty to six hundred dollars per fairing assembly. This range captures several drivers: the complexity of the repair, the extent of surface preparation required, the time spent in spray booths, and the skill level of the technicians. While these numbers may seem high to riders looking for a quick fix, they reflect the realities of trained labor, premium materials, and controlled finishing environments that guarantee durability and color fidelity. A so-called DIY repair might save a little upfront, yet it risks poor adhesion, uneven finishes, or hidden defects that only reveal themselves after weeks of riding. The cost calculus, therefore, should weigh the value of a reliable, long-lasting finish against the risk of premature failure or the need for rework after a failed repair.
Another dimension of professional service is ongoing assessment. A shop that treats fairing restoration as a holistic service will not simply hand you a repaired panel and call it a day. Rather, they will examine the entire set of fairings, brackets, and mounting points, checking for alignment and stress distribution. They will advise on preventive measures to protect the panels from future damage, such as protective films, correct torque sequences on fasteners, and careful handling during transport and installation. This preventive approach helps preserve the visual appeal and structural integrity of the fairings over time and aligns with broader maintenance practices recommended for motorcycle bodies.
For riders who are weighing options, the decision to engage professional services often comes down to a balance of risk, quality, and value. When a fairing has any appreciable structural compromise or when the finish must achieve a showroom-like standard, professional restoration provides a level of predictability and accountability that DIY methods typically cannot guarantee. A qualified shop offers not only the repair work itself but also the expertise to determine whether a patch is viable or whether replacement is the better path. They provide documentation of the process, color-matching records, and a warranty that reassures the owner that the investment is protected. In other words, professional restoration is as much about trust as it is about technique.
Riders seeking to explore options within a practical frame can benefit from locating a shop that specializes in motorcycle plastics and paint work, ideally one that demonstrates experience with ABS and PP+EP materials. When communication with a shop, it helps to discuss the specific bike model, the year, the fairing types involved, and any riding goals that may influence the finish and protection strategy. The conversation should cover how the shop plans to assess compatibility between materials, the steps involved in surface preparation, the welding or bonding methods to be used, and how color matching will be achieved across panels that may have aged differently. A transparent dialogue reduces the risk of surprises and aligns expectations from the outset.
If you are curious about options for specific fairing families, many riders find value in exploring curated collections that catalog compatible shapes and mounting interfaces. A practical starting point is to view comprehensive collections that categorize fairings by manufacturer, model, and generation, which helps ensure that any replacement or compatibility checks align with the bike’s original geometry and aesthetic. For example, a rider exploring options for a given model line might refer to a dedicated collection that focuses on that brand’s fairings. This approach does not replace professional assessment, but it frames the restoration context, helping riders understand what is possible and what to anticipate in terms of fit and finish. For readers who want to browse such categories, a relevant starting point is the Honda fairings collection, which offers an overview of components and compatibility across common models. Honda fairings collection.
Ultimately, the choice to entrust a restoration to professionals is an investment in the bike’s safety, value, and longevity. It is a decision rooted in an understanding that modern fairings are complex assemblies, composed of materials that respond in particular ways to heat, impact, and aging. The best outcomes arise when skilled technicians bring together material science, precision welding, and finish engineering to produce a final product that looks immaculate and holds up under riding conditions. Owners who have seen the difference in professional results describe a marked improvement in panel alignment, paint clarity, and the feel of the bike’s silhouette as it cuts through air. The improvements extend beyond appearances; they contribute to better protection, fewer maintenance surprises, and a restored sense of pride in the machine. For riders who value those outcomes, professional services in restoring motorcycle fairings offer a pathway to return a bike to its original character or to elevate it to a new standard of presentation and performance.
External resources and guidelines reinforce the importance of professional approaches to maintenance and restoration. For authoritative guidance on best practices in motorcycle maintenance and safety, see the Motorcycle Industry Council’s Maintenance & Safety Guidelines: https://www.mic.org/resources/maintenance-safety-guidelines.
Final thoughts
Restoring motorcycle fairings involves navigating various challenges, particularly regarding the materials used. By understanding the specific techniques for each type of plastic, such as PP+EP and ABS, business owners can enhance their repair offerings. Moreover, considering the financial implications of restoration versus replacement can lead to better business decisions. The introduction of new technologies, like mold-making and 3D printing, further diversifies the restoration options available. Ultimately, leveraging professional services plays a critical role in achieving high-quality results and customer satisfaction, which should be a priority for all motorcycle repair businesses.