Successful motorcycle fairing restoration is vital for enhancing brand appeal and customer satisfaction in the motorcycle industry. Business owners must understand the essentials of sanding and painting fairings to deliver high-quality results that meet customer expectations. This article will cover crucial processes including surface preparation, the importance of using proper materials, and the advanced techniques needed for a flawless finish. By focusing on three key chapters—Preparation and Surface Treatment, Priming Techniques and Material Selection, and Final Painting and Finishing Techniques—business owners can ensure they are equipped to elevate their product offerings and maintain a competitive edge in the marketplace.
From Bare Plastic to Flawless Finish: A Cohesive Prep and Surface-Treatment Guide for Motorcycle Fairings
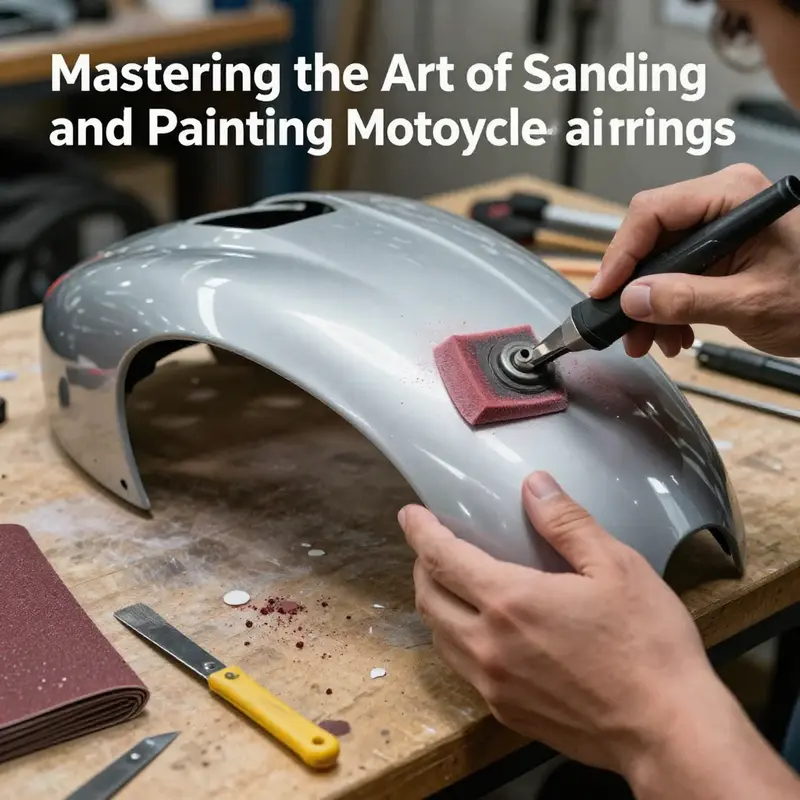
Every successful paint job starts with the right prep. For motorcycle fairings made from plastic or composite, the goal is a surface that grips primer and paint without pinholes or contamination. This requires planning, care, and patience through each step.
First, remove the fairings to access every surface. Label and photograph fasteners and mating points to simplify reassembly, and work in a clean, organized space where you can control dust and overspray. Protect other components from cleaners and dust.
Cleanliness is critical. Use a degreaser or plastic-safe cleaner to remove oils, wax, and fingerprints. Wipe with a clean lint-free towel, then inspect under bright light for any remaining film. If you see residue, repeat the cleaning until the surface looks uniform and bright.
Sanding creates a micro-roughness that primer can bite into. Start with a moderate grit like 400–600 to remove gloss and flatten obvious blemishes, then move to 800 for a smooth base. Keep the tool flat, use even pressure, and avoid gouges that would require more repair work than you want to perform.
Remove dust and particles before priming. A tack cloth works well for lifting fine dust, and a quick pass with compressed air can reach corners. If humidity is high, acclimate the parts in a cleaner, dust-free environment to minimize airborne contaminants at prime time.
Priming follows. Use a plastic- or fiberglass-compatible automotive primer and apply thin, even coats. Allow each coat to approach a tacky stage before applying the next. The goal is a uniform, slightly textured base that does not obscure the fairing lines.
Drying and surface refinement. Let the primer cure completely according to the manufacturer, then lightly wet-sand with 1000–1500 grit to erase ridges and create a smooth base for color. The surface should feel nearly glassy to the touch.
Color and clear. Mix base coat per the instructions and spray in ultra-thin coats, building color depth with several passes rather than one thick layer. After the color dries, apply optional clear coats in thin layers, allowing full cure between coats. Clear adds UV protection and depth.
Final refinement. Buffing and polishing restore gloss without risking heat damage to the clear coat. Use a gentle approach, and finish with a clean wipe and a check under light for uniformity and depth. Work in a clean, dust-free space to preserve the result as it cures.
Practical notes. Work in a controlled environment with stable temperature and low dust. Practicing on a scrap piece first helps calibrate spray pressure and color before touching the real fairings. With careful prep, you transform bare plastic into a durable, showroom-ready finish that endures road conditions.
Priming for Performance: Mastering Primer Choices and Material Compatibility for Sanded Motorcycle Fairings
Priming for performance begins the moment you wipe the last speck of dust from a sanded surface. The fairing’s final look and its resistance to chips, cracks, and UV fade hinge on the primer you choose and how well it bonds to the material beneath. Sanding creates a mechanical key, but primer is what locks that key into place and gives the paint something stable to cling to for years. This chapter dives into the heart of that bond. It unpacks how primer choice, material compatibility, and the mechanics of application come together in a seamless sequence, flowing from the careful prep you’ve already done through to the glossy finish you want to ride with. The aim is not merely a good-looking panel but a durable, professional finish that stays true under sun, rain, and the flexing and vibration that come with riding.
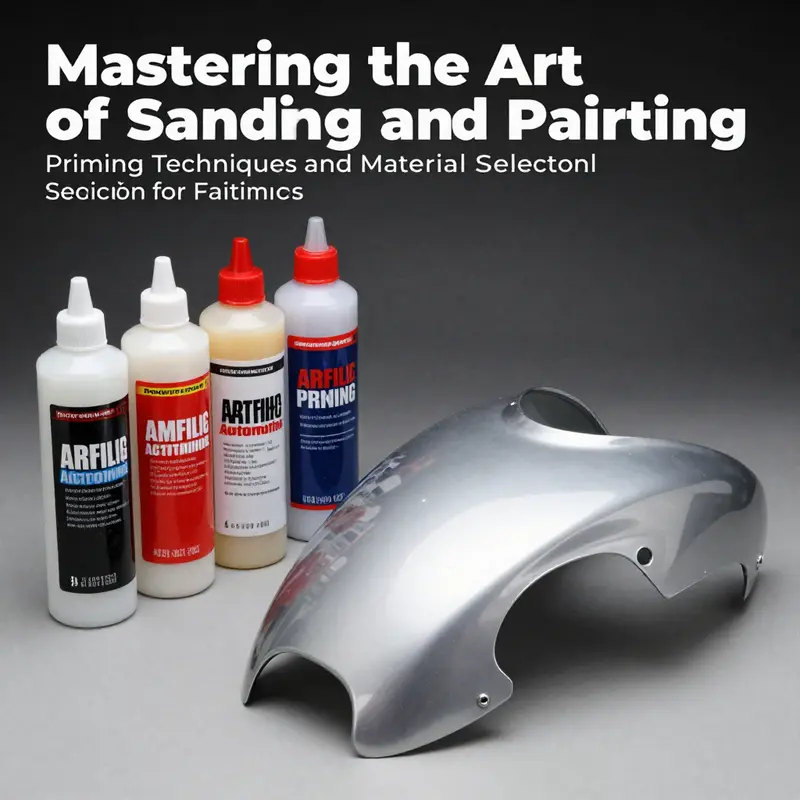
Begin at the surface with a clear understanding of what your fairing is made from. Most modern sportbike fairings are molded from ABS plastic or a combination of ABS and fiberglass. ABS presents a particular challenge because it is flexible, low-density, and prone to absorbing surface contaminants if not cleaned properly. Primer for ABS must provide excellent adhesion while remaining flexible enough to accommodate minor substrate movement without cracking. This is where the distinction between a run-of-the-mill primer and a true, 2K or two-part primer becomes meaningful. A two-part primer offers superior adhesion, a tougher film, and better resistance to cracking and peeling as the panel expands and contracts with temperature changes. It also tends to tolerate minor surface imperfections that a single-component primer might otherwise telegraph through the color coats. When you opt for a primer designed for plastic or fiberglass, you are acknowledging the substrate’s needs and choosing a protective layer that won’t fail under stress.
The process you follow after sanding should be as precise as the sanding itself. Contaminants are your enemy here. Even a tiny remnant of wax or silicone can create a barrier that the primer cannot bridge. Thorough cleaning with a degreaser or a cleaner formulated for plastics sets the stage for reliable adhesion. You’ll want to remove all oils, wax residues, and silicone-based compounds that may have migrated to the surface during storage or handling. After cleaning, you still cannot rush the priming step. Allow the surface to dry completely and proceed with a careful inspection for pinholes, scratches, or sanding scratches that may have telegraphed through the primer later. Those flaws demand attention before you apply any primer. A tack cloth should be used to lift away fine dust, because even the finest particulates can create small craters or texture that will compromise a smooth base.
Sanding, while it may feel repetitive, is a quiet form of preparation that pays off in the final result. Starting with a 400–600 grit abrasive, you lightly abrade the surface to create a textured key. The goal is not to remove the plastic or to create deep scratches but to give the primer a micro-roughness to bite into. As you progress, finish with a finer grade—1200 or 1500 grit—just enough to smooth the surface without erasing the key. This progressive abrading is what makes the next steps predictable and repeatable. After the final wipe with a tack cloth, you should have a surface that looks uniform, free of dust motes, and ready to accept the primer. If you pause too long at this stage, the surface can pick up dust again or accumulate fingerprints that will undermine adhesion.
Choosing the right primer is more than a color choice or a convenient name. It is a decision about chemistry and compatibility. For ABS plastic, a high-quality two-part primer is highly recommended. Two-part primers combine a resin and a hardener that react to form a cross-linked film. This chemistry produces a film with greater bond strength and flexibility than a single-component primer. The result is a primer that can tolerate substrate movement, resist cracking, and maintain adhesion under UV exposure. It is essential to verify that the primer is compatible with both the substrate and the topcoat you intend to use. For plastics-based fairings, you want a primer designed specifically for plastics or, at minimum, one that explicitly states compatibility with ABS. Incompatibility here can lead to adhesion failure, lifting, or peeling after the coating has cured.
As you commit to a primer, you also commit to the environment in which you apply it. A well-ventilated spray booth or an outdoor area with steady airflow is ideal. The directionality of airflow matters; you want to avoid drafts that blow dust onto wet primer and create texture in the film. Temperature and humidity influence the curing time and film strength, so follow the manufacturer’s recommendations to the letter. Thin coats, dried between passes, offer more control and fewer runs than a single thick application. The general rule of thumb remains: apply multiple thin coats rather than a single heavy one. Each coat should be allowed to dry thoroughly and be lightly sanded with a fine grit before the next coat. This incremental approach helps to fill in any small imperfections without provoking heavy orange peel or sinking into the sanded texture that you want to keep intact.
Once the primer has cured, evaluate the surface for uniformity. Lightly sand with a very fine grit—around 800 to 1000—just enough to smooth any high spots or dust nibs that may have formed during the primer’s cure. Wipe again with a tack cloth. The surface at this stage should feel smooth and look uniform under a bright light. Any persistent pinholes or imperfections can be spot-filled with a dab of light body filler, followed by another light sanding and re-priming as needed. The goal is a flawless yet pliant foundation that will not telegraph defects through the topcoats. If you have filtered the surface well, the primer layer will present a uniform color, indicating an even film thickness and a well-distributed cure across the entire panel.
With the primer ready and standing up to inspection, you move into the painting phase. Color coats require a consistent color and viscosity to ensure even coverage. Automotive-grade urethane paints designed for plastics are widely favored for their flexibility, durability, and resistance to UV fade. These paints are formulated to adhere to primed plastic without excessive solvent attack, which means they won’t soften or crack the primer layer under normal ride conditions. Proper mixing of the color coat is essential. Follow the manufacturer’s instructions for proportions, and ensure that the color is thoroughly stirred to a uniform consistency. Any separation or color variation can become visible once you apply the final clear coat. When you are ready to apply, an airbrush or spray gun is the preferred tool. The aim is to deliver a series of very light, even coats. A common practice is to apply four to six thin coats rather than two heavy coats. Each layer should be allowed to dry fully before the next coat is applied. The wait times are not merely about convenience; they give solvent and pigments a chance to dissipate correctly, reducing the risk of solvent pop or solvent entrapment inside the film.
The decision about clear coats is the decision about protection. A clear coat—preferably a two-part 2K clear coat—serves two critical roles: it seals the color and provides a protective shield against UV rays, abrasion, and environmental exposure. The clear coat should be applied in several thin layers, just as with the color. Build the coating gradually, allowing each coat to cure before applying the next. The final clear coat should be permitted to reach full cure before any buffing or polishing is attempted. Buffing on a not fully cured surface can cause heat build-up, which may lead to hazing or discoloration. The polishing step is not a mere finish touch; it is part of the protective strategy. When cured properly, the clear coat will yield a showroom gloss that resists yellowing and retains its clarity through time.
The interplay between sanding and priming and paint and clear coat is a conversation about film thickness, adhesion, and planarity. If any stage is rushed or treated as an afterthought, the subsequent steps become vulnerable to failure. The sanded surface’s texture, the primer’s ability to wet and adhere, and the paint’s flow all combine to deliver a smooth, even, color-rich finish. A well-executed primer acts as a bridge: it tolerates the substrate’s irregularities, it accepts paint evenly, and it remains durable as the panel experiences field conditions. In contrast, a poor primer choice can result in adhesion failures, peeling, blushing, or a finish that looks dull no matter how carefully the paint is applied.
Beyond the mechanics of priming and coating, there is the practical consideration of material compatibility at the moment you assemble your fairings onto the motorcycle. If you intend to swap panels, or if you’re updating a model with aftermarket or OEM-like components, you will encounter variations in substrate finishes and thickness. The right primer will accommodate these differences by forming a resilient bond across a spectrum of surface textures. It is worth noting that not every primer will play nicely with every topcoat. This is especially true when mixing legacy paints with newer formulations. Take the time to validate compatibility, err on the side of a slightly more robust primer, and test a small area if you are in a mixed-material scenario. A small test panel can save you from the disappointment of a full-panel failure after you have already committed to multiple layers of color and clear.
In this world of careful preparation, one small yet meaningful decision can ripple through the entire process. If you are seeking to keep options open for color matching or panel replacement, consider sources that emphasize compatibility with ABS fairings and offer a range of primer and paint options designed to work with plastics. For readers who want to explore a curated range of replacement panels and compatible components, the Honda fairings collection provides a practical reference point and a reliable starting point for compatible parts. You can browse this collection to understand how replacement panels align with the material and finish requirements discussed here. Honda fairings collection is a useful reference as you map out a project that may include both restoration and modernization of your bike’s fairings.
As you consider finishing, there is also the matter of environmental control and safety. Work in a clean, dust-free environment, and keep the workspace calm and free of debris during curing and while you are applying coats. Adequate ventilation reduces exposure to solvents and helps you maintain a safe breathing environment. The sequence from sanding to priming, painting, and sealing owes much of its success to the discipline you bring to these environmental conditions. Temperature, humidity, and air quality all shape the film’s final texture and its resistance to damage. By embedding these conditions into your routine, you set up your fairings to perform under real-world conditions the moment you reinstall them on the bike.
In closing the loop between preparation and performance, remember that the goal of priming in this context is not simply to improve aesthetics. It is to create a durable, compatible interface between the substrate and the finishing layers. A primer that adheres well to ABS, a paint that wets evenly and cures with a smooth film, and a clear coat that seals and adds depth—these elements together create a panel that resists the daily grind of sunlight, moisture, and road grit. When you approach priming with the same care you bring to the sanding and the paint, you transform a potential vulnerability—the plastic underbody of a motorcycle—into a robust, resilient surface that looks excellent and lasts. The entire process—from the initial wipe-down to the final polish—becomes a single, continuous craft. The finished fairing tells a story of preparation and precision as surely as the bike’s engine tells a story of power.
For readers who want a broader, practical guide that confirms these steps in a structured, actionable way, there is a detailed practical resource available online that walks through the sanding, priming, painting, and sealing sequence. It reinforces the concepts discussed here and provides concrete guidance on mixing ratios, spray techniques, and curing times to help you refine your technique and avoid common pitfalls. If you are seeking further step-by-step confirmation or hints drawn from real-world practice, this external reference complements the considerations outlined in this chapter and can help you translate theory into a dependable, professional finish. See the Practical Guide linked below for a comprehensive, field-tested approach to painting motorcycle fairings.
External resource for further guidance: How to Paint Motorcycle Fairings – A Practical Guide.
From Sand to Shine: Final Painting and Finishing Mastery for Motorcycle Fairings

When the fairings come off and the workshop light softens, the final act of a paint project begins. It is the moment where all the careful prep, all the careful sanding, and the disciplined layering of color and clear coat converge into something more than a cosmetic upgrade. It becomes a statement about how a rider treats the machine they ride, and it rests on a sequence of practiced decisions as much as on raw materials. The final painting and finishing techniques are not merely procedural; they are a dialogue between surface chemistry, physics, and the hands of the painter. The goal is a finish that is not only visually compelling but durable under sun, rain, and the inevitable vibrations of a high‑rpm engine packing into a fairing’s curves. To reach that destination, the process begins with surface preparation that respects every micrometer of the plastic or fiberglass substrate, then proceeds through controlled application to a gloss that endures, followed by polishing and protection that preserve depth and clarity over time. This journey, while technical in its steps, unfolds most clearly when read as a seamless narrative of texture, light, and form.
The journey begins with a return to the line between roughness and refinement. After the color has been laid down and the base layers have cured, a careful, final sanding is performed. The goal is not to erase every imperfection but to even the entire layer so that the next coat sits evenly and flash dries without compounding ridges. This initial sanding is modest in aggressiveness yet exacting in execution. A fine grit range, typically between 1000 and 2000, is used to knock down the micro highs and smooth out any tiny dust nibs that made it through the earlier rounds. The intent is not to create a perfectly flat, glassy surface at this stage but to create a uniform, receptive canvas for the next coat. The surface should feel silky to the touch, with no obvious grit or roughness, and the color underneath should be visually consistent without patches of uneven shading. As you move through this stage, you will frequently wipe the surface with a clean, lint‑free cloth lightly dampened with a prep solvent. This solvent, or a high‑quality isopropyl alcohol, dissolves any leftover oils or fingerprints that could interfere with adhesion. A tack cloth then follows, lifting the last traces of dust that could mar the finish. The sequence—sanding, followed by solvent wipe, then tack cloth—reads as a steady ritual: a ritual of responsibility, not mere repetition.
With the surface prepared, the priming comes next, and here the choice of primer is as important as the accompanying technique. Modern fairings are often made from plastic or fiberglass, and the primer chosen must be compatible with those materials while providing a robust bond for subsequent layers. A high‑quality automotive primer designed for plastics or fiberglass is typically applied in thin, even coats. The primer serves multiple roles: it fills minor micro‑imperfections, enhances paint adhesion, and establishes a uniform color plane that helps the color coats read true under the showroom light. Allowing the primer to cure fully before any sanding is essential. Once dry, a light, mechanical pass with a very fine grit—usually around 1500 to 2000—smoothed the surface further and eliminated any tiny imperfections that might otherwise show through the color layer. The aim is not to remove the primer but to create a micro‑texture that the subsequent coats can grip onto with consistency. In this stage, patience is not a luxury; it is the foundation of a durable finish.
The next act is color—the actual pigment that gives the fairing its personality. Color application is a disciplined exercise in repetition and control. The paint is mixed according to manufacturer instructions to achieve proper color balance, viscosity, and pot life. An airbrush or spray gun is used to apply multiple fine layers rather than a single heavy coat. Three to five coats are standard for a balanced, even finish that resists runs and sags. Each coat needs to dry to an appropriate level before the next is applied; the exact timing will depend on ambient temperature, humidity, airflow, and the specific paint formulation being used. The environment plays a silent but decisive role. A clean, dust‑free space, with controlled temperature and minimal air movement, helps to ensure that the spray pattern remains uniform and that the paint lays down evenly across the curves of the fairing. Even with the best technique, a little patience goes a long way: waiting the recommended time between coats prevents you from chasing a problem that appears only after a coat has cured.
As you approach the midsection of the project, regard the transitions between coats as a study in chemistry and optics. The finish you see will be the light response of the pigment, the binder, and the curvature of the fairing interacting in a given angle and under a specific light source. The more uniform the color layers, the more the subsequent clear coat can magnify the depth and clarity of that color. The color work culminates not in the final visible color only but in the way the light travels across the panel, revealing micro‑curvature and the smoothness of the surface. After the final color coat dries, a clear coat is applied to protect the pigment and to add gloss. The clear coat is another layer of protection against UV exposure, air, and moisture, and it also contributes to the overall ‘wet’ look that defines a premium finish. The clear coat is typically applied in several thin layers, just as with the color. The philosophy here is to build a barrier that can flex with the fairing’s panel joints and resist micro‑cracking while maintaining a crisp, high‑polish finish. Each layer should be allowed to cure according to the manufacturer’s guidance; rushing this stage increases the risk of solvent entrapment, solvent pop, or soft spots that could haunt the surface after months of exposure to the elements.
Once the clear coat has cured, the surface enters the polishing phase. Polishing is where the finish finally reveals its depth and reflects light with a mirrorlike clarity. The process begins with a light, targeted compound that removes any micro‑imperfections introduced during the clear coat application or created during the drying process. A dual‑action polisher is highly effective here because it reduces heat buildup and minimizes the risk of creating new curved holograms. A careful hand on the trigger, a steady travel speed, and a methodical cross‑hatch pattern help achieve a uniform gloss. The objective is a finish that reads as seamless rather than a collection of glossy planes. A few minutes with a fine paste or compound can lift the clarity to a level where the color depth is almost tangible in bright light. The polishing step should be approached with respect for the material’s tolerance: too aggressive a polish can thin the clear coat or burn through any edges, while too gentle an approach may leave the surface cloudy or dulled. The balance is found in keeping the pad clean, using proper polishes, and maintaining a comfortable, controlled pace.
After polishing, a final wax or protective sealant is applied to lock in the gloss and provide an additional layer of defense against environmental contaminants. Wax and sealant are not mere cosmetics; they create a hydrophobic surface that helps rain bead away, reduces the adherence of dust, and gives the finish a longer life. The right wax or sealant is chosen to suit the prismatic nature of the clear coat, the underlying pigment, and the rider’s maintenance habits. The timing of waxing is straightforward: after the final polish has fully cured, the wax is applied with a soft cloth or applicator pad, allowed to haze, and then buffed to a clean, residue‑free finish. The result is a protective barrier that resists the gradual dulling effects of UV exposure and environmental pollutants while preserving that showroom gleam.
The chapter on finishing would be incomplete without considering the broader lifecycle of the finish. A well‑executed final painting is not only about the moment the bike is photographed at a show; it is about how the surface stands up to road grime, rain, heat, and the inevitable micro‑impacts from pebbles and debris. In practice, this means the coatings chosen must manage thermal expansion, UV exposure, and chemical resistance. The practitioner who plans ahead will select primers, paints, and clear coats with this longevity in mind. They will also maintain proper workshop practices, including dust control, clean air supply, and appropriate ventilation to ensure that every stage remains uncontaminated. The discipline of surface preparation, the precision of layer application, and the patience to allow full cure times all converge into a final finish that not only turns heads but lasts with grace.
In this discipline, the craft of painting is inseparable from the science of adhesion and surface energy. The surface energy of the plastic or fiberglass fairing, modified by the primer, determines how well the subsequent coats cling. The sanding steps, both initial and final, are not merely about smoothing; they are about shaping a surface energy profile that will bond consistently with the primer and paint. A well‑executed sequence of sanding, solvent cleaning, priming, and controlled color and clear coats yields a final surface with minimal risk of peeling, cracking, or hazing. It is a careful balance between mechanical abrasion and chemical compatibility, between patience and precision, and between the art of color matching and the science of film thickness. The finished piece, when viewed under the showroom lights, should reveal the painter’s intention: a deep, even color that reads true from multiple angles, a glassy clear coat that seems to pull the color into itself, and a surface that can endure wind, rain, and the road’s occasional roughness without losing its luster.
For readers seeking more model‑specific guidance or a deeper dive into materials, consider exploring options in the Honda fairings collection to understand how shape and substrate choice can influence preparation and finishing decisions. The journey through fairing finishing is not one of generic steps but of adaptable practice that acknowledges the differences between models, materials, and even climate. When the rough edges of a particular fairing shape demand a different approach to sanding texture, or when a certain pigment responds differently to clear, the core principles still apply: create a uniform canvas, apply thin, even layers, respect cure times, and protect the surface with a resilient topcoat and smart maintenance. This is how a practical craft becomes a polished product—and how a rider’s faith in their machine’s finish becomes a quiet source of pride after every ride.
To deepen your understanding of the practical sequence and consult additional step‑by‑step guidance, you can refer to authoritative, model‑specific resources. For example, a practical guide on how to paint motorcycle fairings offers actionable details on mixing, spray technique, and finishing that complement the methods described here. Honda fairings collection provides a perspective on how different body shapes influence prep and finish, which can help you tailor your approach to common fairing geometries. Remember that painting is as much about preparation as it is about pigment; the best color work rests on a foundation of careful cleaning, consistent sanding, and methodical layering. The final look—the depth of color, the clarity of the gloss, the seamless transition across curves—speaks to the care you invested in every stage of the process.
In closing, the final painting and finishing of motorcycle fairings is a discipline built on restraint, measurement, and respect for the material. It rewards practitioners who choose quality over shortcuts and who treat each coat as an opportunity to refine the surface toward a mirrorlike finish. The result is a fairing that not only turns heads but also performs under pressure—the kind of professional finish that makes a rider feel that the bike has been prepared for the road with the same attention that goes into building an instrument, a work of art that merges engineering with aesthetics. The steps outlined here—careful sanding, thorough cleaning, deliberate priming, measured color layering, protective clear coating, and disciplined polishing and waxing—are not merely a routine. They are the architecture of a finish that can endure, while still reflecting the rider’s eye for detail and the bike’s unique character. For those who pursue this craft, the road ahead is a canvas, and every layer you apply writes another line of depth into the story your fairings tell as the sun catches their curves.
External reference for broader context and step‑by‑step guidance: How to Paint Motorcycle Fairings – A Practical Guide
Final thoughts
In summary, the meticulous process of sanding and painting motorcycle fairings is integral to achieving professional-grade results that enhance both aesthetics and performance. By understanding the importance of each step—from preparation to finishing techniques—business owners can deliver quality restorations that satisfy customer demands and promote brand loyalty. As you refine these techniques within your own operations, remember that precision and attention to detail will set your work apart in a competitive market.