Sanding motorcycle fairings is pivotal for both aesthetics and functionality when preparing for paint or repair. With the right techniques, tools, and a commitment to detail, business owners can ensure that their motorcycle projects meet high standards of quality and durability. This article will explore the nuances of sanding motorcycle fairings, covering basic techniques, necessary tools, preventative strategies to avoid damage, tips for achieving a smooth finish, and crucial final steps after sanding. Each section contributes to a holistic understanding of the sanding process, empowering owners to deliver exceptional work in the motorcycle customization and repair industry.
null
null
From Rough to Radiant: Selecting Tools and Materials for Sanding Motorcycle Fairings

Sanding motorcycle fairings is more than a task of rubbing away imperfections. It is a careful orchestration of texture, control, and material knowledge that sets the stage for a durable paint job and a showroom-smooth finish. The purpose is not merely to remove old layers or flatten a surface; it is to create a surface that will hold primer, bond well with color, and resist the daily stresses of riding, heat, and sun. Achieving that starts with choosing the right tools and the right materials, because the most expensive paint job will still crack if the surface beneath it isn’t prepared with precision. The process unfolds like a conversation between the sander and the fairing, where each step guides the next and where pressure, pattern, and product specification matter just as much as grit and speed.
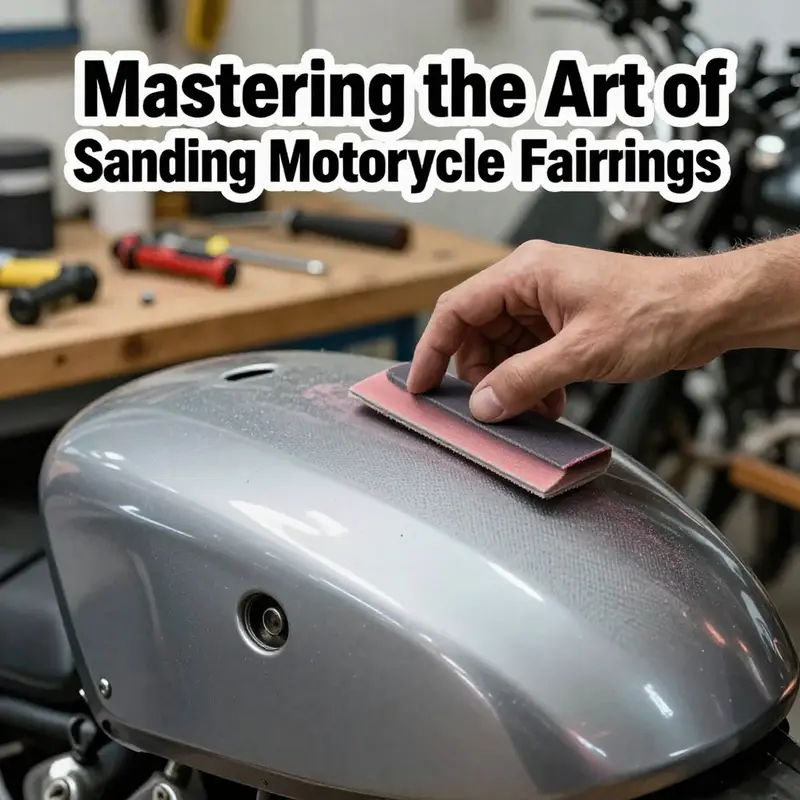
Begin with a clear plan. The fairing is typically plastic or composite, curved and often thin around the edges. Its geometry demands tools that can adapt to contours without creating new grooves or uneven high spots. A set of sanding blocks or foam pads gives the necessary even pressure across irregular surfaces. The blocks distribute force more evenly than fingers alone, reducing the risk of creating flat spots on a curved surface. For large, flat areas, a random orbital sander is invaluable. It offers consistent motion that minimizes swirl marks, a common problem when finishing plastics. Yet the nooks, corners, and tight edges still require a detail sander or careful hand work. This is not a case for brute force; it is a case for measured control and the right tool for the right area.
The sequence of tools must mirror the plan. Start with a coarse abrasive to remove major imperfections, old paint, or heavy blemishes. An initial 80 to 120 grit helps to knock down rough areas efficiently. It’s tempting to push too far with aggressive sandpaper, but overzealous stock removal can breach the surface and compromise the integrity of thin areas near edges or attachment points. As the major irregularities flatten, move to intermediate grits—180 to 220—to begin erasing the deep scratches left by the coarse paper. The goal at this stage is not to finish but to prepare a smoother substrate that accepts finer abrasives without dragging gouges into the plastic. Then progress to 320 and 400 grit for the final smoothing that primes the surface for primer adhesion. A final 600 to 800 grit can produce a near-mirror finish if you’re preparing for a clear coat or if the color coat requires very delicate final polishing. Skipping grits is a classic mistake; each stage must remove the scratches of the previous one, not just blend them. The ritual is deliberate, not hurried.
Between grits, cleanliness is nonnegotiable. Dust is the enemy of adhesion; it acts like sandpaper in a contact layer, leaving microscopic trails that lead to premature chipping or peeling later on. A tack cloth is the most reliable ally here. Wipe the surface after every grit change, then again before primer. If you’re working in a dusty environment, a masking tape barrier around the work area can help keep stray particles from landing on newly smoothed sections. A clean surface also helps you notice the real texture beneath—whether you’ve achieved the intended satin smoothness or if stubborn scratches remain that require another pass with a finer grit. Patience in this step translates to durability in paint and longevity in the finished look.
The method of sanding matters as much as the grit. Light, even pressure is essential. Pressing hard can carve into the plastic, especially near edges or on thin, flexible sections that bend with the bike’s lines. Let the abrasive do the work, not your hand strength. Move the sander across the surface in overlapping passes, rotating the tool if you’re using a random orbital sander to prevent repeating the same path. When you encounter a stubborn burr or a protruding knot of hard filler, switch to a detail sander or use hand sanding carefully around the obstruction. Curved fairings require a flexible pad that can ride over a radius rather than trying to push a rigid block into a curve. The shape of the pad matters as much as the grit; a flexible foam pad makes it possible to maintain contact without creating flat spots on a bulging contour.
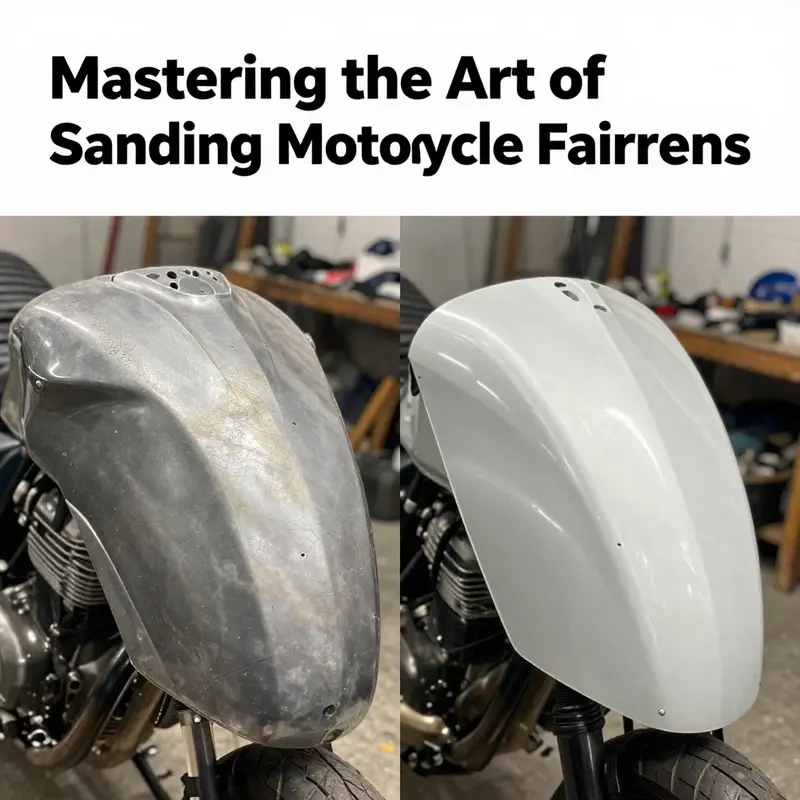
A critical but often overlooked pair of steps lies in filler and primer compatibility. If you find small gouges, pinholes, or uneven regions after the initial sanding, a light application of plastic filler can help. It’s important to sand this filler flush with the surrounding surface before proceeding through the grit ladder. The goal is a seamless substrate that accepts primer evenly. When the surface looks uniform and shows no visible high or low spots, apply a high-quality primer designed for plastics or composites. Primer does more than color; it seals the surface and improves adhesion for subsequent coats. A well-sanded, correctly primed base can make the color coat look richer and resist peeling—an outcome every rider hopes for when a fairing is a focal piece of the bike’s aesthetic.
As with every craft, safety cannot be an afterthought. Sanding plastic dust is not inert; it’s a fine, persistent irritant that can affect the eyes, lungs, and skin. A respirator or suitable dust mask is essential, especially when using a powered sander for extended periods. Safety glasses protect against tiny particles that might become airborne, and gloves keep the hands from drying out under constant friction. The color of the dust can also reveal whether you’re burning through material or just removing surface blemishes; a consistent, light color is usually a sign you are staying within the intended surface boundaries. Ventilation matters too. If you are indoors, bring in airflow or work near a shop fan to keep dust from resettling on freshly smoothed sections. Proper protection, in short, keeps the work steady and the finish uncompromised.
The materials you choose—sanding blocks, pads, and abrasive papers—play a larger role than most hobbyists realize. High-quality abrasives are more resistant to tearing and wear, especially on plastic and fiberglass. They maintain a consistent cut, which translates to more predictable results and less time spent chasing scratches. Because plastics vary in hardness and flexibility, it’s wise to select a set with a range of pad densities. This allows you to match the contour and thickness of any fairing piece while keeping pressure even. In this sense, the tools become extensions of your hands—their response to your touch informs your technique, and your technique, in turn, determines the surface’s readiness for primer and paint.
For those curating a specific fairing project, exploring the right parts and compatibility is also part of the preparation. When considering options for replacement panels or repair kits, browsing a dedicated collection can be helpful to understand how different shapes and curves behave under sanding and priming. A practical approach is to look for collections that emphasize fitment and curvature, ensuring your preparation steps are appropriate for the chosen panels. For example, you can browse a Honda fairings collection to get a sense of common contour patterns and edge profiles across popular models. This helps you anticipate where extra care might be needed and where your technique can stay consistent across the entire surface. See the Honda fairings collection for reference as you map out your sanding plan and material choices.
The progression of grits, the discipline of cleanup, and the care taken around edges all converge into a surface that is ready for primer and paint. Preparation is where the real art happens; it’s the quiet phase that makes the bold finish possible. When you take the time to blend, to clean, to verify the smoothness with a tack cloth, you are not merely removing material. You are shaping a foundation strong enough to hold the color, resilient enough to weather exposure, and precise enough to meet the eye of a meticulous rider. The difference between a good paint job and a great one often rests on this foundation—the depth, uniformity, and absence of micro-scratches that only become apparent after the primer. In that sense, the chapter on tools and materials is not a mere shopping list. It is an invitation to approach sanding as a craft—one that respects the complexity of plastic bodies while delivering a finish that elevates the entire motorcycle’s appearance.
As you finish this stage and move toward primer, remember that the effect you aim for is consistency. Consistency in pressure, consistency in dust removal, and consistency in following the grit sequence. Those elements are the quiet engines behind a durable, long-lasting paint job. And when you later step into color and clear coat, the smoothness you achieved will reveal itself in a uniform shine, minimal edge haze, and a finish that resists the micro-scratches of road life. In the end, the tools and materials you choose are not just equipment; they are the first collaborators in a shared goal: to return a rider’s fairing to a pristine condition while respecting the material’s nature and the bike’s design lineage. For those who want to map out their specific project with direct procurement in mind, a visit to a dedicated fairing collection can provide context and reference, reminding you that the process is as much about preparation as it is about paint.
External resource: https://www.harley-davidson.com/en-us/support/maintenance/repair-tips/sanding-motorcycle-fairings.html
Guarding the Gloss: Mastering Damage Prevention While Sanding Motorcycle Fairings

Sanding motorcycle fairings is more than a preparatory step; it is the quiet craft that determines how a painted surface will look and hold up under the streetlight glare of everyday riding. The fairings, often made from plastics that bend, flex, and sometimes wrinkle under pressure, are the first line between the rider and the elements. When you strip away years of finish, you expose the true surface beneath—the skin of the bike that will carry your color, your emblem, and your own sense of pride. In this space, the difference between a glossy, enduring finish and a dull, speckled coat rests on a careful habit: damage prevention during the sanding process. The goal is not aggression but precision. You want to encourage adhesion and evenness without sacrificing the material’s integrity or shaping the wrong contours in a moment of haste.
Begin with a clean stage. A dust-free workspace is not a luxury but a necessity. Particles in the air will settle into the pores and on the edges, creating micro-scratches that later reveal themselves under paint. The floor should be swept, the air as still as possible, and the only mess allowed is the controlled trail of dust from your own sanding. A clean zone prevents contamination from old waxes, polishing residues, or sanding dust that could become a breadcrumb trail of imperfections. At the same time, the surface to be worked on should be free of balm, tar, or any sealant that might resist the new layer. You want the fairing to reveal only its true texture when you cut into it with the paper, not layers of old coatings peeling away in a messy mosaic.
Safety is the second pillar of effective sanding. A respirator protects you from fine particles and resin-based fumes that can linger in the air, particularly when fiberglass or composite components are present in the construction or repair. Safety goggles protect your eyes from flying grit, and a lightweight long-sleeved shirt can help shield your skin from tiny shards that might otherwise become irritants. The goal is to work calmly and deliberately rather than pressiveness; injuries or fatigue can derail even the best intentions. A thoughtful approach to safety also reduces the likelihood of rushing to a finish that looks good at a glance but hides flaws that will become evident after primer and paint. The moment you accept a steady, measured pace is the moment you begin to protect both yourself and the surface you’re shaping.
The choice of sandpaper is not arbitrary. It is a decision rooted in material science and the particular evolution of the fairing. Start with a coarser grit, typically in the 80–120 range, to remove old paint, gloss, or rough spots that stand in the way of a smooth finish. This initial step is where you determine the fairness of the surface; you want to erase significant irregularities without carving into the plastic. After the major imperfections are reduced, you move through a deliberate progression of grits—moving from 180 to 240, then 320 and finally 400. Skipping grits can leave behind visible scratches that mirror themselves through every subsequent layer, an effect that can demand extra work later. The idea is to create a gradually refined surface, where each pass leaves the fibers finer and the texture more uniform.
A crucial ally in this process is the sanding block or foam pad. Bare hands do not distribute pressure evenly, and inconsistent pressure is the enemy of a uniform finish. A block maintains a flat plane across the fairing, helping you maintain the desired contour and avoid corner lipping or rounding. The block is not a luxury; it is a tool for precision. Use it with light but steady pressure, allowing the grit to do the work while your hand follows the line of the fairing. The visual cue you want is a surface that, when you run a finger along it, feels consistently smooth with no sharp ridges or pocked areas. As you progress, keep the surface cool. Heat can soften or warp the plastic, especially around edges or thin sections. If you notice warmth, pause, re-wet the area if you’re using water, or take a small break to let the material breathe. Rushing through heat-laden spots accelerates warping and can undermine the long-term integrity of the fairing.
Before and during sanding, inspect the fairing for underlying cracks, delaminations, or any structural weakness. Sanding over damaged areas without addressing them can propagate fractures and complicate later repairs. This is not a judgment call alone; it is a practical check that pays off when you apply primer and paint. If a seam or an edge shows signs of separating or flexing, it may be better to address those issues first or consult a professional. The fairing is not just a shell; it is a structural panel of sorts that supports your cosmetic work. A fragile or compromised area will not behave predictably under abrasion, and you’ll end up chasing problems that began long before you picked up the sandpaper.
Plastic presents its own set of cautions. The plastics used in many fairings are not infinitely thick. The temptation to press hard near an edge or to sand aggressively around a corner can lead to overheating, softening, or warping that alters the fairing’s geometry. You must respect the material’s limits and adapt your technique accordingly. On painted surfaces, you must balance the desire to feather the edges with the need to preserve the integrity of the primer or base coat beneath. If you sand too deeply, you risk cutting into the primer or base layer, which can compromise adhesion for the next coats. The right approach is to accept small, incremental progress and check your work frequently. A quick wipe with a tack cloth or a gentle inspection with a clean finger can reveal scratches, rough patches, or unevenness that isn’t visible in oblique light.
As the sanding progresses, a disciplined sequence becomes evident. Begin with coarse grit to knock down the major irregularities. After that, test the surface by running a clean, gloved hand or a light touch along the contour to feel for consistent smoothness. If you feel any catching or roughness, you know which area needs a repeat pass with the appropriate grit. Move methodically, not randomly. The directionality of sanding matters as well. Always sand in one direction, and preferably along or with the fairing’s grain or primary contours. Crossing directions creates a crosshatch pattern that can be stubborn to remove in later stages and may require more material to be removed just to reach a uniform surface. The sanding block should glide along the curve, maintaining an even contact with the surface, and you should avoid circular motions that can generate hot spots or uneven textures.
After each sanding stage, the surface must be cleaned thoroughly. Dust is a thief of adhesion and a co-conspirator in texture problems. A tack cloth is the simplest and most effective tool here, capturing particles that would otherwise lodge in the pores or feathered edges. In some cases, an isopropyl alcohol wipe can be used to remove fine dust and oils, but you must allow the surface to dry completely before moving on. This step is essential because the next layer—whether primer or sealer—will only bond properly if the surface is truly clean. The cleaning step is not a chore but a safeguard; a minute surface contamination now can undermine the evenness of a finish later.
The transition to priming is a moment of reassurance. A light primer sealer can fill minor pores and create a uniform platform for the base coat. Primers not only improve adhesion but also help reveal residual flaws you might have missed in the sanding stage. The choice of primer and sealer should be appropriate to the plastic type and the paint system you intend to use, and you should follow the manufacturer’s guidance for cure times and sanding gaps before applying paint. At this point, the work shifts from brute abrasion to controlled refinement. You are not merely removing material; you are shaping a surface that will reflect light evenly, hold color consistently, and resist micro-scratches that would otherwise steal gloss over time.
If you are considering where to source fairings that align with a careful preparation philosophy, you can explore a range of components online and see how pre-finished pieces compare to raw shells. For example, the Honda CBR600RR fairings collection offers a variety of options that can be selected to suit different restoration or customization projects. Honda CBR600RR fairings collection This reference is not about promotion; it is about recognizing how different fairings respond to sanding and priming. Each fairing type has its own stiffness, fiber content, and surface texture, which subtly influence how you approach sanding and how you plan the subsequent paint system. By choosing a fairing with a known baseline, you can calibrate your expectations for the level of refinement you will be able to achieve with your tools and grit progression.
As you near the end of the process, the surface should resemble a mirror of the intended final finish in its feel, not just its look. The gloss of the future paint should appear uniform across the entire panel, with no visible scratches or irregularities that would distort the color or sheen. At this stage, many technicians will re-check edges and corners for micro-scratches, ensuring that the transitions between panels are smooth and that no edge has a brittle callous formed by aggressive sanding. The final wipe-down after priming and just before paint is a moment to reset the senses: breathe, examine under a bright light, and confirm that the surface is ready for the next layer that will carry the bike’s new personality.
The guidelines embedded in professional repair manuals and safety advisories stress that the best practice is never to hurry. The development of muscle memory—how your hands learn to apply just enough pressure with a steady cadence—takes time. A well-sanded fairing is a reflection of a practiced rhythm: the quiet, measured strokes, the patient progression through grits, and the willingness to pause when the material shows signs of stress. This is where knowledge becomes craft, where the mind stays ahead of the hand and the surface is prepared not merely for paint but for durability. You will notice that, in a well-executed job, every edge is crisp, every contour reads as designed, and the final color rests on a foundation that was prepared with respect for the plastic’s character and for the material’s limits. The result is a finish that not only looks good in the moment but holds its luster through miles and seasons, maintaining the ride’s clean, professional aesthetic.
For readers who want to ground these practices in broader standards, the Motorcycle Industry Council’s safety and repair guidelines offer a framework for safe handling, ventilation, and methodical repair work. Consistent adherence to such guidelines can help align individual practice with industry expectations and improve outcomes across a range of plastics and coatings. This chapter has stayed focused on the procedural core—how to manage grit, pressure, and timing—while acknowledging that external resources provide a broader safety net for your project. The story of sanding is, at its heart, a story of attention: attention to the material, to the tools, to the environment, and to the finish you want to achieve. When those threads come together, the gloss you seek is not a forced result but a natural outcome of careful preparation, patient technique, and a commitment to doing the work right the first time.
External resource for further guidance: MIC Safety & Repair Guidelines
null
null
null

null
Final thoughts
The process of sanding motorcycle fairings is an essential component of motorcycle repair and customization that requires a blend of techniques, proper tools, and careful attention to detail. By mastering this craft, business owners can ensure their projects not only look great but also hold up against the rigors of the road. Each chapter has outlined critical aspects of sanding, from the foundational techniques to necessary materials and final preparations for painting. Emphasizing quality in these steps ultimately leads to satisfied customers and a strong reputation within the motorcycle community.