Introduction
Spray painting motorcycle fairings offers a powerful way to customize and restore a bike’s appearance, but it demands precise preparation, expert techniques, and effective finishing to ensure longevity and visual appeal. Business owners in the motorcycle industry understand how critical the finish is—not just for aesthetics, but for durability under demanding conditions. This overview guides you through the core facets of spray painting fairings: from the crucial surface preparation and treatment that ensure paint adhesion and durability, to the specialized painting methods and materials tailored for plastics. Finally, the discussion covers protective clear coats and finishing procedures that safeguard the paintwork, boost gloss, and extend product life. Each chapter builds toward a comprehensive approach to spray painting motorcycle fairings that can elevate your service offerings and customer satisfaction.
Tables of Contents
Chapter 1: Preparation and Surface Treatment Essentials for Spray Painting Motorcycle Fairings
- Mastering Cleaning and Sanding: Foundational Steps for Flawless Motorcycle Fairing Paintwork
- Mastering Primer and Clear Coat Application for Durable Motorcycle Fairing Finishes
Chapter 2: Painting Techniques and Materials for Can You Spray Paint Motorcycle Fairings
- Mastering Surface Prep and Priming: The Cornerstone of Spraying Motorcycle Fairings
- Mastering Spray Application and Finishing for Durable Motorcycle Fairing Paint
Chapter 3: Protection and Finishing Coats in Can You Spray Paint Motorcycle Fairings
- Enhancing Durability: Chemical and Abrasion Resistance of Protective Finishes on Motorcycle Fairings
- Innovative Protective Coatings: Elevating Spray Painted Motorcycle Fairings to Lasting Perfection
Chapter 1: Preparation and Surface Treatment Essentials for Spray Painting Motorcycle Fairings
1. Mastering Cleaning and Sanding: Foundational Steps for Flawless Motorcycle Fairing Paintwork
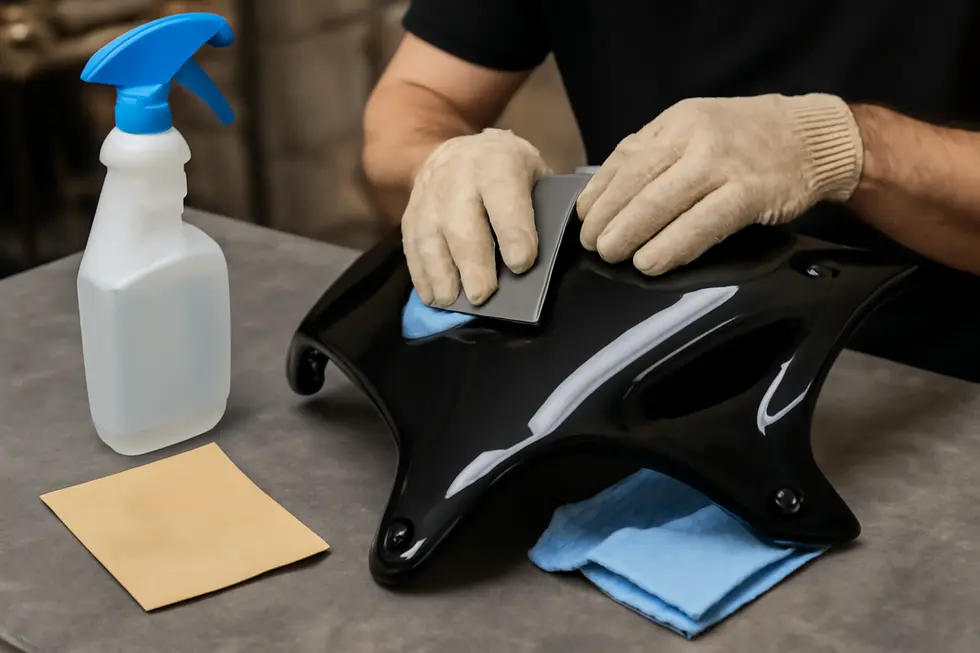
Preparing motorcycle fairings for spray painting is a meticulous process that begins with the essential stages of cleaning and sanding. These steps pave the way for excellent paint adhesion and a smooth, high-quality finish, which are critical when working with fairings typically made from plastic materials such as ABS or fiberglass. Proper care in these early phases cannot be overstated, as neglecting them often leads to paint failure, including peeling, cracking, or uneven texture.
The cleaning process involves more than just wiping down the surface. It requires a thorough removal of dirt, grease, oils, and any residual contaminants that could hinder paint adhesion. Fairings tend to accumulate oils from road grime and handling, so using a mild detergent or a specialized degreaser formulated for plastic or fiberglass is ideal. This ensures contaminants are broken down gently but effectively without damaging the material. After applying the cleaner, a careful rinse with fresh water removes any lingering chemicals followed by complete drying—moisture left on surfaces can cause poor primer and paint bonding. Taking the time to properly clean establishes a pure, contamination-free surface that supports lasting paint adherence.
Following cleaning, sanding is the indispensable step that creates microscopic texture, allowing paint layers to grip firmly onto the smooth plastic or fiberglass surfaces. Starting the sanding process with medium-grit sandpaper—generally between 320 and 400 grit—is practical to scuff the entire surface evenly. This initial abrasion removes surface gloss, minor scratches, old paint traces, and other imperfections. For fiberglass fairings or those that have received repairs with fillers, sanding also helps feather those areas to blend seamlessly with the surrounding material. The objective here is uniform dullness rather than aggressive material removal.
Once the initial sanding phase is complete, gradually moving to finer grits such as 600 to 800 replaces the roughness with a smoother finish that primes the surface for painting. These finer abrasions create enough tooth for primer to bond well while reducing visible sanding marks that could reflect through paint layers. At times, especially between primer and base coats, very fine wet sanding using 1000 to 3000 grit sandpaper is recommended to further refine the surface and remove minor imperfections or dust nibs. Wet sanding helps achieve the silky finish that professional paint jobs demand by allowing better control and less dust generation.
Technique is key throughout sanding. Employing a sanding block or foam pad helps distribute pressure evenly, preventing gouges or uneven sanding spots, particularly on the curved and contoured shapes found on fairings. Sanding in a circular or crosshatch pattern ensures consistent abrasion across all sections rather than following linear directions that can cause patchiness. When addressing any cracks, pinholes, or deeper surface flaws, applying a body filler or glazing putty before sanding is necessary. The filler must cure completely, and sanding it smooth creates an imperceptible repair that blends into the fairing’s surface—this step is vital for professional-looking finishes.
After each sanding stage, it is crucial to clean the surface again to remove dust particles that could disrupt paint adhesion or appear under the final paint layer. A gentle wipe with a tack cloth or a clean microfiber towel ensures debris-free surfaces ready for primer application.
Applying a suitable primer formulated specifically for plastic or fiberglass surfaces follows cleaning and sanding. Priming seals the substrate, prevents paint from flexing or peeling off, and enhances overall paint durability. After the primer dries, a light sanding with fine grit further smooths the surface, removing any raised spots or orange peel texture from the primer coat.
Together, these interlinked cleaning and sanding practices establish the foundation for successful spray painting by fostering strong chemical and mechanical bonding between the paint and fairing material. Skipping or rushing these steps is a common cause of premature paint failure, while thorough attention ensures that your motorcycle’s fairings develop a smooth, even, and lasting coat.
For enthusiasts looking to deepen their understanding of sanding and repair techniques on motorcycle fairings, the instructional video “How Do You Repair Fiberglass On A Motorcycle?” offers comprehensive guidance on sanding, filling, and priming. Additionally, exploring detailed resources like the Explore the Best Motorcycle Fairings at Summit Fairings can help you select quality surfaces primed for customization.
Integrating diligent cleaning and progressive sanding—from coarser to ultra-fine grits—alongside proper priming constitutes the essential groundwork that every rider or DIY painter must master. This preparation not only elevates the visual appeal but also protects and extends the life of your motorcycle’s fairings after spray painting.
2. Mastering Primer and Clear Coat Application for Durable Motorcycle Fairing Finishes
Achieving a durable and professional finish when spray painting motorcycle fairings hinges critically on the application of primer and clear coat. These two stages not only protect the surface and paint but also enhance adhesion, longevity, and the overall aesthetic appeal of the fairings.
Before primer application, the surface must be impeccably clean and properly prepared. Any residual grease or contaminants can undermine adhesion, leading to peeling or uneven finishes. After thorough cleaning, lightly sanding the fairings with fine-grit sandpaper or a maroon scuff pad creates a slightly rough texture, crucial for the primer to bond effectively with the plastic surface. The importance of an adhesion promoter designed specifically for plastics should not be underestimated; it forms a foundation that helps the primer cling even on challenging materials like ABS or fiberglass.
Selecting the right primer is essential. A plastic-compatible primer, applied with even, fan-shaped sprays, preserves the smoothness of the surface while ensuring full, uniform coverage. Coating too thinly risks poor coverage, while overly heavy applications can cause runs and reveal texture imperfections after drying. Adhering to the recommended drying times in the product’s technical data sheet ensures the primer fully cures, reducing the chance of cracking or paint failure. Some professionals use a wet-on-wet primer technique, layering primers without fully drying the first coat to maximize adhesion; however, this demands a clean and appropriately scuffed surface to avoid adhesion issues.
Once the primer layer sets properly, the base and color coats can be applied. Yet, the job is far from complete without sealing the work beneath a clear coat. The clear coat acts as the ultimate shield, guarding against UV rays, environmental pollutants, rain, dust, and abrasion. It also adds depth and gloss, transforming the multilayered paintwork into a vibrant, eye-catching finish. Depending on your project goals, options include 1K acrylic clear coats, valued for their unlimited pot life and ease of use across multiple sessions, or 2K clear coats that offer superior durability and chemical resistance. Regardless of your choice, multiple thin, even coats with proper flash time between each layer guarantee a smooth and resilient finish.
Patience during the curing phase is just as vital as skill during application. The clear coat must be protected from adverse conditions while curing to prevent defects such as clouding or premature wear. Avoid polishing, buffing, or compounding the surface until the clear coat has cured fully—typically around 30 days—so the finish remains intact and avoids scratches or swirls. Post-curing, applying a protective wax or ceramic coating further extends UV protection and preserves shine for the long term.
Environmental conditions at the time of painting significantly affect results. High humidity, extreme temperatures, or dusty surroundings can lead to undesirable textures like orange peel, bubbling, or dust spots embedded in the finish. Consequently, shooting primer, paint, and clear coats in controlled environments promotes the smoothest and most lasting result.
Though generally applied to plastics, these primer and clear coat techniques also carry importance for any metal parts integrated into the fairings or supporting structures. Areas vulnerable to rust should receive a rust converter and an appropriate metal primer to prevent corrosion beneath paint layers.
Meticulous preparation and execution of primer and clear coat application ultimately determine the integrity of your motorcycle fairings’ new paint job. The time invested during these crucial stages rewards with a resilient, attractive finish that enhances both the appearance and lifespan of your ride’s bodywork.
For a detailed step-by-step visual demonstration of primer application, basecoat, candy layers, and clear coating on plastic surfaces, the Tropical Glitz paint tutorial offers valuable practical insights.
To explore resources and options for high-quality motorcycle fairings that complement your custom paint projects, visit Discover affordable motorcycle fairings at Summit Fairings.
Chapter 2: Painting Techniques and Materials for Can You Spray Paint Motorcycle Fairings
1. Mastering Surface Prep and Priming: The Cornerstone of Spraying Motorcycle Fairings
Achieving a flawless spray paint finish on motorcycle fairings begins well before the paint even touches the surface. Preparation and priming form the foundation of any durable and aesthetically pleasing paint job. This crucial phase ensures that the paint adheres properly, resists peeling or cracking, and presents a smooth, even look that can withstand the rigors of riding. Motorcycle fairings are predominantly made from plastics such as ABS or composite materials like fiberglass, which demand careful treatment to handle their unique surface properties.
The first step in preparation involves meticulous cleaning. Fairings often accumulate layers of dirt, grease, road grime, and residues from previous paint or wax. These contaminants interfere with paint adhesion and can cause visible defects such as bubbling or flaking after drying. It is essential to use a degreaser or a cleaner specifically formulated to remove oils and dirt without harming the plastic. A thorough wash followed by wiping with a lint-free cloth or tack cloth ensures the surface is free from dust and oils. Avoid using harsh solvents that may degrade the plastic or soften the surface.
Once clean, the next essential technique is sanding. This step is critical to creating a texture the primer and paint can latch onto, as plastics often have smooth, slick surfaces that repel paint. Start with a fine-grit sandpaper—usually between 600 and 800 grit—to gently scuff the entire surface. This creates microscopic scratches that enhance mechanical adhesion. For areas with scratches, chips, or unevenness, wet sanding with ultra-fine grit (1500 to 2000) smooths imperfections without damaging the underlying material. Wet sanding minimizes dust and reduces the risk of heat buildup, which can warp plastics.
Masking follows sanding and should never be overlooked. Using quality masking tape and plastic sheeting or paper shields nearby parts that should remain unpainted prevents overspray and keeps lines clean. Take care to firmly press edges to avoid paint bleeding, especially around intricate shapes or vent openings common on fairings.
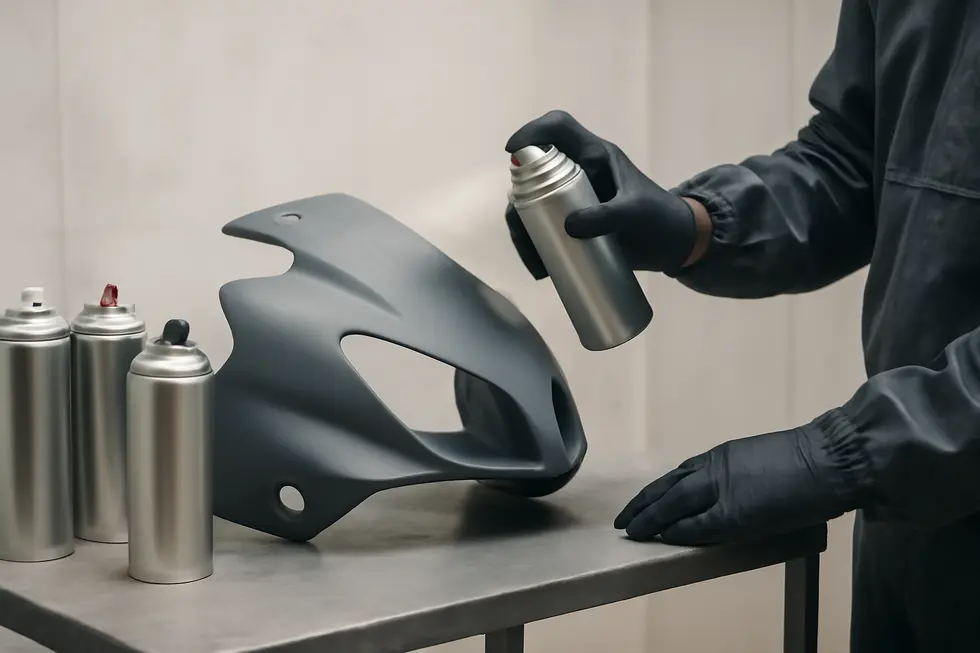
Priming is the step that truly prepares the fairing surface for paint application. Selecting the correct primer suited for plastic is critical—standard primers often fail to bond properly or may crack as the plastic flexes. Epoxy primers are particularly effective due to their excellent adhesion, chemical resistance, and ability to seal the surface against moisture. These qualities reduce the likelihood of corrosion for metal components and improve compatibility with subsequent layers. For hobbyists and DIY painters, aerosol primers designed specifically for plastic can deliver reliable results with convenient application. They typically require multiple thin coats applied evenly to avoid runs or uneven buildup.
When applying primer, patience and technique dictate the success of the entire project. Each coat should be sprayed at a consistent distance, using smooth passes while maintaining wet edges to prevent streaks. Allowing ample drying time between coats is a must; rushing this process jeopardizes the bonding strength and can produce an uneven base for paint. Once the primer has fully cured, a light sanding with very fine grit paper (around 1000 to 1500 grit) can gently smooth any texture or dust nibs, enhancing the final surface quality.
Beyond just adhesion, priming offers the benefit of hiding surface flaws and creating a uniform color base. This neutrality helps the color coat’s true tone emerge vividly and consistently. Skipping or rushing primer often leads to patchy or peeling paint, especially on curved or contoured fairings where paint films stretch and flex during riding.
The synergy between preparation and priming elevates the entire painting process. Investing time and care in these initial stages reduces frustration, improves paint longevity, and results in a finish worthy of any motorcycle enthusiast’s pride. This attention to detail honors both the craftsmanship and the durability requirements unique to motorcycle components.
For those seeking a visual demonstration, expert tutorials showcase how to prep and prime motorcycle fairings using aerosol primers with step-by-step guidance. Such resources emphasize cleaning, the right sanding techniques, and careful primer application to achieve an ideal base before coloring and clear coating. Viewing these can supplement practical understanding and build confidence to tackle your own fairing spray paint project.
If you want to explore further the variety and quality of motorcycle fairings suited for customization and painting, Summit Fairings’ blog offers extensive insights and product options ideal for riders and DIY painters.
To deepen your knowledge on this topic, the video titled “Project 2: Yamaha Aerox (pt6) Full restoration and stage 6 racing rebuild ep11) Paint Fairings and Logos” is an excellent external resource that walks through prepping, priming, and clear coating techniques for motorcycle fairings, providing invaluable practical tips and visual clarity: https://www.youtube.com/watch?v=ormm3j8U71Q
2. Mastering Spray Application and Finishing for Durable Motorcycle Fairing Paint
Achieving a professional and long-lasting finish on motorcycle fairings through spray painting hinges on precise application and finishing techniques. These steps transform a simple surface coating into a resilient, visually appealing layer that can endure the rigors of riding exposure such as weather, fuel, and minor impacts.
Preparation is the foundation that ensures paint will adhere and perform well. After thoroughly cleaning to remove contaminants like grease or dirt, a light sanding using fine-grit sandpaper—from 180 to 320 grit—follows. This subtle abrasion provides texture for the primer and paint layers to grip onto, while smoothing out minor surface imperfections.
Next comes priming. A plastic-compatible, high-build primer specifically designed for automotive or plastic surfaces is critical. Applying two to three even coats fills any subtle surface flaws and seals the substrate, preparing an ideal canvas for the base paint. Each primer coat must dry completely before application of the next, and gentle sanding between coats can maintain smoothness. Skipping or rushing this stage can lead to peeling or cracking later because plastic fairings flex and expand under heat and motion.
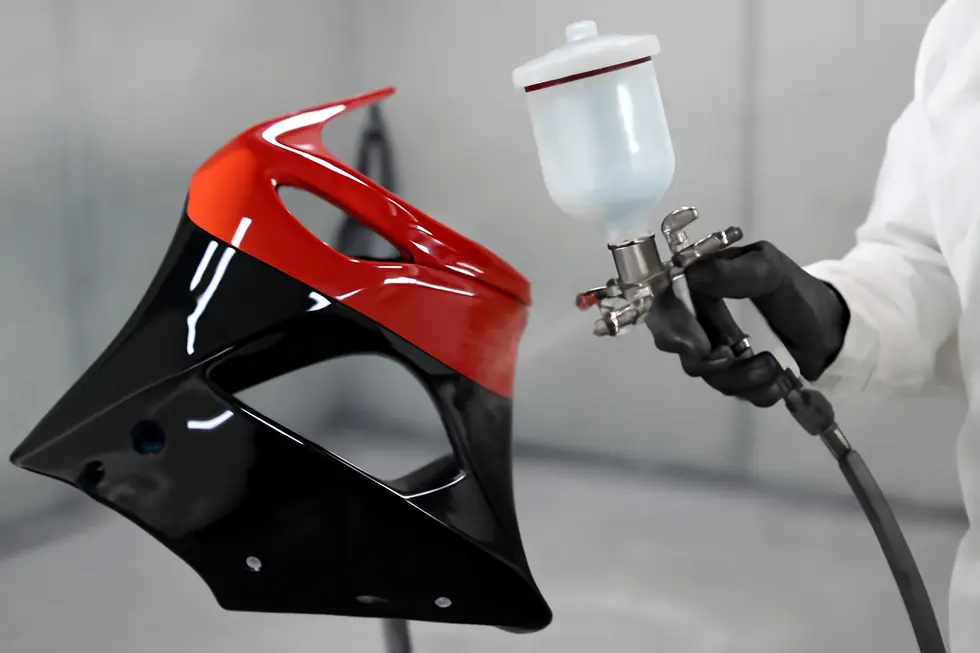
When moving on to the base coat, the technique of spray application is crucial for even coverage and an attractive finish. Using either a spray can or a spray gun, maintaining a consistent distance from the surface—typically about 6 to 10 inches—is necessary to avoid runs or pinholes. Spraying in smooth, deliberate strokes with about 50% overlap helps prevent stripes or patchy areas. The nozzle should face directly and parallel to the surface, with the operator’s arm and wrist moving fluidly to follow the curves and contours of the fairing. Multiple thin coats produce a richer, more consistent color than a single heavy one and reduce the risk of drips.
Once the base color dries—usually requiring at least 30 minutes—attention shifts to protecting the painted surface with a clear coat. This final layer adds depth and gloss, while providing critical defense against environmental hazards such as UV rays, fuel spills, and abrasions. The preferred clear coat is a durable 2K (two-component) variant available in spray cans for ease of use, which cures into a tough and resilient shell.
Spraying the clear coat also demands patience and care. Thin, multiple layers with about 10 minutes of drying time in between maintain smoothness and avoid clouding or orange peel effects. Importantly, the base coat should not be sanded before clear coating; sanding marks can show through and spoil the finish. The clear coat effectively seals the paint beneath and enhances longevity, which is particularly important given the exposure fairings endure.
After all paint and clear coat applications, the curing phase is vital. The paint must rest untouched and undisturbed for 24 to 48 hours, depending on environmental conditions, to fully harden. Attempting to handle or reinstall fairings too soon risks scratches or damage to the fresh surface. A well-cured finish not only resists chipping but also holds up better under post-paint cleaning and detailing.
Additional best practices to ensure excellent results include working in a clean, dust-free environment to minimize imperfections such as dust nibs in the paint, and maintaining steady spray distance and speed to achieve an even film. Using clear coats formulated for resistance to heat, chemicals, and abrasion ensures the finish will endure the specific challenges motorcycle fairings face from engine heat and road debris.
Mastering these application and finishing techniques empowers enthusiasts and professionals alike to confidently spray paint motorcycle fairings with results rivalling professional body shops. This process also makes customization and restoration more accessible and cost-effective, allowing riders to refresh or transform their motorcycle’s appearance with skill and precision.
For those seeking step-by-step visual demonstrations, tutorials such as “2K Clear in a Can. How to Spray Paint like a Pro” offer invaluable guidance on properly prepping, spraying, and clear coating motorcycle fairings at home. They provide clarity on common pitfalls and highlight tips that ensure a smooth, glossy, and durable finish.
For further insight on selecting quality motorbike parts and fairings that complement your painting projects, explore affordable motorcycle fairings options that suit restoration and customization needs.
In mastering proper primer choice, spray technique, and clear coat finishing, spray painting motorcycle fairings becomes a practical and rewarding undertaking. When executed with care, these methods transform plastic panels into vibrant, high-gloss surfaces that stand up beautifully to daily riding demands.
Chapter 3: Protection and Finishing Coats in Can You Spray Paint Motorcycle Fairings
1. Enhancing Durability: Chemical and Abrasion Resistance of Protective Finishes on Motorcycle Fairings
Enhancing Durability: Chemical and Abrasion Resistance of Protective Finishes on Motorcycle Fairings
When spray painting motorcycle fairings, the choice of protection and finishing coats is just as crucial as the paint itself. These layers shield the paintwork from harsh environmental elements and mechanical wear, preserving both appearance and structural integrity. Understanding how different protective coatings combat chemical exposure and abrasion helps ensure a long-lasting, high-quality finish.
Motorcycle fairings, often made from plastics like ABS or fiberglass composites, require durable coatings that bond well without compromising flexibility. The protective layers applied after painting serve multiple roles: guarding against chemical damage, resisting scratches and scuffs, and resisting fading caused by ultraviolet (UV) light. Chemical resistance is vital since fairings routinely encounter fuel spills, oil splashes, cleaning solvents, and road grime—all with the potential to degrade paint quality if not properly guarded.
Industrial-grade spray paints designed specifically for heavy-duty applications offer a robust defense against such challenges. These coatings are engineered to cure into tough, resilient films that resist gasoline, motor oils, harsh chemicals, and even UV rays from sunlight. Fully cured, these paints provide abrasion resistance that rivals more industrial coatings like powder coating, while still being accessible for home applications without specialized equipment. The curing process, typically spanning 2 to 3 days, allows the paint’s molecular structure to crosslink, creating a durable, chemically resistant layer that adheres firmly to the plastic fairings.
Following a base paint layer, clear coats elevate protection further by adding a smooth barrier that absorbs mechanical impacts and protects color fidelity. Two-component (2K) clear coats, in particular, are recognized for their superior chemical and abrasion resistance. These finishes cure through a chemical reaction between a resin and a hardener, forming a tough, scratch-resistant surface that withstands gasoline, weather elements, and everyday wear. Their satin or gloss finish not only enhances the aesthetic but also facilitates polishing and cleaning without risking damage to the underlying paint. Typically, these clear coats become touch-dry within 1.5 hours and fully cure within 12 to 24 hours, providing convenience without compromising durability.
An emerging technology in protective finishing is the application of ceramic coatings. These are not conventional clear coats but rather coatings containing microscopic ceramic particles bonded to the surface. This treatment creates an almost impervious barrier against chemical attack and physical abrasion. Ceramic finishes are highly praised for their longevity and resistance to scratches, often described as nearly impossible to remove by standard cleaning or abrasion. Although requiring specialized application knowledge and varying cure times, ceramic coatings can drastically extend the lifespan and appearance of painted motorcycle fairings.
Key to realizing the protective qualities of these finishes is meticulous surface preparation and strict adherence to curing times. Improper curing or rushed layers increase the risk of cracking, peeling, or chemical infiltration. Every layer must bond and harden properly to maintain a continuous, resilient shield. Besides, curing times affect not only resistance properties but also the final gloss and smoothness perceived by the eye and to the touch.
Additionally, it is crucial to use spray paints and coatings formulated for plastics or automotive use. These products have additives and binders optimized to flex with plastic substrates, reducing flaking or crazing. Using generic spray paints risks insufficient adhesion and chemical resistance, leaving fairings vulnerable to damage from oils, fuels, and debris encountered during rides.
To illustrate, a comparative overview reveals three common types of protective finishes and their respective resistances: industrial-grade spray paints offer high chemical and abrasion resistance after days of curing; 2K clear coats deliver very high resistances while adding polish and gloss with quicker curing; and ceramic coatings provide exceptionally high resistance through permanent ceramic particle bonding, though with variable curing requirements.
Together, these products define a spectrum of protective solutions tailored to various needs and budgets. For motorcycle enthusiasts seeking to spray paint their own fairings, prioritizing quality products and allowing proper curing can yield a finish that holds up against the rigors of daily use and environmental exposure.
For further insight into selecting and applying the right coatings to motorcycle fairings, the comprehensive guidance found in expert tutorials can be invaluable. These resources detail the nuances of layering, curing, and polishing to maximize chemical and abrasion resistance while achieving a professional-quality finish.
Finally, for those interested in exploring options that blend durability with ease of application, reviewing specialized industrial-grade spray paints known for their toughness without need for specialized equipment offers practical benefits. More information can be found through trusted suppliers who provide detailed product specifications and safety data.
For more details on sourcing high-quality motorcycle fairings and maintaining their appearance, consider exploring discover affordable motorcycle fairings at Summit Fairings.
For industrial-grade spray paint details, see: https://www.seymourpaint.com/product/mro-industrial-grade-high-solids-spray-paint-safety-red-16-oz/
2. Innovative Protective Coatings: Elevating Spray Painted Motorcycle Fairings to Lasting Perfection
Spray painting motorcycle fairings provides the essential base coat of color and style, but to truly safeguard the finish and extend its lifespan, applying advanced protective technologies is crucial. Motorcycle fairings face constant exposure to environmental elements, road debris, UV radiation, and abrasion, all of which can degrade paint over time. Integrating cutting-edge protective coatings after spray painting transforms fragile finishes into resilient, long-lasting surfaces that maintain gloss and vibrancy.
Motorcycle fairings are predominantly composed of plastics such as ABS or polycarbonate, materials that demand careful preparation and compatible finishing layers to ensure adhesion and durability. Once a flawlessly cleaned, sanded, and primed fairing has received its spray paint application, the next step involves protective layers that not only shield the paint but enhance its appearance with added gloss, hardness, and hydrophobic properties.
One of the most effective protective options is Paint Protection Film (PPF), a transparent polyurethane layer applied over the painted surface. This film acts as a physical barrier against scratches, chips, and chemical contaminants. Unlike traditional coatings, PPF absorbs impacts from gravel and minor abrasions, virtually preserving the underlying paint from mechanical damage. Its elasticity allows it to conform perfectly over complex curves and edges common to motorcycle fairings. High-grade PPF can offer warranties up to ten years without cracking, yellowing, or peeling. Achieving the best results with PPF relies heavily on impeccable surface prep following paint curing; any dust or unevenness compromises film adhesion and longevity.
Complementary to PPF, ceramic coatings have surged in popularity as a chemical sealant that chemically bonds at a molecular level with the paint or plastic surfaces. These coatings form an ultra-hard, virtually invisible shield that significantly increases resistance to UV rays, acidic contaminants, and minor abrasions. Unlike wax or traditional sealants that sit on the surface, ceramic coatings self-heal minor scratches under heat and repel water and dirt due to their hydrophobic nature. Motorcyclists appreciate how this chemistry maintains a showroom gloss and reduces cleaning frequency, preserving the original paint depth.
Pushing the boundaries of ceramic protection, formulations infused with graphene deliver even greater benefits. Graphene’s exceptional thermal conductivity and mechanical strength reinforce the protective layer, granting it unparalleled hardness approximating 10H on the Mohs scale—far exceeding standard ceramic coatings. This results in enhanced heat resistance ideal for bike parts exposed to engine heat or sun exposure. Furthermore, graphene’s anti-static properties reduce dust adhesion, keeping surfaces cleaner longer. Application remains straightforward, typically through spray or wipe-on methods, making it accessible to enthusiasts seeking professional-grade finishes.
Automotive-grade basecoat and clearcoat systems represent the traditional method for achieving deep color richness paired with glossy protective surfaces. While these require controlled environments such as spray booths for optimal finish and compliance with volatile organic compound (VOC) regulations, their multi-layer structure ensures a robust and lustrous paint job. The basecoat delivers consistent color, while the clearcoat adds UV protection, gloss, and chemical resistance. For DIY projects or aftermarket customizations, combining these with post-application protective films or coatings yields professional outcomes.
While spray painting itself demands evenly applied thin coats to avoid runs and ensure smoothness, the final application of protective layers significantly determines the fairings’ long-term appearance and resistance to wear. Ceramic and graphene-infused coatings chemically fortify the painted surface, aiding in fade resistance and ease of cleaning, while paint protection films provide a sturdy physical defense against impact damage.
Incorporating these advanced protective technologies not only enhances durability but preserves the aesthetic integrity of motorcycle fairings amid harsh riding conditions. Riders benefit from coatings that repel dirt and resist chemical etching, reducing maintenance effort and costs. The synergistic use of clear coats, ceramic or graphene coatings, and paint protection films represents the current pinnacle of motorcycle finish technology.
For riders and hobbyists aiming to elevate their fairings’ resistance while maintaining vivid color and shine, understanding and applying these innovations after spray painting is vital. Proper surface preparation and curing are essential to maximize bonding and lasting effects. Exploring professional tutorials and trusted resources can guide successful application and maintenance of these technologies.
For those interested in deeper insights and detailed application techniques of these advanced coatings, the comprehensive resources available at Explore the Best Motorcycle Fairings at Summit Fairings offer valuable guidance and inspiration. Additionally, industry-leading formulations and instructions can be found through specialized suppliers detailed in resources such as ceramic coating and sealant industry products.
Final thoughts
Successfully spray painting motorcycle fairings hinges on a triad of critical factors: meticulous preparation, skilled application of appropriate painting materials, and final protective finishing. Proper surface treatment ensures that paint adheres effectively to plastic or fiberglass substrates, greatly reducing the risk of peeling or cracking over time. Employing specialized spray paints designed for plastics in thin, controlled layers achieves a flawless, professional finish that meets the demands of motorcycle riders and enthusiasts. Concluding with a durable clear coat not only serves as a shield against environmental stressors like heat, abrasion, and oil but also delivers the rich gloss that customers seek. By mastering these stages, business owners can elevate their service quality, offering visually stunning and long-lasting motorcycle fairings that drive satisfaction and repeat clientele.
Ready to elevate your ride? Summit Fairings delivers premium, custom-fit fairings that blend style and durability. Whether you’re chasing speed or turning heads, we’ve got your bike covered. Don’t wait—transform your machine today. Click, customize, and ride with confidence. Your perfect fairing is just a few clicks away. Act now!
About us
undefined