Introduction
Spray painting motorcycle fairings demands precision, expertise, and a thorough understanding of the process to deliver a flawless, durable finish that stands out. For business owners in the automotive and customization sectors, mastering this craft is vital to satisfying clients and boosting reputation. From meticulous surface preparation to the final protective clear coat, every step impacts the ultimate quality and longevity of the finish. This guide explores key phases: preparation techniques foundational for adhesion, priming methods that ensure smoothness and flaw coverage, systematic painting procedures for consistent color application, and finally, clear coating paired with critical safety practices. Each chapter builds on the previous to present a holistic, actionable framework tailored to help businesses elevate their motorcycle fairing refinishing capabilities.
Tables of Contents
Chapter 1: Preparation Techniques for How to Spray Paint Motorcycle Fairings
- Essential Cleaning and Surface Preparation for Perfect Motorcycle Fairing Paintwork
- Mastering Surface Refinement: Sanding, Repairing, and Priming Motorcycle Fairings for a Flawless Paint Job
- Mastering Paint and Clear Coat Application for Flawless Motorcycle Fairing Finishes
Chapter 2: Priming Techniques for Durable Motorcycle Fairing Finishes
- Enhancing Paint Durability with Plastic Adhesion Primers on Motorcycle Fairings
- Achieving Smooth Surfaces with High-Build Primers and Precise Preparation
- Essential Mixing, Application, and Sanding Strategies for Optimal Primer Performance
Chapter 3: Painting Procedures for How to Spray Paint Motorcycle Fairings
- Mastering Surface Preparation: The Essential Foundation for Spray Painting Motorcycle Fairings
- Mastering Primer and Base Coat Application for Flawless Motorcycle Fairings
- Mastering the Final Steps: Clear Coating, Curing, and Polishing Motorcycle Fairings for a Professional Finish
Chapter 4: Clear Coating and Safety Practices in How to Spray Paint Motorcycle Fairings
- Mastering the Application of Durable 2K Clear Coats with Essential Safety Measures
- Critical Safety Measures and Environmental Controls When Applying Clear Coat to Motorcycle Fairings
- Mastering Surface Preparation and Protective Finishes for Flawless Clear Coats
Chapter 1: Preparation Techniques for How to Spray Paint Motorcycle Fairings
1. Essential Cleaning and Surface Preparation for Perfect Motorcycle Fairing Paintwork
Achieving a flawless paint finish on motorcycle fairings begins long before the spray gun is even lifted—in the critical phase of cleaning and surface preparation. The first step involves thoroughly removing every trace of dirt, grease, and contaminants from the fairings. Utilizing a strong degreaser or appropriate cleaner ensures that oils and grime, which could compromise paint adhesion or cause imperfections, are eradicated. After cleaning, the surface must be completely dry and free of residue to avoid trapping any impurities beneath the paint.
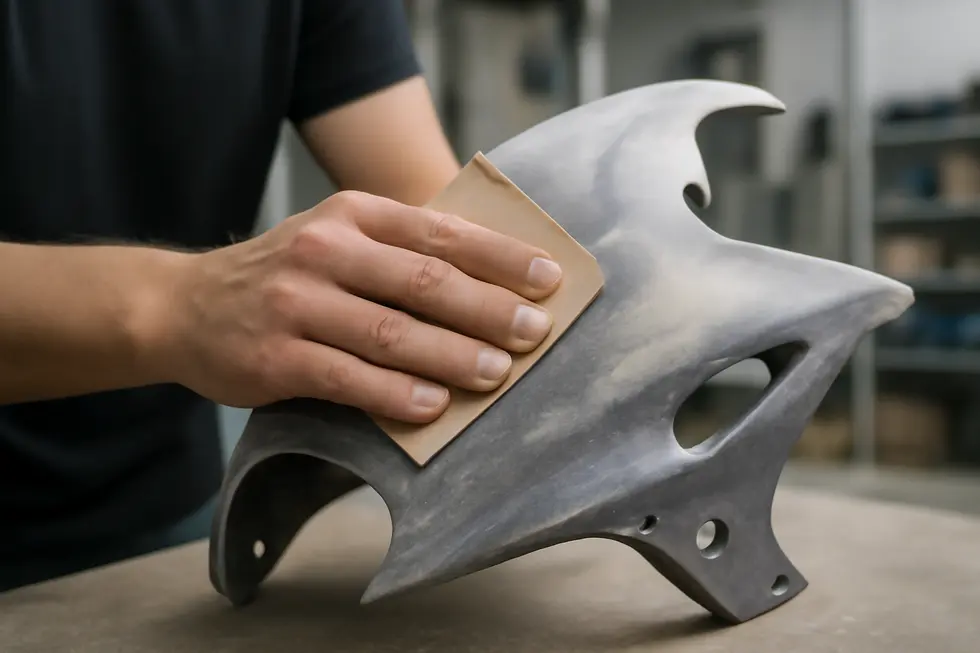
Following cleaning, sanding shapes the foundation for a professional finish. Starting with coarser grit sandpaper smooths out old paint layers, scratches, and imperfections, while progressively finer grits refine the surface to a uniform, matte texture. This slightly roughened surface is essential for the primer and paint to bond properly. It’s important to avoid touching the sanded fairings with bare or oily hands to maintain cleanliness.
Any decals or stickers must be fully removed prior to sanding, as they can create uneven spots or peeling later. For cracks or dents discovered during this process, body filler repairs help restore a smooth contour, which should be sanded level once dried.
Once the fairings are sanded and repaired, a high-build primer is applied in two to three thin layers to fill minor surface flaws and unify the texture. Proper drying times between coats are crucial, and a light sanding might be needed to maintain an even surface, although care should be taken not to over-sand. A final cleaning with a tack cloth or lint-free cloth removes residual dust and prepares the fairing flawlessly for paint application.
Throughout these steps, precision and patience define the quality of the finish. Keeping spray motions consistent during painting and applying multiple thin coats will prevent runs and texture issues. This thorough preparation phase is widely recognized as the cornerstone of expert motorcycle fairing spray painting and sets the stage for flawless results. For more detailed insights on motorcycle fairings, see Explore the Best Motorcycle Fairings at Summit Fairings.
2. Mastering Surface Refinement: Sanding, Repairing, and Priming Motorcycle Fairings for a Flawless Paint Job
Achieving a smooth and durable paint finish on motorcycle fairings begins with meticulous surface refinement focused on sanding, repairing, and priming. Start by thoroughly cleaning the fairings to eliminate dirt, grease, or any contaminants that can compromise adhesion. Once clean, sanding is essential: begin with a coarser grit sandpaper to strip off old paint or imperfections, then progressively move to finer grits. This gradient sanding not only smooths the surface but also subtly roughens it to enhance primer and paint adhesion. Special attention is required for fiberglass fairings; after any repairs, sanding should seamlessly blend patches with the surrounding areas to avoid noticeable transitions.
Repairs focus on restoring the structural and aesthetic integrity of the fairings. For cracks or holes, layering fiberglass cloth saturated with resin delivers strength and resilience. Applying these layers carefully—starting from smaller patches and feathering outwards—ensures an even build-up. Once curing completes, sand the resin smooth to prepare it for final finishing. To address minor surface flaws like pinholes or dents, apply body filler or glazing putty. After this filler fully hardens, sand again until the surface becomes impeccably smooth and level.
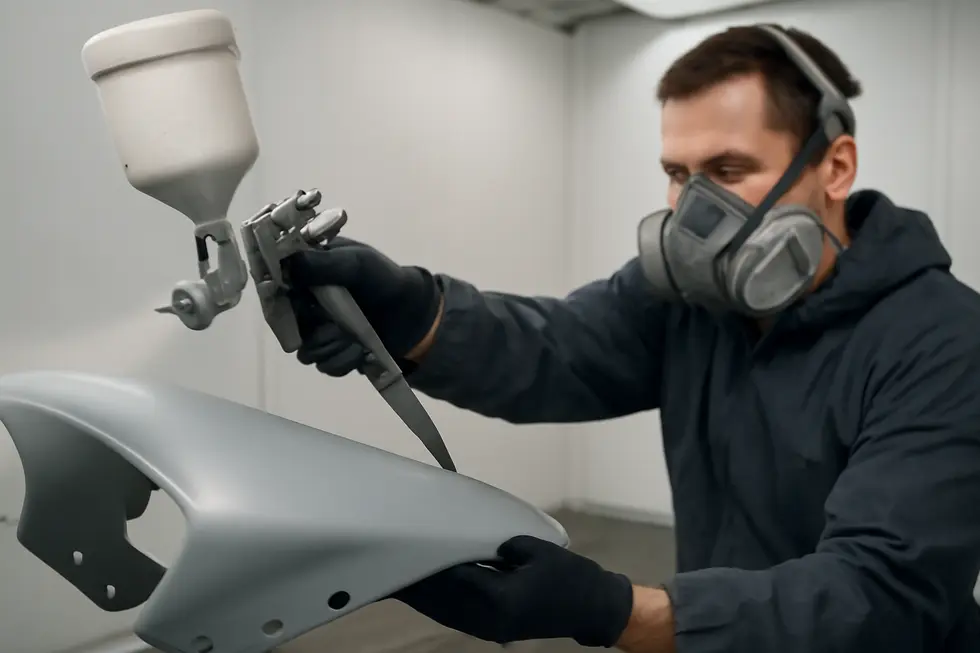
Priming is the final critical step before painting. Choose a primer suitable for plastic or fiberglass surfaces, as it promotes adhesion and creates a uniform base tone. Apply the primer evenly using smooth, controlled sprays, taking care to cover all areas without runs or pooling. Once dry, lightly sand the primer with fine grit sandpaper to eliminate any texture or imperfections. This ensures an ultra-smooth surface ideal for accepting the base coat uniformly.
Each stage—from sanding through priming—sets the foundation for a flawless paint finish. Attention to detail during these steps guarantees that your motorcycle fairings not only look professional but also maintain durability over time. For further guidance on repairing fiberglass and surface preparation, explore resources such as this in-depth guide to quality motorcycle fairings.
3. Mastering Paint and Clear Coat Application for Flawless Motorcycle Fairing Finishes
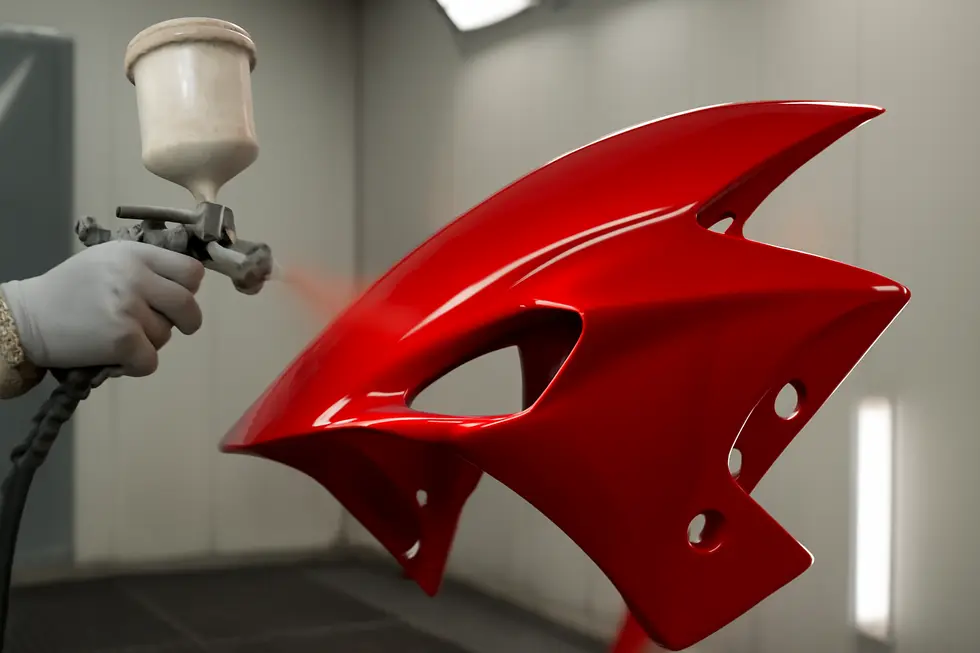
Achieving a professional finish on motorcycle fairings hinges on meticulous paint and clear coat application following thorough preparation. After sanding and priming, applying the base coat involves several thin, even layers. Spraying 4 to 5 coats allows the paint to build depth without runs or drips. It’s best to begin by painting the edges before systematically covering the main surfaces, maintaining a steady, fluid motion to ensure uniform coverage. Waiting about ten minutes between coats lets solvents evaporate properly, which prevents imperfections like bubbling or wrinkling.
Once the base color has dried, the clear coat is vital. A durable, glossy finish is usually achieved by applying three thin coats of a two-component (2K) clear coat. Carefully timing each layer—waiting 5 to 10 minutes—ensures proper adhesion and smoothness. Avoid sanding the base coat before clear coating, as scratches may show through the final finish. The clear coat requires full curing, often overnight, to reach optimal hardness and durability before any handling or polishing.
Safety cannot be overstated, especially when spraying 2K clear coats, which release hazardous fumes. Use a proper respirator and ensure excellent ventilation in the workspace to protect your health.
Additional tips include mixing paint with the appropriate reducer to control drying speed and flow, which is crucial for larger parts. Using slow reducers helps maintain a wet edge, allowing for a smoother finish without quick drying distortions. After the clear coat has fully cured, some enthusiasts enhance gloss and protection by wet sanding and polishing or applying advanced ceramic coatings, though these steps require patience and precision.
This entire painting and clear coating process can be accomplished successfully at home using spray cans or spray guns when each step is approached with care and discipline. For further insight into quality paint techniques and product options, exploring affordable motorcycle fairings at Summit Fairings offers valuable inspiration and resources.
Chapter 2: Priming Techniques for Durable Motorcycle Fairing Finishes
1. Enhancing Paint Durability with Plastic Adhesion Primers on Motorcycle Fairings
Plastic adhesion primers play a crucial role when preparing motorcycle fairings for spray painting. Since most fairings are made from rigid plastics, traditional primers often struggle to bond properly to their surfaces. These specialized primers chemically interact with plastic substrates, forming a strong base layer that prevents paint from peeling or flaking over time. Without this intermediary treatment, the paint’s durability and finish quality are greatly compromised.
The process begins with carefully cleaning and lightly scuffing the plastic fairings to remove contaminants and create a slightly roughened texture. This prepares the surface for better primer grip and encourages chemical bonding. Once the surface is ready, applying a plastic-specific adhesion promoter ensures the paint will adhere evenly and resist peeling even under stress or exposure to the elements.
Plastic adhesion primers are formulated to address the unique properties of automotive-grade plastics, providing flexibility and excellent compatibility with subsequent base coats. The proper use involves spraying a thin, even layer, and allowing it to cure fully before proceeding with base paint application. This layering strategy significantly enhances finish longevity while maintaining a smooth, professional appearance.
Skipping or improperly applying this primer stage often leads to unsightly defects, such as blistering or flaking paint, which diminish both the aesthetic and protective qualities of the motorcycle’s exterior. By choosing the right adhesion primer and carefully following application guidelines, DIY painters and professionals alike can achieve a durable and consistent result that stands up to daily use.
For further insights on selecting and applying primers tailored for motorcycle plastics, exploring dedicated resources on motorcycle fairings can provide practical tips and product recommendations to optimize primer performance and final finish quality.
2. Achieving Smooth Surfaces with High-Build Primers and Precise Preparation
Attaining a professional finish on motorcycle fairings begins with meticulous surface preparation and the expert use of high-build primers. These primers play a critical role by not only improving paint adhesion but also by filling minor imperfections such as scratches and small dents, creating an ideal base for the layers to follow. The process starts with carefully sanding the fairings, typically progressing to a fine grit between 180 and 320. This gradual smoothing removes blemishes and roughens the surface just enough to promote primer bonding without damaging the plastic substrate.
Once prepared, the application of high-build primer must be done with precision. These primers, often two-component systems requiring a hardener, offer superior durability and flexibility, essential for plastic fairings subject to stress and vibration. They are usually sprayed in two to three even coats using a spray gun fitted with an approximately 1.8 mm tip. Between coats, sufficient drying time ensures proper curing and prevents imperfections like runs or sags. The thicker layer achieved through multiple coats compensates for imperfections that sanding alone cannot eliminate.
After the primer has fully dried, a subsequent sanding with finer grit from 320 to 600 smooths the primer into a flawless surface ready for the base paint. This step is vital to remove any unevenness and to support the flawless appearance of the final finish. Environmental factors such as ambient temperature and humidity also influence primer performance and must be controlled to avoid issues like improper drying or adhesion failure.
Skillful primer preparation and application create a resilient foundation that enhances the overall longevity and visual appeal of the paint job. For those looking to explore further, comprehensive guidance on preparing and finishing motorcycle fairings can be found in detailed resources like the Explore the Best Motorcycle Fairings at Summit Fairings blog, which complements the technical precision discussed here.
3. Essential Mixing, Application, and Sanding Strategies for Optimal Primer Performance
Achieving a flawless base coat on motorcycle fairings starts with meticulous attention to primer preparation and application. Properly mixing the primer is vital; it often involves combining a two-component system with precise ratios of primer and hardener. This exact blend ensures the primer cures correctly and forms a robust foundation that can withstand subsequent layers of paint. Inadequate mixing can compromise adhesion and durability, so thorough blending is essential for consistent performance.
Once mixed, the primer should be applied in even, controlled layers using a spray gun fitted with a tip around 1.8 mm in diameter. Applying two to three thin coats while allowing appropriate flash-off time between them prevents runs or sags and fills minor imperfections effectively. This layered approach not only smooths out surface irregularities but also prepares the plastic substrate for optimal paint adherence. Rushing this stage often leads to uneven texture and can undermine the final finish quality.
Sanding plays a dual role in the priming process. Prior to priming, the fairings require careful sanding starting with coarser grits, such as 180, progressing to finer grits up to 320. This progression removes visible flaws and creates a slightly roughened surface to promote mechanical bonding of the primer. After the primer cures, refinishing with fine-grade sandpaper—320 grit or higher—is essential to eliminate any orange peel effects or texture inconsistencies. Feathering the edges smoothly ensures seamless transitions for the paint layers that follow.
Between each stage, cleaning the surface rigorously is critical to remove dust, oils, and residual contaminants that could interfere with adhesion. Using degreasers and tack cloths will maintain a pristine surface ready for subsequent layers. Additionally, maintaining proper ventilation and wearing adequate protective equipment safeguards both the user and the quality of the application.
By mastering these integrated mixing, application, and sanding techniques, you create a durable, smooth primer base that enhances the longevity and appearance of your motorcycle fairings. For further insights into selecting the right fairings to complement your paintwork, explore this comprehensive guide on motorcycle fairings.
Chapter 3: Painting Procedures for How to Spray Paint Motorcycle Fairings
1. Mastering Surface Preparation: The Essential Foundation for Spray Painting Motorcycle Fairings
Achieving a flawless and durable paint finish on motorcycle fairings begins long before the first spray of paint—it starts with meticulous surface preparation. Proper cleaning, sanding, and priming form the critical backbone of any successful spray painting procedure, ensuring the paint adheres firmly and the final finish is smooth and professional.
The process begins with thorough cleaning to remove all contaminants such as dirt, grease, wax, and any residues that could compromise paint adhesion. Using specialized degreasers and wiping down with tack cloths guarantee a pristine surface ready to accept paint. This step is fundamental because even microscopic impurities can cause bubbling or peeling later.
Sanding follows, where fine-grit sandpaper—typically between 600 and 800 grit—is employed to create a slightly roughened texture on the fairing’s surface. This abrasion is crucial on plastic or fiberglass parts that often come with glossy finishes, which paint adheres poorly to if left untouched. Sanding not only removes existing imperfections but also provides an ideal profile for primers to bond securely.
Next comes priming with a fast-drying, sandable primer formulated for the material of the fairings. This layer serves multiple purposes: it evens out minor surface irregularities, enhances paint adhesion, and provides protection. The primer must be applied evenly across all surfaces and allowed to dry completely before light sanding smooths out any remaining imperfections. Avoid excessive sanding at this stage to maintain a uniform surface ready for painting.
It is also essential to carefully mask surrounding areas that aren’t to be painted, such as engine components and handlebars, to prevent overspray and maintain clean edges.
For comprehensive insights and visual guidance on surface preparation techniques including sanding and cleaning, exploring various tutorials can be especially helpful. A detailed resource highlighting these preparation steps can be found at explore the best motorcycle fairings at Summit Fairings.
By investing time and attention during surface preparation, painters lay the foundation for a resilient, attractive paint job that withstands wear and elevates the bike’s appearance.
2. Mastering Primer and Base Coat Application for Flawless Motorcycle Fairings
The foundation of a professional paint job on motorcycle fairings lies in the careful application of primer and base coat. This process begins immediately after thorough cleaning and sanding, which is essential to create a clean, slightly rough surface for optimal paint adhesion. Primer serves multiple critical roles: it bonds the paint to the substrate, whether plastic or metal; it fills minor surface imperfections to establish a smooth canvas; and, on metal parts, it guards against corrosion. Applying primer in thin, even coats prevents runs and uneven textures. Patience is vital, as each coat must dry properly—usually about 30 minutes or as the product instructions specify—to ensure a uniform layer. Multiple coats may be necessary to achieve full, consistent coverage and surface leveling. Once the primer has cured and is gently sanded for smoothness, the base coat application begins. This color layer provides the visual appeal and character of the fairings. Spraying multiple thin layers rather than one heavy coat is crucial to avoid drips and unevenness. Each coat should be allowed to ‘flash off,’ typically 10 to 15 minutes depending on environmental conditions and paint formulation. An effective technique is to start spraying the edges before covering flat panels, which helps prevent paint pooling and overspray. Using a slow-drying reducer mixed with the paint can enhance flow and leveling, especially on larger surfaces, producing a glassy appearance free from texture inconsistencies. Importantly, avoid sanding between the base coat and clear coat layers to prevent visible marks in the finish. Maintaining steady, consistent spray gun or can movement and precise timing throughout this stage sets the groundwork for the durability and gloss of the final result. Following these steps carefully ensures the fairings achieve a smooth, evenly colored surface that will respond well to clear coating. For those looking to deepen their understanding of the full process, exploring resources like this detailed guide on motorcycle fairings can provide valuable insights and inspiration.
3. Mastering the Final Steps: Clear Coating, Curing, and Polishing Motorcycle Fairings for a Professional Finish
Achieving a durable, glossy finish on motorcycle fairings hinges on the crucial final steps in the painting process. Once the base color has properly dried and cured, applying a clear coat seals in the paint and elevates its appearance while protecting it from environmental damage. This transparent layer safeguards against UV exposure, minor scratches, and chemical wear, enhancing both the longevity and aesthetic depth of the paint. To ensure a smooth, flawless finish, it’s essential to apply the clear coat in several thin, even layers rather than heavy coats that risk runs or sags. Patience during this phase is vital, allowing each layer to settle before the next application.
After completing the clear coat application, the curing stage demands attention. The clear coat must dry thoroughly following the manufacturer’s guidelines, which can range from several hours to days depending on factors like temperature and humidity. Proper curing prevents soft spots and ensures the topcoat hardens securely. Only once fully cured should the fairings undergo any further work.
The next step involves refining the surface through wet sanding using ultra-fine grit sandpaper, typically between 1500 and 3000 grit. This process removes textural imperfections such as orange peel or dust particles trapped during spraying. Wet sanding requires gentle, consistent motions with plenty of water to avoid sanding through the clear coat. Following this, polishing compounds restore the deep shine and smoothness, transforming the clear coat into a mirror-like finish that rivals professional paint jobs.
For enhanced protection, an optional ceramic coating can be applied after polishing. This advanced layer forms a durable, hydrophobic barrier resistant to dirt, chemicals, and minor abrasion, extending the visual appeal and protection of your work. Applying ceramic coatings demands meticulous preparation and careful technique but yields outstanding long-term results.
By integrating these final coating, curing, sanding, and polishing steps, you complete the painting procedure with a resilient and visually compelling finish. For more insights on preparing and customizing plastic parts prior to painting, explore the detailed guidance at unveiling elite motorcycle fairings your premium source for custom styles.
Chapter 4: Clear Coating and Safety Practices in How to Spray Paint Motorcycle Fairings
1. Mastering the Application of Durable 2K Clear Coats with Essential Safety Measures
Choosing and applying a high-quality 2K clear coat is a pivotal step in achieving a resilient, glossy finish on motorcycle fairings. Unlike single-component clear coats, 2K (two-component) clear coats consist of a clear base and a hardener that must be mixed thoroughly before use. This combination results in superior chemical resistance, UV protection, and hardness, making it ideal for safeguarding your fairings against environmental wear and extending the life of your paint job.
Before application, confirm that the base paint has fully cured and that the surface is impeccably clean. While some products may recommend light sanding between base and clear coats for better adhesion, this step should be cautiously executed to avoid marring the paint. Mixing the clear coat and activator evenly ensures proper chemical reaction and performance.
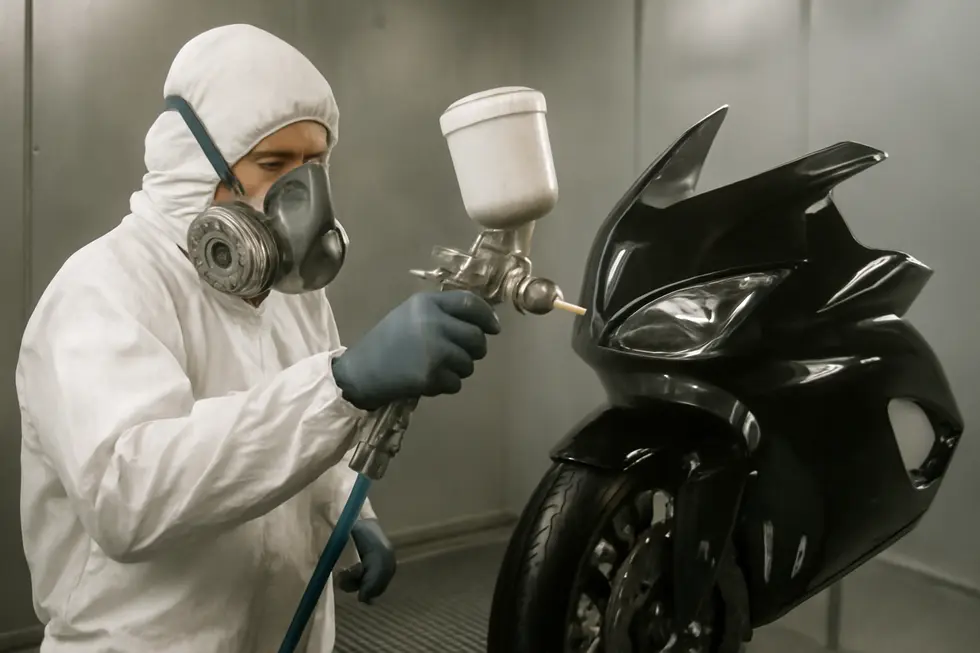
When spraying the clear coat, apply multiple thin, even layers—typically two to three coats—with careful attention to flash times of 10 to 15 minutes between each. This prevents runs, sags, or uneven gloss. Maintain a consistent spray gun distance and steady motion to cover edges and flat surfaces uniformly. Given the sensitivity of motorcycle fairing plastics like ABS, gentle handling and precise technique are essential during this phase.
Safety is crucial while working with 2K clear coats because they contain isocyanates, which pose inhalation hazards. Always wear a suitable respirator, gloves, and eye protection, and ensure you work in a well-ventilated space or spray booth. These precautions protect your health while allowing you to focus on technique.
After applying the clear coats, allow an adequate curing period as specified by the manufacturer. Proper curing solidifies the clear coat’s toughness and clarity, ultimately producing a durable, high-gloss surface that highlights your paintwork and withstands daily use.
For more insights into spray painting and coating motorcycle parts, explore this comprehensive motorcycle fairings blog that covers expert tips on preparation and finishing techniques.
2. Critical Safety Measures and Environmental Controls When Applying Clear Coat to Motorcycle Fairings
Spray painting motorcycle fairings demands not only skill but strict adherence to safety and environmental standards to achieve optimal results without health risks. When applying clear coat, the use of essential safety gear is paramount. A properly fitted respirator mask ensures protection against inhaling harmful fumes and airborne particles released by solvent-based paints and two-component clear coats, which often contain toxic isocyanates. Complementing the respirator, chemical-resistant gloves guard skin from direct contact with solvents and paints that can cause irritation or chemical burns. Protective eyewear prevents overspray and accidental splashes from reaching the eyes, while wearing long sleeves and pants minimizes skin exposure to hazardous substances throughout the spraying process.
Equally important is maintaining a controlled environment during clear coating. Operating in a well-ventilated space or a dedicated spray booth equipped with efficient exhaust systems helps to remove hazardous fumes promptly, ensuring fresh air circulation for both safety and paint quality. Controlling dust and airborne debris through the use of drop cloths or plastic sheeting safeguards the surface finish from imperfections, while regulating temperature and humidity within the manufacturer’s recommended range promotes proper curing and adhesion of the paint layers.
The application itself requires finesse: preparing the surface thoroughly by cleaning and sanding eliminates contaminants that could mar the finish. Applying multiple thin, even coats of clear coat—with appropriate drying intervals—prevents runs, sags, or cloudiness in the finish. Post-application, allowing the clear coat to fully cure in a dust-free environment is essential for long-lasting durability and gloss.
Observing these safety and environmental protocols not only protects personal health but also significantly enhances the quality and longevity of your motorcycle fairing’s finish. For insights on sourcing the right fairings for your project, explore how to find the best motorcycle fairings that meet your customization and quality needs.
3. Mastering Surface Preparation and Protective Finishes for Flawless Clear Coats
Achieving a durable and pristine clear coat on motorcycle fairings begins with meticulous surface preparation that ensures optimal adhesion and long-lasting results. Before applying the clear coat, the fairings must be thoroughly cleaned to remove dirt, grease, and any contaminants invisible to the naked eye. This cleaning phase often involves washing with degreasers followed by paint decontamination techniques to eliminate embedded particles that can compromise the finish. Plastic fairings especially benefit from light scuffing using fine grit sanding pads (600-800 grit), creating a subtly roughened surface that promotes better bonding of primers and clear coats without damaging the material.
Once the paint layers are applied and the clear coating process is complete, attention shifts to post-clear coat treatments that preserve and enhance the finish. Ceramic coatings are a popular choice for adding a resilient, semi-permanent protective layer. Bonding at a molecular level with the clear coat, they improve hardness, amplify gloss, and provide hydrophobic properties that repel water and dirt. Regular use of spray polishes between washes can maintain the clear coat’s shine and offer UV protection without requiring extensive re-cleaning, helping the fairings retain their vibrant appearance.
Throughout the entire process, strict adherence to safety protocols is paramount. Using personal protective equipment such as respirators safeguards against inhaling hazardous fumes, especially during application of 2K clear coats. Proper masking prevents overspray from contaminating other motorcycle parts or the environment. Ensuring good ventilation and working within manufacturer-recommended drying conditions minimizes the risk of coating defects and contributes to a durable finish. In addition, allowing adequate curing time under clean, controlled conditions is critical to prevent surface imperfections like dust nibs or fogging.
This comprehensive approach to surface preparation, protective finishing, and informed safety practices guarantees motorcycle fairings achieve an impeccable, lasting clear coat. For enthusiasts seeking expert guidance and tips on motorcycle fairings, exploring a dedicated motorcycle fairings resource offers valuable insights and options.
Final thoughts
Spray painting motorcycle fairings is a multifaceted process that directly affects the durability, aesthetic appeal, and overall customer satisfaction of your business projects. By investing time and attention into thorough preparation, using the right priming techniques, applying multiple thin coats of base paint, and finishing meticulously with a clear coat, business owners can achieve a high-quality finish that stands out in the competitive market. Coupled with strict adherence to safety practices, especially when handling hazardous materials like 2K clear coats, these steps form the foundation of professional refinishing operations. Implementing these best practices not only enhances the product’s visual and functional longevity but also builds a trusted reputation, positioning your business as a reliable destination for premium motorcycle fairing refinishing.
Ready to elevate your ride? Summit Fairings delivers premium, custom-fit fairings that blend style and durability. Whether you’re chasing speed or turning heads, we’ve got your bike covered. Don’t wait—transform your machine today. Click, customize, and ride with confidence. Your perfect fairing is just a few clicks away. Act now!
About us
undefined