Introduction
Motorcycle fairings are vital not only for aesthetics but also for protecting the bike’s structure. For business owners operating repair shops, dealerships, or customization services, understanding how to expertly touch up fairings is crucial. Proper restoration techniques extend the life of the motorcycle’s appearance and build customer trust through quality work. This guide systematically covers each critical phase—from initial cleaning and surface preparation to advanced structural repairs and preventative care—empowering your business with the knowledge to deliver impeccable finishes that stand the test of time. By mastering these steps, you can optimize workflows, reduce rework, and elevate your brand reputation in the competitive motorcycle maintenance market.
Tables of Contents
Chapter 1: Cleaning and Surface Preparation in How to Touch Up Motorcycle Fairings
- Mastering Cleaning and Material Choices for Flawless Motorcycle Fairing Touch-Ups
- Mastering Sanding and Priming: Essential Steps for Durable Motorcycle Fairing Touch-Ups
Chapter 2: Mastering Sanding and Priming Techniques for How to Touch Up Motorcycle Fairings
- Essential Sanding Methods and Surface Preparation for Durable Motorcycle Fairing Repairs
- Choosing and Applying the Ideal Primer to Ensure Durable, Smooth Motorcycle Fairing Repairs
Chapter 3: Selecting and Applying Touch-Up Paint in How to Touch Up Motorcycle Fairings
- Achieving Perfect Color Matching: Selecting Authentic Touch-Up Paint for Motorcycle Fairings
- Mastering Surface Prep and Precision Application for Flawless Motorcycle Fairing Touch-Ups
Chapter 4: Mastering Protective Coatings: Essential Steps for Flawless Motorcycle Fairing Touch-Ups
- Preparing Motorcycle Fairings for Lasting Protective Coatings: Cleaning, Sanding, and Primer Application
- Maximizing Durability and Shine: The Essential Role of Clear Coats, Wax, and Ceramic Coatings in Motorcycle Fairing Touch-Ups
Chapter 5: Structural Repair Considerations in How to Touch Up Motorcycle Fairings
- Essential Surface Preparation and Material Choices for Durable Fairing Repairs
- Precision in Paint Application and Protective Finishing for Lasting Structural Fairing Repairs
Chapter 6: Enhancing Motorcycle Fairing Longevity Through Proactive Maintenance
- Ensuring Durable Touch-Ups with Quality Materials and Environmental Shielding
- Smart Maintenance and Early Damage Detection to Reduce Fairing Repairs
Chapter 1: Cleaning and Surface Preparation in How to Touch Up Motorcycle Fairings
1. Mastering Cleaning and Material Choices for Flawless Motorcycle Fairing Touch-Ups
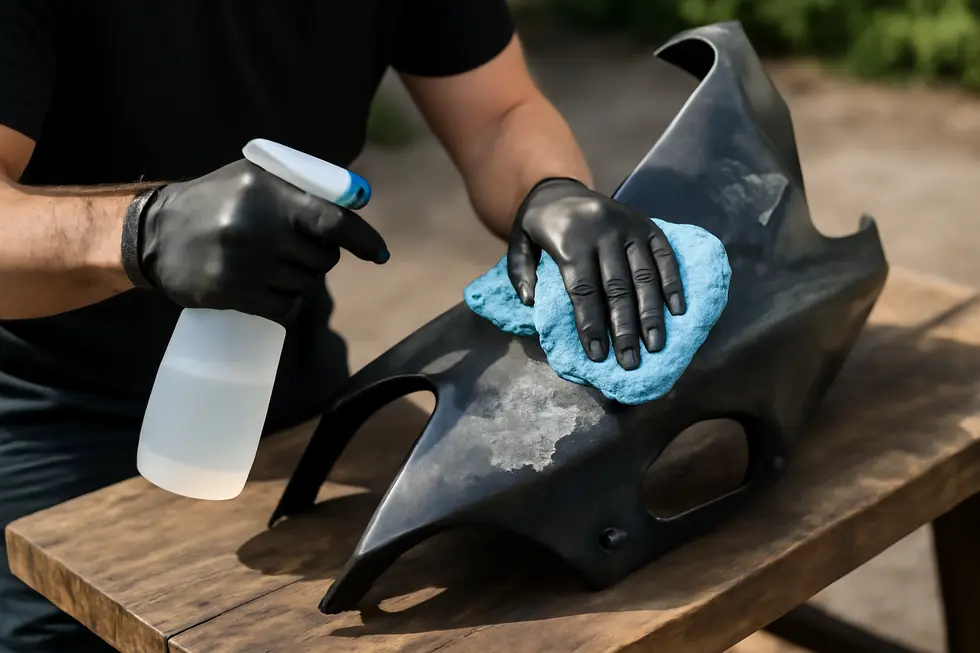
A flawless touch-up on motorcycle fairings begins with meticulous cleaning and thoughtful material selection, the foundation for a durable and seamless finish. Before any sanding or painting, it’s essential to thoroughly remove all dirt, grease, and debris using gentle, non-abrasive soaps and soft cloths. Harsh chemicals or abrasive tools can easily dull or damage the fairing’s surface, undermining paint adhesion. Starting with a water rinse followed by mild detergent or specialized cleaners ensures contaminants are loosened without harming the plastic. After washing, drying the area carefully with a clean microfiber towel prevents water spots and readies the surface for sanding.
Light sanding is done using fine-grit sandpaper, smoothing blemishes and providing a receptive texture for primers and paint. This step demands a delicate balance—not too aggressive to avoid further damage but enough to enhance adhesion. For cracks or deeper gouges, specialized preparation such as V-grooving may be required to maintain structural integrity alongside visual repair.
Choice of materials plays a crucial role in the touch-up’s success. If replacing parts, opting for high-quality ABS plastic ensures durability and compatibility with paint products. For touch-up paint, selecting a color-matched formula designed explicitly for plastic motorcycle fairings is vital to achieve a uniform look. Applying a compatible primer to bare or sanded sections guarantees better paint grip and helps the final coat achieve consistent coverage. Once paint is applied, sealing it with a clear coat not only restores gloss but also shields the surface from UV damage, scratches, and environmental wear.
To extend the repair’s lifespan, applying protective wax or ceramic coatings adds extra resilience and enhances shine. This comprehensive approach to cleaning and material selection lays the groundwork for professional-grade results. For more detail on choosing materials and preparation techniques, explore the insights available at Summit Fairings blog.
2. Mastering Sanding and Priming: Essential Steps for Durable Motorcycle Fairing Touch-Ups
Achieving a flawless touch-up on motorcycle fairings hinges on meticulous sanding and priming after thorough cleaning. Once the fairing surface is free of dirt and grease, gently sanding with fine-grit sandpaper refines the damaged area, smoothing out scratches and chips. This gentle abrasion not only levels imperfections but also creates a slightly rough texture, enabling primer and paint to bond more effectively. It is critical to strike a balance; sanding should be thorough enough to prepare the surface without causing additional damage.
Following sanding, applying a primer specifically formulated for plastic fairings—commonly ABS material—is crucial. Primer acts as a foundational layer that enhances paint adhesion and fills minor surface irregularities, ensuring a uniform base. It also guards the fairing against moisture and environmental wear that could undermine the repair’s durability. After the primer has dried, a light, careful sanding may be necessary to maintain a smooth finish, removing any raised particles or texture.
Before moving to paint application, wipe the surface clean again to remove dust or residue so the paint layer adheres properly. These well-executed preparation steps—cleaning, sanding, priming, and final wiping—form the cornerstone of a long-lasting, professional-looking repair that can withstand riding conditions and weather exposure.
For detailed visual guidance on this process, exploring resources like the comprehensive step-by-step instructions at Summit Fairings’ blog can be invaluable. Their insights walk enthusiasts through every stage of preparing motorcycle fairings for paint, ensuring each touch-up delivers quality and endurance.
Chapter 2: Mastering Sanding and Priming Techniques for How to Touch Up Motorcycle Fairings
1. Essential Sanding Methods and Surface Preparation for Durable Motorcycle Fairing Repairs
Achieving a seamless and long-lasting touch-up on motorcycle fairings starts with meticulous sanding and surface preparation. The process begins by thoroughly cleaning the damaged area to remove dirt, grease, and debris. This step is vital because any leftover residue can prevent fillers and paint from properly adhering to the surface.
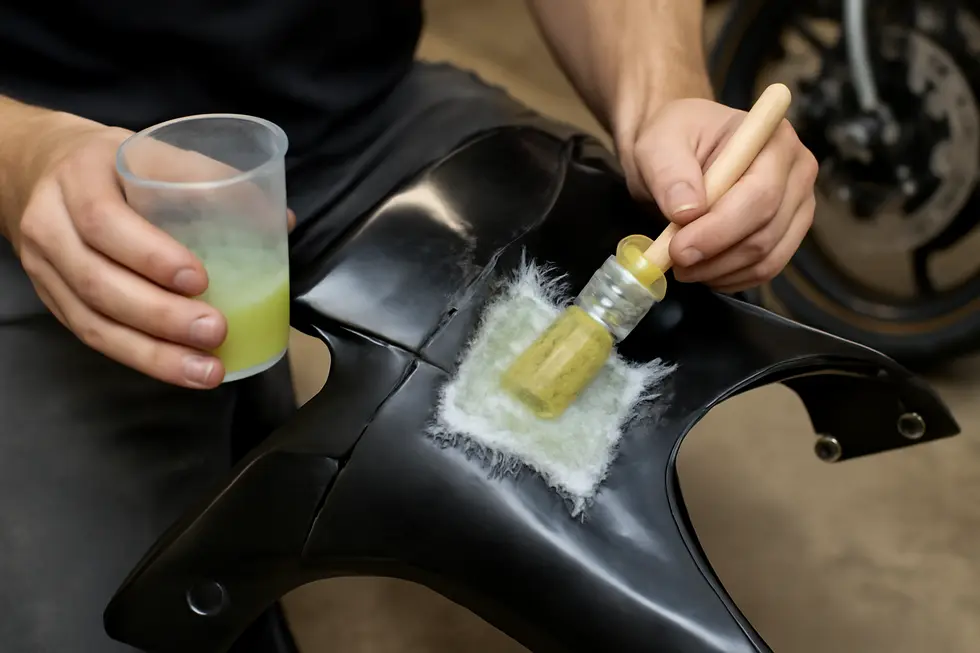
When working with fiberglass fairings, structural repairs often involve layering resin and cloth to rebuild integrity. Each layer must be completely cured before sanding to smooth the surface. For minor imperfections, applying body filler or glazing putty allows you to level the surface before sanding it flush.
Sanding itself requires a progressive approach. Start with coarse grit sandpaper (80-120 grit) to eliminate rough edges or old paint remnants. Gradually transition to medium and fine grits (320 to 600 grit) to feather edges and refine the surface, ensuring a uniform transition between damaged and intact areas. Using sanding blocks or foam pads helps distribute pressure evenly and avoids gouging or creating uneven spots.
Once sanding achieves a smooth surface, clean the area again to remove all dust and particles that could interfere with primer adhesion. Selecting a primer suited for the fairing’s material is crucial; it promotes bonding, protects against corrosion, and fills minor imperfections to provide a flat, consistent base for paint.
For an ultra-refined look, wet sanding with very fine grit papers (1000 to 3000 grit) after priming or painting removes minor flaws and enhances gloss. This careful sanding and surface preparation ensures that every layer builds upon a perfect foundation, resulting in a durable, professional-quality finish that blends flawlessly with the rest of the fairing.
For more detailed insights into repairing fiberglass parts and surface prep, explore this comprehensive resource on your ultimate source for affordable motorcycle fairings.
2. Choosing and Applying the Ideal Primer to Ensure Durable, Smooth Motorcycle Fairing Repairs
Achieving a smooth, lasting repair on motorcycle fairings starts with selecting the right primer and applying it correctly. After carefully sanding the damaged area to remove loose paint and smooth rough edges, the surface becomes ready to receive primer. This sanding step is essential—not only does it eliminate imperfections, but it also creates a slightly textured profile that helps the primer bond firmly to the surface.
Choosing a primer specifically formulated for the fairing material is the next critical step. Since most motorcycle fairings are made from plastics like ABS, a plastic-compatible primer is vital for ensuring proper adhesion. Using a generic primer may lead to peeling or cracking later, undermining the entire touch-up effort. For metal components, an automotive metal primer should be used instead.
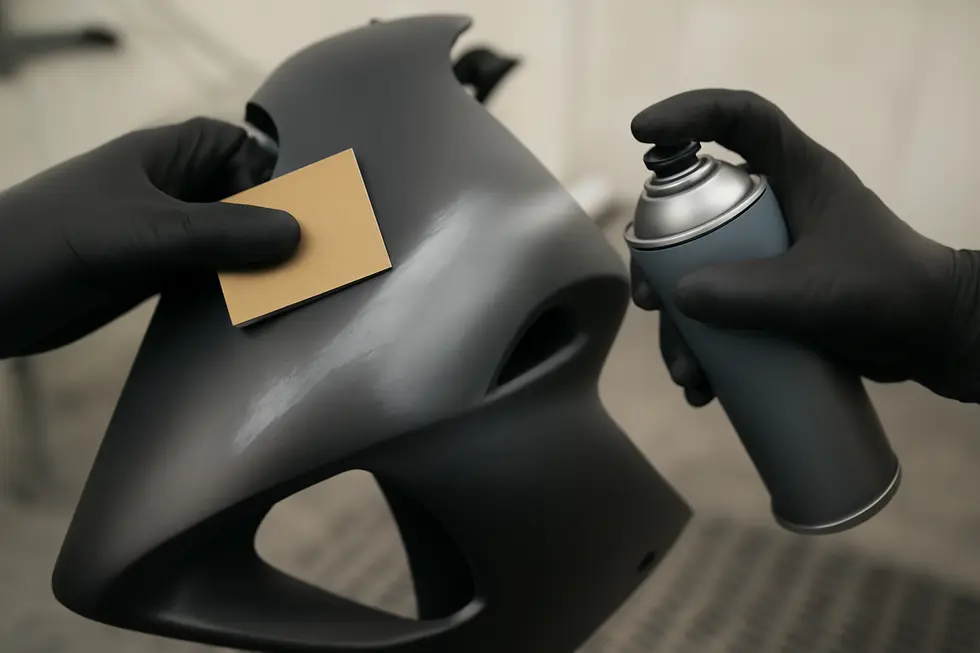
Primer application should be approached with care to achieve an even, thin coat that avoids drips or thick patches. Spray cans or airbrushes allow controlled coverage, and applying multiple light coats is preferable over a single heavy one. Each coat must be allowed to dry thoroughly before applying the next, maintaining an even texture across the surface.
Once fully dry, the primer layer needs to be lightly sanded with fine-grit paper to smooth out any texture or dust particles. This creates an ideal foundation for applying the basecoat paint, helping to unify the finish and prevent imperfections from showing through.
Integrating these careful primer selection and application practices is key to extending the life and improving the appearance of your repair. This foundational step is often included in OEM touch-up kits, underscoring its importance for deep scratches or areas where bare plastic is exposed.
For further insights into selecting materials for your motorcycle, visit this comprehensive source on affordable motorcycle fairings.
Chapter 3: Selecting and Applying Touch-Up Paint in How to Touch Up Motorcycle Fairings
1. Achieving Perfect Color Matching: Selecting Authentic Touch-Up Paint for Motorcycle Fairings
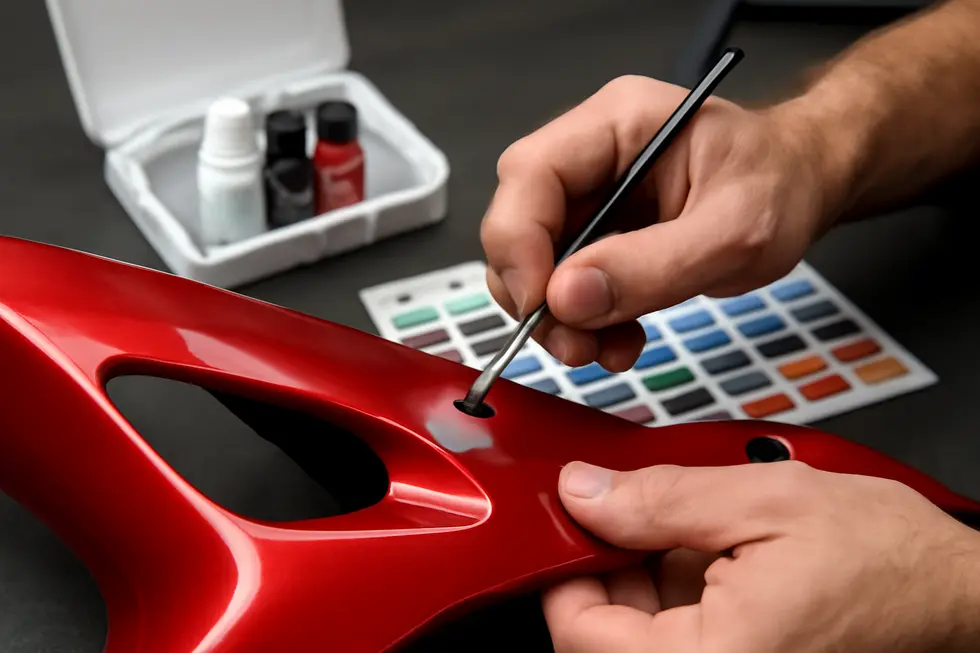
Ensuring authentic color matching when selecting touch-up paint for motorcycle fairings is crucial to maintain your bike’s original finish and value. The process begins by identifying the exact color code of your motorcycle, typically found on a manufacturer’s sticker or plate attached to the frame or inside a fairing panel. This code guarantees that the paint matches the factory color, avoiding the common pitfall of noticeable color differences after repair.
Equally important is choosing OEM (Original Equipment Manufacturer) or high-quality aftermarket paint formulations designed specifically for motorcycles. These products preserve color depth and offer durability suited to outdoor exposure and vibrations. Matching the paint type and finish—whether gloss, matte, or satin—is essential to blend seamlessly with the undamaged fairing surfaces.
Before applying paint broadly, testing on a small, less visible area confirms the accuracy of the color match and compatibility with the fairing material. This step helps prevent costly mistakes or the need for rework. When available, opt for touch-up kits that include primer and a clear coat to replicate the original paint layers, enhancing adhesion and protecting the finish against UV rays, scratches, and environmental wear.
Avoid mixing paints unless you have expert knowledge, as color blending can lead to inconsistent results that are difficult to correct. To maximize the repair’s longevity and appearance, it is wise to source touch-up paint from reputable suppliers or directly from manufacturers, which assures authenticity.
In conjunction with proper selection, preparing the damaged surface with thorough cleaning and careful sanding will further ensure the paint adheres well and the repair is visually undetectable. For more insights on maintaining and restoring your motorcycle’s appearance, explore detailed guides and resources on Summit Fairings’ blog.
2. Mastering Surface Prep and Precision Application for Flawless Motorcycle Fairing Touch-Ups
Achieving a flawless touch-up on motorcycle fairings hinges on meticulous surface preparation and precise paint application. Begin by thoroughly cleaning the damaged area with soap and water to remove dirt and grime, followed by a wax and grease remover to eliminate residues that can compromise paint adhesion. Light sanding smooths out scratches and chips, creating an ideal texture for paint to bond securely without causing additional damage. If the repair exposes bare plastic or metal, applying a primer specifically formulated for these materials is vital; this base coat enhances adhesion and durability, ensuring the repair withstands the elements.
When moving on to paint application, use the touch-up paint sparingly and in thin, uniform layers. Avoid rushing—allow each layer to dry completely before adding the next to prevent runs or uneven textures. Employing a fine brush or precision applicator helps maintain control and keeps the repair neat, especially around detailed or curved areas. This careful approach facilitates blending the new paint seamlessly with the surrounding finish.
Once the paint has fully dried, applying a clear coat restores gloss and shields the repair from environmental damage such as UV rays and minor abrasions. For optimal results, after the clear coat cures, gently wet sanding with very fine grit sandpaper followed by polishing can enhance smoothness and shine. Throughout the process, protect your work from direct sunlight and dust to maintain paint integrity and drying consistency.
Adopting these careful techniques not only revitalizes the fairing’s appearance but also extends the lifespan of the repair. For an in-depth visual guide on this procedure, resources such as the detailed content at Explore the Best Motorcycle Fairings at Summit Fairings offer valuable insights into maintaining and improving your motorcycle’s bodywork.
Chapter 4: Mastering Protective Coatings: Essential Steps for Flawless Motorcycle Fairing Touch-Ups

1. Preparing Motorcycle Fairings for Lasting Protective Coatings: Cleaning, Sanding, and Primer Application
Achieving a durable and seamless touch-up on motorcycle fairings hinges on meticulous surface preparation and primer application. The first step is a thorough cleaning to eliminate dirt, grease, and any contaminants that can hinder paint adhesion. Using a gentle degreaser ensures no residue remains, as even minute oil traces can cause paint failure. Once clean, the damaged area should be sanded lightly with fine-grit sandpaper—typically between 320 and 400 grit—to dull the glossy finish and create a subtle texture. This not only smooths minor scratches but also promotes better primer and paint bonding.
If the fairing has cracks or deeper damage, any repair compounds or fiberglass reinforcements must be fully cured and sanded smooth before progressing. With the surface properly prepared, applying a primer designed specifically for automotive plastics like ABS becomes critical. The primer acts as a sealing layer that improves adhesion and prevents the base paint from peeling or blistering. High-build urethane primers are especially beneficial when filling small surface irregularities, providing a more uniform finish.
Primer should be applied in thin, even coats, allowing adequate drying time as per manufacturers’ instructions. Some primers enable multiple “wet-on-wet” coats without sanding between them, which can save time without sacrificing quality. Once dry, a light sanding with fine grit refines the surface for the final paint application, ensuring smoothness and reducing imperfections.
Choosing primers and paints compatible with your fairing material and finishing system is essential to prevent issues such as cracking or lifting. Protecting the repair area from prolonged sun exposure and harsh chemicals during preparation helps maintain fairing integrity. Finally, the primer establishes a foundation for the protective clear coat that completes the touch-up, enhancing gloss, durability, and UV resistance. For more insights on fairing materials and care, explore this detailed guide on motorcycle fairings.
2. Maximizing Durability and Shine: The Essential Role of Clear Coats, Wax, and Ceramic Coatings in Motorcycle Fairing Touch-Ups
Applying protective coatings after touching up motorcycle fairings is crucial to ensure both durability and an appealing finish. The process typically culminates with the application of a clear coat, which provides a transparent, glossy layer that seals the touch-up paint. This final coating not only enhances the visual integration of repairs with the surrounding surface but also offers resistance against UV rays, minor abrasions, and environmental factors that can degrade paint over time. Clear coats act as a shield, preserving the aesthetic improvements made during the touch-up process.
Following the clear coat, waxing the fairings adds another dimension of protection and shine. Wax forms a sacrificial barrier that repels dirt, water, and harmful UV rays, maintaining the gloss and color depth of the paint and clear coat beneath. Regular waxing is recommended as an accessible maintenance step that refreshes the fairing’s appearance and extends the lifespan of previous repairs. It is particularly useful in protecting against grime buildup and surface oxidation encountered during everyday riding conditions.
For those seeking a more advanced level of protection, ceramic coatings provide a significant upgrade. These coatings chemically bond to the paint and plastic surfaces, creating a durable, hydrophobic layer that resists UV damage, chemical stains, and oxidation far better than traditional coatings. This hydrophobic quality allows water and dirt to bead and roll off, simplifying cleaning and helping to preserve the fairing’s original color vibrancy over extended periods. Although ceramic coatings typically require professional application and proper surface preparation, their long-term protective benefits make them ideal for touch-ups where lasting resilience is a priority.
In practice, combining these protective layers—applying the clear coat immediately after painting, followed by periodic waxing or a ceramic coating—optimizes both appearance and longevity. This comprehensive approach to finishing reinforces the repaired surface, preventing fade and wear while maintaining a showroom-worthy gloss. To maintain the integrity of motorcycle fairings, regular cleaning, careful sun exposure management, and timely reapplication of these coatings are essential.
For further detailed guides on maintaining and protecting motorcycle fairings, explore the wealth of resources available at the Summit Fairings blog.
Chapter 5: Structural Repair Considerations in How to Touch Up Motorcycle Fairings
1. Essential Surface Preparation and Material Choices for Durable Fairing Repairs
Surface preparation and material selection form the foundation of a successful structural repair and touch-up on motorcycle fairings, directly impacting adhesion, durability, and finish quality.
Thorough cleaning is the first indispensable step. Removing dirt, grease, and contaminants using mild cleaners ensures the surface is receptive. Harsh chemicals like bleach must be avoided because they can deteriorate plastic or composite materials. After cleaning, gentle sanding lightly scuffs the surface, providing the necessary texture for primers and paints to adhere properly. This is especially critical when dealing with composite materials like fiberglass or carbon fiber, which require careful handling to prevent further damage.
Selecting the right materials for repair is equally vital. Motorcycle fairings are commonly made from ABS plastic, fiberglass, or carbon fiber, each with distinct properties. ABS is cost-effective and durable, while fiberglass offers lightweight rigidity but can be brittle. Carbon fiber stands out for its strength-to-weight ratio but demands specialized repair methods due to its composite nature.
For structural repairs, particularly on carbon fiber, two-part epoxy resins made for composites are preferred. These resins create strong, heat-resistant bonds critical for maintaining the fairing’s load-bearing capabilities. In contrast, everyday adhesives such as superglue or silicone are unsuitable as they lack the strength and longevity required for structural repairs. Additionally, protective coatings compatible with the fairing material, like ceramic-based finishes for carbon fiber, can enhance scratch resistance and maintain gloss.
Meticulous surface preparation combined with the appropriate materials ensures repairs that sustain both the fairing’s integrity and aesthetic appeal. For deeper insight into maintenance and fairing types, exploring informative guides on Summit Fairings’ blog can be invaluable to enthusiasts seeking reliable and affordable motorcycle fairings.
2. Precision in Paint Application and Protective Finishing for Lasting Structural Fairing Repairs
Achieving a flawless structural repair on motorcycle fairings relies heavily on meticulous application and finishing techniques that restore both strength and appearance. The process begins with careful surface preparation: thoroughly cleaning the affected area to remove dirt, grease, and wax ensures optimal adhesion. A gentle sanding follows, smoothing scratches and creating a receptive surface without compromising the fairing’s integrity. When underlying plastic or old paint layers are exposed, applying a compatible primer is essential to bond effectively with the substrate and promote paint durability.
Selecting a precise color match for touch-up paint is critical to seamless blending. Expert application involves layering thin, even coats, permitting ample drying time between each layer to prevent runs and uneven textures. Employing fine tools such as a small brush or toothpick enables controlled paint placement, especially around edges or chipped spots. For aftermarket ABS plastic fairings, following multi-step paint processes tailored to plastic enhances color depth and longevity.
Once the paint cures, the finishing stage protects the repair and reintroduces the original gloss. Applying a clear coat seals the paint, shielding it from UV rays, moisture, and abrasive wear. After curing, gentle polishing harmonizes the repair’s sheen with the surrounding areas, minimizing visible repair lines. A final wax layer further guards against environmental degradation, preserving both appearance and structural soundness over time.
Additional care practices include minimizing sun exposure, avoiding harsh cleaning chemicals, and utilizing UV-protective covers when the motorcycle is parked. These steps collectively extend the life of repairs by reducing fading and surface wear. Patience and attention to detail throughout each stage ensure the repair not only looks professional but endures the rigors of riding. For insights on high-quality fairings suitable for touch-up and repair projects, explore trusted sources such as the guide on exploring the best motorcycle fairings at Summit Fairings.
Chapter 6: Enhancing Motorcycle Fairing Longevity Through Proactive Maintenance
1. Ensuring Durable Touch-Ups with Quality Materials and Environmental Shielding
Maintaining motorcycle fairings to minimize touch-up repairs begins with the selection of high-quality materials designed to withstand environmental stressors. Durable substrates like ABS plastic, carbon fiber, and fiberglass form the backbone of resilient fairings capable of resisting impacts and paint degradation. ABS plastic, popular for its robust strength and excellent paint adhesion, benefits significantly from a meticulous multi-step painting process to enhance both color vibrancy and durability. Using professional-grade primers, paints, and clear coats specifically formulated for plastic fairings is essential; these products improve adhesion, color fidelity, and prolong the finish’s lifespan. Applying paint in thin layers with sufficient drying intervals prevents surface cracking and peeling, maintaining a smooth, lasting repair.
Equally important is environmental protection through thoughtful maintenance routines. Regular cleaning with gentle, non-abrasive soaps and soft cloths avoids dulling and surface damage that can invite premature wear. Protective coatings such as waxes and UV-blocking agents act as a barrier against sunlight, oxidation, and pollutants that progressively degrade plastic and paint. Parking in shaded areas or using UV-protective covers further shield fairings from harmful rays that cause fading and brittleness. Plastic restorers also play a crucial role by penetrating and conditioning the surface, preserving flexibility and appearance.
Sustainability in care practices contributes to lasting results and environmental stewardship. Choosing low-VOC products reduces chemical emissions, while precise, minimal sanding and paint application limit waste. Preventing frequent repainting conserves resources and lowers the ecological footprint linked to manufacturing and disposal. This integrated approach combining material quality and environmental shielding forms a reliable foundation for keeping fairings visually sharp and structurally sound over time.
For more insights on maintaining durable and attractive motorcycle fairings, explore a comprehensive source on affordable motorcycle fairings.
2. Smart Maintenance and Early Damage Detection to Reduce Fairing Repairs
Preventative care for motorcycle fairings hinges on consistent maintenance and vigilant early damage detection. Regular cleaning removes dirt, grease, and debris that can gradually degrade both paint and the underlying plastic, preserving the fairing’s surface and enhancing the longevity of any future touch-up work. Beyond cleaning, frequent visual inspections are crucial to catch minor scratches, paint chips, or early signs of oxidation before these issues develop into more severe damage. Spotting subtle discoloration, clear coat dulling, or cracks allows for timely repairs that prevent the need for extensive panel replacements.
Applying protective coatings like wax or ceramic treatments provides an added safeguard against environmental stresses, such as UV exposure and moisture, which accelerate paint fading and structural deterioration. Proper storage habits—parking in shaded or covered areas and handling the motorcycle carefully—also play a vital role in reducing impact damage and surface wear.
Early detection extends to employing simple diagnostic tools; for instance, paint thickness gauges can help assess the thickness of clear coats and determine whether minor touch-ups are appropriate or full repainting is required. Recognizing cracks or chips early prevents them from spreading, which if ignored, can lead to complex repairs involving structural restorations.
Combining these maintenance routines with early, thorough damage assessments ensures that minor imperfections receive prompt attention, minimizing repair costs and preserving the fairings’ aesthetic and structural quality. Preparing affected areas carefully before repair—such as cleaning thoroughly and performing techniques like V-grooving—improves paint adhesion and durability, further reinforcing the effectiveness of touch-up efforts.
For deeper insights into selecting and maintaining fairings, explore expert resources that detail optimal care strategies tailored to motorcycle exteriors at Explore the Best Motorcycle Fairings at Summit Fairings.
Final thoughts
Efficiently touching up motorcycle fairings requires a methodical approach encompassing cleaning, surface preparation, expert sanding and priming, precise paint application, and protective finishing. Structural repairs demand additional care to restore strength before cosmetic work. Integrating these practices into your business not only enhances repair quality but also builds credibility and customer satisfaction. Emphasizing preventative care safeguards investments and reduces future repair needs, ultimately streamlining your services. Adopting these comprehensive techniques equips your workshop or dealership to deliver professional, lasting results that stand out in the competitive motorcycle maintenance industry.
Ready to elevate your ride? Summit Fairings delivers premium, custom-fit fairings that blend style and durability. Whether you’re chasing speed or turning heads, we’ve got your bike covered. Don’t wait—transform your machine today. Click, customize, and ride with confidence. Your perfect fairing is just a few clicks away. Act now!
About us
undefined