VTX motorcycles, especially the VTX1300 and VTX1800 models, are not just about performance but also about comfort and style. One of the most transformative upgrades for these bikes is the installation of fairings, particularly the popular batwing style. This article will explore crucial aspects of VTX motorcycle fairings, including the materials used, the variety of types available, the benefits they offer, the installation process, and aesthetic considerations—each an essential component in optimizing the riding experience while enhancing the motorcycle’s appeal.
null
null
Winged Shields for the VTX: A Rider’s Guide to Fairing Types, Fit, and Feel
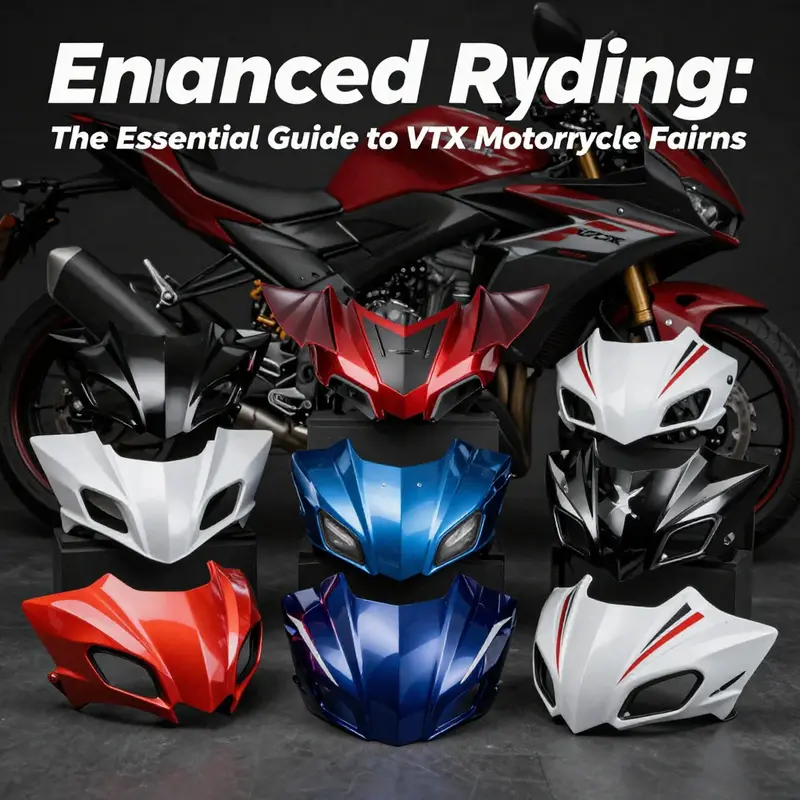
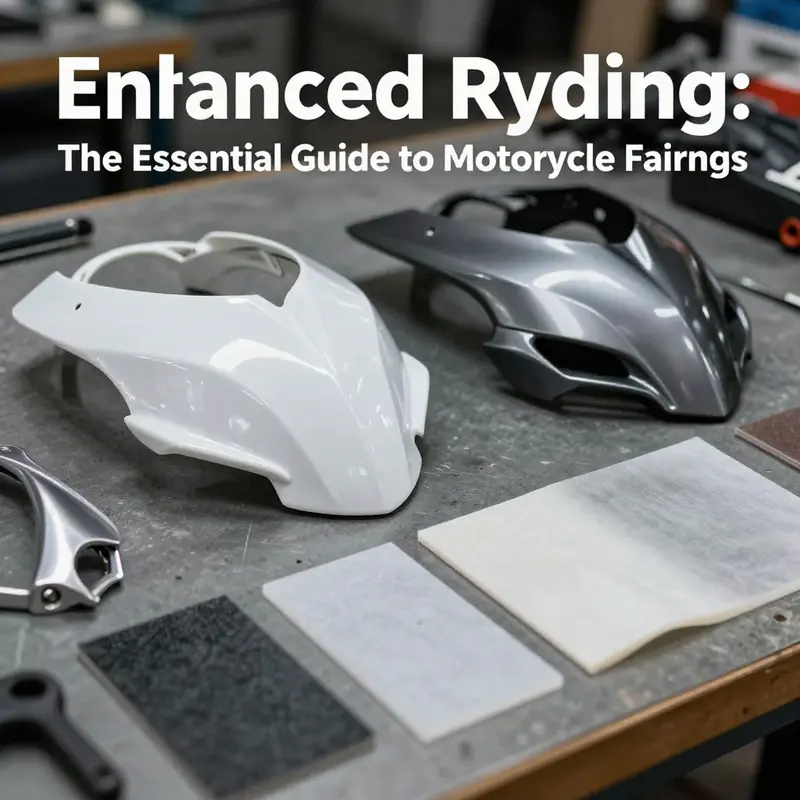
Fairings on a VTX motorcycle are more than wind shields. They shape the riding experience as surely as the engine tune or tire choice. On the VTX lineup, fairings range from full enclosures to half fairings and smaller headlight pieces, plus a variety of aftermarket options. The choice depends on how you ride: long highway miles, backroad carving, or a daily commute. Full fairings offer the best wind protection but can require careful fitment and more maintenance. Half fairings, often called batwing, balance wind protection with easier service access and a bold look. Quarter fairings provide a light touch that preserves engine access while refreshing the front end. Material choices like ABS and fiberglass affect weight, finish, and repairs. ABS is durable and affordable; fiberglass allows more shaping. Installation and maintenance vary by model and year, so verify fitment before buying and consider professional mounting for complex setups. The riding style you prefer should guide your choice: touring typically favors maximum deflection, cruising suits the batwing silhouette, and a simple quarter fairing can suit a minimal look. When shopping, check mounting points, wiring routing for any integrated audio or lighting, and ensure compatibility with your specific VTX variant. For reference, see Honda fairings collection: https://www.summitfairings.com/collections/honda-fairings and a general overview at https://en.wikipedia.org/wiki/Fairing_(motorcycle).
Streamlined Resilience: How VTX Fairings Elevate Aerodynamics, Comfort, and Longevity

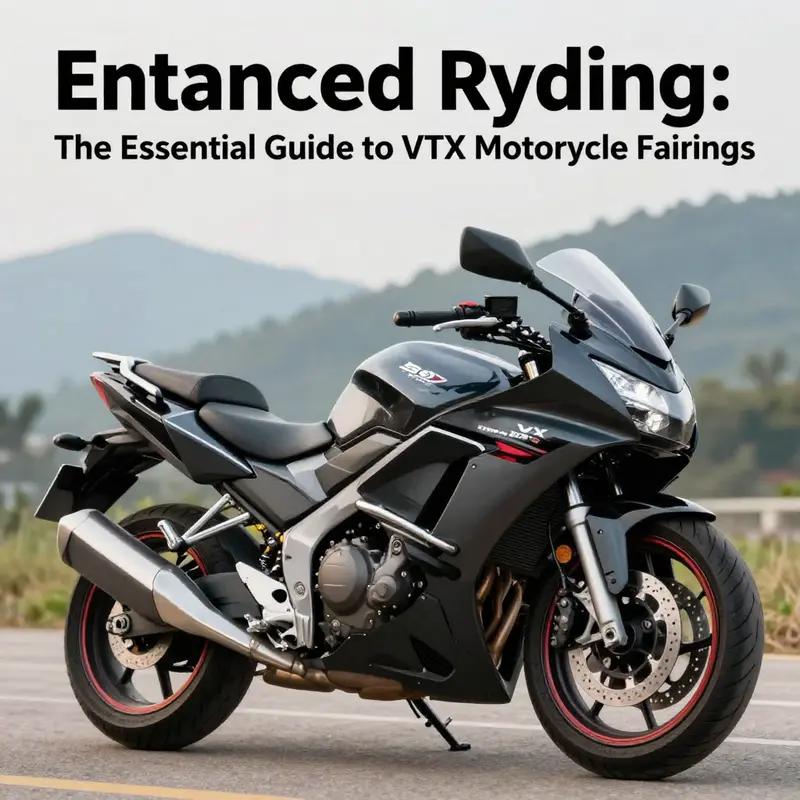
A motorcycle’s silhouette is as much a statement as a function, and for the VTX lineup, the batwing fairing is more than a styling cue. It is a purposeful, engineered shell that redefines how the bike moves through air, how the rider feels on the seat, and how the machine survives the road’s unpredictable moods. When you set eyes on a VTX with a thoughtfully designed fairing, you’re witnessing a blend of form and physics, a deliberate conversation between wind, weight, and rider posture. The decision to install a fairing on a VTX is rarely driven by a single motivation. It is a synthesis of comfort, efficiency, protection, and personality. What begins as a cosmetic upgrade soon reveals itself as a system-level enhancement that touches every mile you ride and every weather system you meet along the way. And while each rider may prioritize a different aspect, the core benefits remain interconnected, weaving together a more relaxed ride, an easier route through the wind, and a more confident sense of control at speed.
The most immediate impact of a VTX fairing is aerodynamic. A well-shaped shell channels air around the sides of the bike rather than piling it onto the rider’s upper torso. The integrated windshield, when aligned to the rider’s eye line, minimizes the buffeting that can feint the head, shoulders, and neck at highway velocities. The result is a calmer cockpit, a stable wind stream that translates to steadier steering input and a more predictable ride. Even modest drag reductions matter on long trips, where cumulative gains in efficiency can translate into fewer fuel stops and more time on the road. In practical terms, the ride feels quieter and more composed, not because the bike travels faster in an abstract sense, but because the air is behaving like a cooperative partner rather than an opposing force.
Comfort is not an afterthought but the lifeblood of a touring-oriented setup. A batwing fairing diverts the majority of wind away from the rider’s chest and arms, reducing fatigue on extended stretches and helping maintain a relaxed wrist position. The effect is especially noticeable in cool or unsettled weather, where the riding posture would otherwise contend with a stiff, chilling draft along the torso. With the wind deflected, the rider breathes more easily, shoulders settle, and the lower back is less taxed by gusts or uneven air flows. The practical upshot is straightforward: more hours of comfortable riding per day, a higher likelihood of choosing a longer route, and a broader window for enjoying the scenery rather than fighting the elements.
Alongside comfort, protection is a central virtue of the fairing’s design. The shell acts as a shield for engine components, wiring, and exhaust assemblies from road debris, spray, and incidental impacts that can occur during cornering on rough pavement or urban debris. A fairing’s breadth and depth create a barrier that minimizes the probability of minor dents, chips, or moisture intrusion in vulnerable spaces. This protective layer can contribute to longer-term reliability by reducing exposure to grit and dampness that, over time, influence performance or lead to maintenance concerns. The deeper value here is not simply keeping the bike clean; it is preserving the integrity of critical systems that keep the VTX running smoothly in varying conditions.
Aesthetics and customization form a meaningful part of the owner’s relationship with the bike. The batwing silhouette is instantly recognizable, but the surface finish, color, and graphics become a canvas for personal expression. ABS plastic and fiberglass, the two common materials for aftermarket fairings, offer distinct paths to that canvas. ABS brings durability, impact resistance, and a factory-like consistency that tends to appeal to riders seeking a balance of performance and cost. Fiberglass, in turn, offers higher levels of customization potential and a lighter profile when tuned and finished with care. The ride, in turn, is married to a look that matches the rider’s aesthetic, from sleek, glossy finishes to matte or textured schemes. In this way, a fairing becomes not just a shield but a statement of identity on the road. For those who crave a curated combination of look and feel, the fairing can also accommodate audio and lighting upgrades, with cutouts and mounting provisions that keep accessories tidy and aligned with the bike’s geometry, rather than tacking on awkward add-ons that threaten aerodynamics or clearance.
The performance implications of a VTX fairing extend beyond the obvious wind management. Reducing drag, and if weight is kept in check with chosen materials, can yield measurable improvements in power delivery and throttle response. The rider may notice a more eager feel when accelerating into top gear or maintaining speed on a gusty highway—an impression that comes from a smoother air interaction rather than a sudden boost in horsepower. Even when the gains are incremental, they contribute to a more efficient power-to-weight relationship, enhancing handling and maneuverability. A fairing’s influence on airflow can also affect engine temperatures, as airflow patterns encase the radiator or air intake paths in a way that encourages consistent cooling at speed, provided the installation is properly aligned with the bike’s framework and cooling configuration.
No discussion of a fairing’s value would be complete without acknowledging maintenance and durability. A well-fitted fairing protects vulnerable components from splash and grime, reducing the frequency of minor cleaning tasks and the wear that can accompany road spray. The materials chosen—ABS or fiberglass—also determine how easily the surface can be repaired and refinished after a minor scrape or impact. ABS’s inherent resilience makes it forgiving in everyday use, while fiberglass offers a lighter frame and a customized surface that can be coaxed into a pristine finish with professional attention. Regardless of the material, proper mounting is essential. The fairing must align with factory mounting points, avoid contact with moving parts, and maintain clearances around the windscreen, mirrors, and lighting. A poorly mounted fairing can introduce rattles, create interference with turning radii, or even affect suspension behavior on rough roads. The installation choice—whether DIY with careful guidance or entrusted to a qualified technician—will strongly influence the fairness of the final ride.
The decision-making process for a VTX fairing inevitably involves a balance among aesthetics, durability, and budget. The most compelling choice recognizes that a fairing is a system component that interacts with the bike’s chassis, powertrain, and rider posture. It should be chosen not as a standalone cosmetic addition but as part of a holistic upgrade that aligns wind management, protection, and style with how the rider uses the motorcycle. This is especially true for the VTX, a model line celebrated for its comfortable cruising and confident highway demeanor. When you select a fairing, you’re selecting a framework that will influence riding dynamics, daily practicality, and even resale appeal—elements that matter long after the first impression of the paint has faded. To begin exploring options, riders might consider the Honda fairings collection as a practical starting point for assessing fit, dimensions, and mounting compatibility. Honda fairings collection
Compatibility remains a practical reality. Fairings are not universal parts; mounting points, dimensions, and windshield height can vary with model year, trim level, and sub-variants. Before committing to a purchase, it is wise to verify fitment for your exact configuration. Even small mismatches can compromise alignment and reduce effectiveness, undermining the wind management benefits or causing interference with the handlebars or instrument cluster. The careful reader will also consider the finish and repainting implications. A factory-minished shell can offer a clean, seamless look out of the box, while a fiberglass option may demand careful prep work, edging, and color matching to achieve a flawless final appearance.
From an owner’s perspective, the most meaningful proof of value comes from the riding experience and the long arc of ownership. A well-chosen fairing does not merely transform a bike’s silhouette; it reshapes the texture of the road itself. On a day that begins in drizzle and ends in sun, a well-configured batwing can dynamically adapt to the changing weather, guiding air flow in a way that minimizes fatigue and maintains stability. On a long, straight highway, the wind’s resistance becomes a more manageable partner rather than a constant counterweight, allowing for relaxed posture and steady cruise. In twists and undulating terrain, the balance between wind protection and steering accuracy can contribute to a sense of confidence and clarity that encourages extended rides.
These advantages are not merely subjective. They are anchored in practical considerations—the wind profile around the rider, the rate of debris exposure, and the potential for minor energy savings over thousands of miles. The combined effect is a more predictable, more enjoyable riding experience that resonates with riders who view the motorcycle as a companion rather than a machine to endure. In this context, the VTX fairing becomes a keystone upgrade, one that supports comfort, protection, and performance in equal measure and scales with the rider’s evolving preferences for aesthetics and speed.
For readers seeking deeper technical context about materials and standards, a foundational resource on motorcycle fairings offers broader industry insight into composition and benefits across different manufacturers and regions. External resource: https://www.motorcyclefairings.com/chinese-motorcycle-fairings-composition-standards-industrial-benefits/
The Gentle Fit: Mastering Batwing Fairings on Cruiser Motorcycles for Comfort, Style, and Safety
Batwing-style fairings have become a defining upgrade for cruiser motorcycles, transforming long rides from gusty endurance tests into comfortable, enjoyable journeys. The installation journey is more than a toolbox exercise; it is a careful negotiation between aesthetics, aerodynamics, and the bike’s native ergonomics. A well-fitted fairing should feel like a natural extension of the machine, not a bulky add-on. It should shed wind on the rider without overpowering the bike’s classic silhouette, and it should do so without compromising handling or reliability. As riders explore the options—full fairing kits that cradle the front and sides, or more restrained semi-fairings that shield the head and instrument cluster—the underlying principles remain the same: align precisely, protect wiring, and honor the bike’s original geometry. The goal is a discreet integration that enhances comfort at highway speeds while preserving the bike’s timeless character. In practice, that means planning before you lift a single bolt and accepting that every mounting point has a story of fitment, clearance, and methodical adjustment.
Choosing between a full kit and a semi-fairing is a decision that echoes through every phase of the installation. A full kit offers sweeping aerodynamics and a cohesive, race-inspired appearance. It can dramatically improve wind protection for rider and passenger, especially on longer trips, and it folds the headlight and instruments into a single, sculpted surface that can look stunning when finished with the right paint and clear coat. Yet the complexity is real. Full kits rely on a maze of mounting points, some of which must align with the frame, the tank area, and existing brackets. They can require precise drilling or the careful removal and reattachment of adjacent bodywork to ensure there are no gaps or misalignments that would ruin airflow or cause rattling at speed. A semi-fairing, by contrast, provides a more modest step up in comfort. It typically covers the front, leaving the sides and rear exposed to preserve that classic cruiser look while still offering meaningful wind deflection. It is lighter, simpler to install, and often more forgiving for riders who value ease of maintenance or who want to preserve the bike’s original silhouette. The choice hinges on a rider’s priorities—whether the aim is maximal wind protection for mile after mile, or a balance between updated ergonomics and the bike’s enduring aesthetic.
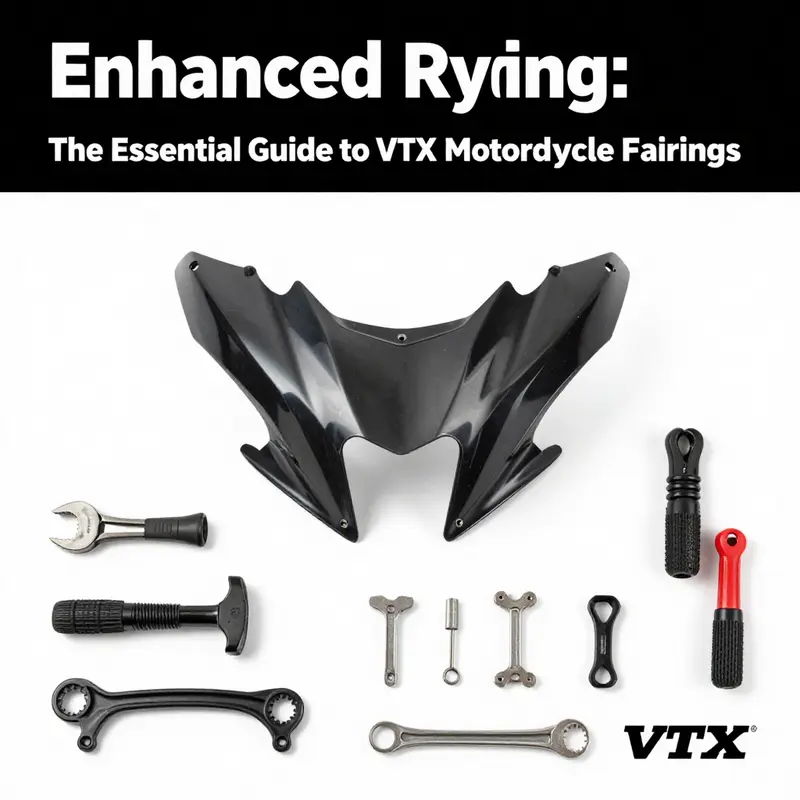
The installation flow begins long before you touch a wrench. A measured approach is essential because the same mounting points can differ between model years and even within trim variations. The first act is a meticulous inventory: confirm the fairing type and its components, tally hardware, and map out which pieces will contact the bike’s frame, fork crown, or triple tree. Preparation also means documenting the route for electrical connections. If the fairing includes lights, speakers, or instrument wiring, you’ll want a clean path that avoids moving parts, hot areas, and potential chafing. For those who like to keep things tidy, it helps to plan cable routes with loom, grommets, and weather-sealed connectors that resist moisture and vibration. A clean plan reduces guesswork and makes the actual mounting smoother, with fewer opportunities for mistakes that would require disassembly later.
Removing existing panels or setting aside the bike’s current front-end components is the practical starting point. With the bike on a stable stand, you’ll detach fairing fasteners, carefully separate any mounting brackets, and set aside hardware in labeled containers. The goal is to access the mounting surfaces without scratching paint or bending brackets. Clean surfaces are the unsung heroes of a lasting install; dust, oil, and old adhesive can prevent a new fairing from seating properly. As you prepare, you’ll notice that the mounting surfaces aren’t always perfectly flat or square. Small gaps or unevenness can be addressed with shims or small spacers, always prioritizing a snug fit that won’t shift under wind or vibration. The next phase is to test-fit—placing the major fairing pieces in position to verify alignment, clearance around the headlight assembly, and the interaction with nearby bodywork. A patient mock-up helps prevent late surprises when you’re tightening the last bolts.
When you commit to securing the fairing, the method follows the same principle: secure the essential points first, then refine the fit. For most full kits, you’ll begin with the main support brackets or frame mounts. These are critical because they carry the load and influence how the entire fairing sits in relation to the rider. If the kit uses a set of quick-release or bolt-on brackets, you’ll install those first, checking vertical and horizontal alignment against the bike’s centerline. It’s not uncommon to discover minor asymmetries that require a small adjustment—slight shifts in the position of a bracket can produce a noticeable change in glare, line of sight for the headlight, or the wind-deflecting angle. The semi-fairing approach often uses a lighter touch. The mounting hardware might tuck under the upper triple clamp or rely on existing bolts for a clean integration. In either case, the principle holds: tighten in a sequence that maintains alignment and permits final tuning without binding or over-stressing any single point.
Electrical routing is where the install becomes an exercise in discipline. If the fairing integrates lighting, the wiring should be routed inside the fairing’s internal channels whenever possible, protected by loom and tucked away from any moving parts. It’s wise to bundle connectors in a weather-sealed harness that remains accessible for service but protected from the elements, heat, and vibration. When the fairing includes a speaker system, plan the signal path from the head-unit or amplifier to the speaker cutouts with care. Ensure that the speaker wires are insulated and won’t rub against mounting hardware or the edges of fiberglass or ABS panels. A clean harness not only reduces the risk of shorts but also makes future maintenance far simpler. Respecting the bike’s existing electrical system is paramount. If the installation adds additional current draw, consider checking the alternator output and battery capacity, and, if needed, upgrade the charging system to preserve electrical reliability on long rides.
With the fairing physically mounted and the wiring underway, attention shifts to fit and finish. The adjacent surfaces may require minor trimming or sanding, especially if fiberglass is used. ABS molds generally tolerate gentle trimming and sanding to achieve a seamless edge. A key moment is the windscreen, which must be oriented to optimize airflow and minimize buffeting. The screen’s height and angle can dramatically alter ride quality; many riders adjust it to balance visual comfort with the wind’s direct impact on the chest and helmet. A fairing’s success is not merely in how it looks when the bike sits idle in the driveway, but how it performs on a highway bluster. You want a silhouette that looks integrated, with a uniform gap around the headlight and consistent gaps along the sides. Any misalignment is amplified at speed, creating wind noise, flutter, or even air leaks behind the instrument cluster.
Aesthetics deserve attention as well. Depending on the finish, you may need to address edge seams, paint matching, and protective coatings. The choice between ABS and fiberglass affects finishing strategy. ABS tends to be more forgiving for beginners and can be reinforced with post-installation sealing or paint that cures to a durable, glossy finish. Fiberglass, while lighter and highly customizable, can require more meticulous finishing work to prevent micro-cracks at stress points. The craftsmanship shows in the details: perfectly smooth edges, evenly seated gaskets, and a shadow-free transition between fairing components and the bike’s original lines. Finishing touches extend beyond the shell. If your plan includes light lenses or reflective accents, ensure they’re aligned for optimal visibility from all angles. The overall effect should be a cohesive front end that communicates speed and comfort without shouting for attention.
Beyond the thrill of the upgrade lies a practical, ongoing responsibility. A well-installed fairing should not interfere with steerage, braking, or access to maintenance points. Frequent checks after a few rides can catch any loose fasteners or shift in alignment before they become a problem. The installation process is not a one-and-done event; it’s a dialogue with the bike’s geometry and the rider’s evolving needs. For riders who prefer professional help, or who are upgrading to a more complex full-kit, expert installation can safeguard the experience and preserve warranty protections that might hinge on correct mounting and electrical routing. The careful alignment, secure mounting, and clean wiring reframe the bike’s performance profile, delivering smoother highway cruising, reduced fatigue, and an appearance that honors the bike’s enduring personality.
For readers exploring options, a practical step is to browse the broader fairing collection that can accommodate cruiser platforms while respecting the bike’s classic proportion and rider ergonomics. A carefully chosen kit can feel like a natural extension of the ride, not an afterthought. As with any significant modification, the emphasis should be on fit, finish, and function. A fairing that fits well reduces fatigue on long climbs and open road stretches. It minimizes wind noise and buffeting, allowing clearer communication with a passenger and more relaxed posture behind a shield that works with your speed, height, and riding stance. The resulting upgrade is not just about a refreshed look; it’s about enriching the rider’s connection to the machine and reimagining the possibilities of a familiar ride.
For readers seeking a model-agnostic guide, the general principles apply across brands and eras. The best practices involve careful preparation, precise mounting, thoughtful electrical routing, and patient finishing. Those who follow these steps will appreciate how a well-executed fairing installation can transform comfort, visibility, and wind management without compromising the bike’s soul. If you’re looking for a starting point in the catalog, consider the generalized fairings collection as a baseline. And for readers who want a deeper dive into model-specific nuances, the dedicated installation guide from the broader industry resource provides step-by-step compatibility notes, diagrams, and tool requirements to accompany the journey. External reference: https://www.motorcycle.com/tech/honda-vtx-fairing-installation-guide/.
null
null
Final thoughts
Choosing the right fairing for your VTX motorcycle is not merely an aesthetic decision; it’s crucial for enhancing comfort, safety, and the overall riding experience. By understanding the materials, types, and benefits of VTX motorcycle fairings, business owners catering to motorcycle enthusiasts can offer informed guidance to their customers. A well-installed fairing can significantly enhance the rider’s experience, making it an investment worth considering for every VTX owner.