Wrapping motorcycle fairings is a vital aspect of motorcycle customization that caters to both aesthetics and protection. The appeal of wrapped fairings lies in their ability to transform a bike’s appearance while safeguarding it from potential damages. For business owners in the motorcycle aftermarket, understanding the nuances of this process—ranging from effective techniques and necessary materials, to navigating common challenges and recognizing the advantages over traditional painting—is essential. This article aims to equip you with comprehensive insights into wrapping techniques, the best materials, solutions to frequently faced hurdles, and the myriad benefits of choosing wraps over paint, thus enhancing your offerings in the motorcycle customization sector.
Guarded Illusions: The Quiet Art of Wrapping Motorcycle Fairings for Protection and Style
Wrapping motorcycle fairings is more than a cosmetic gesture. It is a transitional craft that blends art and engineering to protect delicate curves from a life of travel, weather, and road rash, while allowing a rider to broadcast personality without sacrificing the integrity of the original bodywork. In practice, the wrap serves as a sacrificial shield, a flexible armor that cushions impact, deflects UV fade, and creates a forgiving surface that can absorb micro-scratches long before they reach the paint. This chapter considers wrapping as a holistic process, one that begins with a clean canvas and ends in a crate-ready, transport-ready finish. It is a journey through surface discipline, material choice, and strategic protection—one that recognizes the fairing as a composite of complex geometries that demand patience, precision, and respect for the material’s limits. When respected in full, wrapping becomes a durable, adaptable solution for both everyday riding and long-haul relocation, a balance of form and function that remains visible in every line and edge of the fairing after hours on the road or months in a crate.
Preparation is the hinge on which a successful wrap turns. A fairing’s surface must be pristine, and the psychology of the task hinges on that clarity. A mild soap solution helps to dissolve dust and grease without leaving residues that could undermine adhesion. After washing, the surface must dry completely. Any lingering moisture invites micro-marring under the vinyl or becomes a seed for adhesion failure at the edges. Beyond cleanliness, the hand of preparation includes a quick wipe with a dedicated cleaner such as isopropyl alcohol to remove any oils, waxes, or residues left from previous finishes. This step is not ceremonial; it is practical, because even micro-contaminants can create a barrier that invites air bubbles, lifting, or micro-fissures at the seams once heat and tension are applied. The attention to detail in preparation sets the tone for the wrap’s long-term performance and its resistance to environmental exposure in transit.
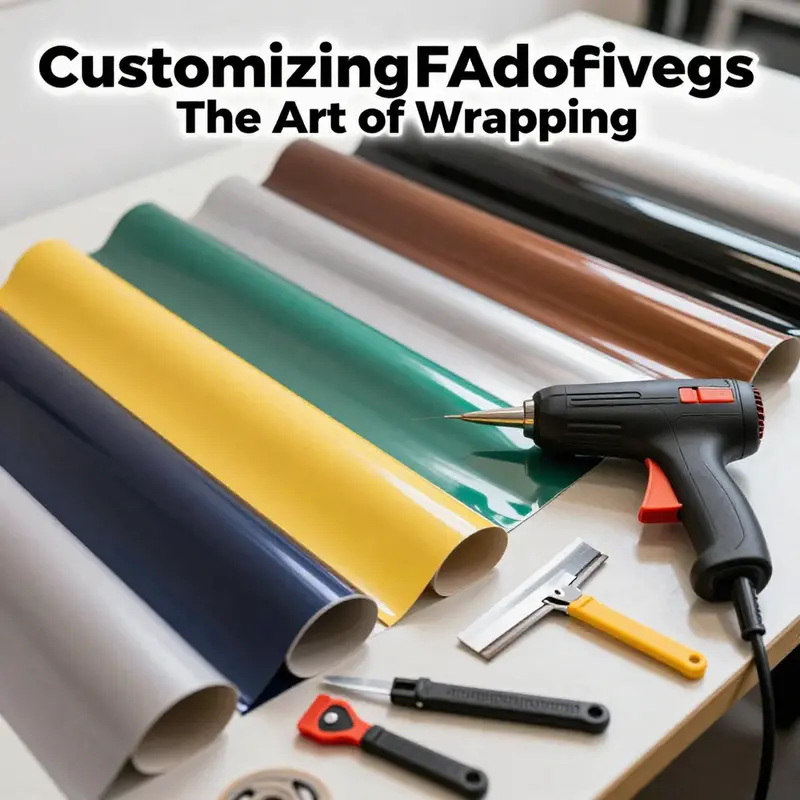
Material choice follows preparation, and here the practicalities of motion and protection guide the hand. High-quality automotive-grade vinyl wraps designed for curved surfaces provide the essential combination of flexibility and durability. Polyurethane and cast vinyl formulations are known for their ability to contour irregular shapes, resist fading under sunlight, and endure the occasional flex of a contact point during handling. The decision to select a vinyl with good stretch characteristics, moderate memory, and a strong, consistent adhesive is the quiet foundation of a wrap that will survive the rigors of transport and the bumps of road use. The choice is not simply about color or pattern; it is about how the material behaves when coaxed over a complex silhouette, how it adheres to the contours, and how it behaves when temperature changes induce stress at the edges. A wrap designed for curved surfaces reduces the risk of overstretching at corners and minimizes the likelihood of crazing or peeling in vulnerable junctures.
Protection during transport must be layered and deliberate. The chapter of protection begins with outer cushioning and ends with inner alignment. Bubble wrap, particularly thick variants with 10–20 millimeter bubbles, plays a central role in buffering the fairing’s outer landscapes from sharp impacts during handling and loading. The bubbles create a sacrificial barrier at the edges, where most damage tends to occur. Behind these shields, rigid foam sheets or foam boards support flatter zones of the fairing, preventing dents from the pressure points that inevitably arise in crates or on palletized transport. In parallel, anti-scratch films or laminated plastic sheeting applied temporarily over painted surfaces can prevent marring during the many moments of moving, lifting, or stacking. The protective ensemble must be applied with care, ensuring that bubble layers do not create overly thick stacks that could interfere with snug packaging or crating. The aim is to cushion, not crowd the fit.
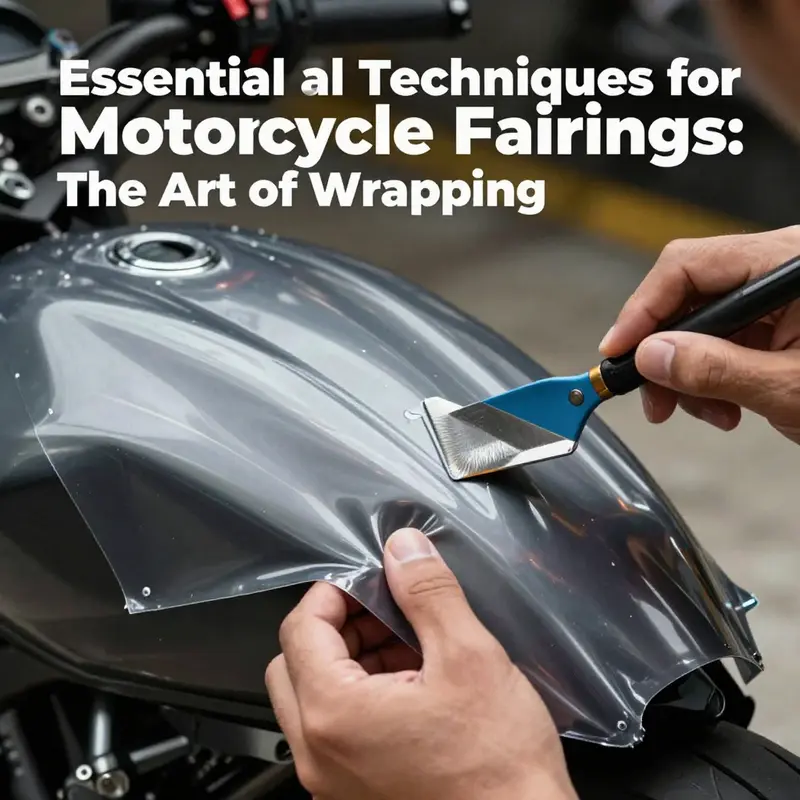
When the wrap itself is being applied for transport rather than a cosmetic facelift, technique becomes a matter of distribution and restraint. The center-first approach offers a natural reference point for tension; the vinyl is then guided outward in overlapping swathes. A squeegee is used to push air out from the center to the edges, and to coax the vinyl to track along the fairing’s contours without creating air pockets that can lead to lifting later. Heat becomes a shaping tool rather than a gimmick. A controlled flow of warmth from a heat gun makes the vinyl pliable enough to bend around curves and into recesses, while avoiding overheating the substrate or causing gloss marks. This is not “stretch and pray”; it is deliberate control. As layers accumulate, attention to seams and joints increases. Each seam becomes a potential stress point, so the wrap must be trimmed with a slight overage beyond the intended edge, a practical safety net that allows precise final trimming and ensures that no gaps remain at intricate junctions where two panels meet.
Edges and corners receive particular care because they are the most vulnerable in both wrapping and subsequent handling. Extra layers of foam or rubber edge protectors can be applied to sharp edges and corners that are prone to chipping or cracking during loading and unloading in a crate or frame. The goal is to distribute the contact forces evenly, so a sharp strike does not translate into a peel line along a seam. Avoiding direct contact between the fairing and metal frames is also critical. Wooden crates and metal frames, while sturdy, can transmit vibration and direct contact that damages the wrap’s surface or distorts its adhesion. Soft spacers—foam blocks or rubber pads—between the fairing and the crate’s interior structures absorb the brunt of movement and dampen vibrations, preserving the vinyl’s integrity until the motorcycle reaches its destination.
Labeling and orientation are practical cues that support the integrity of the wrap during transit. Clear markers such as “This Side Up,” “Fragile,” and “Do Not Stack” help handlers maintain correct orientation and reduce the risk of accidental pressure on wrapped surfaces. Arrows indicating the proper line of sight for inspection can guide stewards to unexpected stress points, particularly if the fairing has asymmetrical design elements or raised decals that can become stressed under pressure. Post-wrap inspection is a ritual that should not be skipped. A thorough pass over every area for gaps, loose edges, or exposed surfaces becomes the moment when the wrap’s resilience is verified before crates are sealed and shipments depart. A well-wrapped fairing is uniformly protected, with no weak spots that would invite moisture ingress, edge lift, or micro-damage during transit.
In the realm of long-distance or high-value shipments, the protective plan extends into the crate itself. A custom-built wooden crate with internal foam padding and steel strapping can secure the entire motorcycle, including its fairings, for the most demanding journeys. The crate acts as a second skin, absorbing shocks and controlling movement. Yet even with such a setup, it is essential to work with a freight carrier experienced in motorcycle transport and to confirm they offer insurance coverage that reflects the risks involved in transit. The wrapping and crating process, taken together, creates a layered defense: the vinyl’s intrinsic durability, the protective cushion of bubble and foam, and the crate’s mechanical restraint working in concert to prevent impact, abrasion, and moisture exposure.
Interwoven through these practical steps is a thread of intention that speaks to the craft’s broader purpose. Wrapping is not merely a way to cover a fairing with a slick color or pattern. It is a disciplined approach to preserving value, reducing downtime, and enabling more flexible relocation for repair or long-haul travel. The material’s flexibility is matched by the operator’s ability to read the fairing’s geometry, to anticipate stress points, and to choreograph a sequence that keeps the surface clean, free of bubbles, and well-aligned with every mounting point. Even the smallest decision—a slightly oversized cut at the outset, a measured heat setting, or a deliberate choice of edge protection—matters in the long run. These choices accumulate into a wrap that remains legible after the first road miles and readable after it leaves a crate. The result is a balance of aesthetics and resilience, a practical art that respects the fairing’s lines while offering a shield against the realities of transport and handling.
For readers seeking further context on sourcing compatible components or exploring different sway of shapes, there is a practical route to information that respects the same careful logic described here. You can explore a catalog of fairing shapes and collections that reflect a broad spectrum of contours, helping you anticipate how a wrap might align with a motorcycle’s original geometry. collections/honda-fairings offers a window into how diverse forms are accommodated by wrap solutions and shows how the wrap remains a faithful companion to the bike’s silhouette rather than an afterthought slapped on at the end. This is not about chasing trends but about anticipating form and function, ensuring that the wrap complements the bike’s lines as you move from workshop to showroom to road.
The wrapping approach described here also aligns with a broader practice of safeguarding bodywork during transit and storage. In the end, the goal is to keep the fairing’s surface as pristine as possible while enabling a level of customization that speaks to the rider’s identity. The wrap should not behave like a brittle shell that breaks at the slightest tremor; it should behave like a resilient veil that gives the bike a durable personality. In time, as conditions change and journeys continue, the wrap’s integrity will reveal itself in a quiet, almost invisible way—the edges stay tight, the color remains bold, and the fairing’s shape remains readable under the hands of a rider who knows how to handle it. The craft is in the rhythm: cleanse, protect, adhere, align, cushion, and inspect. Applied with care, it becomes a routine that extends the life of the fairing and preserves the machine’s character for miles to come.
External resource: Motorcycle Magazine’s transportation tips for protecting motorcycle fairings can provide additional practical nuance on handling, packing, and insurance considerations during transit. Motorcycle Magazine transportation tips for protecting motorcycle fairings.
Essential Materials and Tools for Safeguarding and Wrapping Motorcycle Fairings
Protective materials and the right tools form the backbone of any successful fairing wrap. Whether you’re preparing fairings for transport, long-term storage, or temporary protection during modification, choosing materials that balance cushioning, rigidity, and surface safety is critical. The goal is simple: prevent scratches, dents, and moisture damage while keeping the finish pristine. This requires a layered approach that combines soft, non-abrasive contact with structural supports and a final weatherproof seal.
Start with the surface contact layer. A soft, lint-free cloth such as microfiber is indispensable. Use it first to remove dust and fingerprints and then as an inner padding layer where the wrap might directly contact painted surfaces. Microfiber prevents micro-scratches that coarse materials can cause and helps maintain glossy or matte finishes. Always ensure the fairing is fully clean and dry before adding any protective layers; trapped grit or residual moisture will undermine every subsequent step.
Next, think in terms of shock absorption. High-density bubble wrap with a thickness of at least 3 millimeters offers an excellent compromise between flexibility and cushioning. For edges and corners—where impact forces concentrate—apply multiple layers and orient bubbles inward to increase compliance. Bubble wrap conforms well to compound curves yet maintains a resilient barrier against knocks. When wrapping complex shapes, cut the bubble wrap slightly oversized to ensure full coverage; overlapped seams create redundant protection at vulnerable junctions.
Rigid protection is the second pillar. While bubble wrap handles surface-level shocks, foam sheets or foam boards of 2 centimeters (or thicker) provide structural resistance to bending and crushing. Foam is especially useful for full body kits or larger cowls that might flex if pressure is applied during stacking or transit. Trim foam inserts to match the contour of the fairing and secure them over the most critical areas—center panels, headlight housings, and mounting flanges. The foam should cradle the piece, preventing movement inside its wrapping and distributing external loads over a wider area.
Once soft and rigid layers are in place, seal the assembly with a waterproof outer film. Heavy-duty stretch wrap or plastic sheeting locks everything together, keeping moisture, dirt, and salt spray from reaching underlying surfaces. Stretch film also stabilizes the cushioning and foam, preventing shifts that could expose edges or create stress points. Apply the plastic film smoothly, tensioning it enough to hold layers in place but not so tightly that it deforms or squeezes delicate sections.
Choose tape carefully. Painter’s tape or masking tape is ideal for temporarily securing the inner layers. It holds bubble wrap and foam without leaving sticky residue on paint. Avoid strong adhesive tapes like duct tape directly on the fairing; even with a protective cloth barrier, aggressive tapes can pull at edges or leave residue over time. Use tape only where needed and apply it to the protective wrap rather than the fairing itself.
Tools make execution precise and safe. A sharp utility knife or box cutter lets you trim bubble wrap and foam with clean edges. Blunt blades create ragged edges that catch during handling. Scissors are useful for cutting plastic film and finer trimming around odd curves. A measuring tape ensures you purchase and cut materials efficiently; measure the largest dimensions of each fairing piece and add an allowance for overlaps and seams. A simple marker or chalk allows you to mark foam cut lines without leaving permanent marks.
When working on fairings that remain mounted, a stable work platform is essential. A ladder or adjustable workstand brings you to a comfortable height for upper cowls and keeps you safe during repetitive movements. Secure mounting points and consider using soft straps or padded supports to hold the fairing steady while you wrap. This minimizes hand fatigue and reduces the chances of accidental contact that could scratch a freshly wrapped surface.
Technique matters as much as materials. Begin wrapping with small, manageable sections rather than attempting to cover an entire piece in one pass. Start at the center of each panel and work outward, smoothing bubble wrap and then placing foam over broad flat areas before finishing with plastic film. This sequence reduces trapped air and helps the foam conform more predictably to complex geometries. For intricate edges or recessed vents, build up padding gradually and avoid compressing foam into tight gaps, where it could create pressure vectors that crack brittle plastics.
Labeling is a small step with big payoffs. Use a marker on the outer film to note the part type and orientation so handlers know what they are moving and how to place it. Clear labeling reduces rough handling and speeds unpacking, especially when multiple fairings are shipped or stored together. Add directional arrows and a simple note to indicate fragile edges or critical mounting points.
For long-term storage, consider climate control. Plastic film keeps out moisture, but temperature swings and humidity can still affect finishes and adhesives. If you store fairings for months, choose a dry, stable environment and inspect the packaging periodically. Replace any tapes or wraps that show wear. For shipping, additional bracing in the box—cardboard corners, crumpled paper, or foam blocks—prevents movement within the crate and reduces the chance of impact during transit.
Choosing materials by purpose helps manage cost. Bubble wrap and stretch film are economical and flexible for most jobs. Foam board is slightly pricier but pays off when shipping large or brittle pieces. For high-value finishes or show parts, increasing the number of protective layers is worth the investment. In all cases, ensure materials are clean and free of chemicals that might interact with paints or coatings. Clean hands and a dust-free workspace preserve the integrity of both the fairing and the protection.
A final practical tip: test your wrap strategy on a single spare or less-critical panel first. This trial run reveals how layers conform, whether tape placement is effective, and how the package behaves when handled. Adjust layer thickness, tape locations, or foam shapes based on that test. Small refinements will save time and prevent damage when you wrap the remaining pieces.
For those who prefer ready-made protection kits or bulk supplies, suppliers offer a range of packaging materials tailored to motorcycles and automotive parts. If you need a broad selection for bulk purchasing of packaging materials, review trade listings that aggregate protective options suitable for fairings. Such catalogs can simplify sourcing when you require larger volumes or specific foam profiles.
When materials and tools are chosen and used correctly, wrapping motorcycle fairings becomes a reliable, repeatable process. The layered approach—soft inner contact, shock-absorbing wrap, rigid foam support, and a weatherproof outer seal—minimizes risks during transport and storage. Combine that system with careful handling, clear labeling, and a stable work environment, and you preserve both the appearance and structural integrity of every fairing you protect.
For protective materials and accessory options when preparing fairings for shipment or storage, you can explore bulk suppliers of packaging materials on Alibaba: https://www.alibaba.com/wholesale/moto-luggage.html
You may also find it useful to reference manufacturer-specific fairing collections when planning packaging for particular models, such as the Honda CBR1000RR fairings for 2012–2016, which illustrate common shapes and sizes to consider when cutting foam and wrap: https://www.summitfairings.com/collections/honda-cbr1000rr-fairings-2012-2016
Mastering the Curve: Practical Solutions for Wrapping Motorcycle Fairings
Wrapping motorcycle fairings is as much an art as it is a craft of protection. The challenge sits at the intersection of form and function, where a glossy, contoured surface must be coaxed into a smooth, bubble-free finish that can withstand sun, wind, and the occasional alleyway scrape. The aim is not merely to cover the fairing but to enhance its character, longevity, and resistance to the elements. The best wraps begin long before the first cut is made, with a careful understanding that the curves and edges of a fairing demand a strategy that respects geometry as much as aesthetics. In the quiet between the lines of a design and the texture of the vinyl, a decision is made: to treat the surface as a living skin that will bend, stretch, and hold tight where it matters most. This approach—patient, precise, and deliberate—becomes the foundation for navigating the four recurring challenges that define most wrapping projects: air bubbles and wrinkles, adhesion failures, edge lifting, and color fade or mismatch. Each of these is not a fault but a signal. When read correctly, it points to a remedy that preserves the wrap’s integrity while preserving the bike’s personality.
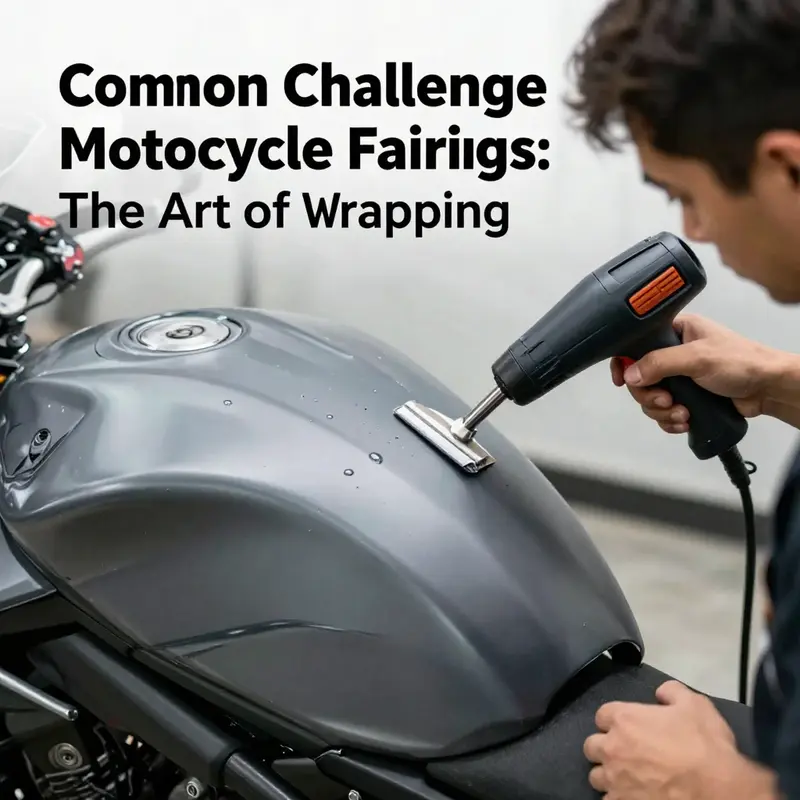
In practical terms, the journey begins with surface preparation. The surface must be clean, dry, and free from any oils or residues that could sabotage adhesion. A mild soap and water wash followed by a wipe with isopropyl alcohol ensures the fairing surface is neutral and receptive. This step is not merely ritual; it creates a stable canvas that resists the slow creep of contaminants that would otherwise undermine bond strength over time. Once the surface is prepared, the wrap itself becomes a partner in shaping the fairing’s silhouette. A heat gun is the ally that makes vinyl pliable, allowing it to follow complex curves, creases, and tight radii without tearing or creating tension points that lead to failure. The process demands patience; it benefits from working in small sections, starting from the center of a panel and moving outward. This technique minimizes the risk of creeping air and enables a more uniform heat application, so that the pressure from the squeegee is evenly distributed rather than concentrated at the edges.
The choice of material is not a mere preference but a strategic decision that influences how the wrap behaves under stress. Automotive-grade vinyl designed for curved surfaces—often polyurethane or cast vinyl—offers the best blend of flexibility, memory, and resistance to fading. These materials adapt to the fairing’s contour with fewer seams and fewer opportunities for air to become trapped in creases or folds. In the real world, the most satisfying results come from treating the wrap as a permanent layer that will live with the bike across seasons. To this end, a fade-resistant, UV-stable product is worth the investment, especially for riders who expose their machines to sunlight for extended periods. Sometimes a protective topcoat is added to increase gloss retention and to offer an additional barrier against UV rays and minor abrasions. The idea is simple: you want the color to stay true and the surface to stay smooth, not just in the first ride but in the long arc of ownership.
Yet even with the best materials, challenges arise. The most common issue is air bubbles and wrinkles. They are not a sign of failure but a sign that technique needs adjustment. The remedy is practical and easy to implement when approached with the right mindset. Start by pressing from the center of the bubble outward, applying gentle heat as needed to relax the vinyl. The heat helps the material relax and conform to the underlying curve, so a once-stiff surface becomes a living mold for the shape of the fairing. The squeegee becomes more than a tool for smoothness; it is a probe that pushes moisture and trapped air toward the edges where it can escape. The key is to work methodically, not aggressively. Rushing through a panel invites tension lines that translate into wrinkles once the heat recedes. A well-controlled sequence—center out, light heat, deliberate pressure—keeps the vinyl calm and the surface honest, revealing the true contours rather than a collection of irregularities.
Adhesion, the second pillar of a successful wrap, is simply the willingness of the vinyl to become one with the fairing. It demands a pristine surface, as any oil, dust, or wax residue becomes a stubborn barrier. The solution is straightforward: thorough cleaning, ample drying time, and a deliberate test fit before final adhesion. The test fit is more than a rehearsal; it’s a diagnostic. If pressure points or edge lift are detected during the test, rework the panel alignment before final bond is established. The use of high-quality vinyl is also a factor in adhesion longevity. A well-chosen UV-resistant layer will resist degradation from sun exposure and temperature swings, reducing the probability of early peel. When necessary, a protective edge sealant or clear tape along the perimeter can reinforce the bond, particularly at seams and cutouts around lights and vents. Edge lifting is often a symptom of misalignment or inconsistent heat application, and addressing it demands precision in both positioning and technique.
A third, persistent challenge concerns edges, seams, and cutouts. Edge lifting and peeling tend to appear where the wrap encounters the fairing’s geometry—where radii tighten, where panels meet at a seam, or where there are sharp transitions around lights or vents. Even a small misalignment can introduce stress that over time works its way to the edge. The antidote is thoughtful preparation and finishing. First, ensure the wrap is cut to an accurate oversize—more material at the edges is a safety net for sealing and trimming without gaps. Then, align carefully in a way that distributes stress away from the most vulnerable points. Finally, wrap the edge with an additional layer of protection, whether through a sealant or a narrow clear edge tape that adheres securely. The result is a bond that resists lift and a seam that remains discreet. The goal is to deliver a seamless flow from face to edge, with no perceptible interruption in color or texture at the boundary. If the area demands extra protection due to aggressive riding conditions or exposure to UV, consider a layered approach that includes a topcoat or protective layer that guards the perimeter without changing the flex behavior of the vinyl.
Color considerations add another layer of complexity. The temptation to choose a color that matches factory paint blindly can lead to mismatches and unexpected fading, especially when the wrap sits in sunlight for long hours. The practical response is to select high-grade wraps designed for outdoor use and to plan for color stability over time. A fade-resistant vinyl dampened by a protective clear coat can preserve hue consistency and shield the surface from the sun’s rays. The color story should be considered not as a static choice but as an evolving relationship between the rider’s vision and the wrap’s performance. In environments with extreme light or heat, a shade that may appear slightly different under indoor lighting might become the new norm in daylight. Anticipating this variability helps avoid a finish that looks ordinary at a peak moment and dull after a few seasons.
The journey through wrapping is a dialogue with the bike’s shape. Some fairings carry more aggressive curves, others present delicate sweeps; the technique must adapt without sacrificing consistency. When approaching a panel with pronounced curvature, allow the vinyl to rest and settle under gentle heat, then use the squeegee with patience to push toward the edges. In areas where the wrap must meet a seam, align with the seam’s axis, trim conservatively, and seal gradually. A common strategy is to cut the vinyl oversize, then trim to the exact contour after the adhesive has started to set. This method helps avoid insufficient coverage or the formation of micro-gaps along the edge. The overall objective remains simple: a continuous, unbroken surface that hugs every contour while maintaining durability against the sun and road grime.
For riders and builders seeking a hands-on reference beyond universal principles, a comprehensive, step-by-step guide is available from an authoritative source. This resource complements the practical techniques described here and reinforces the importance of surface prep, careful cutting, and controlled heat application. If you’re exploring what the broader market has to offer in terms of shapes and profiles, a quick look at the broader catalog of fairing designs can provide useful context for choosing a wrap that aligns with your bike’s silhouette. For an example of accessible, varied fairing shapes and to see how different curves influence wrap strategy, you can visit the Honda fairings collection. This link offers a sense of the diversity of forms a wrap must accommodate and illustrates why preparation and technique matter so deeply in achieving a clean, durable finish. Honda fairings collection.
In the end, wrapping is less about a single perfect move and more about a thoughtful sequence that respects the material and the curve. It is an exercise in patience, precision, and perspective. The surface offers a story—the rider’s intent, the fairing’s geometry, and the vinyl’s memory—and the wrap is the narrative that binds them. When the process is approached with technique, quality materials, and attention to detail, the result is a finish that not only looks deliberate but performs under stress. The wrap becomes part of the bike’s identity, a protective layer that ages gracefully and a canvas that stays faithful to the rider’s chosen aesthetic through many sunset rides and sunlit miles alike.
External reference for deeper technical insight: https://www.motorcyclecycling.com/tech-tips/how-to-wrap-motorcycle-fairings-a-step-by-step-guide
Why Vinyl Wraps Outperform Paint for Motorcycle Fairings
Wrapping motorcycle fairings with vinyl is more than a style choice. It is a practical upgrade that blends protection, flexibility, and cost control in ways paint cannot easily match. For riders who value appearance and durability, a high-quality wrap delivers benefits that ripple through ownership—from easier customization to preserved resale value. This chapter examines those advantages in an integrated way, showing why many riders opt to wrap fairings rather than repaint them.
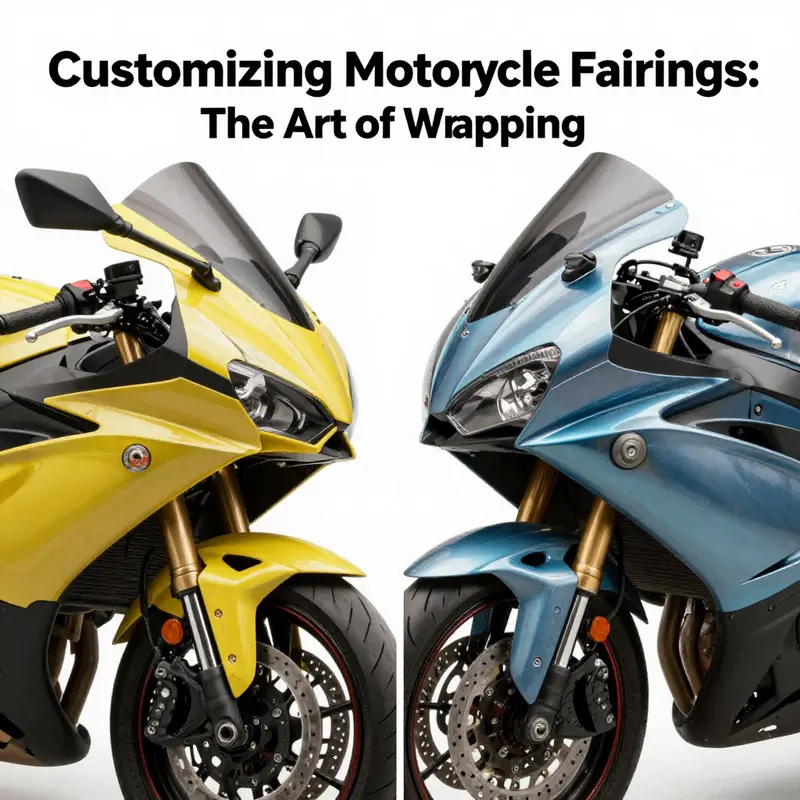
The most visible appeal of a wrap is design flexibility. Vinyl sheets come in a vast range of finishes, from deep matte to high-gloss, metallics to realistic carbon fiber textures. These finishes allow a motorcycle to adopt looks that would be difficult or expensive to achieve with traditional paint. A wrap can deliver a seamless satin black or a complex two-tone scheme without the masking and multiple paint layers that a shop would need. This flexibility also extends to experimental styling. Riders who want to test a bold color or special finish for a season can do so confidently. If the look grows tiresome, the vinyl comes off cleanly, restoring the original paint beneath. That reversibility makes wraps ideal for seasonal changes, event-specific liveries, or trialing a style before committing permanently.
Linked to design freedom is speed. The installation of a fairing wrap, when handled by an experienced installer or a careful DIYer, typically takes hours rather than days. Paintwork requires layered application, baking or curing time, and careful reassembly to avoid runs and dust blemishes. By contrast, a wrap can be finished and road-ready the same day. This shorter downtime benefits riders who rely on their motorcycle regularly. It also reduces the period that stripped fairings sit vulnerable while waiting for paint, which can expose the surface to damage or make logistics more complex.
Cost is a major factor in the choice between wrapping and painting. A well-applied vinyl wrap provides a complete visual overhaul at a fraction of the cost of a professional paint job. Budget-conscious riders can reimagine their bikes without investing in expensive paint booths, specialized pigments, and skilled labor. Even when comparing premium wraps to mid-tier paint, the wrap often remains the more economical option. Importantly, the cost advantage persists over time. Small damage to a wrapped fairing is easy to remedy by replacing a panel or applying a patch of matching vinyl. Repairing a painted fairing frequently involves sanding, color-matching, and refinishing—procedures that inflate labor and material costs.
Protection is where wrapping truly changes the long-term equation. A vinyl layer acts as a sacrificial skin for the factory paint beneath. It shields against rock chips, light abrasions, and the slow bleaching effect of ultraviolet rays. For riders who spend time in harsh sun or on gravel roads, this protective ability preserves the original finish and keeps the bike looking newer longer. The presence of a wrap also simplifies maintenance. Cleaning vinyl requires only gentle soap and water and avoids the need for abrasive compounds that may harm painted finishes. When a rider plans to sell the bike, a well-preserved painted surface beneath an intact wrap can improve resale value.
Durability and longevity are key practical considerations. Modern cast vinyl films are engineered to flex and conform to complex curves, yet resist peeling and cracking over time. They are formulated to withstand UV exposure without significant fading. That performance is particularly important for fairings, where complex contours and mounting holes present stress points for any surface covering. High-quality wraps applied with correct techniques—heat shrinking into tight curves and careful smoothing at edges—stay intact through miles and weather. While excellent paint can last for years, it is more susceptible to chipping from debris and to small blemishes that demand costly touch-ups.
Another advantage of vinyl relates to the risk of imperfections. Painting requires near-perfect environmental control and technique. Dust or oil trapped during application can create flaws that are hard to remove without repainting. A wrap, installed in a controlled but less restrictive environment, tolerates minor variances easier. Any bubble or crease that occurs is often reachable during installation and remedied with a heat gun and squeegee. If a small section is damaged later, it is feasible to replace only that segment. This localized repairability reduces time off the road and overall repair expense.
Practicality extends into the logistics of customization. Riders who want to swap graphics or change color schemes can do so with minimal hassle. A wrap can be removed in hours, leaving the underlying paint pristine. That means a rider can switch from a track-ready livery to a subtle street look in short order. For those who change bikes or sell them frequently, wraps enable personalization without permanently altering the bike. The protective function also means that expensive custom paintwork does not get exposed to everyday wear. Owners who choose to keep a pristine painted surface under a wrap enjoy both aesthetics and protection.
Environmental and time-savvy benefits also merit attention. Paint shops often use solvents and coatings that require ventilation and disposal considerations. A wrap reduces or eliminates the need for those substances on the individual level. The faster application also reduces time spent with a bike out of commission. For workshop owners or busy riders, these efficiencies can tip the scales in favor of wrapping.
Choosing a wrap does demand informed decisions. Material quality matters. Cast vinyl designed for automotive use conforms to curved surfaces better and resists shrinkage. The correct adhesive backing and topcoat improve longevity and protect against contaminants. Installation technique affects outcome. Heat, tension, and careful trimming are required to make the wrap look factory-made. Riders should plan for the wrap to cover entire panels where possible. Gaps or half-wraps can create edges that lift over time.
While wrapping addresses many practical needs, certain scenarios still favor paint. When structural repair is required or the goal is a flawless, singular factory-colored finish, paint may be the better route. Likewise, some collectors and restorers prefer original paintwork for authenticity. But for most riders seeking a balance of cost, protection, and visual impact, wraps provide a compelling alternative.
A final consideration is the market for replacement fairings. Riders who prefer to start from new panels can source aftermarket fairings for numerous models. Those panels pair well with wraps, allowing a rider to install fresh surfaces and customize them immediately. If you ride a popular model and need a specific fit, consider browsing a dedicated parts collection such as the Honda fairings collection to identify compatible panels before customizing them with a wrap.
Adopting a wrap is not a decision to take lightly, but it is one that rewards practical thinking. It combines the cosmetic freedom riders crave with a protective logic that makes day-to-day riding less worrisome. The ability to reverse a wrap, repair selectively, and experiment affordably keeps options open. And when a high-quality vinyl meets careful installation, the result is a resilient, attractive finish that performs for years. For many riders, this blend of benefits makes wrapping motorcycle fairings the smarter, more flexible choice over painting.
For a comparison of painting versus replacing fairings with cost considerations, consult this detailed guide: https://www.bikeride.com/how-much-to-paint-or-replace-motorcycle-fairings-guide/
Final thoughts
Wrapping motorcycle fairings is more than just an aesthetic upgrade; it’s a strategic choice that offers protection and customization for motorcycle enthusiasts. As a business owner in this sector, leveraging the knowledge of wrapping techniques and materials not only enhances your service offerings but positions your brand as a leader in innovative motorcycle solutions. Recognizing the common challenges and articulating the distinct advantages of wrapping over painting can significantly impact customer satisfaction and loyalty. By adopting these insights, you can ensure that your business thrives in the competitive motorcycle market.