
The Allure of LED Lighting in Motorcycle Customization
Motorcycle customization is not just about performance; it’s an artistry reflected in the details that speak to an owner’s style and passion. Among the modern enhancements, LED lighting stands out, offering a thrill that’s both functional and aesthetically pleasing. Imagine riding under the stars, the glow of hidden LED lights illuminating the contours of your motorcycle, creating a mesmerizing silhouette against the night sky. These innovative lights, strategically placed behind fairings and painted to blend seamlessly with the bike’s overall design, provide an understated elegance that transforms the appearance of your ride without compromising its integrity.
In this article, we will explore the exciting venture of how to install LED lights behind motorcycle fairings, focusing on the techniques that ensure they remain hidden yet effective. Not only do these lights enhance visibility on the road, improving safety during nighttime rides, but they also offer a canvas for personal expression. Whether you seek vibrant colors to showcase your personality or subtle hues for a more sophisticated look, LED lights can be customized to match any vision. We’ll delve into the benefits that come with incorporating LED lighting into your motorcycle, including increased visibility and a bold statement in style.
As business owners in the realm of motorcycle customization, understanding how to maximize these benefits is critical. Custom installations can elevate your offerings, drawing in enthusiasts eager to enhance their rides. Let’s dive into the step-by-step process of integrating LED lighting that remains concealed yet impactful, ensuring that your motorcycles stand out on the road while providing the safety every rider deserves. For more insights on motorcycle customization, check our blog or learn about how to paint motorcycle fairings.
Benefits of LED Lights for Motorcycles
Installing LED lights on motorcycles provides numerous advantages that greatly enhance the riding experience. Here’s an ordered list highlighting the key benefits:
- Improved Visibility: LEDs emit 2 to 3 times more light than traditional halogen bulbs, significantly enhancing rider visibility, especially in low-light conditions.
- Energy Efficiency: Consuming up to 80% less power, LED lights minimize the strain on the motorcycle’s electrical system, resulting in better battery performance.
- Long Lifespan: With an average life span of 30,000 hours or more, LED lights far exceed the longevity of halogen bulbs, reducing replacement frequency.
- Durability: Many LED lights are rated IP67/IP68 for waterproof and dustproof protection, making them robust against harsh weather and road conditions.
- Enhanced Aesthetics: The sleek design of LED lights can improve the overall appearance of a motorcycle, adding a modern touch that enhances its aesthetic appeal.
- Instant Illumination: Unlike traditional bulbs, LEDs provide full brightness immediately upon activation, improving safety during night rides or sudden stops.
- Environmentally Friendly: The lower energy consumption of LED lights contributes to a reduced carbon footprint, making them an eco-friendlier choice for motorcycle lighting.
For detailed installation tips, learn how to put LED behind motorcycle fairing hidden in paint. You can also explore the benefits of custom motorcycle fairings here.
Essential Tools and Materials for Installing LEDs Behind Motorcycle Fairings
Installing LEDs behind motorcycle fairings not only enhances the aesthetics of a motorcycle but also boosts visibility and safety. To ensure a successful installation, having the right tools and materials is crucial. Here’s a detailed list of what you’ll need:
Tools
-
Precision Screwdriver Set
Used for removing fairing screws without damaging the panels. A set with both Phillips and flathead options is ideal. -
Plastic Pry Bar
This tool helps in gently prying off the fairings without scratching or damaging the paint or the plastic surfaces. -
Digital Multimeter
Essential for testing voltage and continuity, verifying that the LEDs are connected properly and functioning as expected. -
Wire Strippers
These are necessary for stripping insulation from wire ends, ensuring a good connection when wiring the LEDs. -
Soldering Iron (Optional)
Recommended for securing wire connections, especially if you want to create a more durable joint. A fine tip is preferable for precision. -
Heat Gun
Useful for shrinking heat-shrink tubing over wire connections, which provides additional protection against moisture and abrasion.
Materials
-
LED Strips/Individual LEDs
Choose 12V LED strips or individual LEDs with integrated drivers. Look for options that are IP67-rated for waterproofing. -
Automotive-Grade Wire (18-20 AWG)
Use high-temperature, flexible wire that can withstand the conditions within the motorcycle’s under-hood environment. -
Waterproof Connectors (Molex or Weatherpack)
Necessary for ensuring that all electrical connections remain intact and free of moisture. -
3M VHB Tape or Silicone Adhesive
Strong double-sided foam tape like 3M VHB or silicone adhesive is ideal for adhering LEDs, particularly because they provide durability against vibration. Learn more about adhesive options for installation here. -
Electrical Tape or Heat-Shrink Tubing
To ensure that the electrical connections are insulated properly, preventing short circuits and maintaining safety.
Special Considerations
In some cases, you might need additional tools like a drill with small bits for routing wires. Always remember to consider protective covers to prevent damage while drilling.
With the right tools at your disposal, you’ll be well-equipped to successfully install LEDs behind motorcycle fairings. For further reading on preparing your motorcycle fairings for painting or installation, check out our installation guide for motorcycle fairings.
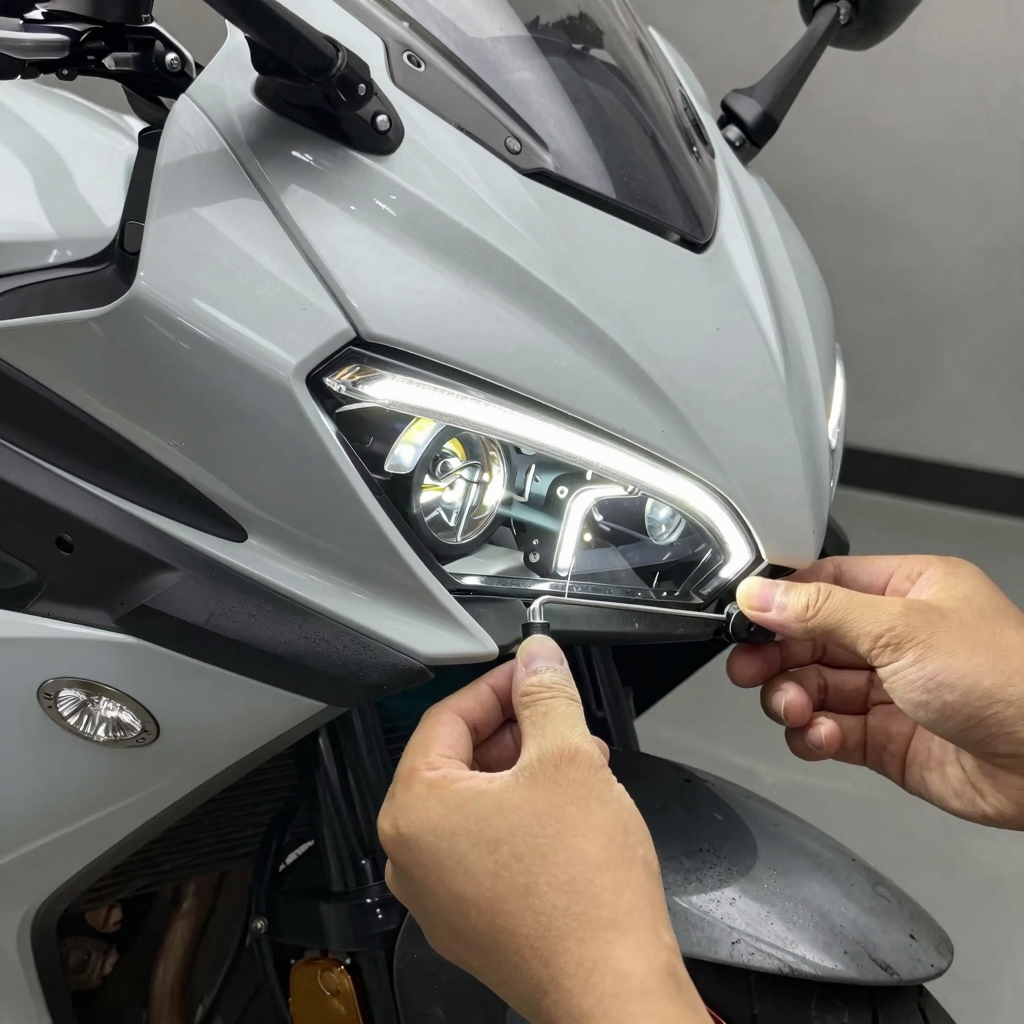
Comprehensive Guide to Installing LED Lights Behind Motorcycle Fairings
Adding LED lights behind your motorcycle’s fairings not only enhances its aesthetic appeal but also improves visibility and safety. In this guide, we will take you through a step-by-step process to install these lights safely and effectively, ensuring that all technical aspects are covered clearly.
Tools and Materials Needed
Before diving into the installation process, gather all the necessary tools and materials:
-
Tools:
-
Screwdrivers (Philips and flat-head)
-
Wire strippers
-
Crimp connectors
-
Heat shrink tubing
-
Multimeter (for voltage checks)
-
Drill (if modifications to the fairing are necessary)
-
Materials:
-
LED light strips or bulbs (ensure they are waterproof)
-
Electrical tape (for extra insulation)
-
Zip ties or mounts for securing wires
-
Relay switch (optional for power management)
Step 1: Safety First
Before starting any electrical work, ensure your safety:
- Disconnect the Battery: Always disconnect the negative terminal of the battery to prevent electrical shorts or shocks during the installation process.
- Use a Multimeter: After disconnecting the battery, use a multimeter to check that there is no voltage in the wiring harness.
Tip: Always wear safety glasses and gloves when handling electrical components.
Step 2: Remove the Fairing
- Access the Fairing: Carefully remove the fairing panels. Use the appropriate screwdrivers and take care not to damage any clips or fasteners during removal. Label the screws and clips to avoid confusion during reassembly.
- Work in Sections: If your fairing is large, consider working in sections to make the process easier and less error-prone.
Learn more about the importance of proper fairing removal in our motorcycle fairings guide.
Step 3: Plan Wire Routing
- Identify Pathways: Determine where you will route the LED wires. Use existing grommets or pathways if available, or plan to drill small holes for new routing.
- Avoid Hazards: Ensure that the wires will not come into contact with moving parts or hot surfaces, as this could lead to wear or shorts.
Step 4: Installing the LED Lights
- Apply LEDs: Strip the adhesive backing off the LED strips and apply them along the desired areas behind the fairing. Ensure the surface is clean and dry before applying the LEDs.
- Secure the LEDs: Use zip ties or mounts to secure the LED strips along the frame or edges of the fairing, preventing any movement or abrasion from surrounding components.
Step 5: Electrical Connections
- Connect to Power: Using the crimp connectors, attach the LED lights to the motorcycle’s wiring harness. Be mindful of polarity: connect red wires to positive and black wires to negative terminals.
- Use a Relay Switch (Optional): To manage power efficiently and prevent battery drain, consider using a relay switch that activates the LEDs only when the motorcycle is running.
For more detailed electrical installation tips, check out our LED light installation guide.
Step 6: Insulate Connections
- Ensure Safety: Insulate all connections using heat shrink tubing to protect against moisture and ensure longevity. Electrical tape can provide additional insulation, but heat shrink is preferred for waterproofing.
Step 7: Test the Lights
- Reconnect the Battery: Before putting the fairing back, reconnect the battery. Use your multimeter to check for proper voltage at the LED connections.
- Test Functionality: Turn on the motorcycle and check if the LED lights function properly. Look for any flickering or irregular performance, which could indicate wiring issues.
Avoid common installation mistakes; find out more in our article on LED light installation mistakes.
Step 8: Reassemble the Fairing
- Careful Reassembly: Once you’ve confirmed that the lights are working correctly, carefully reattach the fairing panels. Keep your organized screws handy to ensure everything fits back together without issues.
- Final Checks: Conduct a final check, look for any loose wires, ensure everything is secure, and test the lights again to confirm they work with the fairing fully assembled.
Step 9: Compliance with Local Laws
- Check Regulations: Before taking your motorcycle out, check local laws regarding the installation of aftermarket LED lights. In some jurisdictions, there are restrictions on the color, brightness, and placement of lights.
Conclusion
Installing LED lights behind motorcycle fairings can dramatically enhance your bike’s appearance and visibility. However, it’s crucial to follow these steps meticulously to ensure a safe and successful installation. By prioritizing safety and proper techniques, you can enjoy your customized ride without concern. If you’d like to learn more about motorcycle fairings, feel free to explore our blog.
By following this guide, you’re well on your way to successfully integrating LED lights behind your motorcycle’s fairings while ensuring safety and compliance with laws and standards.
Comparison of Different LED Options for Motorcycles
When it comes to installing LED lights on your motorcycle, choosing the right type is crucial. Below is a comparison table highlighting various LED options focusing on attributes like brightness, color options, durability, and price ranges. This guide helps motorcycle enthusiasts and business owners make informed purchasing decisions.
| LED Type | Brightness | Color Options | Durability | Price Range |
|---|---|---|---|---|
| Standard LED Bulbs | 300-700 lm | 3,000K-6,500K | IP67 (water-resistant) | $5 – $15 |
| SMD 3030 | 1,000-1,500 lm | 3,000K-6,500K | IP68 (submersible) | $10 – $30 |
| SMD 3535 | 1,800-2,500 lm | 3,000K-6,500K | IP68 (submersible) | $30 – $80 |
| SMD 5050 | 3,000+ lm | 3,000K-6,500K | IP67/IP68 (highly durable) | $50 – $120 |
| Multi-Functional Lights | 1,500-3,000 lm | 6,000K | IP68 (highly durable) | $50 – $120 |
Key Points:
- Brightness: Ideal levels vary. For standard use, aim for 500-1,000 lm; off-road applications may require over 2,500 lm.
- Color Options: Common color temperatures are between 3,000K (warm yellow) and 6,500K (bright white), ensuring optimal visibility under varied conditions.
- Durability: Seek out models with IP67 or IP68 rating for waterproofing to ensure long-term use in all weather conditions.
- Price: Prices vary significantly; budget options start around $5, while premium integrated systems can cost up to $120.
For those looking to integrate these lighting systems seamlessly behind fairings, it’s essential to consider both the aesthetic and functional aspects of illumination. Learn more about motorcycle fairings to enhance your ride further.
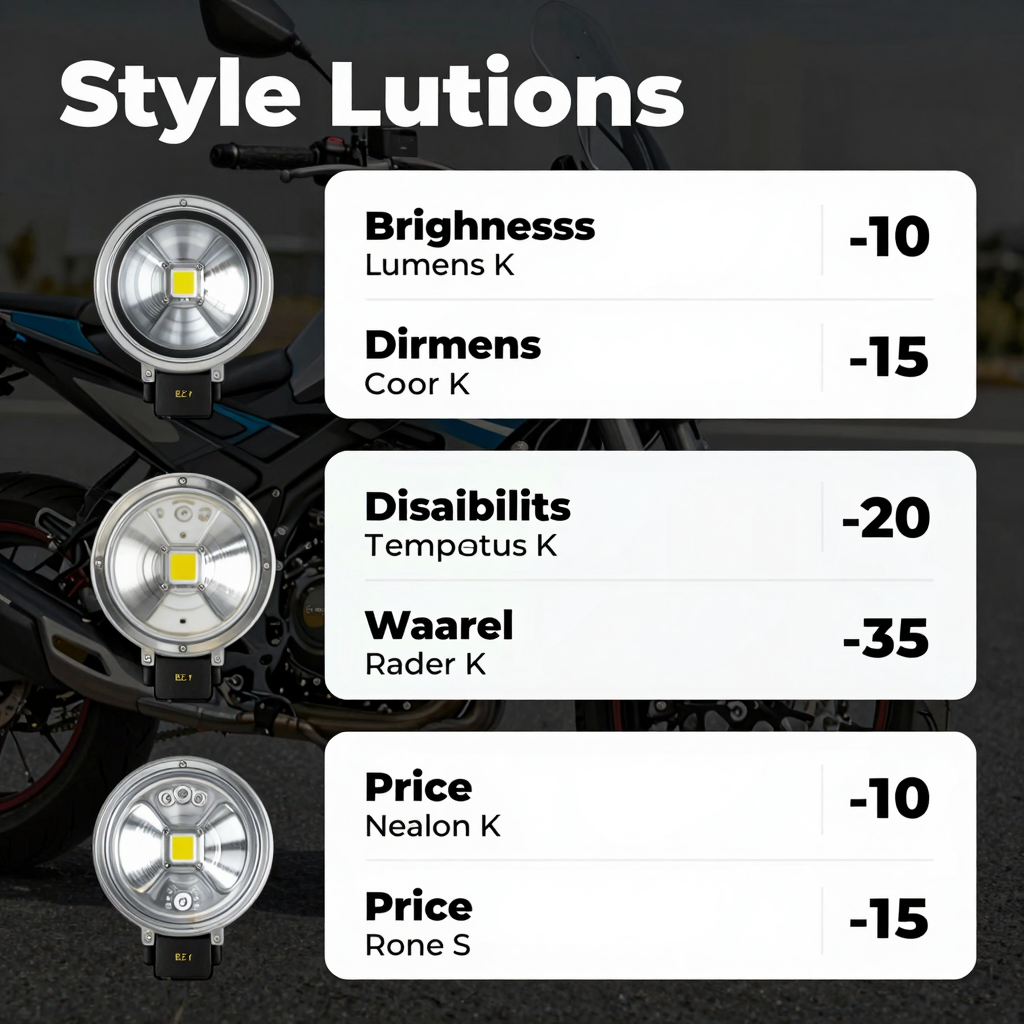
An infographic comparing different types of LED lights for motorcycles, showcasing attributes such as brightness, color options, durability, and price ranges.
In conclusion, whether you’re a motorcycle enthusiast or a business owner, understanding the various LED options available can help you select the best fit for your motorcycle, ensuring both safety and style.
As hidden LED installations become increasingly popular among motorcycle enthusiasts, user feedback reflects a range of experiences focused on ease of installation, visibility, and aesthetics. Here are the key insights drawn from multiple sources regarding the F150S Hidden LED Lights.
1. Ease of Installation
A consistent theme in user reviews is the simplicity of the installation process. Many users report being able to install the lights within approximately 30 minutes, even without prior experience. The integration is often described as non-intrusive, allowing for a no-cut and no-drill installation that avoids damaging the motorcycle’s original wiring. These factors make the lights appealing to both novice and experienced riders.
- Key Quote: One user stated, “Installation was a breeze; even I, a novice, could handle it in half an hour!”
2. Visibility and Performance
Users rave about the performance of the F150S lights, emphasizing their brightness and effective light distribution. Many feedback reviews highlight the significant improvement in visibility offered by the LEDs, particularly in low-light conditions. The warm yellow light (around 3000K) is praised for its ability to penetrate through fog and rain, ensuring that riders can see the road clearly. Furthermore, users appreciate that the lights do not cause glare for oncoming traffic, helping to create a safer riding environment.
- Key Statistics: Reports indicate real lumen outputs of up to 4000 lumens, which users feel is vastly superior to standard motorcycle lights.
3. Aesthetic Appeal
The discreet design of these hidden LED installations is a major selling point. Users appreciate how seamlessly the lights blend into the motorcycle’s bodywork, maintaining the aesthetic integrity of the bike. The “invisible when off, brilliant when on” concept resonates well, with many stating that the light’s presence does not detract from the motorcycle’s appearance.
- Highlight: One reviewer noted, “It feels like an invisible guardian, enhancing my ride without compromising the bike’s visual appeal.”
4. User Safety and Confidence
Many riders express that the installation of hidden LEDs has greatly enhanced their nighttime riding confidence. Users report feeling significantly safer during night rides, noting that the upgraded lighting makes it easier to spot potential hazards on the road.
- Example Insight: A user recalled an instance where the LEDs helped avoid an accident by illuminating a fallen rock on a mountain road, highlighting the practical safety improvements these lights provide.
Conclusion
Overall, the user feedback on hidden LED installations reveals satisfaction with installation ease, enhanced visibility, and a stylish aesthetic. The F150S LED lights stand out as a worthy investment for motorcycle riders looking to improve both safety and aesthetics during night riding.
For those interested in further enhancing their motorcycle’s style with compatible fairings and better lighting solutions, consider exploring how to paint motorcycle fairings or check out options for custom motorcycle fairings.
Maintenance Tips for LED Lights
To ensure the longevity and effectiveness of your installed LED lights, it’s essential to follow a strict maintenance routine. Here are some practical tips:
-
Regular Cleaning: Use a soft, dry microfiber cloth to clean the LED lights. This prevents dust and dirt from accumulating, which can affect brightness and efficiency. Avoid using damp cloths unless necessary to prevent water from seeping into electrical components.
-
Check for Corrosion: Regularly inspect the connections and casing for any signs of corrosion, especially if the LEDs are installed outdoors. Corrosion can interfere with electrical conductivity and lead to malfunction.
-
Stable Power Supply: Ensure that your LED lights are connected to a stable power source. Voltage fluctuations can reduce the lifespan of LED lights, so consider using surge protectors.
“专业且符合标准的隐藏式LED灯改装被普遍视为提升夜间安全的有效手段。‘隐藏’设计的核心价值在于科学的光学控制:确保近光不刺眼、远光不干扰对向车辆,同时提供足够的照射范围。许多资深骑手证实,此类灯具不仅改善了自身视野,更重要的是增强了自己在车流中的‘可被看见性’。”
- 来源: 汽车之家论坛, 详细讨论
Adding hidden LED lighting behind motorcycle fairings not only enhances visibility but maintains aesthetic integrity. This expert opinion highlights its effectiveness in ensuring safety during night rides. For more insights into motorcycle fairings, be sure to check out our other articles on cheap motorcycle fairings and how to paint motorcycle fairings.
Conclusion and Call to Action
Throughout this guide, we’ve explored the intricacies of incorporating hidden LED lighting behind motorcycle fairings. The incorporation of LEDs not only enhances the aesthetics of your motorcycle but also significantly boosts visibility and safety for night riding.
Key Benefits of Hidden LED Lighting
- Enhanced Safety: LED lights provide superior lighting, allowing riders to see better and be seen more clearly, especially in low visibility situations such as nighttime or adverse weather conditions. For more insights on the safety benefits of LED lights, check out this analysis.
- Energy Efficiency: Compared to traditional lighting solutions, LEDs consume much less power and last substantially longer, leading to reduced maintenance costs (with lifespans ranging from 30,000 to 50,000 hours) and battery life extension.
- Customization Potential: The ability to hide LEDs creates a sleek and modern look, allowing motorcycle enthusiasts to personalize their rides without compromising design integrity. Professional custom services, including painting and decals, can significantly enhance this aesthetic. For more information on how customizations can elevate your motorcycle, explore our guide on motorcycle custom decoration.
Make Your Motorcycle Stand Out
At Summit Fairings, we understand that your motorcycle is more than just a mode of transportation; it’s a reflection of your individuality. By integrating hidden LED lights into your fairings, you can achieve not only a stylish look but also an added layer of safety on the road. Whether you’re looking to upgrade your existing bike or build a custom motorcycle from the ground up, our team is here to help.
Take the first step towards transforming your motorcycle today! Contact Summit Fairings to discuss how our expertise in fairing customization can help you achieve the unique ride of your dreams. Don’t hesitate-your motorcycle deserves the best!
Visit Summit Fairings for more resources and to see how we can assist in your customization journey!