Introduction: The Art of Customizing Motorcycle Fairings
When it comes to motorcycle culture, individuality reigns supreme. Every motorcycle enthusiast understands the thrill of riding a machine that resonates with their personal style. A key element of expressing this uniqueness is painting motorcycle fairings. Whether you’re aiming for a sleek, modern look or a homage to classic racing styles, the appearance of your motorcycle can greatly enhance its appeal. Customization not only helps a motorcycle stand out on the road but also serves as a reflection of the owner’s passion and personality.
For business owners in the motorcycle industry, mastering the art of painting fairings can become a significant competitive advantage. Developing skills in this area can lead to offering bespoke services that attract discerning customers. In this article, we will delve into the process of painting motorcycle fairings, covering essential techniques and tips for achieving a professional finish. You will learn about the materials required, step-by-step painting techniques, and how to ensure your designs are both appealing and durable. Get ready to transform your motorcycle, and if you’re looking for a more in-depth exploration of customizing, check out our guide on custom motorcycle fairings to take your riding experience to the next level!
Essential Tools and Materials for Motorcycle Fairing Painting
When preparing to paint motorcycle fairings, having the right tools and materials on hand is crucial for achieving a professional finish. Below is a detailed list to guide you through the process:
- Spray Paints: Use high-quality automotive spray paints designed for plastic surfaces to ensure durability and vibrant colors.
- Primer: A plastic-compatible primer to promote paint adhesion.
- Clear Coat: A UV-resistant clear coat to protect the paint and add shine.
- Sandpaper: Various grits (usually 400, 800, and 1200) for smoothing surfaces before and between coats.
- Masking Tape: High-quality automotive masking tape to protect areas not being painted.
- Plastic Cleaner/Degreaser: To remove oils and residues from fairings before painting.
- Tack Cloth: To wipe the surface clean of dust and particles before painting.
- Respirator Mask: Essential safety equipment to protect from paint fumes.
- Safety Glasses and Gloves: To protect eyes and skin during sanding and painting.
- Drop Cloth or Newspaper: To protect the workspace from overspray.
- Spray Gun or Aerosol Cans: Depending on your setup and preference.
- Heat Gun or Hair Dryer: For speeding up drying times if needed.
Having these tools and materials ensures a smooth, safe, and effective painting process. For a comprehensive guide on prepping motorcycle fairings, you can learn more about how to prep motorcycle fairings for paint. Additionally, for detailed painting techniques, check out our DIY guide on how to paint motorcycle fairings.
Step-by-Step Painting Process for Motorcycle Fairings
Painting motorcycle fairings yourself can save money and allow for personalized customization. Below is a comprehensive DIY guide that covers the preparation, painting, and finishing stages, ensuring a professional-looking result.
Preparation Stage
-
Remove the Fairings: Begin by carefully removing the motorcycle fairings from your bike. Use the appropriate tools to avoid damaging them. Keep track of screws and small parts by placing them in labeled bags.
-
Clean the Surface: Thoroughly clean the fairings with soap and water to remove dirt, grease, and old wax. A degreaser can also help get rid of stubborn residues. Dry completely with a soft cloth.
- Tip: For a visual guide on cleaning, check out this article.
-
Sand the Fairings: Use 320-grit sandpaper to lightly sand the fairings. This step creates a rough surface for the paint to adhere better. Focus on areas with existing paint and scratches. Finish with a finer 600-grit sandpaper for a smooth texture.
-
Clean Again: After sanding, wipe down the fairings with a clean cloth to remove dust. Consider using compressed air to ensure no particles remain.
-
Masking: Use painter’s tape and plastic sheeting to mask off areas you don’t want to paint, such as headlights and frames. This will give you sharp lines and prevent overspray.
Painting Stage
- Priming: Apply a high-quality automotive primer designed for plastics. Use a spray can or a spray gun for an even coat. Hold the spray can about 6-8 inches away from the surface. Allow the primer to dry as per manufacturer’s instructions.
- Recommendation: For primer types and applications, refer to this resource.
-
Painting: Once the primer is dry, it’s time to paint. Use automotive-grade paint that suits your color preference. Apply multiple thin coats, allowing each layer to dry completely before applying the next. Usually, 2-3 coats will suffice.
-
Clear Coating: After the paint has dried, apply a clear coat to protect the color and provide a glossy finish. Again, hold the spray can at the recommended distance and use the same approach with multiple thin coats.
Finishing Stage
-
Curing: Let the painted fairings cure in a dust-free, temperature-controlled environment for several days. Ideal conditions are around 70°F with 50% humidity.
-
Reassembly: Once the paint is fully cured, carefully remove the masking tape and reassemble the fairings back onto your motorcycle. Ensure all pieces fit snugly and securely.
-
Final Touches: Inspect the final finish for any imperfections. If needed, use a polishing compound to buff out small blemishes, enhancing the overall shine.
Conclusion
Following these steps will ensure that your motorcycle fairings are painted to a high standard as if done by a professional. For more on motorcycle painting and customization, visit Summit Fairings Blog. Happy painting!
Comparing Different Paint Types for Motorcycle Fairings
When it comes to painting motorcycle fairings, the choice of paint type is crucial for achieving a durable and visually appealing finish. Below is a comparison of various paint types, focusing on their finish, durability, and cost considerations. This information will help business owners make informed decisions.
| Paint Type | Finish | Durability | Cost |
|---|---|---|---|
| Motorcycle Specific Paint | High-gloss | Excellent adhesion and weather resistance | Moderate |
| Automotive Grade Paint | High-gloss | Extremely durable, resistant to chemicals | High |
| Water-based Paint | Semi-gloss | Moderate, less durable outdoors | Low |
| Polyurethane Paint | Glossy | Very high durability, resistant to impacts | High |
| Acrylic Paint | Bright, vibrant | Less durable outdoors, fades quickly | Low |
Summary
Choosing the right paint for motorcycle fairings involves balancing aesthetics with durability and cost. For extensive use and resilience against external conditions, polyurethane and automotive-grade paints are highly recommended. For more immediate needs, water-based and acrylic paints can serve as economical alternatives, though they may require more frequent reapplication. To dive deeper into the painting process, be sure to check out how to paint motorcycle fairings for detailed guidance.
When it comes to painting motorcycle fairings, experienced DIY painters have shared their valuable tips and techniques that can greatly enhance the quality of the finished product. Here are some of the most recommended practices:
1. Surface Preparation is Key
- Sand with Care: Before applying any paint, it’s crucial to thoroughly sand the fairings using sandpaper ranging from 600 to 800 grit. This creates a textured surface for better paint adhesion. A popular technique is to wet-sand to further smooth the surface, reducing the chance of imperfections.
- Clean Thoroughly: After sanding, clean the fairing with a degreaser or isopropyl alcohol to remove any dirt or oils that may interfere with adhesion. This step cannot be skipped since residue can lead to peeling or bubbling paint.
2. Proper Priming
- Use a Plastic-Specific Primer: Paints formulated for plastic, such as Rust-Oleum Plastic Primer, are recommended as they help prevent the paint from peeling. Apply a thin, even layer and allow it to cure completely before proceeding to the color coat.
3. Choosing the Right Paint and Equipment
- Select High-Quality Paints: Urethane-based paints are favored due to their durability and vibrancy. Ensure the paint is specifically designed for the material of the fairing (typically ABS plastic).
- Utilize the Correct Spray Gun: Users recommend using a High Volume Low Pressure (HVLP) spray gun to minimize overspray and achieve better control over the application. Maintain a distance of about 6-8 inches from the surface while spraying.
4. Technique Matters
- Multiple Thin Coats: Instead of applying one thick coat, use multiple thin coats. This helps prevent issues like drips and runs, ensuring an even finish. Allow each layer to dry for about 15 to 20 minutes before applying the next.
- Maintain a Clean Environment: Work in a clean, dust-free space. Using a spray booth is ideal, but if that’s not possible, ensure your working area is well-ventilated and that you have drop cloths in place to catch overspray.
5. Common Pitfalls to Avoid
- Rushing Dry Time: Patience is critical. Insufficient curing time between coats can cause problems like bubbling and peeling. Ensure that enough time-between 24 to 72 hours-is given for drying before reassembling the bike.
- Mask Properly: Use quality masking tape to cover areas that should not be painted. This ensures clean lines and prevents accidental overspray.
6. Finishing Touches
- Clear Coat for Protection: A clear coat not only enhances gloss but also provides additional protection against UV rays and other environmental factors. It’s best to use a product specifically designed for automotive finishes to ensure longevity.
Conclusion
By following these tips and techniques, DIY motorcycle fairing painting can transform your bike’s appearance while ensuring the paint job stands the test of time. For a detailed step-by-step painting guide, learn more about painting motorcycle fairings.
In summary, successful painting requires dedication to preparation, the right materials, and patience. Engage with fellow DIY enthusiasts for more tips, and don’t hesitate to experiment to find what works best for you!
Paint Your Motorcycle Fairings: Get Inspired
Painting motorcycle fairings can be an exhilarating project that allows you to express your style. Whether you’re looking to refresh your bike or create a unique look, the possibilities are endless. The process involves selecting the right colors, prepping the surface, and applying paint techniques that suit your vision.
Why Paint Your Fairings?
- Personalize Your Ride: Customize your motorcycle to reflect your personality.
- Improve Aesthetics: A fresh coat of paint can make your motorcycle look brand new.
- Protect Your Fairings: Proper painting can protect fairings from environmental damage.
Consider Your Style
Think about various styles when selecting colors and designs. You can opt for classic looks, vibrant graphics, or even a racing-inspired theme. There are countless tutorials available that can guide you through the painting process from preparation to final touches.
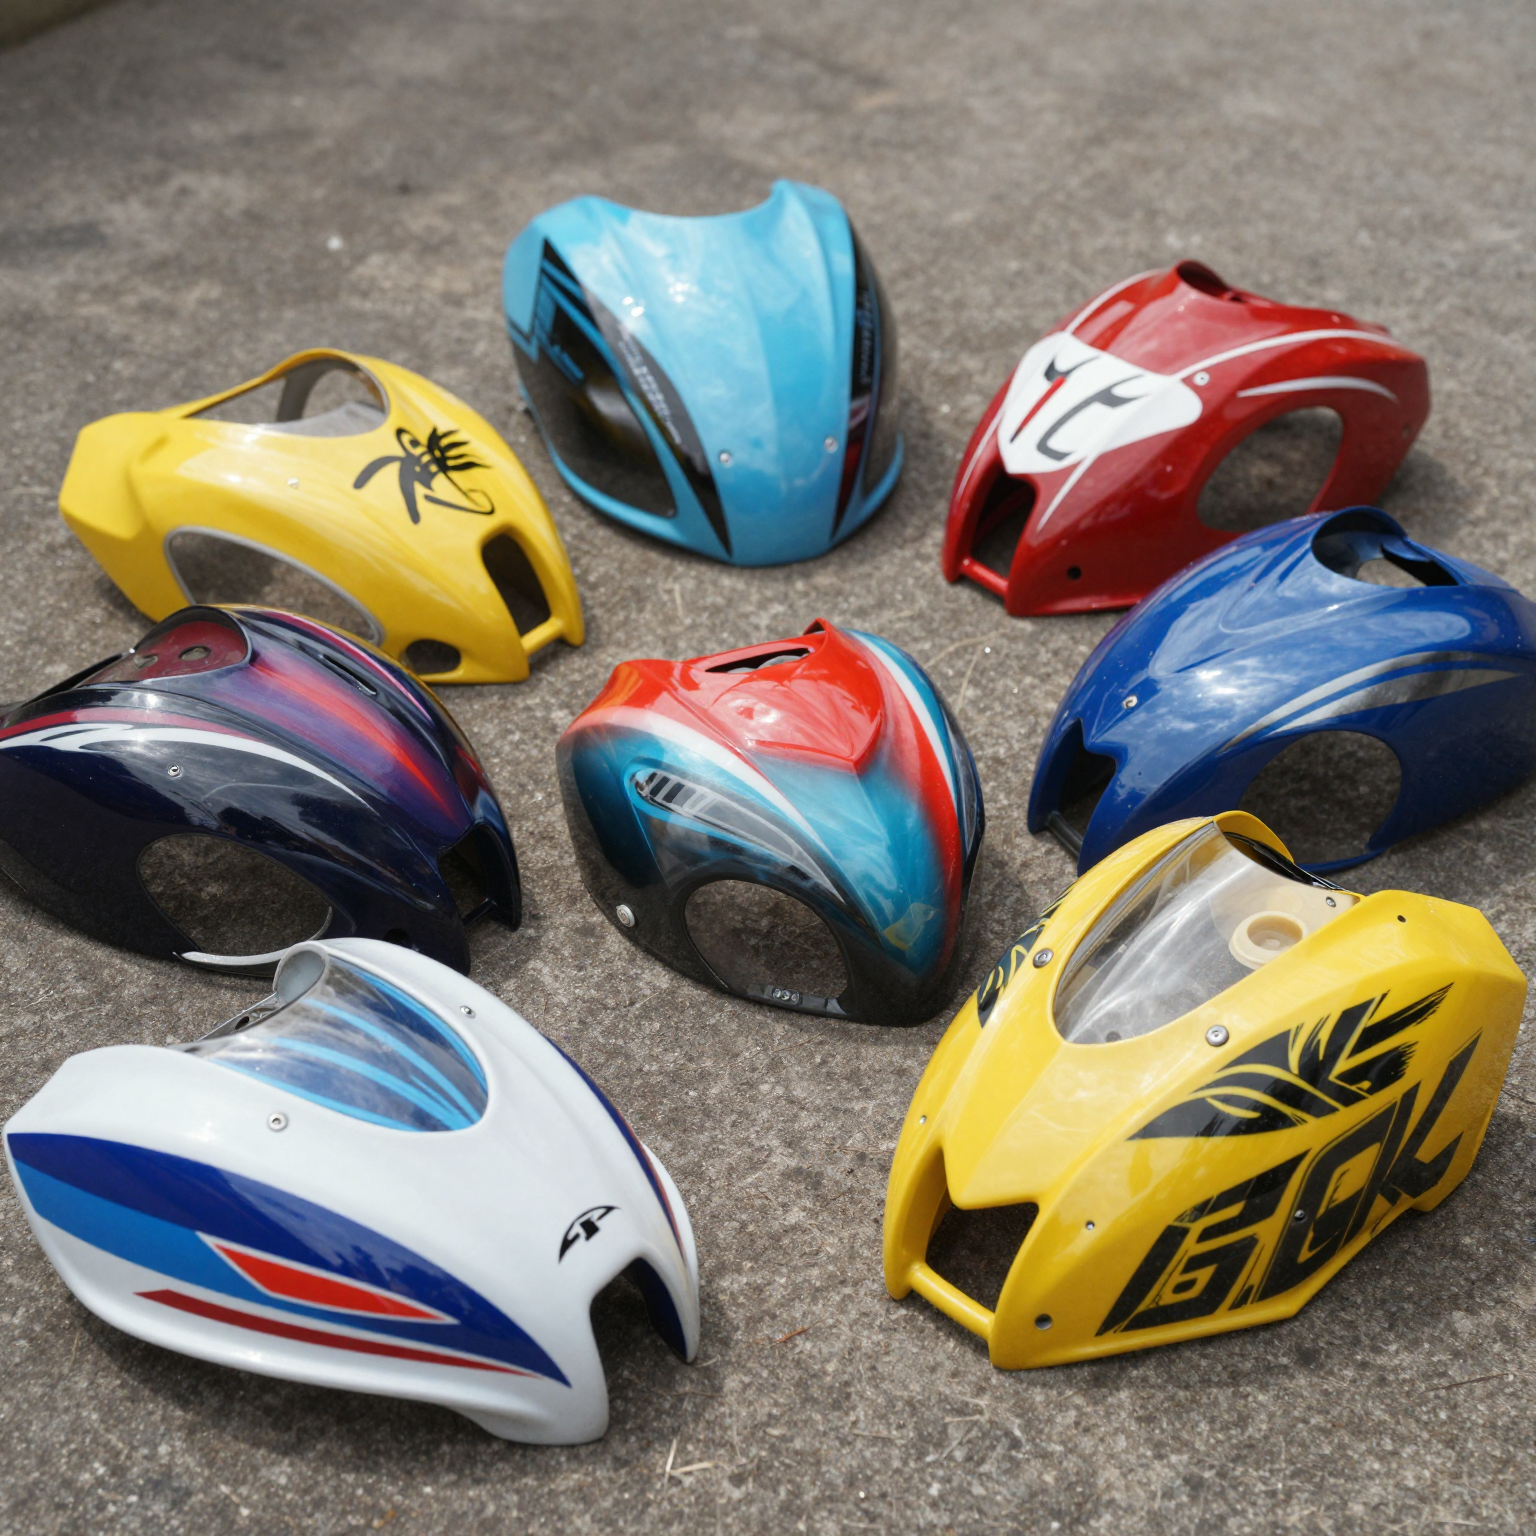
Be Inspired
Here’s an image showcasing beautifully painted motorcycle fairings, perfect for getting your creative juices flowing:
For a detailed guide on the painting process, make sure to check out how to paint motorcycle fairings. You can also explore custom fairings for more inspiration on styles and designs.
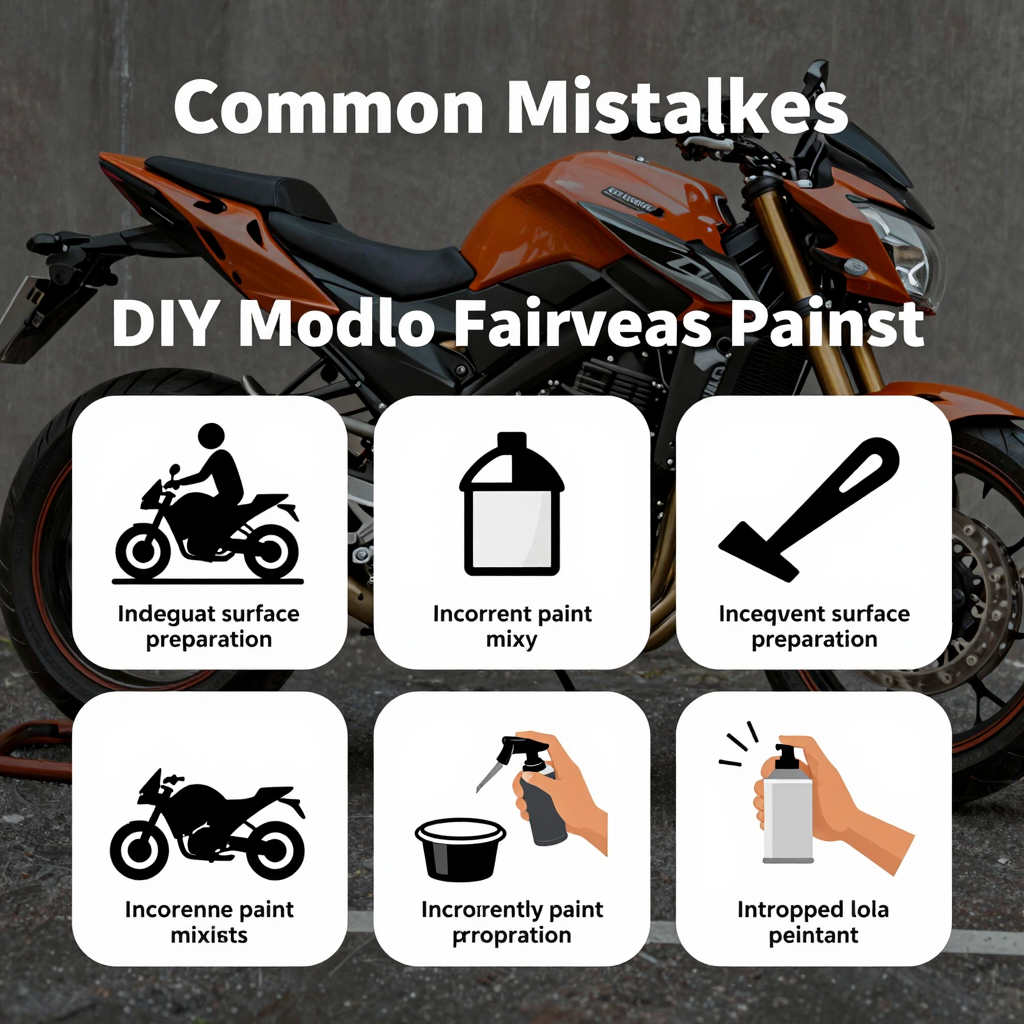
Common Mistakes to Avoid in DIY Motorcycle Fairing Painting
When painting motorcycle fairings yourself, several pitfalls can prevent achieving a smooth and durable finish. Here are some of the most common mistakes and solutions:
- Inadequate Surface Preparation
- Mistake: Skipping cleaning and sanding can result in poor paint adhesion.
- Solution: Always clean the fairings thoroughly with soap and water, sand the surface with fine-grit sandpaper, and then wipe it down with a tack cloth to remove dust.
- Using the Wrong Paint
- Mistake: Some DIYers use automotive enamel instead of urethane paint, which can lead to peeling or bubbling.
- Solution: Use manufacturer-recommended paint for plastics designed specifically for motorcycle fairings.
- Improper Spray Technique
- Mistake: Applying paint too close or too thickly can cause drips and uneven coverage (often referred to as “orange peel”).
- Solution: Keep a consistent distance of 6-8 inches while spraying, applying thin coats and allowing adequate flash-off time between each layer.
- Neglecting the Primer and Clear Coat
- Mistake: Skipping primer or not applying a clear coat can lead to inadequate coverage and reduced durability.
- Solution: Always apply a quality primer suitable for plastic surfaces followed by a clear coat for added protection.
- Rushing the Process
- Mistake: Impatience can lead to mistakes, such as not allowing sufficient drying time between layers.
- Solution: Ensure ample drying time and work in a controlled environment to prevent dust contamination.
For more detailed tips, check out this guide.
Below is a chart illustrating common mistakes and their frequencies in DIY motorcycle fairing painting:
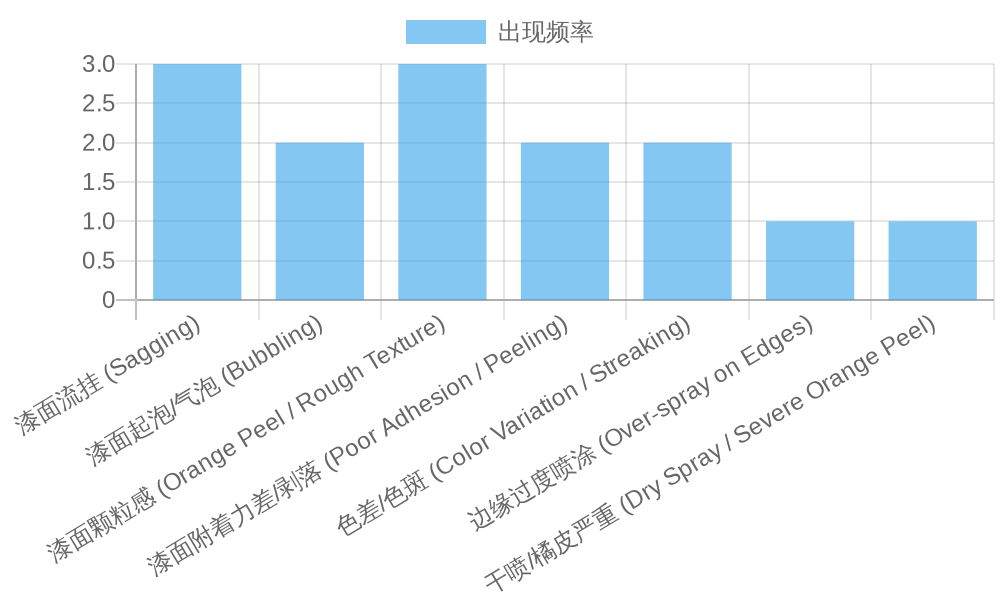
By avoiding these common mistakes, DIYers can achieve a professional-looking finish and extend the life of their motorcycle fairings.
The Benefits of Personalized Fairings and DIY Painting
When it comes to customizing a motorcycle, choosing the right fairings and painting them yourself can transform your bike into a unique expression of your personality. Personalizing fairings allows bikers not just to enhance aesthetics but also to optimize performance. Custom fairings can be lighter and more aerodynamic, which enhances the bike’s efficiency.
A quote from a motorcycle customization expert highlights the importance of the DIY process:
“Personalized fairings are not just for aesthetics; they are the core of self-expression. When you embark on a DIY painting project, following the proper steps like cleaning, sanding, priming, masking, and layering techniques is crucial. Each step must be observed meticulously to ensure that the final effect reaches its full potential.”
This emphasizes that even enthusiasts on a budget can achieve professional-looking results by understanding the painting technique. By mastering DIY painting, business owners can also offer these services, tapping into an ever-growing market of motorcycle lovers eager to express their individuality.
For more guidance on how to paint motorcycle fairings, you can visit our detailed guide on how to paint motorcycle fairings.
Understanding the DIY painting process not only lets you personalize your ride but can also open avenues for business opportunities, allowing passionate customization experts to cater to a niche market eager for unique motorcycle aesthetics.
In conclusion, painting motorcycle fairings not only enhances the visual appeal of your ride but also protects it from the elements. Throughout this guide, we’ve explored the essential steps to successfully paint your fairings, from surface preparation to the final clear coat.
Adopting these DIY techniques effectively transforms the look of your motorcycle and allows you to express your unique style. Learning how to properly care for and maintain painted fairings will ensure that your motorcycle stays in pristine condition for years to come.
But why stop at painting? If you’re looking for a more personalized touch, consider exploring the world of custom fairings. Companies like Summit Fairings offer a variety of options to create custom fairings tailored to your specific preferences, enhancing the functionality and aesthetics of your bike.
Ready to take the next step? Transform your ride by discovering custom fairings at Summit Fairings. Whether it’s for performance or style, your motorcycle deserves the best. Don’t wait any longer; start your journey towards a stunning motorcycle transformation today!
Weighing the Options: Painting Fairings vs. Purchasing Pre-Painted Fairings
When it comes to upgrading or customizing motorcycle fairings, riders often face a crucial decision: should they paint the fairings themselves or purchase pre-painted ones? This blog section presents a thorough comparison to help business owners make informed decisions.
Benefits of Painting Fairings Yourself
- Customization: One of the most significant advantages is the ability to personalize color, design, and finish. You can apply custom graphics or even unique airbrush art that reflects personal tastes.
- Cost: Painting fairings yourself can be more economical. The primary costs are for paint and supplies, which might average around $50 to $150 for quality materials. Moreover, if you already own painting equipment, your costs will drop significantly.
- Learning Experience: This process allows business owners to gain skills in automotive painting, which can be beneficial for future projects or services.
Disadvantages of DIY Painting
- Skill Required: Achieving a high-quality finish requires a degree of skill, proper equipment, and a controlled environment. For someone inexperienced, the results can be disappointing, leading to costly mistakes.
- Time-Consuming: The entire process, involving preparation, multiple coats, sanding, and curing, can take several days.
- Risk of Imperfections: Without professional-grade techniques, risks of flaws like runs or uneven coloration are higher.
Benefits of Purchasing Pre-Painted Fairings
- Convenience: Ready-made fairings are immediately available and can be installed quickly, saving time and hassle for business owners. They offer a straightforward solution for those who lack the time or desire to paint.
- Quality Assurance: Factory-finished fairings generally offer consistent quality, eliminating concerns about imperfections commonly found in DIY projects.
- Faster Installation: These parts are ready to be attached to the motorcycle without wait times for painting and curing, enhancing customer satisfaction.
Disadvantages of Pre-Painted Fairings
- Higher Costs: The upfront cost of pre-painted fairings tends to be significantly higher, often in the range of $800 to $2000, which might not fit all budgets.
- Limited Customization: Options are restricted to available stock designs, which may not always align with the specific desires of the customer.
- Inventory Dependence: Supply chain issues can lead to delays if the desired colors or styles are not in stock.
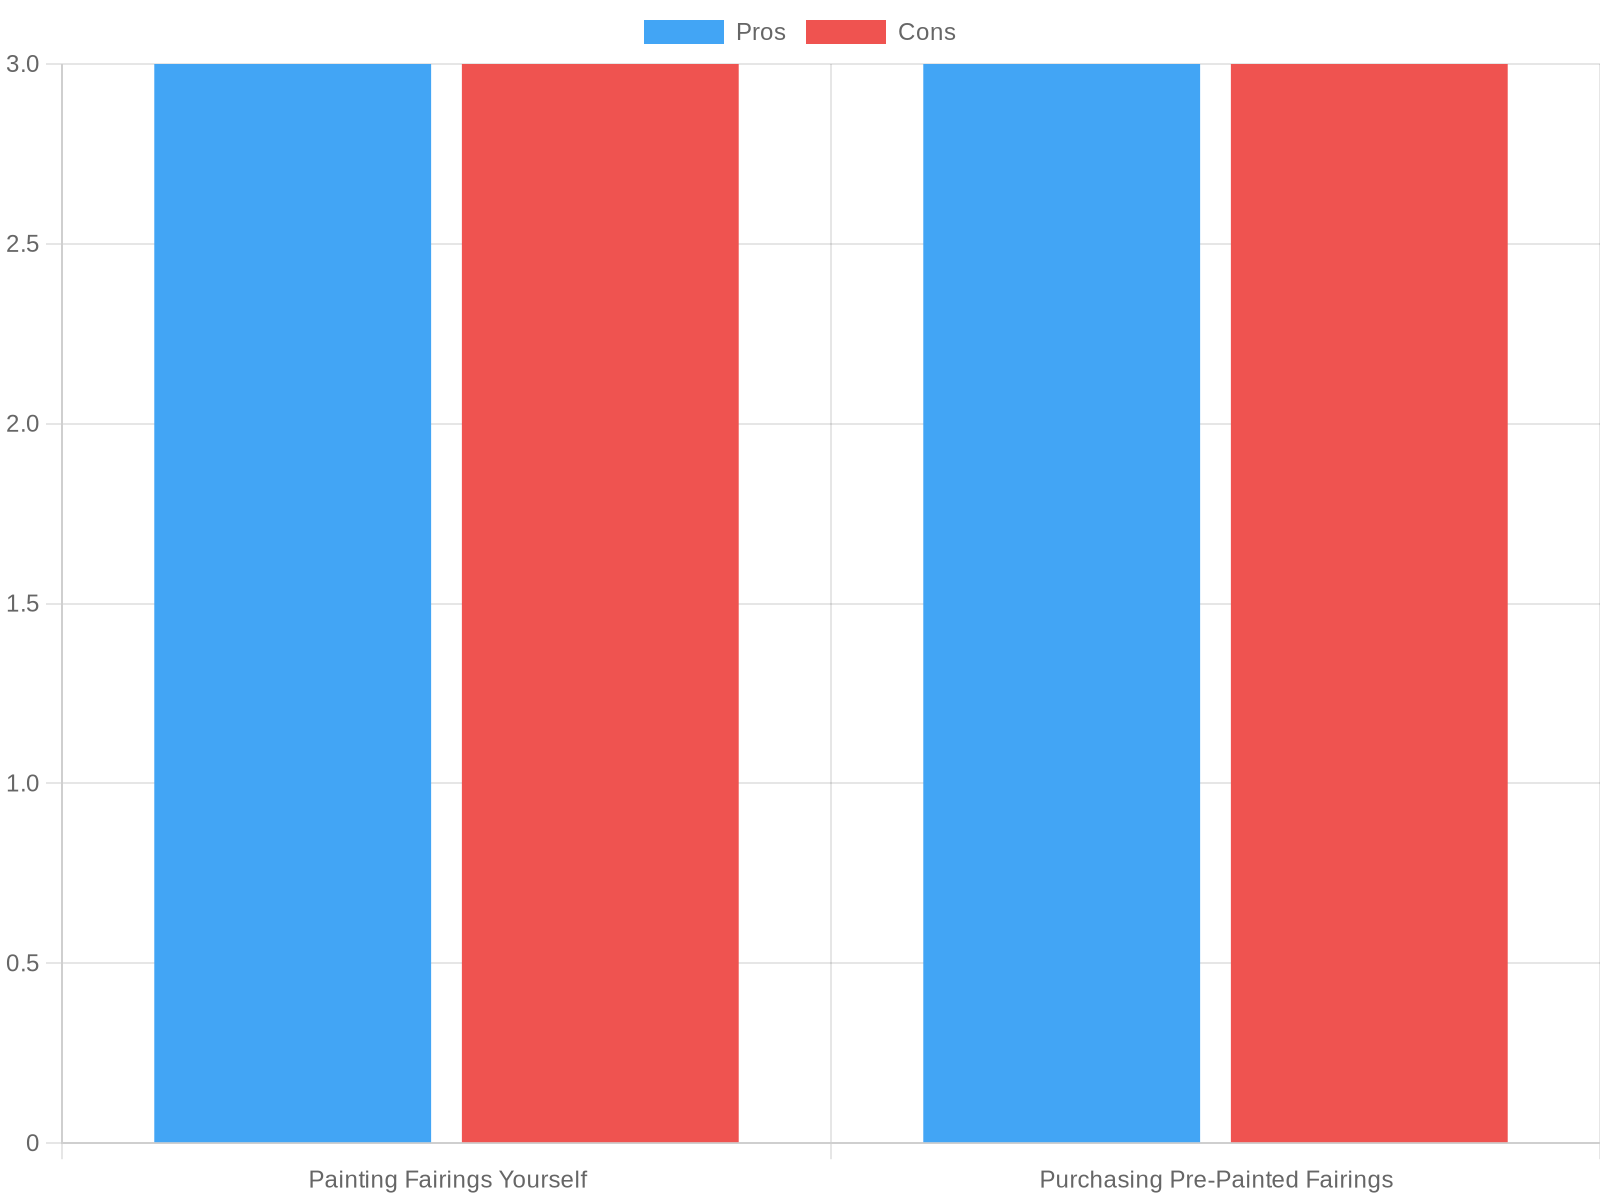
To visualize this comparison further, see the chart below that outlines the pros and cons clearly.
*Sources: Motorcycle.com, RevZilla Blog
Considering these factors can help you choose the best option for your business and customer satisfaction. For a step-by-step guide on how to paint motorcycle fairings yourself, learn more about DIY techniques here.